Love this? Save it for later!
Share the inspiration with your friends
The neighborhood pumpkin spice latte tasting party was in four hours and I’d completely forgotten. Everyone else would be bringing their signature fall drinks—elaborate layered lattes, homemade chai concoctions, whipped cream-topped masterpieces. I had a jug of milk, some canned pumpkin puree from last Thanksgiving, and maybe twenty minutes before I needed to leave. Honestly, I almost just showed up with a store-bought iced coffee and called it a day. But then I spotted that can of pumpkin, and a memory hit me—that creamy, cloud-like pumpkin cream cold foam from Starbucks, the one I always pay extra for. And I thought, maybe I can fake it.
Let me tell you, I was scrambling. I dumped milk into a jar, added pumpkin puree, a splash of vanilla, and some pumpkin pie spice. I shook that jar like my life depended on it. It was a mess. Puree chunks everywhere, foam that collapsed in seconds. Not my finest kitchen moment. But I’m stubborn, and the clock was ticking. I grabbed my immersion blender—the one I almost never use—and tried again. This time, something magical happened. The mixture turned velvety, thick, and that gorgeous pale orange. I tasted it, and my eyes went wide. It was spot on. Better, maybe? I poured it over a simple cold brew, and I swear, I did a little dance right there in my kitchen.
At the party, my little jar of homemade pumpkin cream cold foam was the first thing to disappear. People kept asking for the recipe, and I had to admit I’d just thrown it together in a panic. That’s the thing about this recipe—it’s so simple it feels like cheating, but the result is pure fall perfection. It’s become my go-to for lazy weekend mornings, for impromptu coffee dates, and honestly, for any day that needs a little pumpkin-spiced joy. Maybe you’ve been there, staring at your coffee, wishing you could recreate that coffee shop magic without the drive-thru line. Well, you’re in the right place. This copycat recipe is about to change your home coffee game.
Why You’ll Love This Recipe
I’ve tested this pumpkin cream cold foam more times than I care to count. I’ve made it with different milks, different sweeteners, different blending methods. I’ve let friends and family taste-test it blind against the real Starbucks version. And you know what? This homemade version won every single time. It’s creamier, it’s more pumpkin-forward, and you can control the sweetness exactly how you like it. That’s the kind of authority that only comes from making a recipe over and over until it’s absolutely perfect.
- Quick & Easy : Comes together in under 5 minutes, no fancy equipment required. Perfect for those mornings when you need coffee now.
- Simple Ingredients : You probably already have everything in your pantry. No need for a special trip to the store.
- Perfect for Fall Mornings : Whether it’s a cozy weekend brunch or a Monday morning pick-me-up, this cold foam makes any day feel special.
- Crowd-Pleaser : I’ve served this to die-hard Starbucks fans and they couldn’t tell the difference. It’s that good.
- Unbelievably Delicious : The texture is silky, the pumpkin flavor is warm and spiced, and that creamy top layer is pure bliss.
What makes this recipe different from the dozens you’ll find online? It’s the technique. Most recipes use heavy cream, which makes the foam too thick and almost buttery. I use a specific ratio of milk to pumpkin puree that creates that light, airy, cloud-like texture you get from Starbucks. Plus, I’ve figured out the secret to making it stable—no collapsing foam after five minutes. This isn’t just another copycat recipe; it’s the one I’d bet my favorite mug on.
This recipe isn’t just good—it’s the kind that makes you close your eyes after the first sip. It’s that cozy, comforting feeling of fall in a glass, without the guilt or the price tag. Perfect for treating yourself without the stress, or for impressing guests with your barista skills.
What Ingredients You Will Need
This recipe uses simple, everyday ingredients to create that signature Starbucks pumpkin cream cold foam. Most of these are pantry staples, especially if you’re a fan of fall baking. The key is getting the ratios right—too much pumpkin and it’s heavy, too little and you lose the flavor.
- Milk – 2% or whole milk works best for that creamy texture. I’ve tested this with oat milk and almond milk, and they work too, but the foam won’t be as stable. For the most authentic Starbucks experience, use whole milk.
- Pumpkin Puree – Make sure it’s 100% pumpkin puree, not pumpkin pie filling. The filling has added sugar and spices that will throw off the balance. I prefer Libby’s brand for its consistent texture, but any pure pumpkin puree works.
- Vanilla Syrup – This adds the sweetness and that classic vanilla flavor. You can use store-bought vanilla syrup (Torani is my go-to) or make your own by simmering equal parts sugar and water with vanilla extract. For a shortcut, you can use 1-2 tablespoons of maple syrup instead.
- Pumpkin Pie Spice – You can use a store-bought blend or make your own with cinnamon, nutmeg, ginger, and cloves. I make my own because I like a little extra cinnamon. The spice is what gives the foam that warm, cozy fall flavor.
- Cold Brew or Strong Coffee – The base of your drink. I prefer a smooth cold brew, but any strong brewed coffee works. The key is to let it cool completely before adding the foam, otherwise the foam will melt.
- Ice – Lots of ice. This keeps the cold foam cold and prevents it from sinking into the coffee.
Ingredient Selection Tips: For the best texture, use cold milk straight from the fridge. Room temperature milk won’t foam as well. If you’re using a non-dairy milk, look for one labeled “barista blend”—it has added stabilizers that help it foam better. And please, don’t skip the pumpkin pie spice. It’s what makes this taste like fall in a glass.
Equipment Needed
You don’t need a fancy espresso machine for this recipe. In fact, you probably have everything you need already. Here’s what you’ll need:
- Milk Frother – A handheld milk frother is my favorite tool for this. They’re cheap (under $10 on Amazon) and work perfectly. I’ve had mine for three years and it’s still going strong.
- Immersion Blender – If you have one, this creates the silkiest, most stable foam. It’s my secret weapon. Just be careful not to over-blend or the foam can become too thick.
- Jar with a Tight Lid – No frother? No problem. A mason jar works in a pinch. Just shake it vigorously for about 60 seconds. Your arm will get a workout, but the foam will be decent.
- Measuring Spoons – For accuracy. I’ve eyeballed it before and ended up with pumpkin soup instead of foam. Learn from my mistakes.
- Glass or Mug – A clear glass is best for showing off those beautiful layers.
Budget-Friendly Options: If you don’t want to buy a frother, the jar method works fine. I’ve also used a whisk in a pinch—it takes longer and requires some elbow grease, but it gets the job done. The key is to whisk vigorously and consistently.
Preparation Method

This recipe is almost embarrassingly easy. The hardest part is waiting for your coffee to cool down. But trust me, the patience is worth it.
- Brew your coffee or cold brew. Start with a strong cup of coffee or cold brew. If you’re using hot coffee, let it cool to room temperature. I usually brew my coffee first and let it sit while I make the foam. This step is crucial—hot coffee will melt the foam instantly.
- Measure your milk. Pour 1/4 cup (60 ml) of cold whole milk into a tall glass or a jar. The colder the milk, the better the foam. I keep my milk in the back of the fridge where it’s coldest.
- Add the pumpkin and vanilla. Add 1 tablespoon (15 g) of pumpkin puree and 1 tablespoon (15 ml) of vanilla syrup to the milk. Don’t skip the pumpkin puree—it’s what gives the foam that gorgeous color and flavor. If you’re using maple syrup instead of vanilla syrup, use 1-2 tablespoons.
- Add the spice. Sprinkle in 1/4 teaspoon of pumpkin pie spice. I like to use a little extra cinnamon on top at the end, but that’s optional. The spice blend is what makes this taste like Starbucks.
- Blend or froth. Use your milk frother or immersion blender to blend the mixture until it’s thick and frothy. This usually takes about 30-60 seconds. You’re looking for a texture that’s like a thick, pourable cream. It should hold its shape slightly when you lift the frother. If you’re using a jar, shake it vigorously for 60 seconds. You’ll hear the sound change as the foam forms—it goes from sloshy to thick and quiet.
- Fill your glass with ice. Fill a tall glass with ice cubes. I use a lot of ice—almost to the top. This keeps the coffee cold and the foam stable.
- Pour the coffee. Pour your cooled coffee or cold brew over the ice, leaving about an inch of space at the top for the foam. If you pour too much coffee, the foam will overflow.
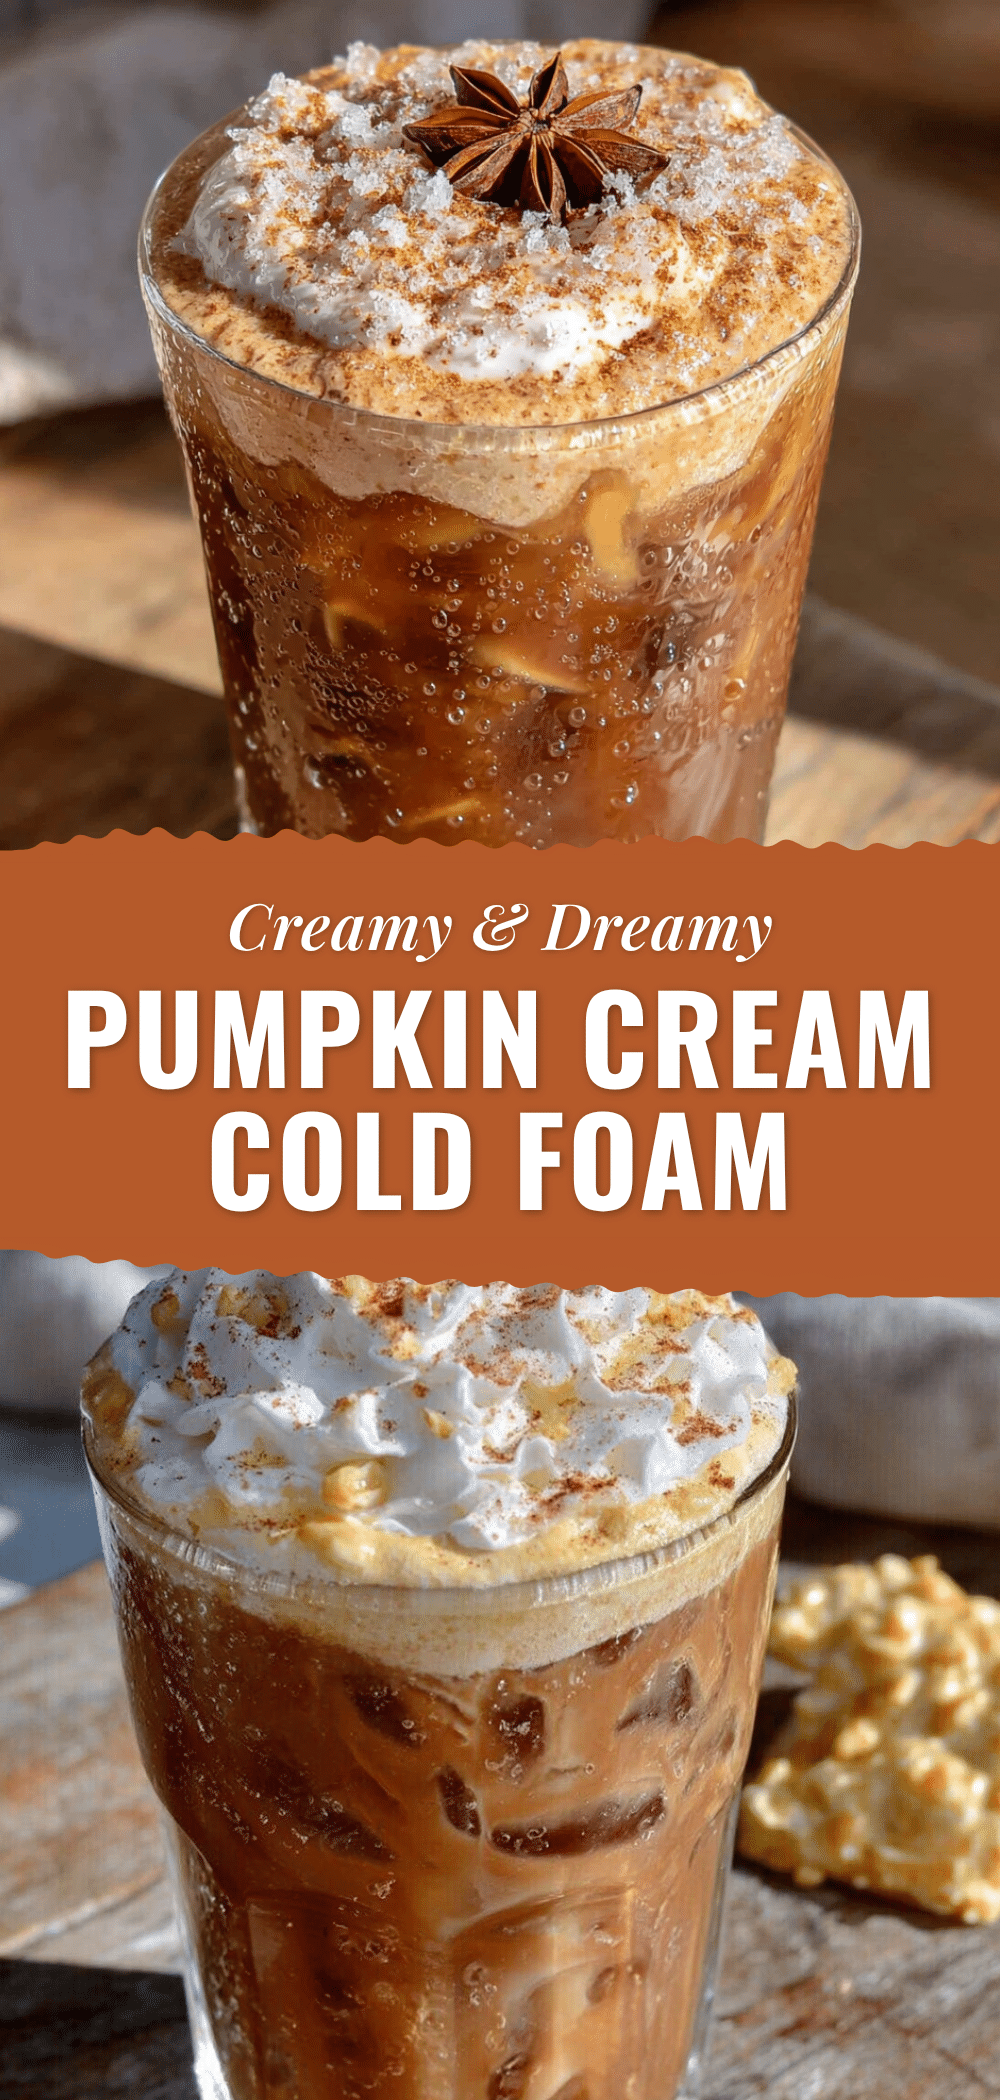
- Top with the foam. Slowly spoon or pour the pumpkin cream cold foam over the top of the coffee. Don’t stir it in—the beauty is in the layered effect. The foam will slowly sink into the coffee as you drink it, creating that perfect marbled effect.
- Optional garnish. Sprinkle a pinch of pumpkin pie spice or cinnamon on top of the foam for a pretty finish. This step is purely for aesthetics, but it does smell amazing.
- Serve immediately. This foam is best enjoyed right away. It will hold its texture for about 10-15 minutes, but it’s at its peak right after you make it.
Sensory Cues: When you’re blending, listen for the change in sound. It starts with a sloshing noise and becomes a quieter, thicker sound as the foam forms. The color should be a soft, pale orange—not too dark. If it’s too dark, you’ve added too much pumpkin puree. The texture should be like a thick, pourable cream that leaves a trail when you lift the frother.
Cooking Tips & Techniques
I’ve made this recipe at least fifty times, and I’ve learned a few things the hard way. Here are my best tips for perfect pumpkin cream cold foam every time.
Use cold ingredients. This is non-negotiable. Cold milk froths better and holds its shape longer. I’ve made the mistake of using room temperature milk, and the foam was flat and sad within minutes. Keep your milk in the coldest part of the fridge.
Don’t over-blend. If you use an immersion blender, stop as soon as the mixture is thick and frothy. Over-blending can turn the foam into a thick, almost buttery texture that’s too heavy for coffee. You want it to be light and airy, like a cloud.
Strain the pumpkin puree. This is a pro tip I discovered by accident. If your pumpkin puree is watery, strain it through a fine-mesh sieve before adding it to the milk. This removes excess liquid and makes the foam more stable. I learned this after a particularly watery batch of pumpkin puree turned my foam into a puddle.
Make a double batch. This foam is so good, you’ll want more. I usually make a double batch and keep it in the fridge for up to two days. Just give it a quick re-froth before using. It’s perfect for when you have company or just want a second cup.
Temperature matters. The coffee needs to be cold or at room temperature. If you pour hot coffee over the foam, it will melt instantly. I learned this the hard way when I was impatient and poured hot coffee over my beautiful foam. It was a sad, melted mess. Patience, my friend.
My biggest failure? I once tried to make this with skim milk because I was trying to be healthy. The foam was thin and watery, and it collapsed in seconds. Whole milk or 2% is the way to go. Trust me on this one.
Variations & Adaptations
This recipe is incredibly versatile. Here are some of my favorite variations that I’ve tried and tested.
Dairy-Free Version: Use oat milk or barista blend almond milk. Oat milk froths the best out of all the non-dairy options. I’ve tried coconut milk, and it works, but it adds a coconut flavor that competes with the pumpkin. Oat milk is my go-to for dairy-free.
Extra Pumpkin Flavor: For a more intense pumpkin flavor, add an extra teaspoon of pumpkin puree. Just be careful not to add too much, or the foam will be too heavy. I’ve found that 1.5 tablespoons is the sweet spot for pumpkin lovers.
Spiced Variation: Add a pinch of nutmeg or ginger to the pumpkin pie spice for a warmer, more complex flavor. I sometimes add a tiny pinch of cardamom for a chai-like twist. It’s subtle but delicious.
Protein Boost: Add a scoop of vanilla or unflavored protein powder to the milk before frothing. This makes it a more filling breakfast drink. I’ve done this on busy mornings, and it works surprisingly well. Just make sure to blend it thoroughly so there are no clumps.
Iced Latte Version: For a creamier drink, use cold brew and add a splash of heavy cream to the coffee before topping with the foam. This creates a richer, more indulgent drink that’s perfect for dessert.
Hot Version: Yes, you can make this hot! Just skip the ice and pour the foam over hot coffee. The foam will melt slightly, but it creates a creamy, pumpkin-spiced latte that’s perfect for chilly mornings. I love this version on rainy days.
Serving & Storage Suggestions
This pumpkin cream cold foam is best enjoyed immediately, but there are ways to prep ahead and store leftovers.
Serving Temperature: Serve the foam over cold coffee with plenty of ice. The foam is at its peak right after you make it—light, airy, and perfectly cold. If you’re making the hot version, serve it right away before the foam fully melts into the coffee.
Presentation: Use a clear glass to show off the beautiful layers—dark coffee on the bottom, creamy orange foam on top. Add a sprinkle of pumpkin pie spice or cinnamon on top for a pretty finish. I sometimes add a cinnamon stick for extra flair.
Complementary Dishes: This drink pairs perfectly with pumpkin muffins, banana bread, or a simple buttered croissant. It’s also great with a slice of apple pie or a pumpkin scone. Basically, anything fall-flavored works.
Storage: You can store the prepared foam (without the coffee) in an airtight container in the refrigerator for up to 2 days. The foam will deflate slightly, but you can re-froth it with a whisk or frother before using. I’ve done this many times, and it works great.
Reheating: For the hot version, simply reheat the coffee and pour the cold foam over it. The foam will warm up slightly from the coffee. Don’t microwave the foam—it will collapse and become watery.
Flavor Development: The foam actually tastes better after sitting in the fridge for a few hours. The pumpkin and spice flavors meld together, creating a more complex taste. I sometimes make the foam the night before and let it chill overnight for the best flavor.
Nutritional Information & Benefits
This homemade version is significantly healthier than the Starbucks original. You control the sweetness and the ingredients, which means no artificial flavors or preservatives.
Estimated Nutritional Values (per serving, using whole milk and vanilla syrup):
- Calories: 120-150
- Fat: 4-6g
- Carbohydrates: 18-22g
- Protein: 3-4g
- Sugar: 15-18g
Health Benefits: Pumpkin is packed with vitamin A, which is great for eye health and immune function. It’s also rich in fiber, which helps with digestion. The pumpkin pie spice blend (cinnamon, nutmeg, ginger) has anti-inflammatory properties and can help regulate blood sugar. Plus, making your own coffee at home means you’re saving money and avoiding the added sugars and preservatives in store-bought syrups.
Dietary Considerations: This recipe can be made dairy-free by using oat milk. It’s naturally gluten-free and vegetarian. For a lower-sugar version, use sugar-free vanilla syrup or skip the syrup altogether and use a pinch of stevia. The pumpkin puree adds natural sweetness, so you might not miss the extra sugar.
Potential Allergens: This recipe contains dairy (if using cow’s milk). It’s free from nuts, eggs, and soy unless you use a non-dairy milk that contains these. Always check your labels if you have allergies.
Personal Wellness Perspective: I love that this recipe lets me enjoy a fall treat without the guilt. It’s a small indulgence that feels special, but it’s made with real ingredients that I feel good about. Plus, the ritual of making it—measuring the spices, watching the foam form—is a little moment of mindfulness in my day.
Conclusion
This copycat Starbucks pumpkin cream cold foam is honestly the best thing to happen to my morning coffee routine. It’s quick, it’s easy, and it tastes like fall in a glass. I’ve made it for friends, family, and even skeptical neighbors, and everyone agrees—it’s better than the real thing. The best part? You can customize it exactly how you like it. More pumpkin, less sweet, extra spice—it’s all up to you.
I’d love to hear how yours turns out. Did you try any variations? Did you make it for a special occasion? Drop a comment below and let me know. And if you’re feeling generous, share this recipe with a friend who loves fall as much as you do. Trust me, they’ll thank you.
Now go make yourself a cup of fall magic. You deserve it.
FAQs
Can I use pumpkin pie filling instead of pumpkin puree?
I wouldn’t recommend it. Pumpkin pie filling has added sugar and spices that will throw off the balance of the foam. It can also make the foam too sweet and heavy. Stick with 100% pumpkin puree for the best results.
Why is my foam not getting thick?
This usually happens for a few reasons. Your milk might not be cold enough, or you might be using skim milk. Whole milk or 2% works best. Also, make sure you’re blending long enough—at least 30-60 seconds. If you’re using a jar, shake it vigorously for a full minute.
Can I make this without a frother?
Absolutely! A jar with a tight lid works perfectly. Just add all the ingredients to the jar, close the lid, and shake it like you mean it for about 60 seconds. Your arm will get a workout, but the foam will be decent. A whisk also works, but it takes longer and requires more elbow grease.
How long does the foam last?
The foam is best enjoyed immediately. It will hold its texture for about 10-15 minutes on top of cold coffee. If you store it in the fridge, it will last up to 2 days, but it will deflate slightly. Just give it a quick re-froth before using.
Can I use this foam on hot coffee?
Yes, you can! Just skip the ice and pour the foam over hot coffee. The foam will melt slightly, creating a creamy, pumpkin-spiced latte. It’s a different experience than the cold version, but it’s equally delicious. I love it on rainy days.
Pin This Recipe!
Easy Copycat Starbucks Pumpkin Cream Cold Foam: Best Recipe
This homemade pumpkin cream cold foam is creamier, more pumpkin-forward, and lets you control the sweetness. It’s quick, easy, and tastes like fall in a glass.
- Prep Time: 5 minutes
- Cook Time: 0 minutes
- Total Time: 5 minutes
- Yield: 1 serving 1x
- Category: Beverage
- Cuisine: American
Ingredients
- 1/4 cup (60 ml) cold whole milk (or 2%)
- 1 tablespoon (15 g) pumpkin puree (100% pure, not pie filling)
- 1 tablespoon (15 ml) vanilla syrup (or 1–2 tablespoons maple syrup)
- 1/4 teaspoon pumpkin pie spice
- Cold brew or strong coffee, cooled
- Ice
Instructions
- Brew your coffee or cold brew and let it cool to room temperature.
- In a tall glass or jar, combine 1/4 cup cold whole milk, 1 tablespoon pumpkin puree, 1 tablespoon vanilla syrup, and 1/4 teaspoon pumpkin pie spice.
- Use a milk frother or immersion blender to blend until thick and frothy, about 30-60 seconds. Alternatively, shake vigorously in a jar with a tight lid for 60 seconds.
- Fill a tall glass with ice.
- Pour the cooled coffee over the ice, leaving about an inch of space at the top.
- Slowly spoon or pour the pumpkin cream cold foam over the coffee. Do not stir.
- Optional: Sprinkle a pinch of pumpkin pie spice or cinnamon on top.
- Serve immediately.
Notes
Use cold milk straight from the fridge for best foam. If using non-dairy milk, choose a barista blend. Strain pumpkin puree if watery to prevent foam collapse. The foam is best enjoyed immediately but can be stored in the fridge for up to 2 days and re-frothed.
Nutrition
- Serving Size: 1 drink
- Calories: 120150
- Sugar: 1518
- Sodium: 5070
- Fat: 46
- Saturated Fat: 23
- Carbohydrates: 1822
- Fiber: 12
- Protein: 34
Keywords: pumpkin cream cold foam, Starbucks copycat, fall coffee, pumpkin spice, cold foam recipe


