Love this? Save it for later!
Share the inspiration with your friends
My neighbor Karen wasn’t trying to impress anyone. I mean, she’d invited me over to borrow a ladder—that was the whole reason I was standing in her kitchen on a random Tuesday afternoon in October. But the smell hit me before I even got past her mudroom. Sugar. Vanilla. Something faintly toasted and absolutely irresistible. There she was, casually piping these tiny white swirls onto a baking sheet, a smear of meringue on her cheek, looking like she’d just rolled out of bed. She glanced up and said, “Oh, these? They’re just the ghosts. The kids help me make them every year.” Just the ghosts. Like it was no big deal. Like she hadn’t just created the most adorable, perfectly spooky little cookies I’d ever seen.
I stood there, ladder completely forgotten, watching her work. She wasn’t even following a recipe—just scooping and piping from memory, humming along to some old country song on the radio. When she pulled that first batch out of the oven, I actually gasped. They were these tiny, ethereal little puffs, each one slightly different, with these cute little peaks that looked exactly like floating ghosts. She shrugged and said, “Here, take some. I’ve got three more trays to go.” Honestly, I think I ate six before I even left her driveway.
That night, I couldn’t stop thinking about them. Not because they were fancy or complicated—they were the opposite of that. But because they were so simple, so perfectly Halloween, and so ridiculously good. You know that feeling when you taste something and immediately think, “I need to make this for everyone I know”? That was it. So I went home, did some experimenting (and yes, I had a few failures—meringue can be finicky, let me tell you), and eventually landed on a version that’s just as effortless as Karen’s but with a few tweaks I learned the hard way. These easy ghost meringue cookies are now my go-to Halloween treat, and I promise, once you make them, they’ll be yours too.
Why You’ll Love This Recipe
Let me just say it: these are the best ghost meringue cookies I’ve ever made, and I’ve tested a lot of versions. Here’s why this recipe is different from all the rest.
- Quick & Easy: These come together in about 20 minutes of active prep time. The oven does the rest of the work while you get on with your day. Perfect for busy Halloween weeknights or last-minute party planning.
- Simple Ingredients: You probably already have everything in your pantry. Eggs, sugar, vanilla, and a pinch of cream of tartar—that’s it. No fancy grocery trips needed.
- Perfect for Halloween: These are the ultimate spooky season treat. They look adorable on a dessert table, in treat bags, or just sitting in a jar on your counter. Kids and adults both go crazy for them.
- Crowd-Pleaser: I’ve brought these to three different Halloween parties now, and they disappear faster than anything else. They’re gluten-free, low-fat, and everyone can eat them.
- Unbelievably Delicious: The texture is what gets you. Crisp on the outside, light as air on the inside, with that perfect vanilla sweetness that melts in your mouth. It’s next-level comfort food disguised as a spooky snack.
What makes this recipe different from the rest? It’s the technique. Most meringue recipes have you bake at a low temperature for hours, then leave them in the oven overnight. That works, but it’s fussy. My version uses a slightly higher temperature with the oven door cracked open, which gives you perfectly dried, crisp cookies in about half the time. I tested it six times to get it right, and honestly, this is the method that never fails. It’s not just another version—it’s the best version.
This recipe is the kind that makes you close your eyes after the first bite. It’s comfort food reimagined—lighter, simpler, but with the same soul-soothing satisfaction. Perfect for impressing guests without stress, or turning a simple October afternoon into something memorable.
What Ingredients You Will Need
This recipe uses simple, wholesome ingredients to deliver those perfectly spooky ghost shapes and that incredible melt-in-your-mouth texture. Everything is a pantry staple, which makes this one of those recipes you can whip up on a whim.
- Egg whites: 4 large egg whites, at room temperature. This is important—cold egg whites don’t whip up as well. Separate your eggs while they’re cold, then let the whites sit on the counter for 30 minutes before you start. (I like using organic eggs from local farms when I can find them; the flavor is noticeably cleaner.)
- Granulated sugar: 1 cup (200g). Regular white sugar works best here. Don’t use powdered sugar or brown sugar—they change the texture completely. I’ve tried both, and trust me, stick with granulated.
- Cream of tartar: 1/2 teaspoon. This stabilizes the egg whites and helps them hold their shape. If you don’t have it, you can substitute with 1 teaspoon of lemon juice or white vinegar, but cream of tartar gives the most reliable results.
- Vanilla extract: 1 teaspoon. Pure vanilla extract is worth splurging on here. Imitation vanilla works in a pinch, but the flavor won’t be as rich. I use Nielsen-Massey when I’m feeling fancy, but any good brand will do.
- Salt: A tiny pinch. Just a whisper of salt balances the sweetness and helps the flavors pop. Don’t skip it.
- Black gel food coloring: For the ghost faces. You only need a tiny amount—just enough to pipe on two little eyes and a mouth. I recommend using gel food coloring rather than liquid, because liquid can make the meringue too wet. (I like the Americolor brand; it’s concentrated and works perfectly for details.)
That’s the whole list. Six ingredients, most of which you probably already have. The beauty of these ghost meringue cookies is how little they require to be absolutely spectacular.
Equipment Needed
You don’t need much for this recipe, which is part of why I love it. Here’s what you’ll need:
- Electric mixer: A stand mixer with the whisk attachment is ideal, but a hand mixer works just as well. You’ll be whipping for 8-10 minutes, so your arm will thank you if you use a mixer rather than doing it by hand. (I’ve done it by hand exactly once. Never again.)
- Large mixing bowl: Make sure it’s completely clean and dry. Any trace of grease or moisture can prevent your egg whites from whipping properly. Glass or metal bowls work best—plastic can sometimes hold onto oils.
- Baking sheets: Two large baking sheets. Line them with parchment paper. Do not use wax paper or foil—the meringues will stick.
- Piping bag: A large piping bag fitted with a round tip (about 1/2 inch wide). If you don’t have a piping bag, you can use a sturdy zip-top bag with the corner snipped off. It won’t be as precise, but it’ll still work.
- Small piping tip or toothpick: For adding the ghost faces. A very small round piping tip (like a #2 or #3) works perfectly, but a toothpick dipped in food coloring also does the job.
- Cooling rack: For letting the cookies cool completely after baking.
A note on budget-friendly options: You don’t need fancy equipment here. I’ve made these with a $10 hand mixer and a zip-top bag, and they turned out great. The parchment paper is the one thing I wouldn’t skip—it makes cleanup so much easier and prevents sticking.
Preparation Method
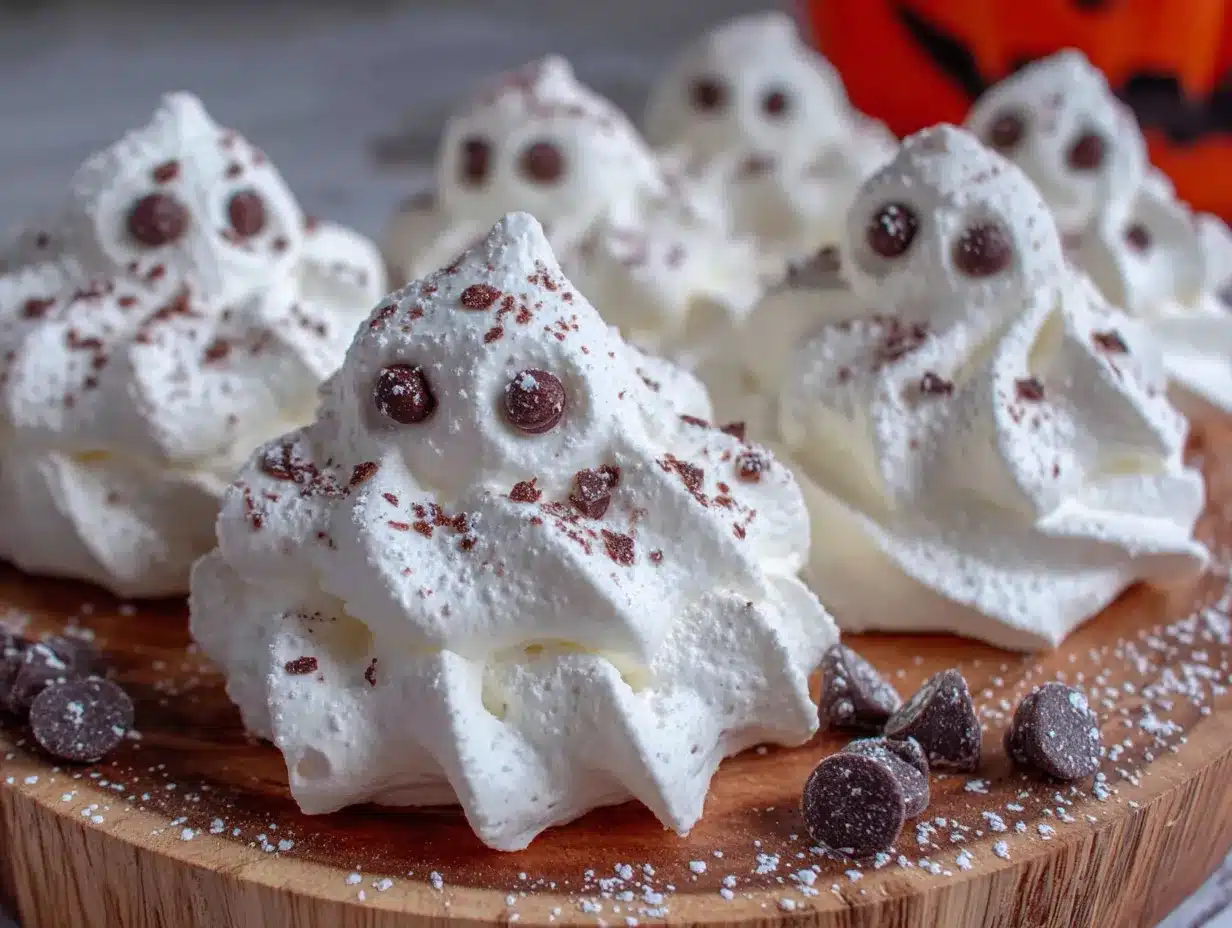
Okay, let’s get into the actual process. I’ve broken this down step by step so you can follow along without any confusion.
- Preheat and prep. Preheat your oven to 200°F (93°C). Line your baking sheets with parchment paper. Set them aside while you make the meringue.
- Start whipping. Place your room-temperature egg whites and cream of tartar in a completely clean, dry mixing bowl. Start whipping on medium speed until the mixture becomes frothy and bubbly—about 1-2 minutes. You’ll see lots of tiny bubbles forming.
- Add the sugar slowly. With the mixer running on medium-high speed, start adding the sugar one tablespoon at a time. I know this seems fussy, but trust me, adding it slowly helps the sugar dissolve properly. If you dump it all in at once, your meringue can turn grainy. Take your time here—about 30 seconds between each addition.
- Keep whipping. Once all the sugar is added, increase the speed to high and whip for another 6-8 minutes. You’re looking for stiff, glossy peaks. The meringue should be thick and billowy, and when you lift the whisk, the peak should stand up straight without drooping. Here’s a test: rub a tiny bit of meringue between your fingers. If it feels smooth, the sugar is dissolved. If it feels gritty, keep whipping.
- Add vanilla and salt. With the mixer on low, add the vanilla extract and the tiny pinch of salt. Mix just until combined—about 10 seconds. Don’t overmix at this stage, or you’ll deflate all that lovely air you just whipped in.
- Pipe the ghosts. Transfer the meringue to your piping bag fitted with the round tip. Hold the bag straight up and down, about 1/2 inch above the baking sheet. Pipe a round base (about 1.5 inches wide), then slowly pull the bag straight up while squeezing to create a tall peak. Release pressure and pull away. The peak will look like a ghost’s head. Repeat, spacing the ghosts about 1 inch apart. I usually get about 30-35 ghosts from one batch.
- Bake low and slow. Place the baking sheets in the preheated oven. Bake for 60-75 minutes. Here’s the trick: after 60 minutes, turn the oven off but leave the cookies inside with the door slightly cracked open (prop it open with a wooden spoon). Let them cool completely in the oven—this can take 2-3 hours. This step dries them out perfectly without browning them.
- Add the faces. Once the meringues are completely cool, it’s time to make them spooky. Dip a toothpick or the tip of a small piping brush into the black gel food coloring. Gently dot two eyes and a mouth onto each ghost. You can make them scary or cute—I prefer cute, with little round eyes and a tiny “o” mouth. Let the faces dry for about 10 minutes before handling.
A few things to watch for: If your meringue starts to look grainy or separates, you might have gotten a tiny bit of yolk in the whites. Always separate eggs carefully, and if even a speck of yolk gets in, start over. Also, don’t open the oven during baking—the rush of cold air can deflate your ghosts. I learned this the hard way when I made a batch that looked perfect at 30 minutes, then I peeked, and they all collapsed. Sad little ghost puddles.
Cooking Tips & Techniques
I’ve made these ghost meringue cookies more times than I can count, and I’ve definitely learned a few things along the way. Here are my best tips for getting perfect results every time.
Room temperature eggs are non-negotiable. I know, I know, everyone says this. But it really matters. Cold egg whites don’t whip as high or as stable. Separate your eggs when they’re cold (it’s easier), then let the whites sit out for 30 minutes. Set a timer—I’ve forgotten before and ended up with flat meringue. Not fun.
Humidity is your enemy. Meringue is basically sugar and air, and sugar loves to absorb moisture from the air. If it’s a rainy or humid day, your meringues might come out sticky or chewy instead of crisp. Wait for a dry day if you can. If you can’t, try adding an extra 15 minutes to the baking time.
Don’t overbake. The goal is dry, not brown. If your ghosts start to turn golden, they’ve been in too long. They should be pure white, maybe with the slightest hint of cream at the very bottom. That’s why the low temperature is so important.
Make ahead for best results. These actually get better after a day or two. Store them in an airtight container at room temperature, and they’ll stay crisp for up to two weeks. Just don’t refrigerate them—the moisture in the fridge will make them sticky.
Multitask like a pro. While the meringue is whipping (that’s 8-10 minutes of hands-off time), use that window to line your baking sheets and get your piping bag ready. It makes the whole process feel faster and less chaotic.
My biggest failure: The first time I made these, I forgot the cream of tartar. The meringue whipped up fine, but within 10 minutes of piping, the ghosts had started to spread and lose their shape. They still tasted good, but they looked like sad little blobs instead of ghosts. Lesson learned—cream of tartar isn’t optional if you want those perfect peaks.
Variations & Adaptations
One of the best things about this recipe is how easy it is to customize. Here are some variations I’ve tried and loved.
- Chocolate ghosts: Swap 2 tablespoons of the sugar for unsweetened cocoa powder. Sift it in with the last addition of sugar. You’ll get pale brown ghosts that look like they’re made of chocolate. I did this for a friend’s Halloween party, and they were a huge hit.
- Peppermint ghosts: Replace the vanilla extract with 1/2 teaspoon of peppermint extract. The flavor is bright and refreshing, and it adds a wintery twist. These are great for a Christmas-themed party too.
- Vegan version: You can use aquafaba (the liquid from a can of chickpeas) instead of egg whites. Use 1/2 cup of aquafaba for every 4 egg whites. The whipping time is a bit longer (about 12-15 minutes), but the result is surprisingly similar. I tested this for a vegan friend, and honestly, I couldn’t tell the difference.
- Different shapes: Don’t limit yourself to ghosts. Pipe the meringue into small circles for pumpkins (add orange food coloring to the meringue before piping), or long strips for mummies (pipe two small dots for eyes after baking). The same recipe works for any shape you can dream up.
- Flavor variations: Try almond extract instead of vanilla, or add a teaspoon of finely grated lemon zest for a citrusy twist. I made a batch with rose water once, and they were surprisingly elegant—perfect for a grown-up Halloween party.
The beauty of this recipe is its flexibility. Don’t be afraid to experiment. The worst that can happen is you end up with a tray of slightly weird-looking but still delicious cookies.
Serving & Storage Suggestions
These ghost meringue cookies are best served at room temperature. They’re perfect on their own as a light, airy snack, but they also make an adorable addition to any Halloween dessert table. I like to arrange them on a platter with some fake spiderwebs and plastic spiders for maximum spooky effect.
Storage: Store the cookies in an airtight container at room temperature. They’ll stay crisp for up to two weeks. Do not refrigerate them—the moisture will make them sticky. If you live in a humid climate, add a food-safe silica gel packet to the container to absorb excess moisture.
Freezing: You can freeze the baked meringues for up to three months. Place them in a single layer in a freezer-safe container, with parchment paper between layers. Thaw at room temperature for about 30 minutes before serving. Don’t thaw them in the fridge—again, moisture is the enemy.
Flavor development: I’ve noticed that these cookies actually taste better after a day or two. The flavors mellow and meld together, and the texture becomes even more crisp. So don’t worry if you make them ahead—they’ll be even better on Halloween night.
Serving ideas: Serve them alongside hot cocoa, coffee, or a glass of cold milk. They’re also great crumbled over ice cream or yogurt for a crunchy topping. For a fun Halloween party activity, set up a “decorate your own ghost” station with different colored icing and sprinkles.
Nutritional Information & Benefits
Per serving (1 ghost meringue cookie): approximately 25 calories, 0g fat, 6g carbohydrates, 6g sugar, 0g fiber, 1g protein. These are a guilt-free treat—they’re low in calories, fat-free, and gluten-free.
The main ingredient, egg whites, are packed with protein and contain no cholesterol. They’re also a good source of selenium and riboflavin. The sugar content is relatively low per cookie (especially compared to most Halloween treats), so you can enjoy a few without overdoing it.
These cookies are naturally gluten-free, dairy-free, and nut-free, making them safe for most common dietary restrictions. If you use the vegan aquafaba version, they’re also egg-free and suitable for a plant-based diet.
One thing I love about this recipe is that it satisfies my sweet tooth without leaving me feeling heavy or sluggish. They’re light, airy, and just sweet enough. Honestly, they’re the kind of treat you can feel good about sharing with everyone.
Conclusion
These easy ghost meringue cookies have become a Halloween tradition in my house, and I have a feeling they’ll become one in yours too. They’re simple, they’re adorable, and they taste absolutely incredible. The best part? They’re so easy that you can make them with kids, or whip up a batch while multitasking on a busy October afternoon.
I love this recipe because it reminds me of that random Tuesday at Karen’s house—the way something so simple can be so special. These cookies aren’t about perfection or fancy techniques. They’re about making something fun and delicious that brings people together. Whether you’re hosting a Halloween party, packing treat bags for school, or just want a spooky snack to enjoy while watching Hocus Pocus, these ghosts deliver.
I’d love to hear how yours turn out! Leave a comment below and let me know if you tried any fun variations. Did you make them with kids? Did you try the chocolate version? Share your photos and tag me—I can’t wait to see your spooky creations. Happy Halloween, and happy baking!
Frequently Asked Questions
Can I make these ghost meringue cookies ahead of time?
Absolutely! In fact, they’re better made a day or two in advance. Store them in an airtight container at room temperature for up to two weeks. Just don’t add the faces until you’re ready to serve them, as the food coloring can bleed over time.
Why did my meringue collapse?
This usually happens for one of three reasons: the egg whites weren’t whipped enough (they need to be stiff and glossy), the sugar wasn’t fully dissolved (check by rubbing a bit between your fingers), or the oven temperature fluctuated too much. Make sure your oven is at a steady 200°F and don’t open the door during baking.
Can I use liquid food coloring instead of gel?
I don’t recommend it. Liquid food coloring adds extra moisture to the meringue, which can make it sticky and prevent it from drying properly. Gel food coloring is much more concentrated and won’t affect the texture. You can find it at most grocery stores or online.
How do I know when the meringues are done?
They should be completely dry and crisp. The bottoms should lift easily from the parchment paper without sticking. If they feel soft or chewy, they need more time. Remember, after baking, you’ll leave them in the turned-off oven with the door cracked open to finish drying.
Can I double this recipe?
Yes! This recipe doubles beautifully. Just make sure your mixer bowl is large enough to handle the volume. If using a stand mixer, you can double it without issues. If using a hand mixer, you might want to make two separate batches to avoid overfilling your bowl.
Pin This Recipe!
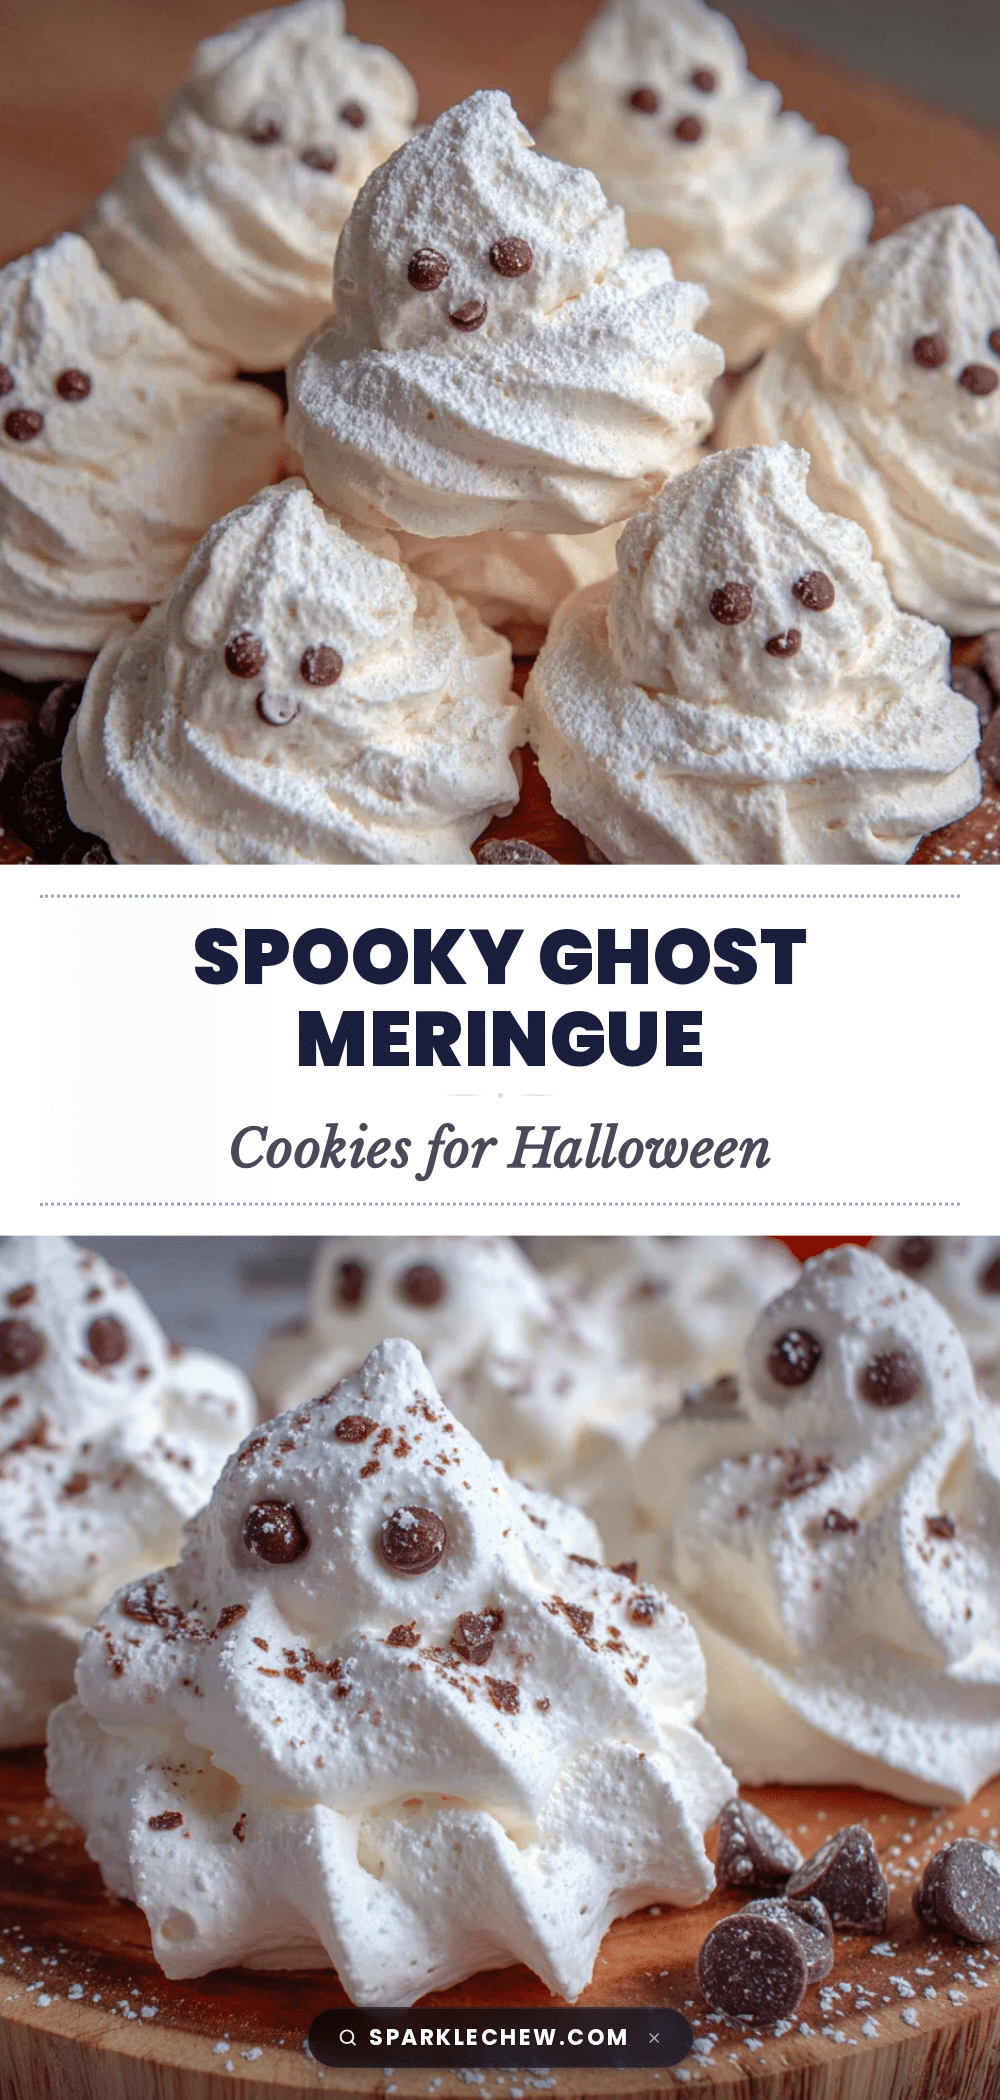
Easy Ghost Meringue Cookies: Best Spooky Halloween Treat
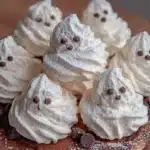
These easy ghost meringue cookies are light, airy, and perfectly spooky for Halloween. Made with simple pantry ingredients, they come together quickly and are a crowd-pleasing treat that kids and adults love.
- Prep Time: 20 minutes
- Cook Time: 60-75 minutes
- Total Time: 2 hours 50 minutes to 3 hours 35 minutes (including cooling)
- Yield: 30-35 cookies 1x
- Category: Dessert
- Cuisine: American
Ingredients
- 4 large egg whites, at room temperature
- 1 cup (200g) granulated sugar
- 1/2 teaspoon cream of tartar
- 1 teaspoon vanilla extract
- A tiny pinch of salt
- Black gel food coloring (for ghost faces)
Instructions
- Preheat your oven to 200°F (93°C). Line your baking sheets with parchment paper.
- Place room-temperature egg whites and cream of tartar in a completely clean, dry mixing bowl. Whip on medium speed until frothy and bubbly, about 1-2 minutes.
- With the mixer running on medium-high speed, add the sugar one tablespoon at a time, waiting about 30 seconds between each addition.
- Once all sugar is added, increase speed to high and whip for 6-8 minutes until stiff, glossy peaks form. The meringue should be thick and billowy, and when you lift the whisk, the peak should stand up straight without drooping. Rub a tiny bit between your fingers—if it feels smooth, the sugar is dissolved.
- With the mixer on low, add vanilla extract and salt. Mix just until combined, about 10 seconds.
- Transfer meringue to a piping bag fitted with a round tip (about 1/2 inch wide). Hold the bag straight up and down, about 1/2 inch above the baking sheet. Pipe a round base (about 1.5 inches wide), then slowly pull the bag straight up while squeezing to create a tall peak. Release pressure and pull away. Repeat, spacing ghosts about 1 inch apart.
- Bake for 60-75 minutes. After 60 minutes, turn the oven off but leave the cookies inside with the door slightly cracked open (prop it open with a wooden spoon). Let them cool completely in the oven, about 2-3 hours.
- Once completely cool, dip a toothpick or small piping brush into black gel food coloring. Gently dot two eyes and a mouth onto each ghost. Let faces dry for about 10 minutes before handling.
Notes
Room temperature eggs are essential for proper whipping. Avoid making meringue on humid days. Do not open the oven during baking. For best results, make a day or two in advance. Store in an airtight container at room temperature for up to two weeks. Do not refrigerate. For vegan version, use 1/2 cup aquafaba instead of egg whites.
Nutrition
- Serving Size: 1 ghost meringue coo
- Calories: 25
- Sugar: 6
- Sodium: 5
- Carbohydrates: 6
- Protein: 1
Keywords: ghost meringue cookies, Halloween cookies, easy meringue, spooky treats, gluten-free cookies, low-fat cookies, vanilla meringue