Love this? Save it for later!
Share the inspiration with your friends
I was standing in the baking aisle of our local grocery store last October, staring at a bag of candy eyeballs like they held the secrets to the universe. A little kid zoomed past me in a dinosaur costume — it was only the 15th, but some people really get into the spirit early — and I caught myself smiling. That’s when it hit me. That weird, specific smell of cheap Halloween candy mixed with the crinkle of plastic packaging, and suddenly I was seven years old at my babysitter Mrs. Kowalski’s kitchen table.
She had this chipped yellow mixing bowl that looked like it had survived a war, and every October 30th, without fail, she’d pull it out. The kitchen would get all steamy and sticky, and us kids would sit there on those wobbly metal stools, swinging our legs, watching her work. She’d let us press the candy eyeballs into the popcorn balls ourselves, and I remember the way my tiny fingers would sink into the warm, marshmallowy mess. Honestly, I think I ate more marshmallow than I actually shaped that first year. Mrs. Kowalski moved to Florida a long time ago, and I haven’t seen her in maybe twenty years, but I keep making these popcorn balls every Halloween. It’s my way of saying thanks, you know?
These Easy Halloween Popcorn Balls with Candy Eyeballs are not fancy. They’re not complicated. But they are exactly the kind of thing that makes Halloween feel like Halloween — messy, a little ridiculous, and absolutely unforgettable. Maybe you’ve got your own version of that chipped yellow bowl sitting in your memory. If not, let me tell you, it’s never too late to start one.
Why You’ll Love This Recipe
Let me be real with you for a second. I have tested more popcorn ball recipes than I care to admit. Some turned into sugary rocks that could break a tooth. Others fell apart the second you looked at them. This one? This is the one I keep coming back to, year after year, and here’s why I think you’ll love it too.
- Quick & Easy: We’re talking 15 minutes of active time, max. No candy thermometer, no complicated steps. If you can melt marshmallows, you can make these.
- Simple Ingredients: You probably have most of this stuff in your pantry right now. Popcorn, marshmallows, butter, a little vanilla. The candy eyeballs are the only special purchase, and you can find them at any grocery store this time of year.
- Perfect for Halloween: These are the life of the party. Seriously. Kids go wild for them, adults get nostalgic, and they look amazing on any dessert table.
- Crowd-Pleaser: I brought a batch to my neighbor’s Halloween block party last year, and they were gone in twenty minutes. A dad actually asked me for the recipe while holding one in each hand.
- Unbelievably Delicious: The texture is spot on — crispy on the outside, chewy on the inside, with that perfect marshmallow sweetness that isn’t overwhelming. The candy eyeballs add a fun little pop of sweetness too.
What makes this recipe different from all the others? It’s the technique. Most recipes tell you to work with the popcorn mixture when it’s piping hot, and that’s a disaster waiting to happen. I figured out that letting it cool for just two minutes makes all the difference. You can actually shape the balls without burning your hands, and they hold together beautifully. It’s one of those little tricks you only learn from making a recipe wrong about six times. Trust me, I paid my dues on this one.
This is the kind of recipe that makes you close your eyes after the first bite. It’s Halloween fun without the stress, and honestly, isn’t that what we all want?
What Ingredients You Will Need
This recipe uses simple, pantry-friendly ingredients to create something that feels way more special than it actually is. No weird stuff here — just classic Halloween magic.
- 12 cups popped popcorn (about 1/2 cup unpopped kernels, or one standard bag of microwave popcorn) — I prefer using plain air-popped popcorn or lightly salted microwave popcorn. Avoid butter-flavored varieties, as they can make the balls greasy and harder to shape.
- 1 (10-ounce) bag marshmallows (miniature or regular, both work fine) — Jet-Puffed is my go-to brand for consistent melting. The mini ones melt faster, which is nice, but regular ones work perfectly too.
- 1/4 cup unsalted butter (salted butter works in a pinch, just skip the added salt) — I recommend using a good quality butter like Kerrygold for the richest flavor. It really does make a difference here.
- 1/2 teaspoon vanilla extract — Pure vanilla extract is best, but imitation will do in a bind. Don’t skip it — it rounds out the sweetness beautifully.
- 1/4 teaspoon salt (if using unsalted butter) — This little pinch balances all that sugar and keeps the popcorn balls from tasting one-dimensional.
- 1/2 cup candy eyeballs — You can find these at any grocery store in the baking aisle during October. Wilton makes good ones, and the store brands work just fine too. I like to buy two packs because I always end up snacking on them.
- Non-stick cooking spray — This is non-negotiable. Your hands will thank you.
For the popcorn, I usually pop my own in an air popper because I’m that person, but honestly, a bag of plain microwave popcorn works great. Just make sure you pick out any unpopped kernels before you start — biting into one of those while you’re shaping the balls is not a fun surprise. Ask me how I know.
If you want to get creative, you can add a few drops of orange or purple food coloring to the marshmallow mixture for extra Halloween flair. I’ve done it with gel food coloring, and it turns out really fun. Just stir it in right after the butter and marshmallows have melted, before you add the popcorn.
Equipment Needed
You don’t need any fancy gadgets for this recipe, which is part of the beauty of it. Here’s what you’ll need:
- Large mixing bowl — You need something big enough to hold all that popcorn and give you room to stir. I use my grandmother’s old ceramic mixing bowl, but any large bowl will do.
- Large pot or saucepan — For melting the marshmallow mixture. A 4-quart pot is perfect.
- Rubber spatula or wooden spoon — For stirring the marshmallow mixture and folding it into the popcorn. A silicone spatula works best because nothing sticks to it.
- Parchment paper or wax paper — For letting the popcorn balls cool and set without sticking to everything.
- Cookie sheet or baking tray — To hold the popcorn balls while they set.
- Measuring cups and spoons — For accurate ingredient portions.
- Your hands — Seriously. You’ll be using your hands to shape the balls, so make sure they’re clean and well-greased with cooking spray.
If you don’t have a large mixing bowl, you can use a stockpot or even a clean paper grocery bag for mixing. I’ve done the grocery bag trick in a pinch, and it works surprisingly well — just be gentle when you shake it.
Preparation Method
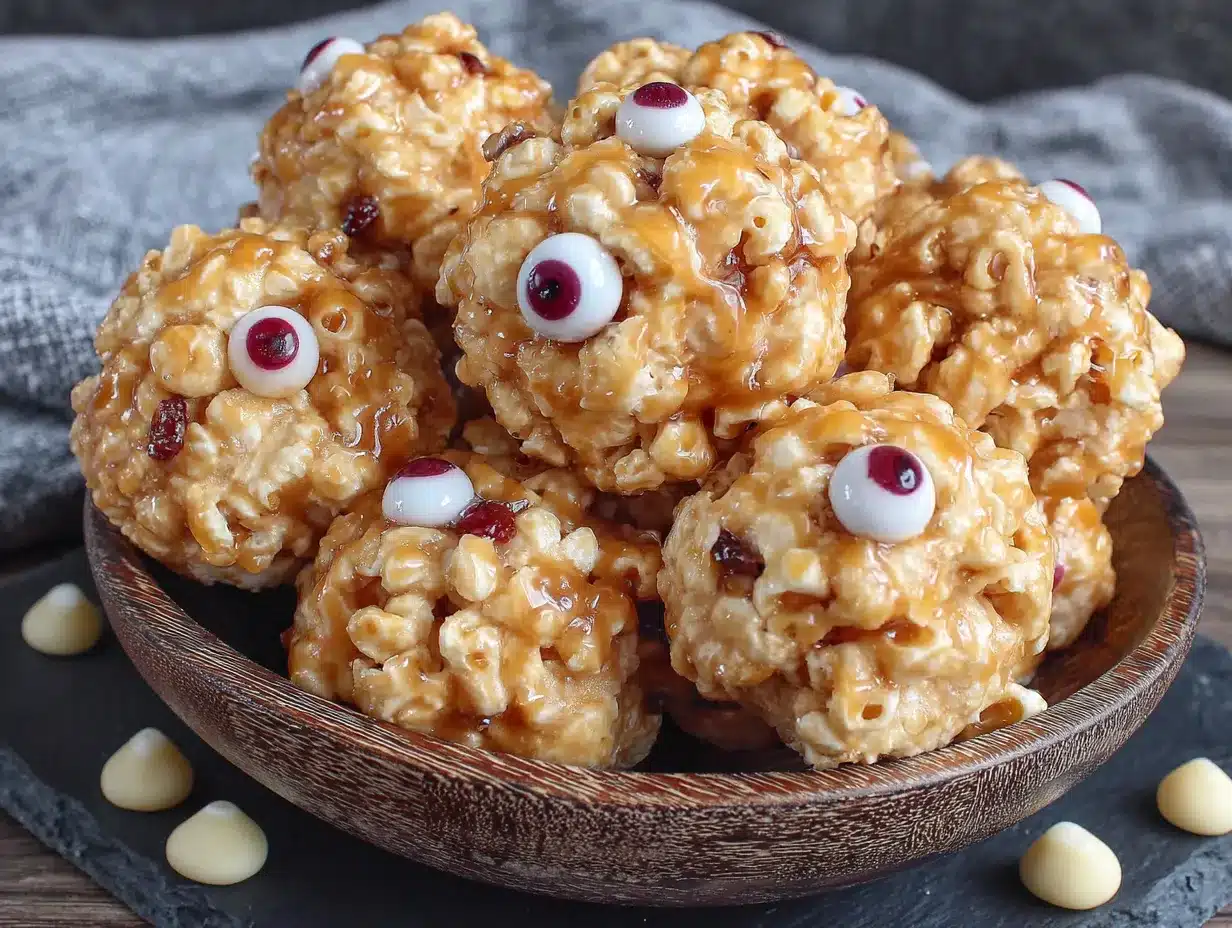
Alright, let’s get to the fun part. Here’s how to make these Easy Halloween Popcorn Balls with Candy Eyeballs without losing your mind or burning your fingers.
- Pop your popcorn. If you’re using kernels, pop them in an air popper or on the stovetop according to your preferred method. If you’re using microwave popcorn, pop one standard bag. You should end up with about 12 cups of popped popcorn. Spread it out on a large baking sheet and pick out any unpopped kernels. Trust me on this one.
- Prepare your workspace. Line a large baking sheet with parchment paper or wax paper. Lightly spray it with non-stick cooking spray. Set it aside — you’ll need it soon.
- Melt the butter. In a large pot or saucepan over medium heat, melt the 1/4 cup of unsalted butter. Swirl the pan occasionally so it melts evenly. This takes about 2 minutes. Watch it closely — you want it melted, not browned.
- Add the marshmallows. Pour the entire bag of marshmallows into the pot with the melted butter. Stir constantly with your rubber spatula or wooden spoon until the marshmallows are completely melted and the mixture is smooth. This usually takes about 4-5 minutes. The mixture will look glossy and stretchy when it’s ready.
- Add vanilla and salt. Remove the pot from the heat. Stir in the 1/2 teaspoon of vanilla extract and the 1/4 teaspoon of salt (if using). The mixture will bubble up a little — that’s normal. Stir until everything is well combined.
- Combine with popcorn. Pour the marshmallow mixture over the popcorn in your large bowl. Use your rubber spatula to gently fold everything together. Work carefully — you want to coat the popcorn evenly without crushing it. This takes about 2-3 minutes of gentle folding. The popcorn should look evenly coated but still have some texture.
- Let the mixture cool slightly. Here’s the trick I mentioned earlier. Let the mixture sit for exactly 2 minutes. It will still be warm, but it won’t be scorching hot. This short wait makes shaping so much easier and less painful.
- Grease your hands. Spray your hands generously with non-stick cooking spray. Reapply as needed throughout the shaping process. This is not optional — the marshmallow mixture is sticky, and you will regret skipping this step.
- Shape the popcorn balls. Grab a handful of the popcorn mixture — about the size of a tennis ball — and gently press it into a round shape. Don’t squeeze too hard, or you’ll end up with dense, hard balls. You want them to hold together but still feel light and airy. Place each shaped ball on the prepared baking sheet. Repeat until all the mixture is used. You should get about 10-12 popcorn balls, depending on size.
- Add the candy eyeballs. While the popcorn balls are still warm and slightly sticky, press 3-4 candy eyeballs into each one. I like to arrange them in funny patterns — some looking straight ahead, others looking off to the side. Get creative with it. If the popcorn balls cool too much and the eyeballs won’t stick, dab a tiny bit of marshmallow mixture on the back of each eyeball to use as glue.
- Let them set. Allow the popcorn balls to cool completely on the baking sheet, about 20-30 minutes. They will firm up as they cool. Don’t rush this step — warm popcorn balls will fall apart when you try to pick them up.
- Serve or store. Once completely cool, your Halloween popcorn balls are ready to eat. Or you can wrap them individually in plastic wrap for later.
A quick note about timing: the whole process from start to finish takes about 45 minutes, including cooling time. The actual hands-on work is only about 15 minutes. This is totally doable on a busy weeknight or even while you’re helping kids with homework.
Cooking Tips & Techniques
I have made this recipe approximately seventeen thousand times (okay, maybe more like twelve), and I have learned a few things the hard way. Let me save you some trouble.
Don’t overmix. I know it’s tempting to keep stirring until everything looks perfectly coated, but overmixing will crush the popcorn and give you dense, sad balls. Fold gently, and stop when the popcorn looks evenly coated. A few dry spots are totally fine — they’ll get covered when you shape the balls.
Work quickly but not frantically. The marshmallow mixture starts to set as it cools, so you want to shape the balls while it’s still pliable. But if you rush and burn your fingers, you’re not going to have a good time. That’s why the two-minute cool-down is so important. It gives you a sweet spot where the mixture is workable but not painful.
Keep your hands greased. I cannot stress this enough. Reapply cooking spray between every 2-3 popcorn balls. If your hands start to feel sticky, wash them, dry them, and spray again. Sticky hands lead to messy, misshapen popcorn balls and a whole lot of frustration.
Use a light touch. When you’re shaping the balls, imagine you’re holding a baby bird. You want it to hold together, but you don’t want to crush it. Gently cup the mixture in your hands and rotate it until it forms a ball. If it falls apart, it’s either too dry (add a tiny bit of marshmallow) or too cool (warm it in the microwave for 10 seconds).
Size matters. I aim for tennis ball-sized popcorn balls, but you can make them smaller for kids or larger for a dramatic centerpiece. Just keep in mind that smaller balls set faster and are easier for little hands to hold.
One time, I got distracted by a phone call and left the marshmallow mixture on the heat too long. It turned into a sticky, caramel-like mess that was impossible to work with. The popcorn balls were rock hard and practically inedible. So learn from my mistake — keep an eye on that pot, and take it off the heat as soon as the marshmallows are melted.
Variations & Adaptations
One of the best things about this recipe is how flexible it is. Here are some ways to make it your own.
Chocolate Drizzle: After the popcorn balls have set, melt 1/2 cup of dark or white chocolate chips with a teaspoon of coconut oil, and drizzle it over the top. It looks gorgeous and adds another layer of flavor. I did this for a Halloween party last year, and people lost their minds.
Spooky Colors: Add a few drops of orange and black gel food coloring to the marshmallow mixture for a festive twist. Just stir it in after the marshmallows have melted. I’ve also done purple and green for a monster theme, which was really fun.
Gluten-Free Version: This recipe is naturally gluten-free as long as you use plain popcorn and standard marshmallows. Double-check your marshmallow brand if you’re serving someone with celiac disease — most are gluten-free, but it’s always worth verifying.
Add Mix-Ins: Fold in 1/2 cup of mini chocolate chips, crushed pretzels, or sprinkles along with the popcorn. Just be gentle when mixing so everything distributes evenly. I made a batch with crushed Oreos last year, and it was dangerously good.
Peanut Butter Twist: Melt 1/4 cup of creamy peanut butter along with the butter and marshmallows for a nutty, salty-sweet version. This is my personal favorite variation. Just make sure no one has a peanut allergy before serving.
Vegan Option: Use vegan marshmallows (Dandies brand works great) and plant-based butter. The texture will be slightly different — a little less stretchy — but the flavor is still fantastic.
I tried a s’mores-inspired version last summer with crushed graham crackers and mini marshmallows mixed in, topped with a drizzle of melted chocolate. It wasn’t exactly Halloween-themed, but honestly, it was incredible. Don’t be afraid to experiment.
Serving & Storage Suggestions
These popcorn balls are best served at room temperature, right after they’ve set. The texture is perfect — crispy on the outside, chewy on the inside, with the candy eyeballs adding a fun little crunch.
For a Halloween party, arrange them on a large platter or cake stand. They make a fantastic centerpiece, especially if you’ve used colored marshmallow mixture. I like to scatter a few extra candy eyeballs around the platter for visual effect. Kids always gravitate toward them first, so put them somewhere accessible.
These also make great party favors. Wrap each popcorn ball individually in clear plastic wrap, tie it with orange or black ribbon, and hand them out at the end of the night. I did this for my niece’s Halloween birthday party, and the parents were thrilled to have a treat that wasn’t just more candy.
For storage, keep the popcorn balls in an airtight container at room temperature. They’ll stay fresh for up to 3 days. Do not refrigerate them — the cold air will make them hard and stale. I learned this the hard way when I tried to make them ahead of time for a party.
If you’re making them more than a day in advance, wrap each one tightly in plastic wrap, then place them in a zip-top bag. Squeeze out as much air as possible. They’ll keep for about 5 days this way, though the texture will soften slightly over time.
These popcorn balls do not freeze well, unfortunately. The marshmallow coating gets icy and weird, and the popcorn loses all its crunch. Make them fresh for the best experience.
Nutritional Information & Benefits
Let’s be honest — these are a treat, not a health food. But here’s the nutritional breakdown for one popcorn ball (based on 12 servings):
| Nutrient | Amount per Serving |
|---|---|
| Calories | 185 |
| Total Fat | 6g |
| Saturated Fat | 3.5g |
| Cholesterol | 15mg |
| Sodium | 115mg |
| Total Carbohydrates | 32g |
| Dietary Fiber | 1g |
| Sugars | 18g |
| Protein | 2g |
On the bright side, popcorn is a whole grain and provides some fiber. The butter adds a small amount of vitamin A, and the vanilla extract has trace amounts of antioxidants. But really, these are about fun and nostalgia, not daily nutrition. I pair them with fresh fruit or veggie platters at parties to balance things out a bit.
If you’re watching your sugar intake, you can use a sugar-free marshmallow alternative, though the texture will be different. For a lower-fat version, use a butter substitute and air-popped popcorn.
These popcorn balls contain dairy (butter) and may contain traces of gluten depending on your popcorn and marshmallow brands. The candy eyeballs often contain sugar, corn syrup, and artificial colors, so check the label if you have specific dietary concerns.
Conclusion
These Easy Halloween Popcorn Balls with Candy Eyeballs are everything I love about this season — simple, fun, and full of character. They bring people together, they make kids smile, and they taste like the best kind of childhood memory. Every time I make them, I think about Mrs. Kowalski and her chipped yellow bowl, and I feel grateful for those sticky, messy afternoons that shaped who I am as a cook.
I really hope you give these a try. Customize them however you like — add chocolate, change the colors, throw in some sprinkles. Make them your own. That’s what cooking is all about, right? Taking something simple and making it yours.
When you make them — and I know you will — come back and let me know how they turned out. Did you add anything fun? Did the kids go wild? Did you burn your fingers anyway despite my warnings? (No judgment, I’ve been there.) Drop a comment below or tag me in your photos. I’d love to see your spooky creations.
Happy Halloween, friends. Now go make some memories — and some popcorn balls.
Frequently Asked Questions
Can I use microwave popcorn for this recipe?
Absolutely. Just make sure you use plain or lightly salted microwave popcorn. Avoid butter-flavored varieties, as the extra oil can make the popcorn balls greasy and harder to shape. Also, pick out any unpopped kernels before you start.
Why did my popcorn balls turn out hard?
This usually happens for two reasons. Either you overcooked the marshmallow mixture (take it off the heat as soon as it’s smooth), or you packed the popcorn balls too tightly. Use a gentle touch when shaping, and let the mixture cool for two minutes before you start working with it.
Can I make these popcorn balls ahead of time?
Yes! You can make them up to 3 days in advance. Store them in an airtight container at room temperature. Wrap each one individually in plastic wrap for best results. Do not refrigerate them — they’ll get hard and stale.
How do I get the candy eyeballs to stick?
Press them into the popcorn balls while the marshmallow coating is still warm and sticky. If the popcorn balls have cooled too much, dab a tiny bit of melted marshmallow on the back of each eyeball and use it as glue. It works like a charm.
Can I use something other than candy eyeballs?
Of course! You can use M&Ms, chocolate chips, sprinkles, or even small candies like candy corn or pumpkin-shaped chocolates. Get creative with it. The eyeballs are fun for Halloween, but these popcorn balls work great with any festive candy you have on hand.
Pin This Recipe!
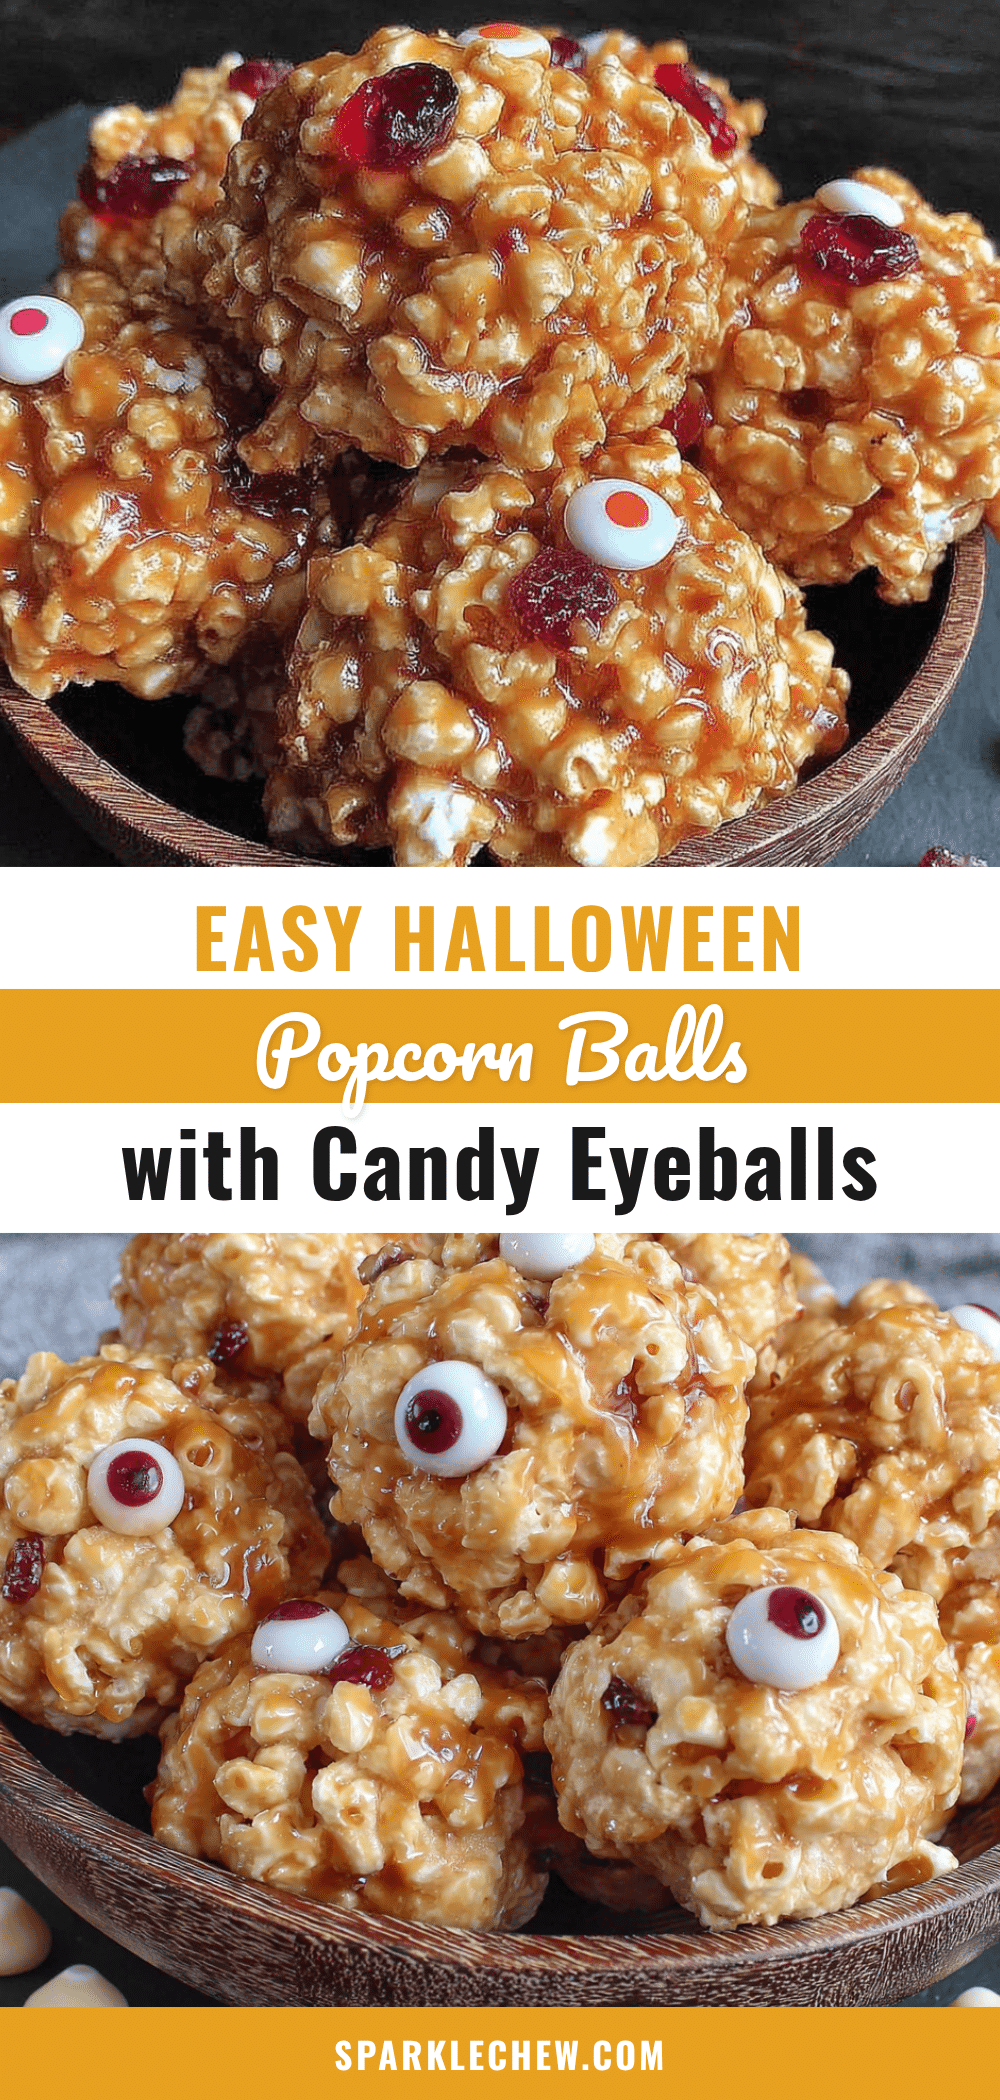
Easy Halloween Popcorn Balls with Candy Eyes
These Easy Halloween Popcorn Balls with Candy Eyeballs are a fun, nostalgic treat that’s quick to make and perfect for Halloween parties. With a crispy-chewy texture and spooky candy eyes, they’re a crowd-pleaser that kids and adults will love.
- Prep Time: 15 minutes
- Cook Time: 10 minutes
- Total Time: 45 minutes
- Yield: 10-12 servings 1x
- Category: Dessert
- Cuisine: American
Ingredients
- 12 cups popped popcorn (about 1/2 cup unpopped kernels, or one standard bag of microwave popcorn)
- 1 (10-ounce) bag marshmallows (miniature or regular)
- 1/4 cup unsalted butter
- 1/2 teaspoon vanilla extract
- 1/4 teaspoon salt (if using unsalted butter)
- 1/2 cup candy eyeballs
- Non-stick cooking spray
Instructions
- Pop your popcorn. If using kernels, pop them in an air popper or on the stovetop. If using microwave popcorn, pop one standard bag. You should end up with about 12 cups of popped popcorn. Spread it out on a large baking sheet and pick out any unpopped kernels.
- Prepare your workspace. Line a large baking sheet with parchment paper or wax paper. Lightly spray it with non-stick cooking spray. Set aside.
- Melt the butter. In a large pot or saucepan over medium heat, melt the 1/4 cup of unsalted butter. Swirl the pan occasionally so it melts evenly. This takes about 2 minutes. Watch it closely — you want it melted, not browned.
- Add the marshmallows. Pour the entire bag of marshmallows into the pot with the melted butter. Stir constantly with your rubber spatula or wooden spoon until the marshmallows are completely melted and the mixture is smooth. This usually takes about 4-5 minutes. The mixture will look glossy and stretchy when it’s ready.
- Add vanilla and salt. Remove the pot from the heat. Stir in the 1/2 teaspoon of vanilla extract and the 1/4 teaspoon of salt (if using). The mixture will bubble up a little — that’s normal. Stir until everything is well combined.
- Combine with popcorn. Pour the marshmallow mixture over the popcorn in your large bowl. Use your rubber spatula to gently fold everything together. Work carefully — you want to coat the popcorn evenly without crushing it. This takes about 2-3 minutes of gentle folding. The popcorn should look evenly coated but still have some texture.
- Let the mixture cool slightly. Let the mixture sit for exactly 2 minutes. It will still be warm, but it won’t be scorching hot.
- Grease your hands. Spray your hands generously with non-stick cooking spray. Reapply as needed throughout the shaping process.
- Shape the popcorn balls. Grab a handful of the popcorn mixture — about the size of a tennis ball — and gently press it into a round shape. Don’t squeeze too hard. You want them to hold together but still feel light and airy. Place each shaped ball on the prepared baking sheet. Repeat until all the mixture is used. You should get about 10-12 popcorn balls, depending on size.
- Add the candy eyeballs. While the popcorn balls are still warm and slightly sticky, press 3-4 candy eyeballs into each one. Arrange them in funny patterns. If the popcorn balls cool too much and the eyeballs won’t stick, dab a tiny bit of marshmallow mixture on the back of each eyeball to use as glue.
- Let them set. Allow the popcorn balls to cool completely on the baking sheet, about 20-30 minutes. They will firm up as they cool.
- Serve or store. Once completely cool, your Halloween popcorn balls are ready to eat. Or you can wrap them individually in plastic wrap for later.
Notes
Let the popcorn mixture cool for exactly 2 minutes before shaping to avoid burning your hands. Keep hands well-greased with cooking spray. Use a light touch when shaping to keep the balls airy. Do not refrigerate; store in an airtight container at room temperature for up to 3 days. For best results, make fresh and serve within a day.
Nutrition
- Serving Size: 1 popcorn ball
- Calories: 185
- Sugar: 18
- Sodium: 115
- Fat: 6
- Saturated Fat: 3.5
- Carbohydrates: 32
- Fiber: 1
- Protein: 2
Keywords: Halloween popcorn balls, candy eyeballs, easy Halloween treat, popcorn balls recipe, spooky snacks, Halloween party food, no-bake dessert


