Love this? Save it for later!
Share the inspiration with your friends
I was standing in line at the hardware store—of all places—when the woman ahead of me started rearranging her entire shopping cart. She had a flat of mason jars, a bag of chocolate chips, and what looked like a pound of butter. I assumed she was making some kind of elaborate gift basket. “Baking project?” I asked, mostly just to be polite.
“Worse,” she said, laughing. “I’m trying to stop spending twelve dollars on fancy hot cocoa mix at the market. My kids go through it like water, and I finally told myself—enough. I’m making my own.” She turned and showed me her cart like she was revealing a secret. “It’s just a few things. You probably have most of them in your pantry right now.”
And honestly? She wasn’t wrong. That chance encounter in the lighting aisle turned into one of the most practical kitchen habits I’ve ever picked up. This easy DIY hot cocoa mix in a mason jar is exactly what she described—simple ingredients, zero fuss, and it tastes better than anything you can buy in a tin. I’ve been making it ever since, and I keep a jar on my counter through every single cold month.
Maybe you’ve been there—staring at the hot cocoa aisle, flipping over a box to read ingredients you can’t pronounce, and wondering why something so simple costs so much. I get it. That’s exactly why this recipe stuck with me. It’s not fancy. It’s not complicated. It’s just good, honest hot chocolate that comes together in about five minutes of measuring and shaking. Let me show you how.
Why You’ll Love This Recipe
Let’s be real for a second. Weeknights are chaos. You’re tired, the kids are hungry, and the last thing you want to do is whip out a complicated dessert recipe. This easy DIY hot cocoa mix solves that problem before you even know you have it.
- Quick & Easy: This mix comes together in under 10 minutes. Seriously. Measure, shake, store. That’s it. No melting, no double boilers, no fuss.
- Simple Ingredients: You probably already have everything in your pantry. No weird additives, no mystery powders. Just real ingredients you recognize.
- Perfect for Busy Nights: When the craving hits, just scoop, heat, and sip. It’s faster than driving to a coffee shop and way cheaper.
- Crowd-Pleaser: Kids love it. Adults love it. Even that picky relative who “doesn’t do hot chocolate” will ask for a second cup.
- Unbelievably Delicious: The texture is silky, the chocolate flavor is deep, and it’s not cloyingly sweet like the store-bought stuff. You can actually taste the cocoa.
What makes this recipe different? Most homemade mixes use powdered milk that leaves a weird aftertaste. I tested a few versions before landing on this one—using a specific ratio of real chocolate to milk powder that gives you that rich, creamy texture without the chalkiness. It’s the kind of hot cocoa that makes you close your eyes after the first sip. And honestly, for something that takes five minutes to throw together? That’s a win.
What Ingredients You Will Need
This recipe uses simple, everyday ingredients to deliver a rich, comforting cup of hot cocoa without any fuss. Most of these are pantry staples, so you might not even need a grocery run.
- 1 cup powdered milk (I prefer Nestlé Nido for its creaminess, but any brand works)
- 1 cup powdered sugar (adds sweetness and helps the mix dissolve smoothly)
- 3/4 cup unsweetened cocoa powder (use a high-quality brand like Ghirardelli or Hershey’s Special Dark for deeper flavor)
- 1/2 cup semi-sweet chocolate chips (finely chopped or mini chips work best—they melt faster)
- 1/4 teaspoon salt (don’t skip this—it balances the sweetness and makes the chocolate pop)
- Optional: 1/2 teaspoon vanilla powder (adds warmth and depth; you can also use vanilla sugar)
- Optional: Pinch of cinnamon or chili powder (for a spiced variation)
Ingredient Selection Tips: Look for cocoa powder that’s rich and dark—it makes a huge difference in flavor. I’ve tried cheaper brands, and they tend to taste flat. Also, if you’re using whole powdered milk instead of nonfat, your cocoa will be noticeably creamier. Trust me on that one.
Substitution Guidance: If you’re dairy-free, swap the powdered milk for coconut milk powder or almond milk powder. You can also use coconut sugar instead of powdered sugar for a less refined option, though the texture will be slightly grainier. For a vegan version, use dairy-free chocolate chips and a plant-based milk powder.
Equipment Needed
You don’t need much for this recipe, which is part of the beauty of it. Here’s what you’ll need:
- Mason jar (quart-sized works best, or use two pint-sized jars for gifting)
- Measuring cups and spoons
- Funnel (optional but helpful for pouring into the jar without making a mess)
- Whisk or fork (for mixing the dry ingredients before jarring)
- Small bowl (for combining everything before transferring to the jar)
I’ve made this mix using a simple fork when I couldn’t find my whisk, and it worked just fine. You don’t need any fancy equipment—just something to stir with and a clean jar. If you’re gifting these, a ribbon and a tag are nice touches, but totally optional. The mix itself is the star.
Preparation Method
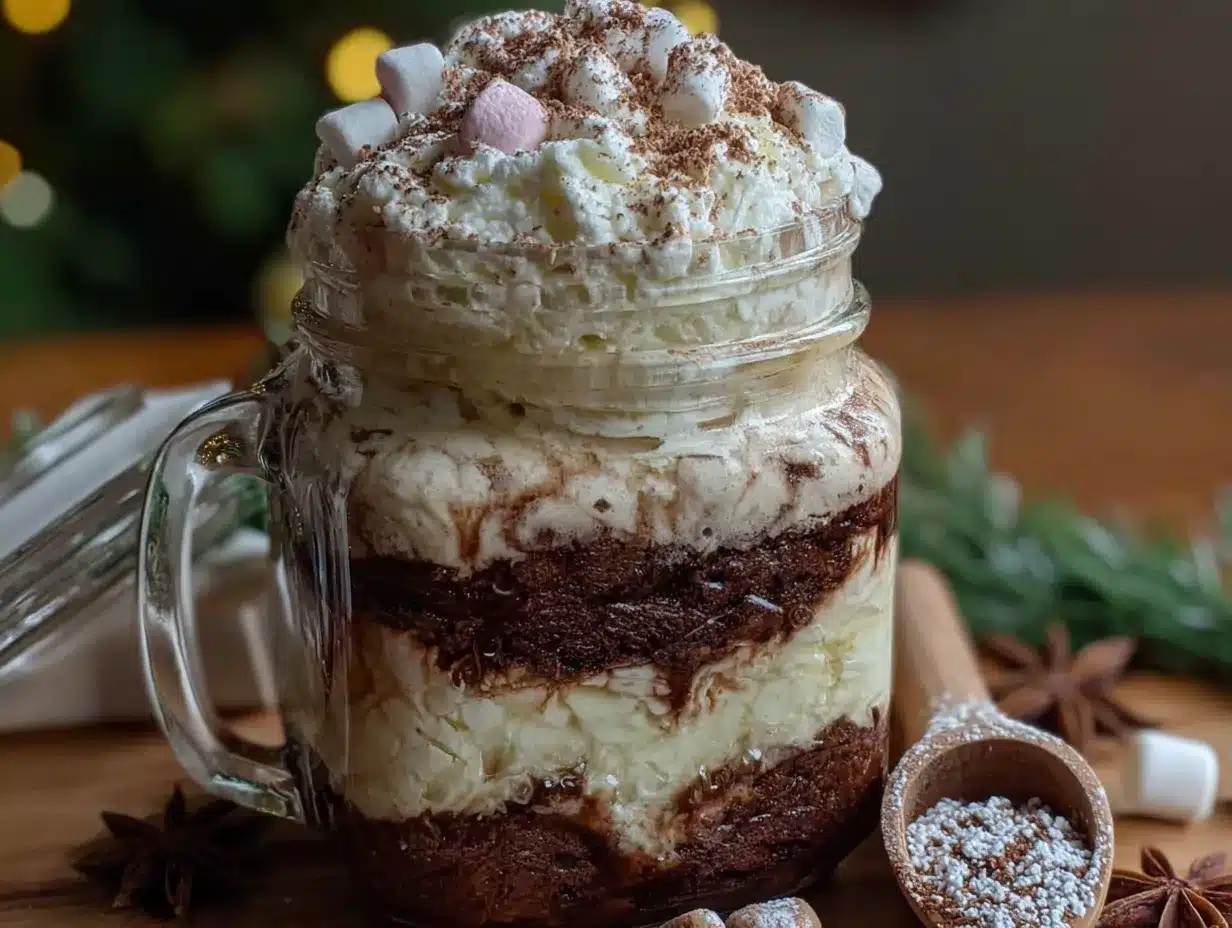
- Combine the dry ingredients: In a medium bowl, whisk together the powdered milk, powdered sugar, unsweetened cocoa powder, and salt. Make sure there are no lumps—cocoa powder tends to clump, so take your time here. I usually sift the cocoa powder through a fine-mesh strainer to avoid any gritty bits.
- Add the chocolate chips: Stir in the finely chopped semi-sweet chocolate chips. If you’re using mini chips, they’ll distribute more evenly. If you only have regular-sized chips, give them a rough chop with a knife first. This ensures they melt quickly when you add hot liquid.
- Mix thoroughly: Whisk everything together until the chocolate chips are evenly distributed and the powder looks uniform. You shouldn’t see streaks of white or brown—just a consistent, dark mixture. This takes about 2 minutes of whisking.
- Transfer to the mason jar: Using a funnel, pour the mix into your clean, dry mason jar. Tap the jar gently on the counter to settle the powder. If you’re layering for a gift, add the ingredients in separate layers (milk powder, sugar, cocoa, chips) for a striped effect—just remember to tell the recipient to shake it well before using.
- Seal and label: Screw on the lid tightly. If you’re gifting, attach a tag with instructions: “Add 1/3 cup mix to 8 oz hot milk or water. Stir until dissolved. Enjoy!”
- To make a single serving: Heat 8 ounces of milk (or water) until steaming but not boiling. Add 1/3 cup of the hot cocoa mix to your mug. Pour the hot liquid over the mix and stir vigorously until the chocolate chips have melted and the powder is fully dissolved. Top with marshmallows or whipped cream if you’re feeling fancy.
Pro tip from my kitchen: I once forgot to sift the cocoa powder and ended up with little cocoa clumps floating in my mug. Not the end of the world, but definitely not as smooth. Take the extra 30 seconds to sift—it’s worth it.
Cooking Tips & Techniques
I’ve made this mix more times than I can count, and I’ve definitely learned a few things along the way. Here are the tips that make a real difference:
- Use hot milk, not water, for the creamiest result. Water works in a pinch, but whole milk or oat milk gives you that rich, velvety texture that makes homemade cocoa so much better than the instant packets.
- Don’t boil your liquid. Overheating can scald the milk or make the cocoa powder taste bitter. Heat it until steam rises and small bubbles form around the edges—that’s your sweet spot.
- Stir constantly while adding the mix. If you dump it all in at once, you’ll end up with clumps. Add it gradually while whisking, and you’ll get a perfectly smooth cup every time.
- Store in a cool, dry place. Humidity is the enemy of powdered mixes. Keep your jar in the pantry, not near the stove or dishwasher. If you live in a humid climate, add a silica gel packet to the jar to absorb moisture.
Mistake I’ve made: The first time I made this, I used regular sugar instead of powdered sugar. It didn’t dissolve properly, and I ended up with grainy cocoa. Powdered sugar is key because it’s finer and dissolves instantly. Don’t substitute it with granulated sugar unless you want a sandy texture.
Variations & Adaptations
This base recipe is just the beginning. Over the years, I’ve played around with different flavors, and here are some of my favorites:
- Peppermint Hot Cocoa: Add 1/4 cup crushed candy canes or peppermint candies to the mix. Stir well. The peppermint pieces melt into the hot cocoa, giving it a refreshing, cool finish. Perfect for holiday gifting.
- Spiced Mexican Hot Cocoa: Add 1 teaspoon ground cinnamon, 1/4 teaspoon cayenne pepper, and a pinch of nutmeg to the mix. The warmth of the spices balances the sweetness beautifully. I make this version every December, and it’s always a hit.
- Vegan & Dairy-Free: Swap the powdered milk for coconut milk powder or almond milk powder. Use dairy-free chocolate chips (Enjoy Life brand works great). The coconut version is especially creamy and adds a subtle tropical note.
- Extra Dark Cocoa: Use dark cocoa powder (like Hershey’s Special Dark) and increase the chocolate chips to 3/4 cup. This version is less sweet and intensely chocolatey—perfect for adults who want a more sophisticated cup.
- Mocha Twist: Add 2 tablespoons of instant espresso powder to the mix. The coffee doesn’t make it taste like coffee—it just deepens the chocolate flavor. It’s my go-to when I need an afternoon pick-me-up.
Serving & Storage Suggestions
This hot cocoa mix is best served steaming hot, topped with whatever makes you happy. I’m a marshmallow person myself, but my husband swears by a dollop of whipped cream and a sprinkle of cinnamon. For a cozy night in, serve it with a side of brownie bites or soft chocolate chip cookies.
Storage: Keep your mason jar sealed tightly in a cool, dark pantry. It will stay fresh for up to 6 months. I’ve kept jars for almost a year with no issues, though the chocolate chips might bloom (develop white spots) if the temperature fluctuates. They’re still safe to eat, just not as pretty.
Reheating: If your cocoa goes cold, pop it in the microwave for 20-30 seconds and stir well. You can also reheat it on the stove over low heat, whisking constantly. Don’t let it boil, or the milk powder might separate.
Make-ahead note: This mix is perfect for busy mornings. Prep a jar on Sunday, and you’ve got instant hot cocoa all week long. I keep one in my pantry and one at my desk at work—because some days just call for chocolate.
Nutritional Information & Benefits
Here’s the estimated nutrition for one serving (1/3 cup mix prepared with 8 oz whole milk):
- Calories: 280
- Fat: 12g
- Carbohydrates: 38g
- Protein: 10g
- Sugar: 30g
- Calcium: 25% of daily value
Health Benefits: Cocoa powder is rich in antioxidants called flavonoids, which can help reduce inflammation and support heart health. The milk powder adds calcium and vitamin D, making this a surprisingly nutritious treat. Plus, since you control the sugar, you can adjust it to your taste—use less powdered sugar for a lighter version.
Dietary Considerations: This recipe is vegetarian and can easily be made gluten-free (just check your cocoa powder label). For a lower-sugar option, reduce the powdered sugar to 1/2 cup and use unsweetened chocolate chips. As always, check with your healthcare provider if you have specific dietary concerns.
Conclusion
Honestly, this easy DIY hot cocoa mix in a mason jar has become one of those recipes I never knew I needed until I had it. It’s simple, it’s practical, and it makes the coldest nights feel a little warmer. Whether you’re making it for yourself, your family, or as a thoughtful homemade gift, I promise you’ll wonder why you didn’t start making it sooner.
I’d love to hear how it turns out for you. Did you add your own twist? Try the peppermint version? Leave a comment below and let me know—I read every single one. And if you share a photo on Pinterest, tag me so I can see your beautiful jars in action. Happy sipping, friends!
Frequently Asked Questions
Can I use water instead of milk?
Yes, you can use hot water, but the cocoa will be thinner and less creamy. For the best texture, I always recommend milk—dairy or plant-based.
How long does this hot cocoa mix last?
Stored in a sealed jar in a cool, dry place, it stays fresh for up to 6 months. If you see any clumps, just break them up with a fork before using.
Can I double this recipe?
Absolutely. Just multiply all the ingredients by two and store in a larger container. I often make a double batch during the holidays for gifting.
Why did my cocoa turn out grainy?
You likely used granulated sugar instead of powdered sugar. Powdered sugar dissolves instantly, while granulated sugar leaves a gritty texture. Stick with powdered for smooth results.
Can I add marshmallows to the jar?
You can, but they’ll absorb moisture over time and become stale. I recommend adding fresh marshmallows when you’re ready to serve the cocoa, not storing them in the mix.
PrintEasy Homemade Hot Cocoa Mix in a Mason Jar

This easy DIY hot cocoa mix in a mason jar is made with simple ingredients, zero fuss, and tastes better than anything you can buy in a tin. Perfect for busy nights, it comes together in about five minutes of measuring and shaking.
- Prep Time: 10 minutes
- Cook Time: 5 minutes
- Total Time: 15 minutes
- Yield: 8 servings 1x
- Category: Beverage
- Cuisine: American
Ingredients
- 1 cup powdered milk (preferably Nestlé Nido)
- 1 cup powdered sugar
- 3/4 cup unsweetened cocoa powder (high-quality like Ghirardelli or Hershey’s Special Dark)
- 1/2 cup semi-sweet chocolate chips (finely chopped or mini chips)
- 1/4 teaspoon salt
- Optional: 1/2 teaspoon vanilla powder
- Optional: Pinch of cinnamon or chili powder
Instructions
- Combine the dry ingredients: In a medium bowl, whisk together the powdered milk, powdered sugar, unsweetened cocoa powder, and salt. Sift the cocoa powder through a fine-mesh strainer to avoid lumps.
- Add the chocolate chips: Stir in the finely chopped semi-sweet chocolate chips. If using regular-sized chips, give them a rough chop first.
- Mix thoroughly: Whisk everything together until the chocolate chips are evenly distributed and the powder looks uniform, about 2 minutes.
- Transfer to the mason jar: Using a funnel, pour the mix into a clean, dry quart-sized mason jar. Tap the jar gently on the counter to settle the powder.
- Seal and label: Screw on the lid tightly. If gifting, attach a tag with instructions: ‘Add 1/3 cup mix to 8 oz hot milk or water. Stir until dissolved. Enjoy!’
- To make a single serving: Heat 8 ounces of milk (or water) until steaming but not boiling. Add 1/3 cup of the hot cocoa mix to your mug. Pour the hot liquid over the mix and stir vigorously until the chocolate chips have melted and the powder is fully dissolved. Top with marshmallows or whipped cream if desired.
Notes
For the creamiest result, use hot milk instead of water. Do not boil the liquid; heat until steam rises and small bubbles form around the edges. Stir constantly while adding the mix to avoid clumps. Store in a cool, dry place for up to 6 months. If using granulated sugar instead of powdered sugar, the cocoa may turn out grainy.
Nutrition
- Serving Size: 1 cup (8 oz prepared
- Calories: 280
- Sugar: 30
- Sodium: 200
- Fat: 12
- Saturated Fat: 7
- Carbohydrates: 38
- Fiber: 3
- Protein: 10
Keywords: hot cocoa mix, DIY hot chocolate, mason jar gift, homemade hot cocoa, easy hot chocolate mix