Love this? Save it for later!
Share the inspiration with your friends
“You know that moment when you’re rummaging through your pantry late on a Sunday afternoon, hoping for something sweet but not wanting to fuss over a complicated recipe? Well, that was me last month when I stumbled upon what I call the easiest, most irresistible dump cake with cherry and peach filling. Honestly, it felt like a little magic happened in my kitchen that day.
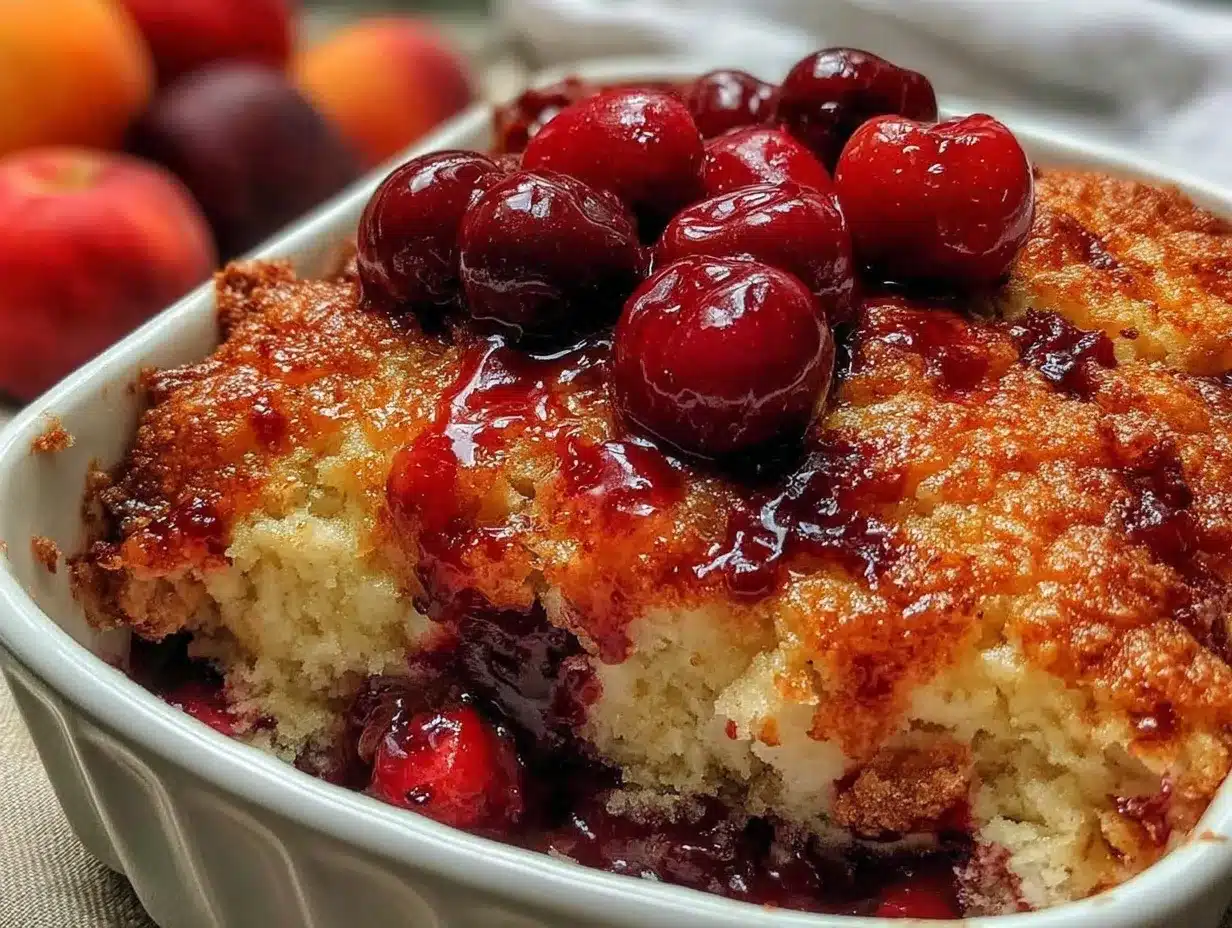
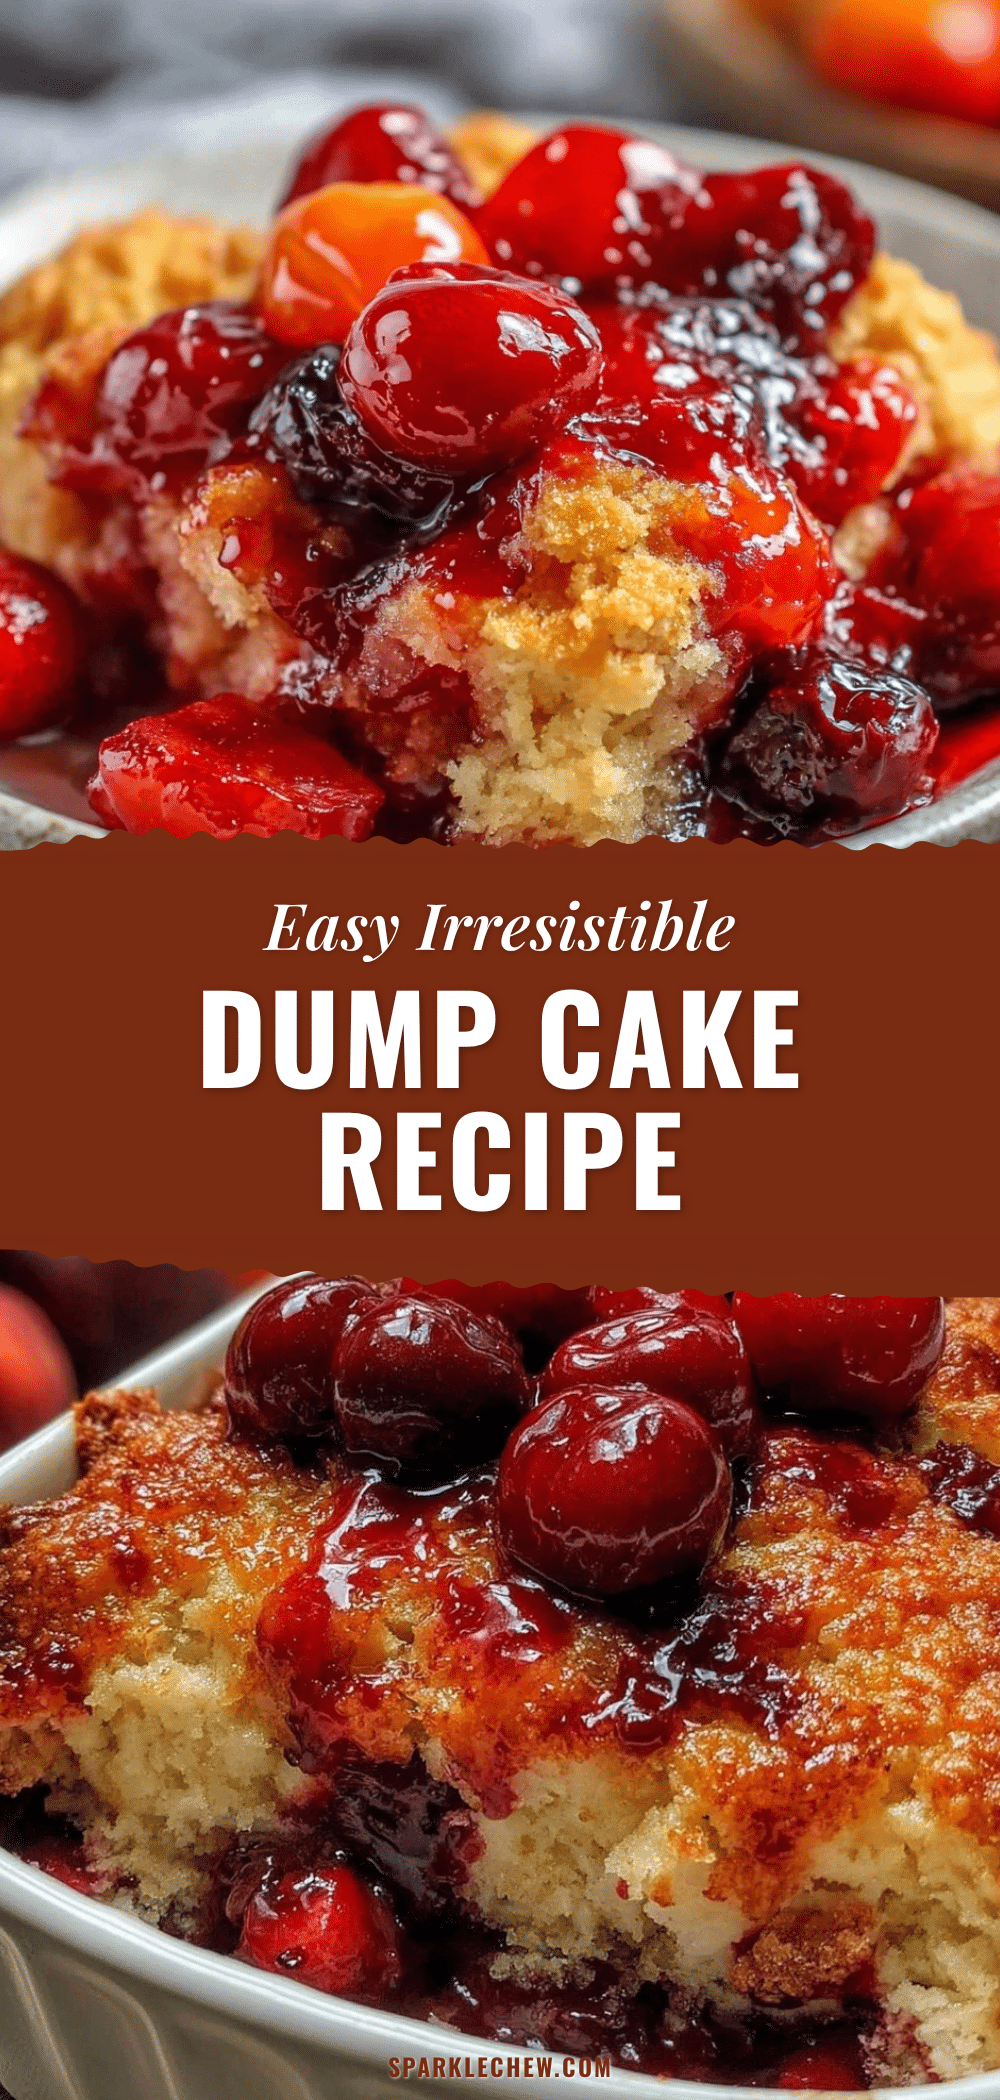
It wasn’t planned. I had a half-empty can of cherry pie filling and some fresh peaches sitting on the counter, and I was just about to throw together something simple. I grabbed a box of yellow cake mix (because, yes, I keep one on hand for emergencies), and instead of mixing everything in a bowl like you usually would, I just dumped it all in a baking dish and hoped for the best. The oven timer went off, and what came out was this bubbling, golden-topped dessert that honestly looked way too pretty for how little effort I put in.
Maybe you’ve been there—craving something homey but not wanting to slave away in the kitchen. This dump cake recipe is like the answer to those moments. It’s quick, it’s comforting, and it somehow brings together the tartness of cherries with the juicy sweetness of peaches like a charm. I remember sitting down with a forkful, the warm fruit filling oozing around the cake’s crunchy edges, and thinking, “This is going to be my go-to.”
So, let me tell you about this easy irresistible dump cake with cherry and peach filling that has been stealing the show at every gathering and quiet night in since that day.
Why You’ll Love This Recipe
Trust me, this dump cake isn’t just another dessert. It’s been tested more times than I can count—sometimes as a last-minute potluck savior, other times as a cozy treat when the weather turns chilly. Here’s why it stands out:
- Quick & Easy: Comes together in under 10 minutes, no fancy skills required. Perfect when you want something sweet but don’t want to spend hours baking.
- Simple Ingredients: You probably already have canned cherry filling, fresh or canned peaches, and a box of cake mix sitting around. No obscure items here.
- Perfect for Any Occasion: Whether it’s a casual family dinner, a picnic, or a holiday gathering, this dessert fits right in without fuss.
- Crowd-Pleaser: Kids, adults, picky eaters—it’s always a hit. The combo of cherries and peaches hits that nostalgic, comforting note.
- Unbelievably Delicious: The texture is just right—the crunchy cake top with that gooey, fruity filling underneath is honestly next-level comfort food.
- What Makes This Recipe Different: Instead of mixing ingredients separately, this dump cake’s charm is in layering everything directly in the pan. The cake mix bakes up crisp on top while soaking in the juices below, creating a layered effect that’s all kinds of yum.
It’s not just a dessert; it’s a little slice of sweet simplicity that makes you close your eyes and savor that first bite. I mean, isn’t that what comfort food should do?
What Ingredients You Will Need
This recipe uses simple, wholesome ingredients that come together to deliver that perfect balance of fruitiness and cakey goodness without any fuss. Most of these are pantry staples, with just a touch of fresh peach to brighten things up.
- Cherry Pie Filling – 21 oz (595 g) can, preferably a trusted brand like Libby’s or Hunt’s for consistent sweetness and texture.
- Peaches – 2 large fresh peaches, peeled and sliced (or you can use a 15 oz/425 g can of sliced peaches, drained; fresh gives a nicer texture in summer).
- Yellow Cake Mix – 1 box (about 15.25 oz / 432 g), I recommend Duncan Hines for its light crumb and buttery flavor.
- Unsalted Butter – 1 cup (226 g), sliced thinly and spread evenly over the top (this adds richness and helps create that golden crust).
- Optional: ½ teaspoon ground cinnamon to sprinkle over the fruit layer for a warm, spicy note.
- Optional: A handful of chopped nuts (pecans or walnuts) to sprinkle on top for crunch.
Substitution tips: Use dairy-free butter or coconut oil for a dairy-free twist. For a gluten-free version, swap the yellow cake mix with a gluten-free cake mix you trust. If fresh peaches aren’t in season, frozen thawed peach slices work nicely too.
Equipment Needed
One of the best things about this easy irresistible dump cake is how little gear you need. Here’s what I used and what you could swap in:
- Baking Dish: A 9×13 inch (23×33 cm) glass or metal baking dish works perfectly. Glass gives even baking and a nice presentation.
- Mixing Spoon or Spatula: For spreading the filling and butter slices evenly.
- Peeler and Knife: To peel and slice your fresh peaches if you’re using them.
- Measuring Cups: For butter and any optional spices.
If you don’t have a glass dish, a metal one is great, just adjust baking time slightly. No fancy gadgets needed, which is part of why this recipe is so low-stress. I once made this for a friend using a disposable aluminum pan because her oven was busy with a roast—worked like a charm!
Preparation Method
- Preheat your oven to 350°F (175°C). This usually takes about 10 minutes—enough time to prep.
- Prepare the fruit layer: If using fresh peaches, peel and slice them thinly. Spread the canned cherry pie filling evenly in the bottom of your baking dish, then layer the peach slices on top. If you want, sprinkle the cinnamon over the fruit now (about ½ teaspoon).
- Add the cake mix: Sprinkle the dry yellow cake mix evenly over the fruit layer. Don’t stir; this layering is key to the texture contrast.
- Butter it up: Slice the cold unsalted butter into thin pats and place them evenly over the cake mix. This will melt during baking and soak into the cake mix, making a crispy, buttery topping.
- Bake: Place the dish in the preheated oven and bake for 45-50 minutes. You’re looking for a golden-brown crust on top and bubbly fruit edges. If the top browns too fast, loosely cover with foil for the last 10 minutes.
- Cool slightly: Remove the cake from the oven and let it cool for 15-20 minutes before serving. This allows the filling to set a bit so it’s easier to scoop and enjoy.
Pro tip: If you notice the butter isn’t melting evenly, you can gently nudge the slices into the cake mix with a spatula before baking. I once forgot to preheat the oven and the butter took longer to melt, but the result was still pretty great—just a little less crispy on top.
Cooking Tips & Techniques
Let me share some things I’ve picked up from making this dump cake more times than I can count. These are the little wins that help you get it just right:
- Don’t stir: The magic of this dump cake is in the layers. Stirring the cake mix into the filling will turn it into a cobbler, not the crisp-topped cake we want.
- Butter placement: Make sure the butter slices cover the cake mix as evenly as possible. This helps create that golden, buttery crust we all crave. If you’re short on time, softened butter works, but cold slices give the best texture.
- Check your oven temperature: Oven temps can vary. If your cake is browning too quickly but not bubbling, lower the heat slightly and extend baking time.
- Fruit variations: If peaches aren’t your thing, swap in sliced apples or blueberries. Just remember to adjust baking time slightly for juicier fruits.
- Multitasking: While the cake bakes, clean up your prep area or whip up a quick whipped cream topping—nothing beats cake with a dollop of fresh cream.
Honestly, once you get the hang of the layering and butter distribution, this recipe feels like second nature. And if you’re like me, sometimes you’ll throw in a little extra cinnamon or nutmeg for a personal touch.
Variations & Adaptations
This dump cake is a fantastic base for all kinds of tweaks, so you can make it your own. Here are a few personal favorites I’ve tried:
- Gluten-Free Version: Use a gluten-free yellow cake mix to keep the texture close to the original. I’ve had great results with Betty Crocker Gluten-Free cake mix.
- Dairy-Free Adaptation: Swap unsalted butter with coconut oil or a vegan butter alternative. The flavor shifts slightly but the cake remains moist and delicious.
- Flavor Twist: Add a teaspoon of almond extract to the fruit layer for a lovely nutty aroma. This makes the cake taste a bit more sophisticated without extra effort.
- Seasonal Spin: In fall, try swapping peaches for sliced pears and adding a sprinkle of pumpkin pie spice with the cinnamon.
- Nutty Crunch: Mix chopped pecans or walnuts into the cake mix layer before topping with butter slices for extra texture.
One time, I mixed in a little bit of fresh lemon zest with the fruit filling—totally unexpected but added a fresh pop that brightened the whole dessert.
Serving & Storage Suggestions
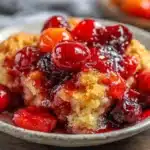
This dump cake is best served warm, straight from the oven or after a short rest to let the filling thicken. I love pairing it with a scoop of vanilla ice cream or a dollop of whipped cream to balance the sweet-tart fruit.
For presentation, a simple dusting of powdered sugar adds a pretty touch, especially if you’re serving guests. If you want to get fancy, fresh mint leaves on top never hurt.
To store leftovers, cover the baking dish with foil or plastic wrap and keep it in the refrigerator for up to 3 days. Reheat individual portions in the microwave for about 30 seconds or until warm. The flavors actually deepen overnight, making the next-day cake even tastier.
If you want to freeze it, wrap tightly and freeze for up to 2 months. Thaw overnight in the fridge and reheat before serving.
Nutritional Information & Benefits
This easy irresistible dump cake with cherry and peach filling isn’t just about indulgence—it also packs some nutritional perks thanks to its fruit content. Here’s a rough estimate per serving (1/12 of the cake):
- Calories: Around 320
- Fat: 14g (mostly from butter)
- Carbohydrates: 45g (includes natural sugars from fruit and added sugars from cake mix)
- Protein: 3g
The cherries and peaches provide antioxidants and vitamins like vitamin C and A, which are great for immune support. Using fresh peaches adds natural fiber, while canned options still offer that fruity goodness.
If you want to lighten things up, try using less butter or a reduced-sugar cake mix, and consider pairing with a plain Greek yogurt topping instead of ice cream for some added protein.
Conclusion
So, there you have it—your new favorite dessert that’s as easy as it is delicious. This easy irresistible dump cake with cherry and peach filling is one of those recipes that sticks with you because it’s reliable, tasty, and requires zero fuss. I love how it brings together simple ingredients in a way that feels special and comforting.
Give it a try, and don’t be afraid to make it your own with the variations and tips shared. I’d love to hear what twists you add or how it turns out for your crew—drop a comment below and share your experience!
Here’s to sweet, simple moments and the joy of a perfect dump cake. Happy baking!
FAQs
Can I use frozen fruit instead of fresh peaches?
Absolutely! Just thaw the frozen peaches first and drain any excess liquid before layering them in the dish.
What can I substitute for the yellow cake mix?
You can use a white or butter cake mix if you prefer a slightly different flavor, or gluten-free cake mix if you need to avoid gluten.
Can I make this dump cake ahead of time?
Yes, you can assemble it and refrigerate for a few hours before baking, but it’s best baked fresh for optimal texture.
How do I prevent the cake from burning on top?
If the top is browning too fast, loosely cover it with foil halfway through baking to protect it while the filling bubbles up.
Is it possible to make this dessert vegan?
Yes! Use a vegan cake mix and replace butter with coconut oil or vegan butter substitutes.
Pin This Recipe!
Easy Irresistible Dump Cake Recipe with Cherry and Peach Filling
A quick and comforting dump cake combining tart cherry pie filling and juicy peaches with a crunchy yellow cake topping. Perfect for any occasion and requires minimal effort.
- Prep Time: 10 minutes
- Cook Time: 45-50 minutes
- Total Time: 55-60 minutes
- Yield: 12 servings 1x
- Category: Dessert
- Cuisine: American
Ingredients
- 21 oz can cherry pie filling (preferably Libby’s or Hunt’s)
- 2 large fresh peaches, peeled and sliced (or 15 oz can sliced peaches, drained)
- 1 box (15.25 oz) yellow cake mix (recommend Duncan Hines)
- 1 cup (226 g) unsalted butter, sliced thinly
- ½ teaspoon ground cinnamon (optional)
- Handful of chopped nuts (pecans or walnuts, optional)
Instructions
- Preheat your oven to 350°F (175°C).
- If using fresh peaches, peel and slice them thinly.
- Spread the canned cherry pie filling evenly in the bottom of your baking dish, then layer the peach slices on top.
- Sprinkle the cinnamon over the fruit layer if using.
- Sprinkle the dry yellow cake mix evenly over the fruit layer without stirring.
- Place the thin slices of cold unsalted butter evenly over the cake mix.
- Bake for 45-50 minutes until the top is golden brown and the fruit edges are bubbly. If the top browns too fast, cover loosely with foil for the last 10 minutes.
- Remove from oven and let cool for 15-20 minutes before serving.
Notes
Do not stir the cake mix into the fruit to maintain the layered texture. Use cold butter slices for the best crispy topping. If the cake browns too quickly, cover with foil. Variations include using gluten-free cake mix, dairy-free butter substitutes, or swapping peaches for apples or blueberries.
Nutrition
- Serving Size: 1/12 of the cake
- Calories: 320
- Fat: 14
- Carbohydrates: 45
- Protein: 3
Keywords: dump cake, cherry dump cake, peach dump cake, easy dessert, quick cake, fruit dessert, yellow cake mix dessert