Love this? Save it for later!
Share the inspiration with your friends
I was at the community garden swap last fall, and a woman named Elena watched me eyeing her overflowing basket of cranberries. She didn’t say anything at first. Then she just smiled, scooped a generous handful into a brown paper bag, and handed it over with a wink. “These aren’t for sauce,” she said. “Trust me.” I didn’t know her well, but something about the way she said it made me feel like I’d just been let in on a secret. That bag sat on my counter for two days while I stared at it, honestly, a little intimidated. Cranberries always seemed like a holiday-only ingredient to me, and here I was in mid-October with no turkey in sight.
I finally called her up—I’d scribbled her number on the bag—and she laughed. “You’re overthinking it,” she told me. “Just make something your kids will eat. Something buttery, with a little cheesecake in the middle.” And that’s exactly what I did. I played around with the idea for a few batches, trying to find the right balance between the tart little berries and a sweet, creamy filling that wouldn’t fight with the crumble on top. The first attempt was a little dry, if I’m being honest. The second one? The crumb topping sank right into the cheesecake layer, and it looked like a weird casserole. But by the third try, I had it.
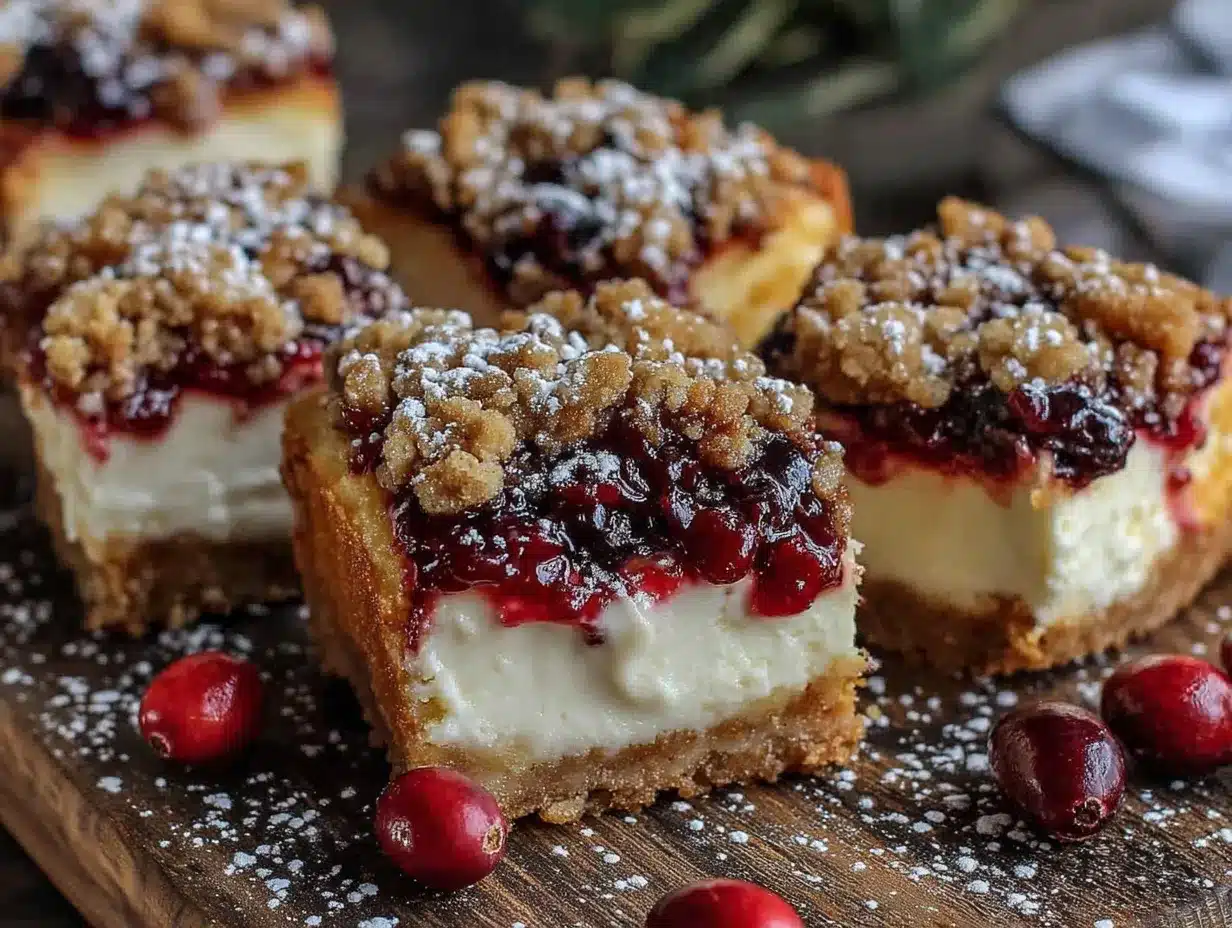
These Kid-Approved Cranberry Cheesecake Crumble Bars are the result of that kitchen mess. They’ve got a buttery shortbread-like base, a smooth and tangy cheesecake center, a tart cranberry layer that pops with flavor, and a golden crumble topping that makes everything better. The first time I made the final version, my kids were hovering around the oven before the timer even went off. My youngest actually said, “Mom, this smells like a hug.” I mean, that’s about the highest praise you can get, right?
Maybe you’ve been there, staring at a bag of cranberries wondering what to do with them besides the usual sauce. These bars are the answer. They’re the kind of dessert that feels special enough for a holiday table but simple enough for a Tuesday afternoon snack. And honestly, that’s why I keep making them. They turned a chance encounter at a garden swap into a recipe that’s become a staple in our house.
Why You’ll Love This Recipe
Let’s be real for a second. Finding a dessert that both kids and adults agree on can feel like a small miracle. These Cranberry Cheesecake Crumble Bars are that miracle. They’ve been tested in my own kitchen (and my neighbor’s, and my sister’s) and every single time, the pan comes back empty. Here’s why this recipe works so well for families on a budget:
- Budget-Friendly Ingredients: You don’t need anything fancy here. Butter, flour, sugar, cream cheese, and cranberries. These are all things you can find at any grocery store without breaking the bank. I usually buy a few extra bags of cranberries when they’re in season and toss them in the freezer. They keep for months and make these bars possible all year round.
- Picky Eater Approved: My oldest is suspicious of anything that looks “too fruity,” but the cheesecake layer in these bars mellows out the tartness of the cranberries perfectly. The crumble on top is buttery and sweet, which is basically a kid’s dream. Even my nephew, who claims he “doesn’t like berries,” asked for seconds.
- Make-Ahead Friendly: These bars actually taste better the next day. The flavors have time to meld together, and the cheesecake layer sets up beautifully. You can make them a day or two ahead of a gathering and just pull them out when you’re ready. No last-minute stress.
- Leftovers That Reheat Well: Not that there are usually leftovers, but if you somehow have some left, they reheat beautifully. Just pop a bar in the microwave for about 15 seconds, and the cheesecake gets slightly soft again while the crumble stays crisp. It’s almost better than fresh.
- Simple Equipment: You don’t need a stand mixer or any fancy gadgets. A hand mixer works perfectly for the cheesecake layer, and you can mix the crumble and crust by hand. This is a low-mess, high-reward kind of recipe.
What makes these bars different from other cranberry desserts is the texture. The base is sturdy enough to hold everything together but still tender and buttery. The cheesecake layer is creamy without being too heavy, and the cranberries provide that little burst of tartness that keeps you coming back for another bite. It’s not just another fruit bar—it’s the one you’ll reach for when you want something that feels like a treat without requiring a culinary degree.
What Ingredients You Will Need
This recipe relies on simple, everyday ingredients that work together to create something truly special. Most of these are pantry staples, and the ones that aren’t are easy to find without any fuss. Here’s what you’ll need:
For the Crust and Crumble Topping
- 2 cups (250g) all-purpose flour – Regular all-purpose flour works best here. It gives the crust structure and helps the crumble stay crisp. If you need a gluten-free option, a 1:1 gluten-free baking flour blend works well.
- 1 cup (200g) granulated sugar – Adds sweetness to balance the tart cranberries. You can reduce this slightly if you prefer a less sweet bar, but I wouldn’t go below ¾ cup.
- 1 cup (226g) cold unsalted butter, cubed – Cold butter is key here. It creates that flaky, tender texture in both the crust and the crumble. I use unsalted so I can control the salt level. If you only have salted butter, just reduce the added salt by a pinch.
- ½ teaspoon salt – Enhances all the flavors and balances the sweetness.
- ½ teaspoon baking powder – Gives the crumble a little lift so it doesn’t turn into a dense brick.
For the Cheesecake Layer
- 16 oz (452g) cream cheese, softened – Full-fat cream cheese gives the best texture and flavor. Let it sit on the counter for about 30 minutes before you start so it blends smoothly. I’ve tried low-fat versions, and they work in a pinch, but the bars are noticeably less creamy.
- ½ cup (100g) granulated sugar – Just enough to sweeten the cheesecake without overpowering the cranberries.
- 2 large eggs – These help the cheesecake set properly. Bring them to room temperature along with the cream cheese for the smoothest filling.
- 1 teaspoon vanilla extract – Pure vanilla extract adds warmth and depth. Imitation vanilla works too, but the flavor won’t be as rich.
- 1 tablespoon lemon juice – This brightens up the cheesecake layer and cuts through the richness. Fresh lemon juice is best, but bottled works in a pinch.
For the Cranberry Layer
- 2 cups (200g) fresh or frozen cranberries – If using frozen, don’t thaw them first. Just toss them in frozen. It actually helps them hold their shape better during baking. I prefer Ocean Spray cranberries because they’re consistently tart and firm.
- ¼ cup (50g) granulated sugar – Just enough to take the edge off the cranberries’ natural tartness. If you like a sweeter cranberry layer, add an extra tablespoon or two.
- 1 tablespoon cornstarch – This thickens the cranberry juices as they bake, preventing a soggy layer.
- 1 teaspoon orange zest (optional) – This is a little trick I learned from Elena. The orange zest pairs beautifully with the cranberries and adds a subtle floral note. It’s optional but highly recommended.
Equipment Needed
You don’t need a professional kitchen to make these bars. Here’s what you’ll need:
- 9×13-inch baking pan – This is the perfect size for these bars. A metal pan works best because it conducts heat evenly. If you only have glass, reduce the oven temperature by 25°F and keep an eye on the edges.
- Parchment paper – This is non-negotiable for easy removal. Leave a little overhang on two sides so you can lift the whole slab out of the pan.
- Hand mixer or stand mixer – A hand mixer is perfectly fine for the cheesecake layer. A stand mixer works too, but don’t overmix or the cheesecake can crack.
- Large mixing bowls – You’ll need at least two: one for the crust/crumble mixture and one for the cheesecake filling.
- Pastry cutter or two forks – For cutting the butter into the flour mixture. You can also use your hands, but work quickly so the butter stays cold.
- Spatula – For spreading the cheesecake layer evenly.
- Measuring cups and spoons – Accuracy matters in baking, so use proper measuring tools.
Preparation Method
Let’s walk through this step by step. Trust me, it’s easier than it sounds.
- Preheat your oven to 350°F (175°C). Line your 9×13-inch baking pan with parchment paper, leaving a couple inches of overhang on the long sides. This will make lifting the bars out so much easier later.
- Make the crust and crumble mixture. In a large bowl, whisk together the 2 cups of flour, 1 cup of sugar, ½ teaspoon of salt, and ½ teaspoon of baking powder. Add the cold, cubed butter. Using a pastry cutter or two forks, cut the butter into the dry ingredients until the mixture looks like coarse crumbs with some pea-sized butter pieces remaining. Don’t overwork it—you want those little butter chunks. Set aside 1 cup of this mixture for the crumble topping.
- Press the crust into the pan. Transfer the remaining mixture to your prepared pan. Press it down firmly and evenly into the bottom. I use the bottom of a measuring cup to get it nice and compact. Bake for 12 minutes, until the edges are just barely golden. Set aside to cool slightly while you make the fillings.
- Prepare the cranberry layer. In a medium bowl, toss the cranberries with ¼ cup of sugar, 1 tablespoon of cornstarch, and the orange zest if using. Make sure every cranberry is coated. Set aside while you make the cheesecake layer.
- Make the cheesecake layer. In a large bowl, beat the softened cream cheese with ½ cup of sugar until smooth and creamy. Scrape down the sides of the bowl. Add the eggs one at a time, beating well after each addition. Mix in the vanilla extract and lemon juice. Beat just until everything is combined—don’t overmix or the cheesecake can puff up and crack.
- Assemble the layers. Pour the cheesecake mixture over the pre-baked crust and spread it evenly with a spatula. Spoon the cranberry mixture over the cheesecake layer, spreading it out as evenly as you can. Some cranberries will sink into the cheesecake, and that’s totally fine. Sprinkle the reserved crumble mixture evenly over the top.
- Bake. Place the pan in the preheated oven and bake for 35-40 minutes. The edges should be golden brown and the center should be set but still slightly jiggly. If the top is browning too quickly, loosely tent it with foil for the last 10 minutes.
- Cool completely. This is the hardest part. Let the bars cool in the pan on a wire rack for at least 1 hour. Then transfer the pan to the refrigerator and chill for at least 2 hours, preferably 4. This allows the cheesecake to set properly so you get clean slices.
- Slice and serve. Once fully chilled, use the parchment overhang to lift the entire slab out of the pan. Place it on a cutting board and use a sharp knife to cut into squares. For the cleanest cuts, wipe the knife clean between slices.
Cooking Tips & Techniques
I’ve made these bars more times than I can count, and I’ve learned a few things along the way. Here are some tips to help you nail it on the first try:
- Don’t skip the chilling step. I know it’s tempting to cut into these bars while they’re still warm, but patience pays off here. The cheesecake needs time to set, and the flavors need time to meld. If you cut too early, you’ll end up with a messy, gooey situation. Trust me, I learned this the hard way.
- Keep your butter cold. Warm butter will make the crust dense and greasy instead of flaky and tender. If your kitchen is warm, pop the flour mixture and cubed butter in the fridge for 10 minutes before mixing.
- Room temperature ingredients matter. Cold cream cheese and cold eggs will give you a lumpy cheesecake layer. Let them sit on the counter for about 30 minutes before you start. If you’re in a hurry, you can soften the cream cheese in the microwave on low power for 10-15 seconds.
- Watch the edges. The edges of the crust and crumble tend to brown faster than the center. If you notice them getting too dark, just tent the pan with foil for the last 10-15 minutes of baking.
- Use frozen cranberries without thawing. This was a game-changer for me. Frozen cranberries hold their shape better during baking and release less liquid, which means your bars won’t get soggy.
- Clean slices every time. Run your knife under hot water and wipe it dry between each cut. This gives you those beautiful, clean edges that look like they came from a bakery.
Variations & Adaptations
One of the best things about this recipe is how adaptable it is. Here are some variations I’ve tried and loved:
- Blueberry Cheesecake Bars: Swap the cranberries for 2 cups of fresh or frozen blueberries. Add an extra tablespoon of sugar to the berry mixture since blueberries are less tart than cranberries. This version is a huge hit with my kids during summer.
- Gluten-Free Version: Use a high-quality 1:1 gluten-free baking flour blend in place of the all-purpose flour. I’ve had great results with Bob’s Red Mill 1:1 Baking Flour. The texture is slightly more tender, but still holds together beautifully.
- Dairy-Free Option: Substitute the butter with a plant-based butter (I like Miyoko’s for baking) and use a dairy-free cream cheese alternative. The texture will be slightly softer, so chill the bars for a full 4 hours before slicing.
- Apple Cranberry Crumble Bars: Add one medium apple, peeled and diced small, to the cranberry mixture. The apple adds a little sweetness and softness that complements the tart cranberries perfectly. This is my go-to version for fall.
- White Chocolate Drizzle: Melt ½ cup of white chocolate chips with 1 teaspoon of coconut oil and drizzle it over the cooled bars. It adds a touch of sweetness and makes them look extra fancy for holidays or bake sales.
Serving & Storage Suggestions
These bars are versatile when it comes to serving. Here’s how to get the most out of them:
Serving. These bars are best served chilled or at room temperature. I actually prefer them straight from the fridge because the cheesecake layer is firmer and the flavors are more pronounced. If you’re serving them at a gathering, let them sit at room temperature for about 15 minutes before slicing—they’ll be easier to cut.
What to serve with them. A dollop of whipped cream or a scoop of vanilla ice cream takes these bars to the next level. For a holiday table, they pair beautifully with a cup of hot apple cider or a mug of spiced chai. My kids love them with a glass of cold milk, and honestly, that’s a pretty perfect combination too.
Storage. Store the bars in an airtight container in the refrigerator for up to 5 days. Place a sheet of parchment paper between layers to prevent them from sticking together. The flavors actually get better after a day or two in the fridge, so don’t be afraid to make them ahead.
Freezing. These bars freeze beautifully. Once they’re fully chilled and sliced, place the bars on a baking sheet in a single layer and freeze for 1 hour. Then transfer them to a freezer-safe container or zip-top bag, separating layers with parchment paper. They’ll keep for up to 3 months. To thaw, just transfer them to the refrigerator overnight or let them sit at room temperature for about 30 minutes.
Reheating. If you like your bars slightly warm, pop a slice in the microwave for 10-15 seconds. The cheesecake gets soft and creamy while the crumble stays crisp. It’s a whole different experience, and honestly, sometimes I prefer it that way.
Nutritional Information & Benefits
While these are definitely a treat, there are a few things to feel good about. Here’s the estimated nutritional breakdown per bar (based on 16 servings):
- Calories: 320
- Fat: 18g
- Carbohydrates: 36g
- Protein: 5g
- Fiber: 1g
- Sugar: 24g
Health highlights. Cranberries are packed with antioxidants and vitamin C, which support immune health—especially nice during the colder months. The cream cheese provides a good amount of calcium and protein, and the butter, while indulgent, contains fat-soluble vitamins A, D, E, and K. Plus, making these at home means you control the quality of the ingredients, avoiding the preservatives and artificial flavors found in store-bought desserts.
Dietary considerations. This recipe is vegetarian. For a gluten-free version, see the variations section. If you’re watching your sugar intake, you can reduce the sugar in the crust and cheesecake layer by about 25% without affecting the texture too much. The bars will be slightly less sweet, but the cranberries will shine through more.
Conclusion
These Kid-Approved Cranberry Cheesecake Crumble Bars are more than just a dessert—they’re a little piece of kitchen magic that came from a simple conversation at a garden swap. They’re the kind of recipe that brings people together, whether it’s your family on a quiet Tuesday night or a crowd at a holiday party. The tart cranberries, creamy cheesecake, and buttery crumble create a combination that’s hard to resist, and the best part is how easy they are to make.
I hope you give these bars a try and make them your own. Maybe you’ll add a little extra orange zest, or swap in blueberries, or drizzle them with white chocolate. Whatever you do, I’d love to hear about it. Drop a comment below and let me know how they turned out, or tag me in your photos—I always love seeing your creations. And if you have a picky eater at home who thinks they don’t like cranberries, these bars might just change their mind. They did in my house.
Happy baking, friends. Your kitchen is about to smell amazing.
Frequently Asked Questions
Can I use dried cranberries instead of fresh or frozen?
You can, but the texture will be different. Dried cranberries are much sweeter and chewier, so they won’t burst and create that lovely tart layer. If you’re in a pinch, rehydrate them in warm water for 10 minutes, drain well, and toss them with a little less sugar. The bars will still be tasty, but they won’t have that same juicy pop.
Why did my cheesecake layer crack?
This usually happens from overmixing or overbaking. When you beat the cream cheese mixture too much, you incorporate too much air, which causes the cheesecake to puff up and then crack as it cools. Also, if you bake it until the center is completely firm, it’s overdone. The center should still jiggle slightly when you shake the pan. It will continue to set as it cools.
Can I make these bars in a different size pan?
Absolutely. An 8×8-inch pan will give you thicker bars, but you’ll need to increase the baking time by about 10-15 minutes. A 9×9-inch pan works too, with a similar adjustment. Just keep an eye on the edges and use the jiggle test to determine doneness.
How do I get clean slices without the crumble falling off?
The key is patience. Make sure the bars are fully chilled before you slice them. Use a sharp knife and run it under hot water, wiping it clean between each cut. Cut in one smooth motion rather than sawing back and forth. A little crumble will inevitably fall off, but these tips will keep it to a minimum.
Can I double this recipe for a crowd?
Yes! Double all the ingredients and bake in a 12×17-inch half-sheet pan. You’ll need to increase the baking time by about 10-15 minutes. Keep an eye on the edges and cover with foil if they’re browning too quickly. This makes a huge batch that’s perfect for potlucks, bake sales, or holiday gatherings.
Pin This Recipe!
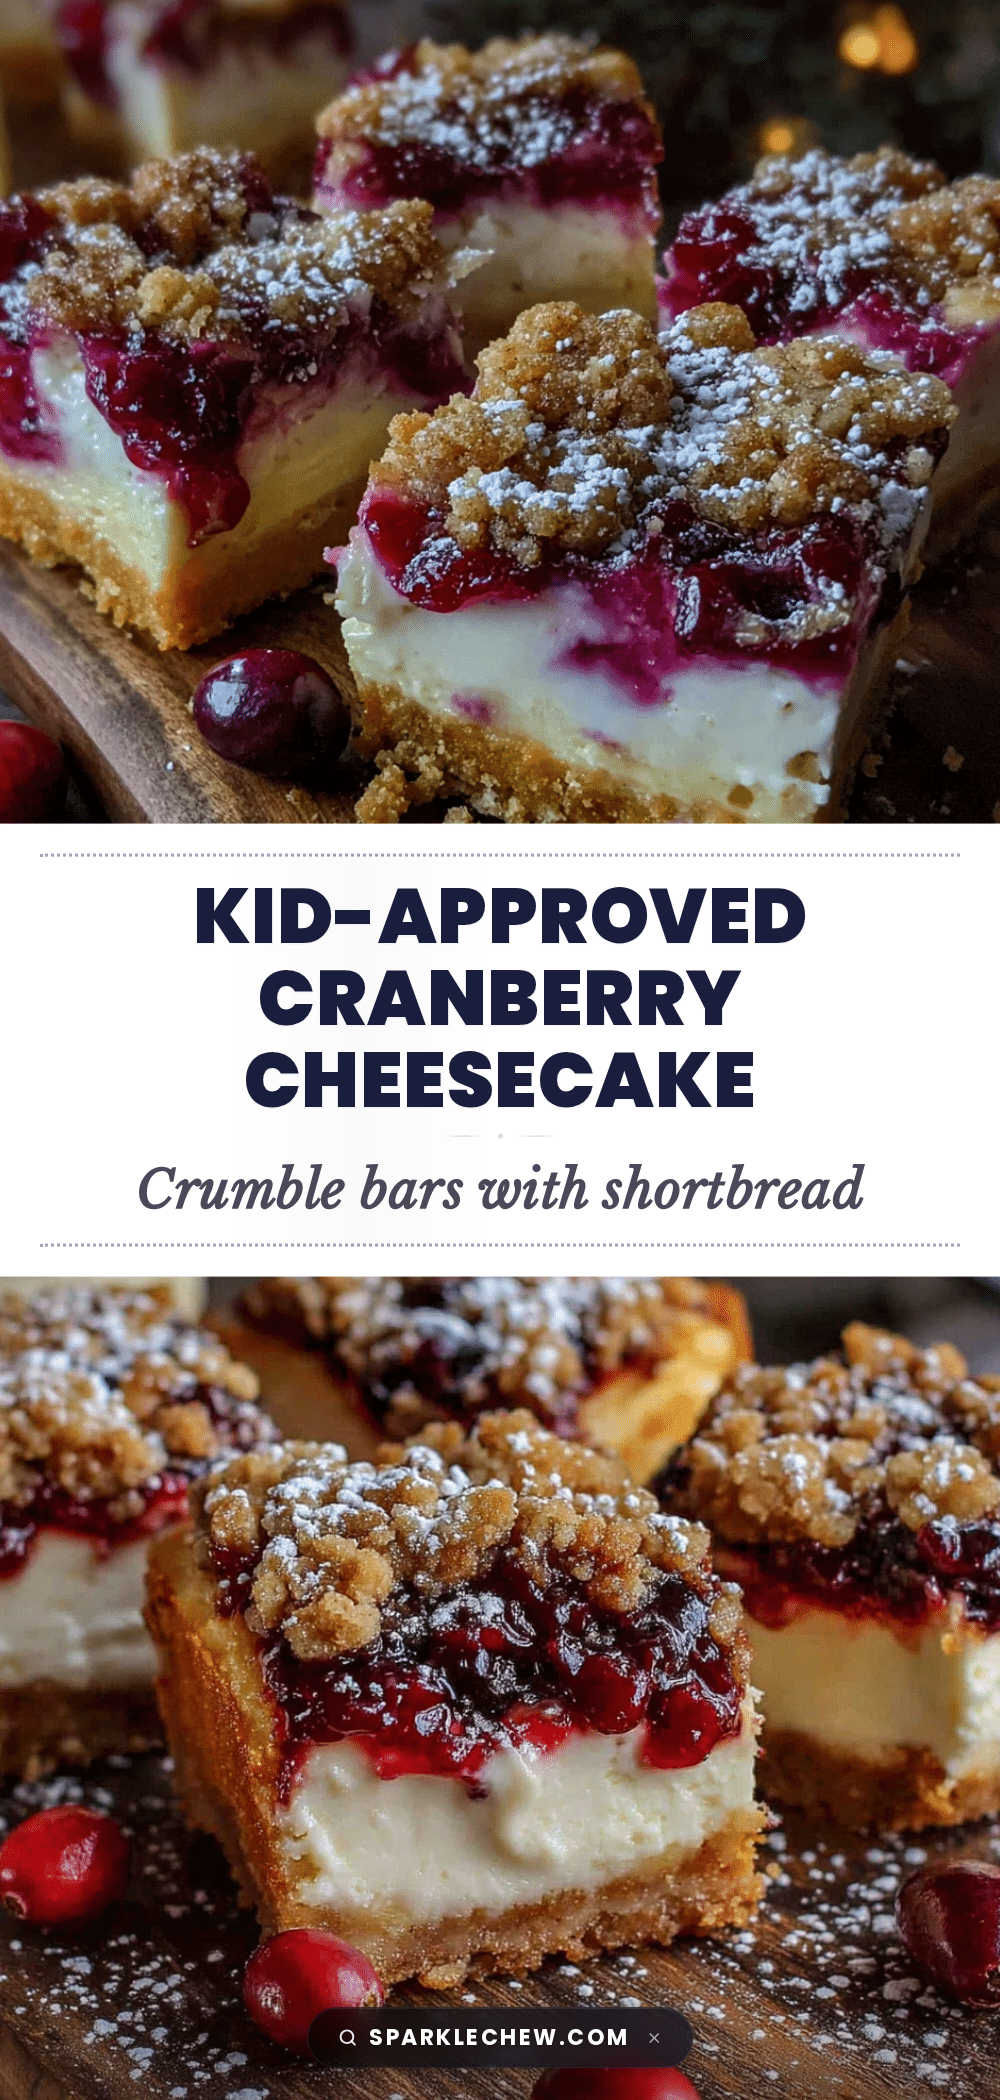
Easy Kid-Approved Cranberry Cheesecake Crumble Bars

These buttery, creamy, and tart bars feature a shortbread-like base, smooth cheesecake center, tangy cranberry layer, and golden crumble topping. They’re a budget-friendly, make-ahead dessert that both kids and adults love.
- Prep Time: 20 minutes
- Cook Time: 35-40 minutes
- Total Time: 3 hours 20 minutes (including chilling)
- Yield: 16 servings 1x
- Category: Dessert
- Cuisine: American
Ingredients
- 2 cups (250g) all-purpose flour
- 1 cup (200g) granulated sugar
- 1 cup (226g) cold unsalted butter, cubed
- ½ teaspoon salt
- ½ teaspoon baking powder
- 16 oz (452g) cream cheese, softened
- ½ cup (100g) granulated sugar
- 2 large eggs
- 1 teaspoon vanilla extract
- 1 tablespoon lemon juice
- 2 cups (200g) fresh or frozen cranberries
- ¼ cup (50g) granulated sugar
- 1 tablespoon cornstarch
- 1 teaspoon orange zest (optional)
Instructions
- Preheat your oven to 350°F (175°C). Line your 9×13-inch baking pan with parchment paper, leaving a couple inches of overhang on the long sides.
- Make the crust and crumble mixture: In a large bowl, whisk together the 2 cups of flour, 1 cup of sugar, ½ teaspoon of salt, and ½ teaspoon of baking powder. Add the cold, cubed butter. Using a pastry cutter or two forks, cut the butter into the dry ingredients until the mixture looks like coarse crumbs with some pea-sized butter pieces remaining. Set aside 1 cup of this mixture for the crumble topping.
- Press the crust into the pan: Transfer the remaining mixture to your prepared pan. Press it down firmly and evenly into the bottom. Bake for 12 minutes, until the edges are just barely golden. Set aside to cool slightly.
- Prepare the cranberry layer: In a medium bowl, toss the cranberries with ¼ cup of sugar, 1 tablespoon of cornstarch, and the orange zest if using. Make sure every cranberry is coated. Set aside.
- Make the cheesecake layer: In a large bowl, beat the softened cream cheese with ½ cup of sugar until smooth and creamy. Scrape down the sides of the bowl. Add the eggs one at a time, beating well after each addition. Mix in the vanilla extract and lemon juice. Beat just until everything is combined.
- Assemble the layers: Pour the cheesecake mixture over the pre-baked crust and spread it evenly with a spatula. Spoon the cranberry mixture over the cheesecake layer, spreading it out as evenly as you can. Sprinkle the reserved crumble mixture evenly over the top.
- Bake: Place the pan in the preheated oven and bake for 35-40 minutes. The edges should be golden brown and the center should be set but still slightly jiggly. If the top is browning too quickly, loosely tent it with foil for the last 10 minutes.
- Cool completely: Let the bars cool in the pan on a wire rack for at least 1 hour. Then transfer the pan to the refrigerator and chill for at least 2 hours, preferably 4.
- Slice and serve: Once fully chilled, use the parchment overhang to lift the entire slab out of the pan. Place it on a cutting board and use a sharp knife to cut into squares. For the cleanest cuts, wipe the knife clean between slices.
Notes
Don’t skip the chilling step—it allows the cheesecake to set properly for clean slices. Keep butter cold for a flaky crust. Use room temperature cream cheese and eggs for a smooth filling. Frozen cranberries can be used without thawing. For clean slices, run your knife under hot water and wipe dry between cuts.
Nutrition
- Serving Size: 1 bar
- Calories: 320
- Sugar: 24
- Sodium: 180
- Fat: 18
- Saturated Fat: 11
- Carbohydrates: 36
- Fiber: 1
- Protein: 5
Keywords: cranberry cheesecake bars, crumble bars, easy dessert, kid-friendly, holiday dessert, cranberry dessert, cheesecake bars