Love this? Save it for later!
Share the inspiration with your friends
My sister-in-law, Jen, wasn’t trying to impress anyone. I’d stopped by to drop off a borrowed garden rake and the smell of maple and cinnamon hit me before I even got through the screen door. It was a Tuesday afternoon, not a holiday, not a baking marathon—just a regular day with three kids underfoot and a sink full of dishes.
She was standing at the counter in sweatpants, wiping flour off her cheek with the back of her hand, while her youngest tugged at her shirt asking for a snack. “Oh, those are just muffins,” she said when I asked what smelled so incredible. “I threw them together this morning so we’d have something for after school.”
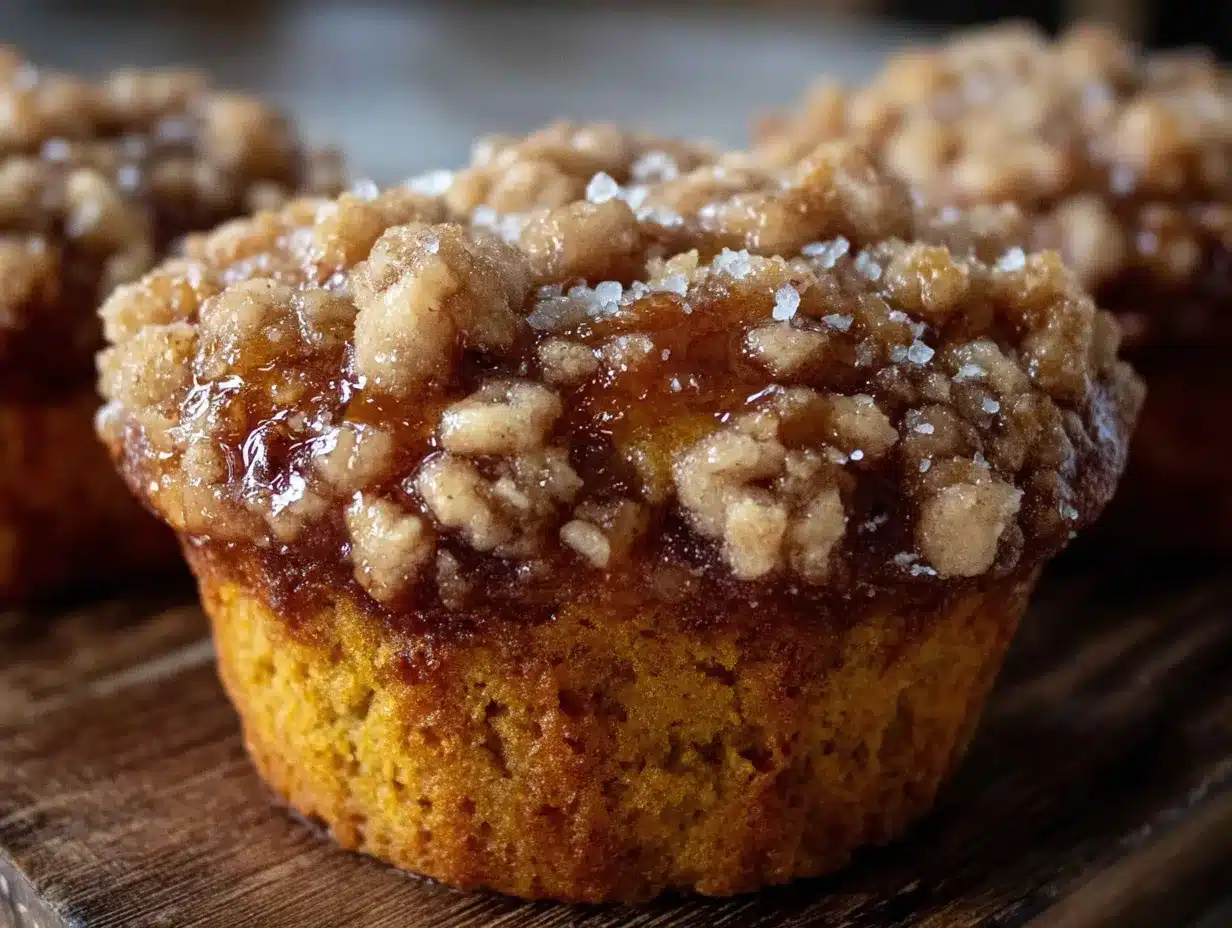
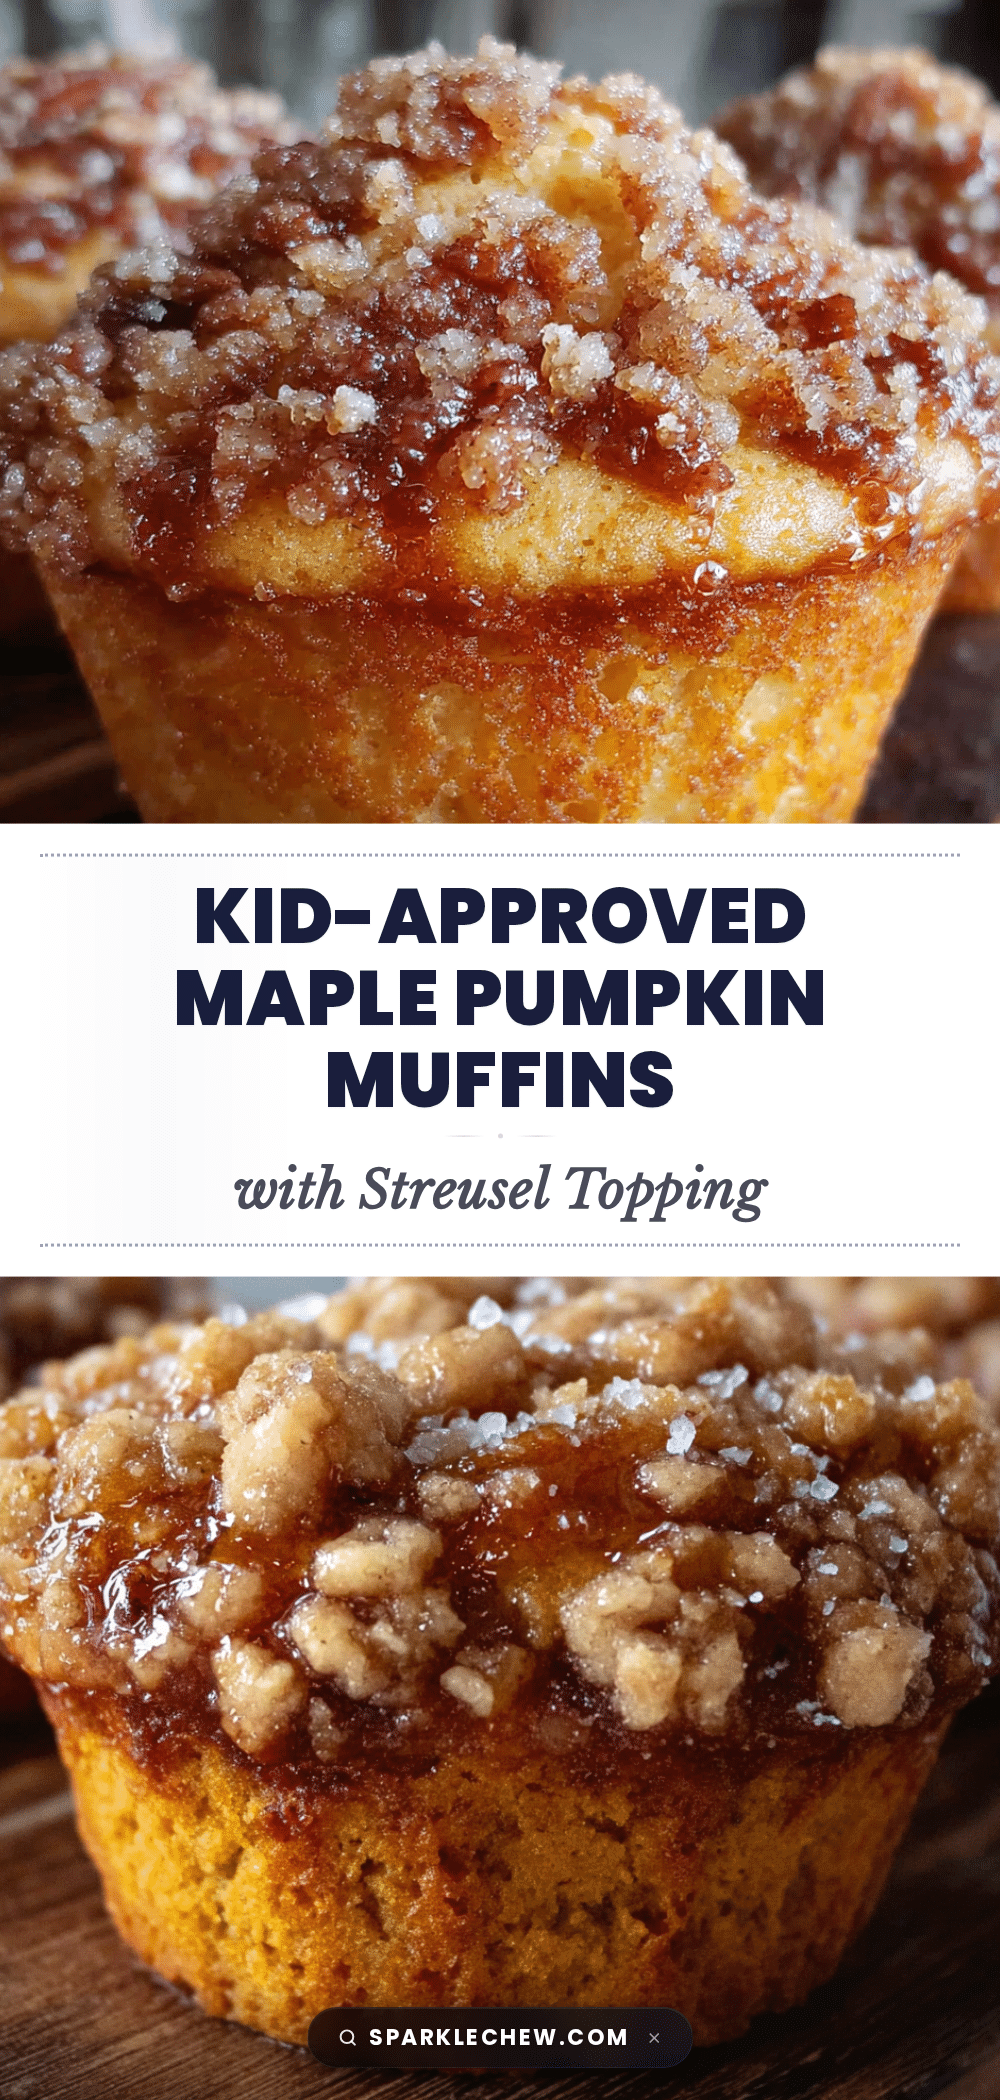
Just muffins. Let me tell you, there was nothing “just” about them. The streusel topping was perfectly crumbly, the pumpkin flavor was warm and cozy, and there was this subtle maple sweetness that made me close my eyes after the first bite. Jen just shrugged and said it was the only way her kids would eat pumpkin. Smart lady.
I asked for the recipe right there, standing in her messy kitchen with a toddler’s sippy cup rolling around on the floor. She scribbled it on a torn envelope, and honestly, that stained piece of paper is still tucked in my recipe box. These Kid-Approved Maple Pumpkin Muffins have become a staple in my house too, and I think you’re going to love how simple they are.
Why You’ll Love This Recipe
I’ve tested this recipe about a dozen times now, tweaking little things here and there, and I can tell you with confidence—this is the version that works every time. Here’s why it stands out from the dozens of other pumpkin muffin recipes out there:
- Budget-Friendly Ingredients: You probably already have most of these in your pantry. No expensive specialty flours or fancy extracts needed. Just good, honest ingredients that won’t break the bank.
- Quick & Easy: From start to finish, you’re looking at about 35 minutes. That’s fast enough for a weekday morning or a last-minute school bake sale request.
- Kid-Approved: My own picky eater, who usually turns up her nose at anything orange, devours these. The maple flavor does something magical—it makes the pumpkin taste like a treat.
- Perfect for Batch Baking: These muffins freeze beautifully, so you can make a double batch and have breakfast or snacks ready for weeks.
- Leftovers Reheat Well: Pop one in the microwave for 15 seconds, and it tastes fresh-baked. That’s a big deal in my house where leftovers usually end up in the trash.
What really makes this recipe different is the streusel topping. Most pumpkin muffins have a plain top that gets soggy after a day. This one stays perfectly crunchy, thanks to a little trick I picked up from Jen—using cold butter in the streusel and baking them just right. It’s the kind of detail that turns a good muffin into a great one.
What Ingredients You Will Need
This recipe uses simple, wholesome ingredients to deliver bold flavor and satisfying texture without the fuss. Most of these are pantry staples, which is exactly what you want when you’re feeding a family on a budget.
For the Muffin Batter
- 1 ¾ cups all-purpose flour (I use Gold Medal, but any brand works fine—just don’t pack it when measuring)
- 1 cup granulated sugar (you can reduce to ¾ cup if your family prefers less sweet)
- 1 teaspoon baking soda (check the expiration date—old baking soda kills the rise)
- 2 teaspoons pumpkin pie spice (store-bought is fine, but I’ll share my homemade blend below)
- ½ teaspoon salt (just regular table salt, nothing fancy)
- 1 cup pumpkin puree (not pumpkin pie filling—make sure it’s 100% pumpkin. Libby’s is my go-to)
- ⅓ cup maple syrup (real maple syrup, not pancake syrup. It makes a big difference in flavor)
- ⅓ cup vegetable oil (canola or avocado oil work great too)
- 2 large eggs (room temperature if you remember, but honestly, straight from the fridge works too)
- 1 teaspoon vanilla extract (pure if you have it, imitation is okay in a pinch)
For the Streusel Topping
- ½ cup all-purpose flour
- ¼ cup brown sugar (packed—this gives the streusel that caramel-like flavor)
- ¼ cup cold unsalted butter (cut into small cubes. Cold is key for a crumbly texture)
- 1 teaspoon pumpkin pie spice (more warmth on top!)
- Pinch of salt
Ingredient Tips: If you want to make your own pumpkin pie spice, mix 2 teaspoons cinnamon, 1 teaspoon ginger, ½ teaspoon nutmeg, ½ teaspoon allspice, and ¼ teaspoon cloves. Store it in a small jar—it keeps for months. For the maple syrup, I’ve tried both Grade A and Grade B, and honestly, either works. Grade A is lighter and more delicate, while Grade B has a deeper, more robust flavor. My kids prefer Grade A, so that’s what I usually use.
Substitution Notes: Need a dairy-free option? Use coconut oil instead of butter in the streusel, and it still turns out great. For a gluten-free version, swap the all-purpose flour with a 1:1 gluten-free baking blend. I’ve tried Bob’s Red Mill and King Arthur, and both worked well—just don’t overmix the batter.
Equipment Needed
You don’t need a fancy kitchen to make these muffins. Here’s what you’ll need:
- 12-cup muffin tin (standard size—if you only have a 6-cup tin, you’ll need to bake in batches)
- Paper muffin liners (I prefer the unbleached ones, but any will do. They make cleanup so much easier)
- Two mixing bowls (one large, one medium)
- Whisk (for combining dry ingredients)
- Rubber spatula (for folding the batter—don’t overmix!)
- Pastry cutter or fork (for cutting butter into the streusel. Two knives work in a pinch)
- Cooling rack (this helps the bottoms stay crisp instead of getting soggy)
- Measuring cups and spoons (the standard set—nothing special)
Budget-Friendly Tip: If you don’t have a pastry cutter, just use your fingers to rub the cold butter into the flour mixture. It’s actually faster and gives you more control over the texture. My grandmother never owned a pastry cutter, and her streusel was legendary.
Preparation Method
Let’s get baking! This recipe comes together quickly, so I like to get everything measured out before I start. Trust me on this one—it makes the whole process smoother, especially if you’ve got kids asking for snacks while you’re trying to work.
- Preheat your oven to 350°F (175°C). Line your muffin tin with paper liners. This is a step you don’t want to skip—these muffins have a streusel topping that can stick to the pan if you go liner-free.
- Make the streusel topping first. In a medium bowl, whisk together the flour, brown sugar, pumpkin pie spice, and salt. Add the cold butter cubes. Use a pastry cutter or your fingertips to work the butter into the flour mixture until it looks like coarse crumbs with some pea-sized butter pieces remaining. Pop this in the fridge while you make the batter. Keeping it cold is the secret to a crunchy topping.
- Mix the dry ingredients. In a large bowl, whisk together the flour, sugar, baking soda, pumpkin pie spice, and salt. Make sure everything is evenly combined—you don’t want a pocket of baking soda in one muffin.
- Mix the wet ingredients. In a separate bowl (or a large liquid measuring cup), whisk together the pumpkin puree, maple syrup, vegetable oil, eggs, and vanilla extract. The mixture should be smooth and a beautiful deep orange color.
- Combine wet and dry. Pour the wet ingredients into the dry ingredients. Use a rubber spatula to fold everything together gently. Here’s the important part: mix only until no streaks of flour remain. A few lumps are totally fine. Overmixing will make your muffins tough and dense, and nobody wants that.
- Fill the muffin cups. Divide the batter evenly among the 12 muffin cups. I use a cookie scoop for this—it’s cleaner and gives you even portions. Each cup should be about ¾ full. Don’t overfill, or the streusel will spill over the sides as they bake.
- Add the streusel topping. Take the streusel out of the fridge. Sprinkle it generously over each muffin, pressing it down gently so it sticks to the batter. Use all of it—don’t be shy. The streusel is the best part!
- Bake. Place the muffin tin in the preheated oven. Bake for 18-22 minutes, or until a toothpick inserted into the center of a muffin comes out clean or with just a few moist crumbs. The tops should be golden brown and the kitchen should smell like fall heaven.
- Cool. Let the muffins cool in the pan for 5 minutes. This gives them time to set. Then transfer them to a wire rack to cool completely. If you try to take them out too early, they might fall apart. Patience, my friend.
- Enjoy! These are delicious warm, but they’re also amazing at room temperature. My kids can’t wait for them to cool down, so I usually let them have one while they’re still slightly warm. No judgment here.
Cooking Tips & Techniques
I’ve made this recipe more times than I can count, and I’ve learned a few things the hard way. Here are my best tips to help you avoid my mistakes:
Don’t overmix the batter. I cannot stress this enough. The first time I made these, I was so excited that I kept stirring until the batter was perfectly smooth. The muffins came out dense and rubbery. Mix until just combined—a few lumps are your friend.
Use cold butter for the streusel. If your butter is soft, the streusel will turn into a paste instead of crumbly bits. I learned this when I tried to rush through the recipe and used butter straight from the counter. The topping melted into the muffins instead of staying crunchy. Keep that butter cold right up until you cut it in.
Check your pumpkin puree. A few years ago, I accidentally grabbed pumpkin pie filling instead of puree. The muffins turned out way too sweet and had a weird texture. Always read the label. You want 100% pumpkin puree, not the pre-sweetened stuff.
Room temperature eggs matter. I know, I know—sometimes you forget to take them out of the fridge. But room temperature eggs incorporate more evenly into the batter, giving you a lighter texture. If you’re in a hurry, place the eggs in a bowl of warm water for 5 minutes. Problem solved.
Let the muffins cool in the pan. I once tried to rush this step because my kids were hungry. The muffin fell apart in my hands, and I ended up eating streusel-topped crumbs off a plate. Not the worst thing in the world, but not ideal. Give them those 5 minutes.
Variations & Adaptations
One of the best things about this recipe is how flexible it is. Here are some variations I’ve tried and loved:
Chocolate Chip Maple Pumpkin Muffins: Fold in ½ cup of semi-sweet chocolate chips after combining the wet and dry ingredients. The chocolate adds a little sweetness that pairs beautifully with the maple and pumpkin. My kids go absolutely crazy for this version.
Gluten-Free Version: Use a 1:1 gluten-free baking flour blend. I’ve tested this with Bob’s Red Mill and King Arthur, and both worked well. The texture is slightly more crumbly, but the flavor is spot on. Add an extra tablespoon of maple syrup to help with moisture.
Dairy-Free Option: Swap the butter in the streusel with coconut oil (solid, not melted). The topping won’t be quite as crunchy, but it’s still delicious. Use a dairy-free milk if you’re adding any mix-ins that call for it.
Spice It Up: If your family likes a little heat, add ¼ teaspoon of cayenne pepper to the dry ingredients. It sounds weird, but the warmth plays really well with the pumpkin and maple. My husband loves this version, but I keep it separate from the kids’ batch.
Mini Muffins: Use a mini muffin tin and reduce the baking time to 10-12 minutes. These are perfect for lunchboxes or toddler snacks. Just watch them closely—they can go from perfect to burnt in about 30 seconds.
Serving & Storage Suggestions
These muffins are incredibly versatile when it comes to serving. Here’s how I like to enjoy them:
Serving Temperature: They’re fantastic warm, right out of the oven, with a pat of butter melting into the streusel. But honestly, they’re just as good at room temperature for an after-school snack or packed in a lunchbox. My kids even eat them cold straight from the fridge—they say they taste like pumpkin pie.
What to Serve With Them: A glass of cold milk is the classic pairing. For breakfast, try them with a side of scrambled eggs and fruit. For a cozy fall treat, warm one up and serve it with a dollop of whipped cream or a drizzle of extra maple syrup. They’re also great with a cup of coffee or tea for the grown-ups.
Storage Instructions: Store leftover muffins in an airtight container at room temperature for up to 3 days. If you live in a humid climate (like I do), they might get a little sticky on top, so I recommend lining the container with a paper towel to absorb excess moisture. Change the paper towel every day to keep them fresh.
Freezing Instructions: These muffins freeze like a dream. Let them cool completely, then place them in a single layer in a freezer-safe bag or container. They’ll keep for up to 3 months. To thaw, just leave them on the counter for an hour, or microwave one for 20-30 seconds. The streusel won’t be quite as crunchy after freezing, but the flavor is still amazing.
Flavor Development: Here’s a little secret—these muffins actually taste better the next day. The flavors have time to meld together, and the pumpkin and maple become even more pronounced. So don’t be disappointed if you can’t eat them all on day one. They’re worth waiting for.
Nutritional Information & Benefits
I’m not a nutritionist, but I do pay attention to what goes into my family’s food. Here’s the breakdown for one muffin (based on the recipe as written):
| Nutrient | Amount Per Muffin |
|---|---|
| Calories | 245 |
| Total Fat | 9g |
| Saturated Fat | 3g |
| Cholesterol | 35mg |
| Sodium | 210mg |
| Total Carbohydrates | 38g |
| Dietary Fiber | 2g |
| Sugars | 22g |
| Protein | 4g |
| Vitamin A | 85% DV |
| Vitamin C | 2% DV |
| Calcium | 3% DV |
| Iron | 8% DV |
Health Benefits: Pumpkin is packed with vitamin A, which is great for eye health and immune function. It’s also a good source of fiber, which helps keep everyone feeling full and satisfied. The maple syrup provides a more natural sweetness than refined sugar, though it’s still sugar, so moderation is key. These muffins aren’t health food, but they’re a whole lot better than most store-bought options.
Dietary Considerations: As written, this recipe contains gluten, dairy, and eggs. But with the substitutions I mentioned earlier, you can easily make it gluten-free and dairy-free. It’s not vegan due to the eggs, but I’m working on a vegan version—stay tuned!
Conclusion
These Kid-Approved Maple Pumpkin Muffins with Streusel Topping have become a fall tradition in my house, and I hope they become one in yours too. They’re simple enough for a Tuesday afternoon, special enough for a holiday brunch, and affordable enough for any family budget. The streusel topping gives them that bakery-quality feel without the bakery price tag.
What I love most about this recipe is how it brings people together. My kids help me make them now—measuring flour, sprinkling streusel, sneaking bites of the batter when they think I’m not looking. It’s become our thing, and I’m so grateful for that stained envelope recipe from Jen’s kitchen.
I’d love to hear how these turn out for you! Did your kids love them? Did you try any fun variations? Drop a comment below and let me know. And if you share a photo on Pinterest or Instagram, tag me so I can see your beautiful muffins. Happy baking, friends!
Frequently Asked Questions
Can I use canned pumpkin pie filling instead of pumpkin puree?
No, I wouldn’t recommend it. Pumpkin pie filling is pre-sweetened and spiced differently than puree. It will throw off the sugar and spice balance in the recipe, and the texture will be much denser. Stick with 100% pumpkin puree for the best results.
How do I make sure the streusel topping stays crunchy?
The key is using cold butter and not overworking it. Keep the streusel in the fridge while you make the batter, and don’t press it too hard into the muffin tops. Also, make sure your muffins are completely cool before storing them in an airtight container—trapped steam will soften the topping.
Can I make these muffins ahead of time for a party?
Absolutely! You can make them up to 2 days ahead and store them at room temperature in an airtight container. They actually taste better the next day. If you want them warm for serving, just pop them in a 300°F oven for 5-7 minutes before serving.
My muffins came out dry. What went wrong?
Dry muffins are usually a result of overbaking or overmixing. Check your oven temperature with an oven thermometer—it might be running hot. Also, make sure you’re measuring your flour correctly by spooning it into the measuring cup and leveling it off, rather than scooping directly from the bag. Scooping packs the flour and leads to dry muffins.
Can I add nuts or dried fruit to this recipe?
Yes! Chopped pecans or walnuts would be delicious folded into the batter or sprinkled on top of the streusel. Dried cranberries or chopped dates would also work well. Just keep the total add-ins to about ½ cup so you don’t overwhelm the batter.
Pin This Recipe!
Easy Kid-Approved Maple Pumpkin Muffins (Best Recipe)
These Kid-Approved Maple Pumpkin Muffins with Streusel Topping are simple enough for a Tuesday afternoon, special enough for a holiday brunch, and affordable enough for any family budget. The streusel topping gives them that bakery-quality feel without the bakery price tag.
- Prep Time: 15 minutes
- Cook Time: 20 minutes
- Total Time: 35 minutes
- Yield: 12 servings 1x
- Category: Dessert
- Cuisine: American
Ingredients
- 1 ¾ cups all-purpose flour
- 1 cup granulated sugar
- 1 teaspoon baking soda
- 2 teaspoons pumpkin pie spice
- ½ teaspoon salt
- 1 cup pumpkin puree
- ⅓ cup maple syrup
- ⅓ cup vegetable oil
- 2 large eggs
- 1 teaspoon vanilla extract
- ½ cup all-purpose flour (for streusel)
- ¼ cup brown sugar (packed, for streusel)
- ¼ cup cold unsalted butter (cut into small cubes, for streusel)
- 1 teaspoon pumpkin pie spice (for streusel)
- Pinch of salt (for streusel)
Instructions
- Preheat your oven to 350°F (175°C). Line your muffin tin with paper liners.
- Make the streusel topping first. In a medium bowl, whisk together the flour, brown sugar, pumpkin pie spice, and salt. Add the cold butter cubes. Use a pastry cutter or your fingertips to work the butter into the flour mixture until it looks like coarse crumbs with some pea-sized butter pieces remaining. Pop this in the fridge while you make the batter.
- Mix the dry ingredients. In a large bowl, whisk together the flour, sugar, baking soda, pumpkin pie spice, and salt.
- Mix the wet ingredients. In a separate bowl, whisk together the pumpkin puree, maple syrup, vegetable oil, eggs, and vanilla extract.
- Combine wet and dry. Pour the wet ingredients into the dry ingredients. Use a rubber spatula to fold everything together gently. Mix only until no streaks of flour remain. A few lumps are fine.
- Fill the muffin cups. Divide the batter evenly among the 12 muffin cups. Each cup should be about ¾ full.
- Add the streusel topping. Take the streusel out of the fridge. Sprinkle it generously over each muffin, pressing it down gently so it sticks to the batter.
- Bake. Place the muffin tin in the preheated oven. Bake for 18-22 minutes, or until a toothpick inserted into the center of a muffin comes out clean or with just a few moist crumbs.
- Cool. Let the muffins cool in the pan for 5 minutes. Then transfer them to a wire rack to cool completely.
- Enjoy! These are delicious warm or at room temperature.
Notes
Don’t overmix the batter. Use cold butter for the streusel. Check your pumpkin puree (use 100% pumpkin, not pie filling). Room temperature eggs incorporate better. Let muffins cool in the pan for 5 minutes before transferring. These muffins taste even better the next day.
Nutrition
- Serving Size: 1 muffin
- Calories: 245
- Sugar: 22
- Sodium: 210
- Fat: 9
- Saturated Fat: 3
- Carbohydrates: 38
- Fiber: 2
- Protein: 4
Keywords: pumpkin muffins, maple muffins, kid-friendly muffins, fall baking, easy muffin recipe, streusel topping