Love this? Save it for later!
Share the inspiration with your friends
I was standing in my kitchen last November, staring at a mountain of half-eaten candy bars. You know the scene—the good stuff was gone, but we were left with a dozen fun-size Snickers, some sad-looking Tootsie Rolls, and way too many of those mystery orange-and-black wrapped things nobody actually likes. My kids had already forgotten about their sugar haul, and I was this close to just tossing it all in the trash. But then my neighbor Linda knocked on the door with a plate of something that looked like pure gold. “What’s that?” I asked, already reaching for one. She grinned and said, “Your kids’ Halloween candy, baked into cookie bars.” Honestly, I thought she was joking. Who bakes with leftover Halloween candy? Turns out, Linda does—and now I do too.
These Kid-Approved Leftover Halloween Candy Cookie Bars are the reason I actually look forward to November 1st. Instead of watching that candy go stale or sneaking pieces myself at midnight (guilty), I throw it all into one pan and bake up something the whole family fights over. The first time I made them, my kids didn’t even recognize their own candy. “Wait, that’s my Butterfinger?” my son asked, grabbing a second piece before I could answer. I mean, that’s the kind of reaction that makes a mom feel like a genius.
Maybe you’ve been there too—standing in your kitchen with a bag of random candy and no clue what to do with it. Let me tell you, these bars are the answer. They’re chewy, buttery, loaded with chocolate and caramel, and they use up every last piece of that Halloween haul. It’s the kind of recipe that turns a kitchen problem into a family tradition. And honestly, it’s way better than eating candy straight from the wrapper.
Why You’ll Love This Recipe
Let me be real with you—I’ve tested this recipe about six times to get it just right. The first batch was too crumbly. The second was too sweet. But by batch number three, my kids were literally licking the pan. That’s when I knew I had something special. Here’s why these cookie bars work for real families on a real budget.
- Uses Up Leftover Candy: No more staring at that half-empty candy bowl. Any mix of chocolate bars, caramel-filled pieces, or peanut butter cups works perfectly. It’s like a clean-out-the-pantry recipe, but way more fun.
- Budget-Friendly: You already bought the candy for Halloween, so this recipe costs next to nothing. No fancy ingredients needed—just butter, sugar, flour, eggs, and whatever candy you’ve got lying around.
- Kid-Approved & Parent-Approved: My kids devour these, and I feel good knowing they’re getting something homemade instead of more wrappers. Plus, the bars freeze beautifully for lunchbox treats.
- Comes Together in Under 30 Minutes: Mix the dough, press it into a pan, chop the candy, and bake. That’s it. No chilling, no rolling, no fuss.
- Perfect for Busy Weeknights: When you need a quick dessert that makes everyone happy, these bars deliver. They’re also great for school bake sales, playdates, or just a Tuesday night treat.
What makes these bars different from every other cookie bar recipe out there? It’s the way the candy melts into the dough. Some pieces stay chewy, others get crispy, and the caramel gets all gooey and spread out. Every bite is a little surprise. Honestly, it’s comfort food at its finest—sweet, familiar, and made from stuff you already have.
What Ingredients You Will Need
This recipe uses simple pantry staples plus whatever Halloween candy you’ve got. The magic is in how it all comes together. Here’s what you’ll need.
- 1 cup unsalted butter, softened – Butter gives these bars that rich, melt-in-your-mouth texture. I use Land O’Lakes, but any brand works fine. If you only have salted butter, just skip the added salt below.
- 1 cup granulated sugar – White sugar keeps the bars tender and helps them spread nicely in the pan.
- 1 cup packed light brown sugar – Brown sugar adds moisture and that deep, caramel-like flavor that pairs perfectly with chocolate candy.
- 2 large eggs, room temperature – Eggs bind everything together. Let them sit out for 15 minutes if you forgot to plan ahead.
- 1 teaspoon vanilla extract – Pure vanilla adds warmth and depth. Imitation works too, but pure is better if you have it.
- 2 ½ cups all-purpose flour – Spoon and level your flour for the best texture. Scooping straight from the bag packs it down and makes bars too dense.
- 1 teaspoon baking soda – This helps the bars rise just a little, giving them a soft, chewy center.
- ½ teaspoon salt – Salt balances the sweetness and makes the chocolate flavors pop. Don’t skip it.
- 2 ½ to 3 cups chopped leftover Halloween candy – Here’s where you get creative. I’ve used Snickers, Milky Way, Reese’s Peanut Butter Cups, Kit Kats, and even some crushed Oreos. Avoid anything with a hard candy shell (like M&Ms) since it gets weirdly crunchy after baking. Chocolate bars, caramel-filled pieces, and peanut butter cups are your best friends here.
Ingredient Tips from My Kitchen: If your candy has been sitting around for a few weeks, it’s still fine to use. Just make sure it’s not stale or melted. For the best texture, chop larger bars into roughly ½-inch pieces. You want some chunks to stay intact while others melt into the dough. I’ve also thrown in some white chocolate chips when I was short on candy, and it worked beautifully.
Substitution Options: Need a gluten-free version? Swap the all-purpose flour for a 1-to-1 gluten-free baking blend. For a dairy-free option, use vegan butter and check that your candy bars are dairy-free (some are, some aren’t). I haven’t tried this with a sugar substitute, so I can’t vouch for the results there.
Equipment Needed
You don’t need anything fancy for these bars, which is part of why I love them. Here’s what you’ll need.
- 9×13-inch baking pan – This is the perfect size for thick, chewy bars. A metal pan works best for even baking. If you only have glass, reduce the oven temperature by 25 degrees.
- Parchment paper – Line your pan with parchment paper, leaving some overhang on the sides. This makes lifting the bars out so much easier. Trust me on this one.
- Large mixing bowl – Any big bowl works. I use a glass one because it doesn’t hold onto odors.
- Electric mixer or stand mixer – A hand mixer is fine, but a stand mixer makes creaming the butter and sugar effortless. You can also do it by hand if you’re feeling strong.
- Sharp knife and cutting board – For chopping the candy into pieces. A serrated knife works well for bars with caramel centers.
- Rubber spatula – For scraping every last bit of dough into the pan. Waste not, want not.
- Cooling rack – Lets the bars cool evenly so they don’t get soggy on the bottom.
Budget-Friendly Tip: If you don’t have parchment paper, you can grease the pan really well with butter or non-stick spray. Just be careful when cutting the bars out. I’ve done it both ways, and parchment paper is worth the small cost.
Preparation Method
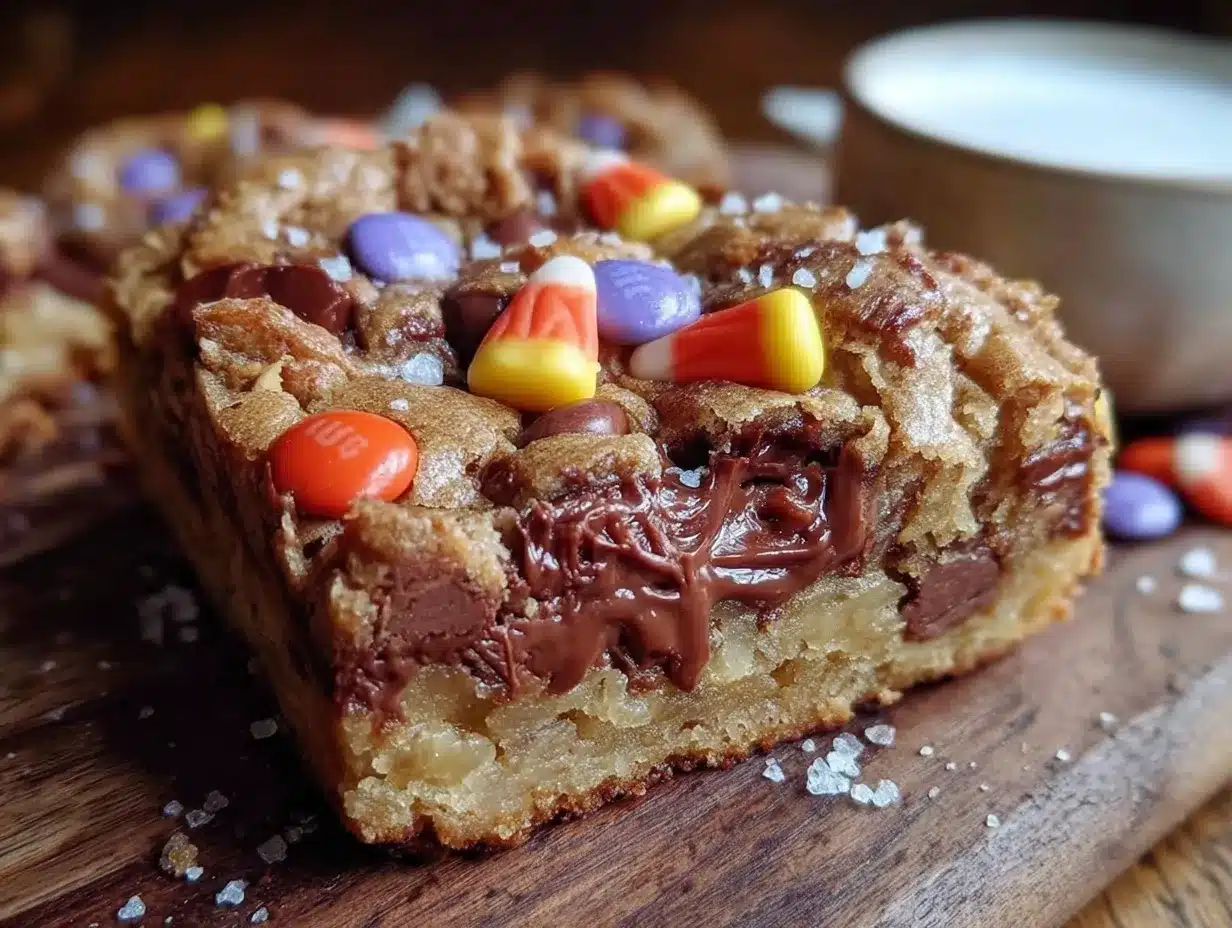
Ready to turn that leftover candy into something amazing? Here’s how to make these cookie bars step by step. The whole process takes about 30 minutes from start to finish.
- Preheat your oven to 350°F (175°C). While it’s heating, line your 9×13-inch pan with parchment paper. Leave about 2 inches of overhang on the long sides. This creates handles for lifting the bars out later.
- Cream the butter and sugars together. In a large mixing bowl, beat the softened butter, granulated sugar, and brown sugar together until light and fluffy. This takes about 2-3 minutes with an electric mixer on medium speed. You’ll know it’s ready when the mixture looks pale and almost doubled in volume. Scrape down the sides of the bowl once during mixing.
- Add the eggs and vanilla. Crack the eggs into the butter mixture one at a time, beating well after each addition. Then add the vanilla extract and mix until combined. The batter should look creamy and smooth at this point.
- Mix the dry ingredients separately. In a separate bowl, whisk together the flour, baking soda, and salt. This ensures the baking soda is evenly distributed so your bars rise evenly.
- Combine wet and dry ingredients. Gradually add the flour mixture to the butter mixture, mixing on low speed just until combined. Be careful not to overmix—stop as soon as you no longer see streaks of flour. Overmixing makes the bars tough.
- Fold in the chopped candy. Using a rubber spatula, gently fold the chopped Halloween candy into the dough. Don’t overmix here either. You want the candy distributed evenly without breaking it into tiny pieces.
- Press the dough into the pan. Transfer the dough to your prepared pan and press it into an even layer. It will be thick—that’s normal. Use your hands or the bottom of a measuring cup to spread it evenly. Make sure it reaches all the corners.
- Bake for 20-25 minutes. Place the pan on the center rack of your oven. Bake until the edges are golden brown and the center looks set but still soft. A toothpick inserted into the center should come out with a few moist crumbs, not wet batter. Every oven is different, so start checking at 20 minutes.
- Cool completely in the pan. This is the hardest part. Let the bars cool in the pan on a wire rack for at least 30 minutes. If you cut them too soon, they’ll fall apart. Trust me, I learned this the hard way.
- Lift out and cut. Once cooled, use the parchment paper handles to lift the entire block of bars out of the pan. Place it on a cutting board and slice into squares. I usually cut 24 bars, but you can make them bigger or smaller depending on your crowd.
What to Watch For: The bars will look slightly underdone in the center when you pull them out. That’s okay—they continue baking from the residual heat of the pan. If you wait until the center looks fully set, they’ll be overbaked and dry. The edges should be golden and slightly crispy, while the center remains soft and chewy.
Cooking Tips & Techniques
I’ve made these bars enough times to know exactly what can go wrong and how to fix it. Here are my best tips for perfect cookie bars every time.
Chop Your Candy Evenly: This is the most important tip I can give you. If you leave some candy pieces too big, they’ll create pockets of molten sugar that make the bars fall apart. Aim for ½-inch pieces for most bars. For softer candies like Milky Way, you can go a little bigger since they melt more evenly.
Room Temperature Ingredients Matter: Cold eggs won’t incorporate well into the butter mixture, leaving you with a lumpy dough. Set your eggs out 15-20 minutes before starting. Same goes for the butter—it should be soft enough that you can press a finger into it easily, but not melted.
Don’t Overbake: I know I said this already, but it’s worth repeating. Pull the bars out when the center still looks slightly soft and puffy. They’ll set as they cool. Overbaked bars turn into dry, crumbly messes, and nobody wants that.
Use Parchment Paper: I tried making these without parchment paper once, and I spent 20 minutes scraping bars out of the pan. The caramel from the candy sticks like glue. Parchment paper saves you so much frustration.
Let Them Cool Completely: I know it’s tempting to cut into warm cookie bars, but warm bars are fragile bars. The caramel needs time to set, and the structure needs to firm up. If you cut too soon, you’ll end up with a delicious but messy pile of crumbs. Wait the full 30 minutes, I promise it’s worth it.
My Biggest Failure: The first time I made these, I used a whole bag of fun-size M&Ms because that’s what we had. Big mistake. The hard candy shells didn’t soften in the oven, so every bite had these weird crunchy bits that felt like eating gravel. Stick to chocolate bars, peanut butter cups, and caramel-filled candies. Your teeth will thank you.
Variations & Adaptations
One of the best things about this recipe is how flexible it is. Here are some ways to change it up based on what you have or what your family likes.
Peanut Butter Lover’s Version: Swap half the chopped candy for peanut butter chips and use Reese’s Peanut Butter Cups as your main candy. You can also swirl ¼ cup of creamy peanut butter into the dough before baking for extra peanut butter flavor. My husband begs me to make this version every year.
White Chocolate & Cranberry Twist: If your Halloween haul is light on chocolate, supplement with white chocolate chips and dried cranberries. The tartness of the cranberries balances the sweetness beautifully. I tried this one year when we had mostly lollipops (which don’t work in this recipe), and it became a new favorite.
Gluten-Free Option: Substitute the all-purpose flour with a 1-to-1 gluten-free baking blend. I’ve used Bob’s Red Mill with great results. The texture is slightly more crumbly, but the flavor is still spot on. Make sure your candy bars are gluten-free too—some contain wheat-based ingredients.
Double Chocolate Version: Replace ¼ cup of the flour with unsweetened cocoa powder. This turns the dough into a chocolate base that pairs perfectly with any candy. Add a handful of chocolate chips if you want even more chocolate. My kids call these “the brownie cookie bars.”
Healthier-ish Version: Use whole wheat pastry flour instead of all-purpose flour, and reduce the sugar to ¾ cup each of granulated and brown sugar. The bars won’t be quite as sweet, but they’ll still satisfy that cookie craving. I’ve also added ¼ cup of ground flaxseed for extra fiber, and nobody noticed.
Serving & Storage Suggestions
These cookie bars are perfect straight from the pan, but here’s how to serve and store them for the best experience.
Serving Temperature: These bars are delicious at room temperature, but they’re absolutely amazing warm. Pop a bar in the microwave for 10-15 seconds, and the caramel gets all gooey again. Serve with a scoop of vanilla ice cream for an extra special treat. My kids love them with a cold glass of milk.
Presentation Ideas: For a Halloween party, cut the bars into small squares and arrange them on a platter. Sprinkle a little powdered sugar on top for a fancy look. You can also drizzle melted white chocolate over the top and add sprinkles for a festive touch.
Storage Instructions: Store the bars in an airtight container at room temperature for up to 5 days. Layer them between sheets of parchment paper to prevent sticking. If your kitchen is warm, the caramel might get sticky, so you can refrigerate them if needed. Just let them come to room temperature before serving for the best texture.
Freezer-Friendly: These bars freeze beautifully. Wrap individual bars in plastic wrap, then place them in a freezer-safe bag or container. They’ll keep for up to 3 months. To thaw, just leave them on the counter for about 30 minutes. They’re also great frozen—my kids eat them straight from the freezer like ice cream bars.
How Flavors Develop: Honestly, these bars taste even better the next day. The flavors meld together overnight, and the texture becomes perfectly chewy. If you can resist eating them all on day one, you’ll be rewarded on day two.
Nutritional Information & Benefits
Let’s be honest—these are a treat, not a health food. But here’s what you should know if you’re keeping an eye on nutrition.
Estimated Per Bar (based on 24 bars): About 220 calories, 10g fat, 32g carbohydrates, 3g protein, and 18g sugar. These numbers vary depending on the candy you use, so take them as a rough guide.
Health Highlights: The butter and eggs provide some protein and healthy fats, and the candy does contain small amounts of calcium and iron (especially if you use chocolate). The brown sugar adds a touch of molasses, which has some minerals. Of course, the main benefit here is happiness—these bars bring smiles to faces, and that counts for something.
Dietary Considerations: This recipe contains gluten, dairy, and eggs. For a gluten-free version, see the variations section. For dairy-free, use vegan butter and check your candy labels. I haven’t tested an egg-free version, but a flax egg might work in a pinch.
My Take: I believe in balance. We eat healthy meals most of the time, but when Halloween rolls around, we enjoy these bars without guilt. They’re made from real ingredients, and they bring our family together in the kitchen. That’s a win in my book.
Conclusion
These Kid-Approved Leftover Halloween Candy Cookie Bars are the reason I actually get excited about November 1st. Instead of stressing over what to do with all that leftover candy, I turn it into something my whole family loves. The bars are chewy, buttery, loaded with chocolate and caramel, and they come together in under 30 minutes with stuff you already have in your kitchen. Honestly, they’ve become a post-Halloween tradition in our house, and I have a feeling they’ll become one in yours too.
I’d love to hear how these turn out for you. What candy did you use? Did your kids help chop and mix? Drop a comment below and let me know—I read every single one. And if you end up making a double batch (which I fully support), share a photo and tag me. There’s nothing better than seeing these bars being made in kitchens all over the place.
So go ahead—dig through that candy bowl, preheat your oven, and make something delicious. Your family will thank you, and you’ll feel like a kitchen hero. Happy baking, friends!
Frequently Asked Questions
Can I use any type of leftover Halloween candy?
Most chocolate bars, peanut butter cups, and caramel-filled candies work great. Avoid hard candies, lollipops, and candies with hard shells like M&Ms. Those don’t soften during baking and create an unpleasant texture.
How do I prevent the bars from sticking to the pan?
Line your pan with parchment paper, leaving overhang on the sides. This creates handles that let you lift the entire block of bars out cleanly. If you don’t have parchment, grease the pan very well with butter or non-stick spray.
Can I make these cookie bars ahead of time?
Absolutely. These bars actually taste better the next day after the flavors have melded together. Store them in an airtight container at room temperature for up to 5 days, or freeze individual bars for up to 3 months.
My bars came out too crumbly. What went wrong?
This usually happens from overbaking or overmixing the dough. Pull the bars out when the center still looks slightly soft. Also, make sure you’re measuring your flour correctly—scooping straight from the bag packs it down and throws off the ratio.
Can I add nuts or other mix-ins?
Definitely. Chopped walnuts, pecans, or almonds add a nice crunch. You can also toss in shredded coconut, dried fruit, or extra chocolate chips. Just keep the total mix-ins to about 3 cups so the dough isn’t overloaded.
Pin This Recipe!
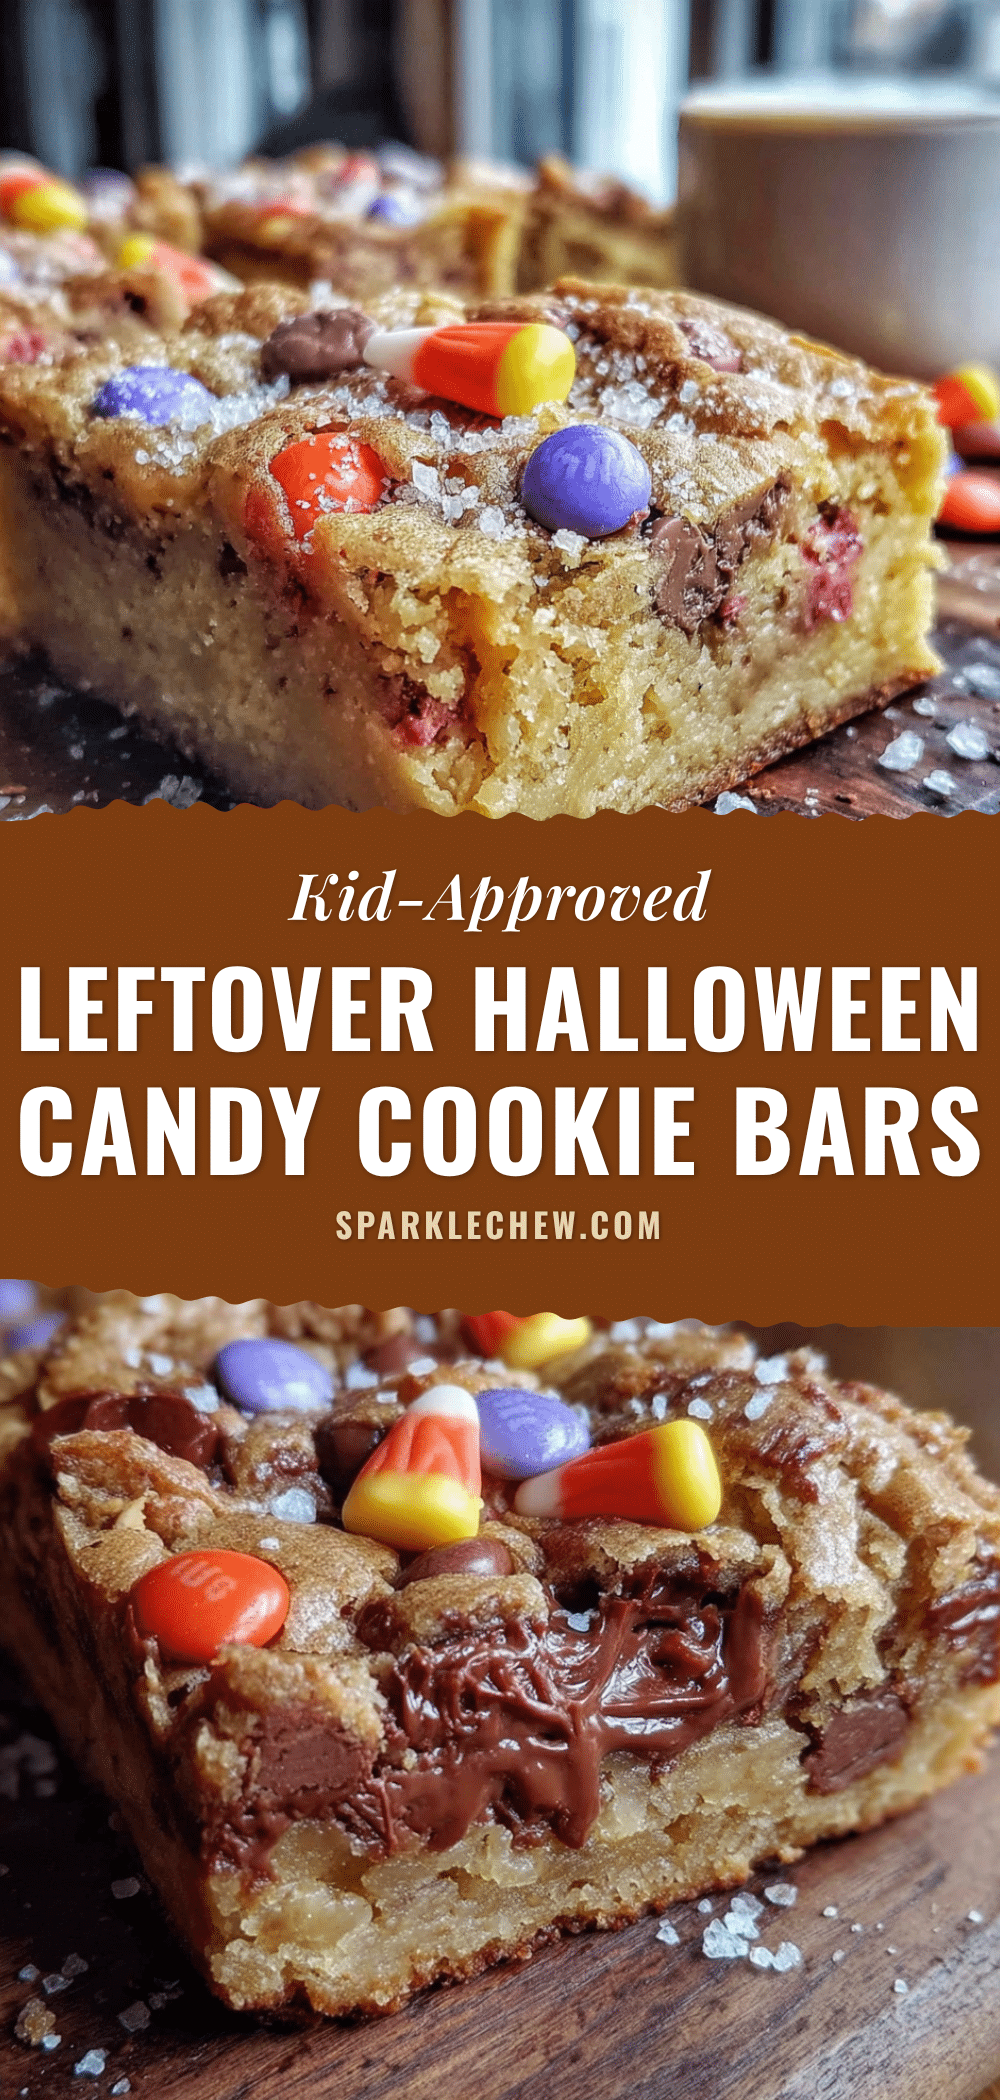
Easy Leftover Halloween Candy Cookie Bars: Perfect Kid-Approved Recipe

These chewy, buttery cookie bars are loaded with chocolate and caramel, using up every last piece of your Halloween candy haul. They come together in under 30 minutes and are a family favorite that turns a kitchen problem into a tradition.
- Prep Time: 10 minutes
- Cook Time: 20-25 minutes
- Total Time: 30-35 minutes
- Yield: 24 bars 1x
- Category: Dessert
- Cuisine: American
Ingredients
- 1 cup unsalted butter, softened
- 1 cup granulated sugar
- 1 cup packed light brown sugar
- 2 large eggs, room temperature
- 1 teaspoon vanilla extract
- 2 ½ cups all-purpose flour
- 1 teaspoon baking soda
- ½ teaspoon salt
- 2 ½ to 3 cups chopped leftover Halloween candy (e.g., Snickers, Milky Way, Reese’s Peanut Butter Cups, Kit Kats, crushed Oreos)
Instructions
- Preheat your oven to 350°F (175°C). Line a 9×13-inch baking pan with parchment paper, leaving about 2 inches of overhang on the long sides.
- In a large mixing bowl, beat the softened butter, granulated sugar, and brown sugar together until light and fluffy, about 2-3 minutes with an electric mixer on medium speed. Scrape down the sides once.
- Add the eggs one at a time, beating well after each addition. Then add the vanilla extract and mix until combined.
- In a separate bowl, whisk together the flour, baking soda, and salt.
- Gradually add the flour mixture to the butter mixture, mixing on low speed just until combined. Do not overmix.
- Using a rubber spatula, gently fold the chopped Halloween candy into the dough until evenly distributed.
- Transfer the dough to the prepared pan and press it into an even layer. Use your hands or the bottom of a measuring cup to spread it evenly.
- Bake for 20-25 minutes, until the edges are golden brown and the center looks set but still soft. A toothpick inserted into the center should come out with a few moist crumbs.
- Cool completely in the pan on a wire rack for at least 30 minutes.
- Use the parchment paper handles to lift the entire block of bars out of the pan. Place on a cutting board and slice into squares (usually 24 bars).
Notes
Chop candy into ½-inch pieces for best results. Avoid hard candies or candies with hard shells (like M&Ms). The bars will look slightly underdone in the center when pulled from the oven; they continue baking from residual heat. For best texture, let cool completely before cutting. Bars taste even better the next day.
Nutrition
- Serving Size: 1 bar
- Calories: 220
- Sugar: 18
- Sodium: 120
- Fat: 10
- Saturated Fat: 6
- Carbohydrates: 32
- Fiber: 1
- Protein: 3
Keywords: leftover Halloween candy, cookie bars, kid-approved, easy dessert, Halloween recipe, candy bars, chocolate, caramel