Love this? Save it for later!
Share the inspiration with your friends
Halloween was in six hours and I’d completely forgotten. Everyone else would be bringing elaborately decorated cakes, themed cupcakes with perfect piped frosting, and those creepy-crawly gelatin desserts that take three days to set. I had a can of pumpkin puree, a box of refrigerated pie crusts, and about forty-five minutes before I needed to leave for the neighborhood potluck. Honestly, I was ready to just grab a bag of candy and call it a day. But then I spotted the mini muffin tin in the back of the cupboard, and a frantic, slightly desperate idea started to form. I figured I could make something small, something handheld, and hope nobody noticed it was a last-minute panic project.
I mean, let me tell you, the pressure was real. I was already picturing the spread: a ghost-shaped cheesecake from the neighbor who always wins the bake-off, a cauldron of spiced cider, and those adorable mummy hot dogs that look way too cute to eat. And here I was, racing the clock with a rolling pin and a prayer. The kitchen timer felt like it was mocking me with every tick. But you know that feeling when you just have to make something work? That was me, covered in a light dusting of flour, muttering to myself about the texture of the dough.
Fast forward to the party. I walked in with a simple platter of these mini pumpkin hand pies, dusted with a little cinnamon sugar. They looked humble, sure. But the first person who grabbed one let out a little gasp. Then another person. Then a whole group of people crowded around the table. They were gone in ten minutes. Someone actually asked me for the recipe, and I had to pretend I hadn’t just thrown it together in a panic. These little pies were the underdog that won the whole night. And now, they’re my go-to for any Halloween gathering — because honestly, they taste like a warm hug from autumn itself, and they make me look way more put-together than I actually am.
Why You’ll Love This Recipe
These mini pumpkin hand pies aren’t just another dessert to add to the rotation. They are the kind of recipe that makes you look like a hero with almost zero effort. I’ve tested this approach a dozen times, tweaking the filling ratio and the baking time to get that perfect, flaky-yet-holdable texture. It’s a recipe born from a real kitchen emergency, and it works every single time.
- Quick & Easy: From start to finish, you’re looking at about 45 minutes. That includes baking time. Perfect for the day-of panic or a planned spooky spread.
- Simple Ingredients: You probably have most of this in your pantry right now. No weird extracts or specialty flours. Just good, honest ingredients.
- Perfect for Halloween: They are adorable, portable, and fit right in with any spooky theme. Kids and adults go crazy for them at parties.
- Crowd-Pleaser: I’ve brought these to three different Halloween events now, and they disappear faster than anything else on the table. People love the individual serving size.
- Unbelievably Delicious: The combination of the buttery, flaky crust with the warm, spiced pumpkin filling is pure comfort. It’s like a pumpkin pie you can eat with your hands.
What makes these different from other hand pie recipes? It’s the texture. I use a trick of pre-cooking the pumpkin filling just a bit on the stove to concentrate the flavor and remove excess moisture. That means no soggy bottoms. Each bite is perfectly crisp and wonderfully creamy. This isn’t just another pumpkin recipe — it’s your new secret weapon for hosting.
What Ingredients You Will Need
This recipe relies on a handful of pantry staples to create something truly special. The beauty is in the simplicity, and each ingredient plays a key role in building that perfect fall flavor and texture.
- For the Filling:
- 1 cup (240g) pumpkin puree (not pumpkin pie filling — make sure it’s 100% pure pumpkin. I prefer Libby’s for its consistent texture)
- 1/3 cup (65g) packed light brown sugar (adds a deeper, molasses-like sweetness)
- 1 large egg yolk (helps thicken the filling and gives it a silky richness)
- 1 teaspoon pumpkin pie spice (or make your own with 1/2 tsp cinnamon, 1/4 tsp ginger, 1/4 tsp nutmeg, and a pinch of cloves)
- 1/2 teaspoon vanilla extract (adds warmth and rounds out the flavors)
- 1/4 teaspoon salt (don’t skip this — it balances the sweetness)
- For the Crust:
- 1 box (14.1 oz) refrigerated pie crusts (I use Pillsbury for convenience, but homemade works beautifully too. Let them sit at room temperature for 15 minutes so they don’t crack)
- 1 tablespoon unsalted butter, melted (for brushing the tops, adds a beautiful golden color)
- 1 tablespoon granulated sugar mixed with 1/2 teaspoon cinnamon (for that sparkly, crunchy topping)
Ingredient Selection Tips: When buying pumpkin puree, give the can a shake. You want to hear a solid thud, not a slosh. Too much liquid means the puree is watery, and you’ll end up with a runny filling. If you’re feeling ambitious, you can roast and puree your own sugar pumpkin, but honestly, canned is more consistent for this recipe.
Substitution Guidance: For a dairy-free version, use a vegan pie crust and substitute the butter with coconut oil or a vegan butter alternative. The cinnamon sugar topping can be made with coconut sugar for a less refined option. If you don’t have pumpkin pie spice, just use cinnamon — it’ll still taste fantastic.
Equipment Needed
You don’t need a fancy pastry kitchen to pull these off. Here’s what you’ll really use:
- Mini muffin tin (12-cup works perfectly. If you don’t have one, you can use a regular muffin tin, but the pies will be larger and need a few extra minutes of baking time)
- Rolling pin (for rolling out the pie crusts if they crack. A wine bottle works in a pinch — I’ve done it)
- 2.5-inch round cookie cutter (or a drinking glass with a similar diameter. A shot glass also works for a smaller version)
- Small saucepan (for cooking down the filling. A non-stick one is easier to clean)
- Pastry brush (for the melted butter. A clean, unused paintbrush works too — just make sure it’s never been used for paint!)
- Baking sheet (to place under the muffin tin and catch any drips. I learned this the hard way after a sticky oven incident)
Budget-Friendly Options: You can skip the cookie cutter and just use a knife to cut rough circles. They’ll look more rustic and homemade, which honestly adds to the charm. A fork is your best friend for crimping the edges — no special tool needed.
Preparation Method
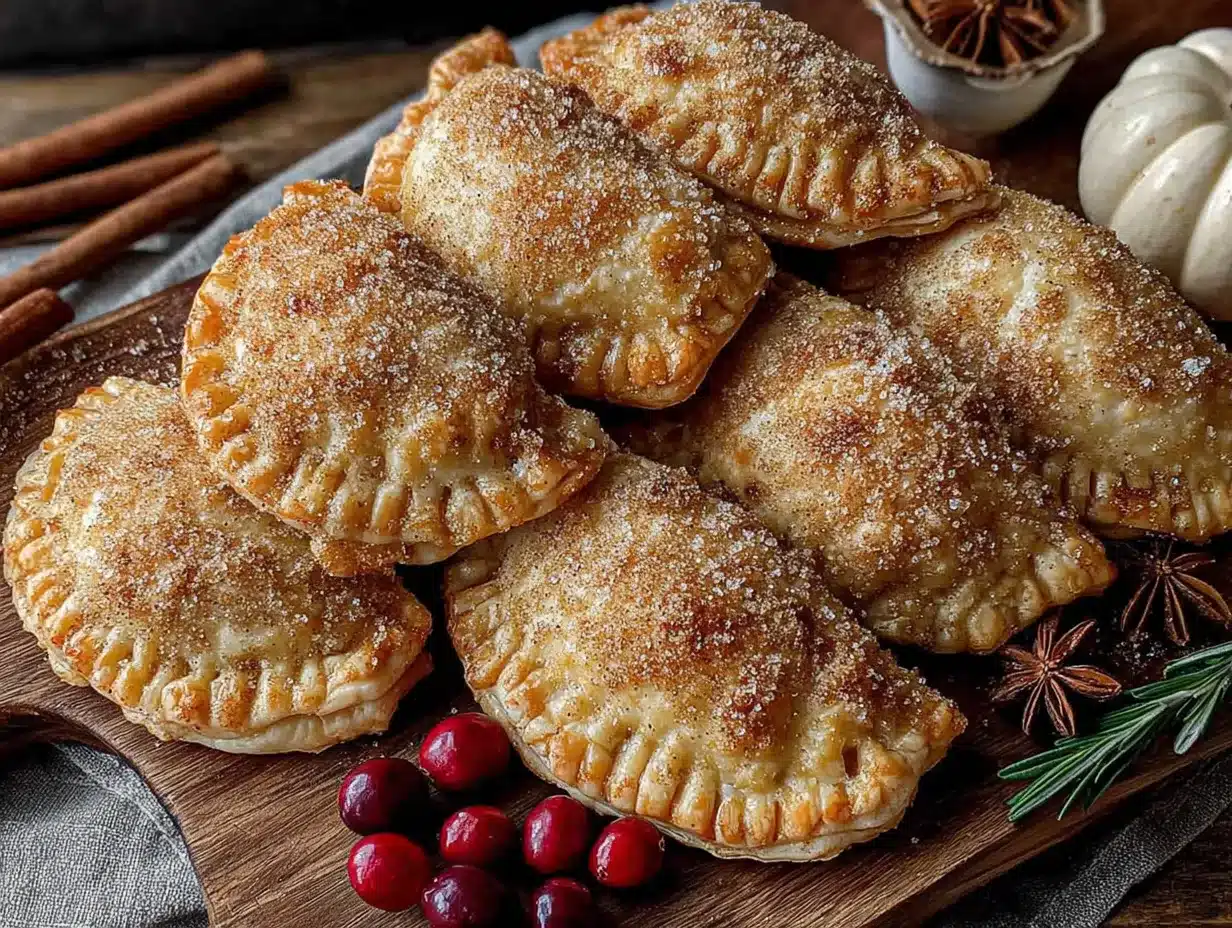
Alright, let’s get to the good part. This method is designed to be straightforward, even if you’re in a rush. Follow these steps, and you’ll have a platter of perfect hand pies before you know it.
- Preheat your oven to 375°F (190°C). Place a baking sheet on the middle rack. This helps distribute heat evenly and catches any filling that might bubble over. Lightly grease your mini muffin tin with non-stick spray or butter.
- Make the filling. In a small saucepan over medium heat, combine the pumpkin puree, brown sugar, egg yolk, pumpkin pie spice, vanilla extract, and salt. Whisk everything together until smooth. Cook for 3-4 minutes, stirring constantly, until the mixture thickens slightly and starts to pull away from the sides of the pan. You’ll notice it darkens in color and smells incredibly fragrant — that’s the sugar caramelizing and the spices blooming. Remove from heat and let it cool completely. This step is crucial; a hot filling will make the crust soggy.
- Prepare the crust. Unroll the pie crusts onto a lightly floured surface. If they crack at the edges (this happens to me almost every time), just press the cracks back together with your fingers. Use your rolling pin to gently roll the crust to about 1/8-inch thickness. The goal is to even it out and make it slightly thinner.
- Cut out the circles. Using your 2.5-inch round cookie cutter, cut out as many circles as you can from the first crust. You should get about 10-12 circles per crust. Gather the scraps, gently press them together (don’t overwork the dough), and re-roll to cut more circles. You’ll need 24 circles total to make 12 hand pies.
- Assemble the pies. Gently press one dough circle into each cup of the mini muffin tin. Make sure the dough comes up the sides a little. Spoon about 1 tablespoon of the cooled pumpkin filling into each cup. Don’t overfill — leave a little room at the top. Place another dough circle on top. Use your fingers to press the edges of the top and bottom crusts together to seal. Then, take a fork and crimp the edges all around. This isn’t just for looks; it creates a tight seal so the filling doesn’t leak out. Poke a small slit in the top of each pie with the fork tines to let steam escape.
- Bake the pies. Place the muffin tin on the preheated baking sheet. Bake for 18-22 minutes, or until the crusts are golden brown and the filling is bubbling slightly through the slits. Your kitchen will smell like a pumpkin spice dream at this point. Let them cool in the tin for 5 minutes — they are very hot and fragile right out of the oven.
- Finish with the topping. While the pies are still warm, carefully remove them from the tin and place them on a wire rack. Brush the tops with the melted butter. Immediately sprinkle the cinnamon sugar mixture over the tops. The butter helps the sugar stick and adds that gorgeous sheen.
Troubleshooting Tip: If your filling seems too runny after cooking, you might have had a watery pumpkin puree. Just cook it for another minute or two until it thickens up. If the crusts are browning too quickly in the oven, tent the muffin tin loosely with aluminum foil for the last 5 minutes of baking.
Cooking Tips & Techniques
I’ve made these pies about a dozen times now, and I’ve learned a few things the hard way. Here’s what I wish I knew from the start.
Don’t skip cooling the filling. I know, it’s tempting to just throw it in the crust while it’s still warm to save time. But trust me, warm filling creates steam inside the pie, which makes the crust soggy and can cause the pies to burst open in the oven. I learned this when I had a batch that looked like little pumpkin volcanoes.
Use cold crusts. If the dough gets too warm and sticky while you’re working, pop the assembled pies in the fridge for 10 minutes before baking. This firms up the butter in the crust, resulting in flakier layers. This is a classic pastry chef trick that makes a huge difference.
Seal those edges well. A bad seal is the number one cause of filling leakage. I press the edges with my fingers first, then go over them with the fork tines. Make sure you really crimp them down. I had one batch where I was rushing, and half the pies leaked filling onto the pan. They still tasted good, but they weren’t as pretty.
Multitask like a pro. While the filling is cooling, cut out your dough circles. While the pies are baking, clean up your workspace. This makes the whole process feel much faster and less chaotic. I usually set a timer for 10 minutes to let the filling cool, and I use that time to prep the crusts.
Variations & Adaptations
One of the best things about this recipe is how flexible it is. You can easily tweak it to suit different tastes or dietary needs.
Spooky Shape Variation: Instead of round pies, use Halloween-themed cookie cutters like bats, ghosts, or pumpkins. Just make sure the shapes are roughly the same size. You’ll need to cut the top and bottom separately, but the result is incredibly cute. I did this for a kids’ party, and they were a huge hit.
Vegan Adaptation: Use a vegan pie crust (many store-bought options are accidentally vegan) and substitute the egg yolk with 1 tablespoon of cornstarch mixed with 2 tablespoons of water. Brush the tops with a little plant-based milk instead of butter. The texture will be slightly different, but still delicious.
Savory Pumpkin Version: For a non-dessert option, skip the sugar and pumpkin pie spice. Instead, add 1/4 cup of grated Parmesan cheese, 1/2 teaspoon of garlic powder, and a pinch of black pepper to the pumpkin filling. These make a fantastic appetizer for a fall gathering. I tried this once for a friend who doesn’t have a sweet tooth, and he ate six of them.
Extra Spiced Filling: If you like things warm and spicy, add 1/4 teaspoon of cayenne pepper or a pinch of ground cardamom to the filling. The heat pairs beautifully with the sweetness of the pumpkin. It’s an unexpected twist that will surprise your guests.
Serving & Storage Suggestions
These mini pies are incredibly versatile when it comes to serving. They are designed to be a crowd-pleaser, so think about the presentation.
Serving Temperature: Serve them warm or at room temperature. They are absolutely divine when they are still slightly warm from the oven, with the filling soft and the crust flaky. If you’re serving them at a party, room temperature is perfectly fine, and they actually hold their shape better.
Presentation Ideas: Arrange them on a platter lined with a festive napkin or a bed of orange and black sprinkles. Dust the platter with a little extra cinnamon for a beautiful effect. For a Halloween party, you can add a small dollop of whipped cream or a drizzle of caramel sauce on the side.
Complementary Dishes: These pies pair wonderfully with a hot cup of apple cider, a pumpkin spice latte, or even a scoop of vanilla ice cream. They also work well alongside a cheese board or a platter of other finger foods. For a full Halloween spread, serve them with mummy hot dogs, witch’s finger cookies, and a bowl of spiced punch.
Storage Instructions: Store leftover pies in an airtight container at room temperature for up to 2 days. If you need to keep them longer, refrigerate them for up to 5 days. The crust will soften slightly in the fridge, but they’ll still taste great. To reheat, pop them in a 350°F (175°C) oven for 5 minutes, or in an air fryer at 300°F (150°C) for 3 minutes. Do not microwave them — the crust will become tough and chewy.
Freezing Instructions: You can freeze the unbaked, assembled pies on a baking sheet until solid, then transfer them to a freezer bag. Bake them directly from frozen, adding 3-5 minutes to the baking time. This is a great make-ahead option for busy hosts.
Nutritional Information & Benefits
While these are a treat, they do have some redeeming qualities. Here’s a rough breakdown per hand pie (based on 12 servings):
- Calories: Approximately 180-200
- Fat: 10g
- Carbohydrates: 22g
- Fiber: 2g
- Sugar: 12g
- Protein: 3g
Health Benefits: Pumpkin is a fantastic source of vitamin A, which is great for eye health and immune function. It also provides fiber, which helps with digestion. The cinnamon in the spice blend has anti-inflammatory properties and can help regulate blood sugar. Of course, the pie crust and sugar add calories and fat, so these are best enjoyed as an occasional treat.
Dietary Considerations: This recipe is vegetarian. For a gluten-free version, use a gluten-free pie crust mix. For a lower-sugar option, reduce the brown sugar to 1/4 cup and use a sugar substitute like monk fruit sweetener in the filling. The pies are naturally nut-free, but always check your pie crust label for potential cross-contamination.
I personally love that these pies feel indulgent but aren’t overly heavy. They satisfy that pumpkin craving without making you feel sluggish.
Conclusion
These mini pumpkin hand pies are more than just a recipe — they are a lifesaver for any host who wants to impress without the stress. Whether you’re scrambling at the last minute like I was, or you’re a seasoned planner, these little pies deliver every single time. They are cute, delicious, and surprisingly easy to make.
I encourage you to make them your own. Try the savory version for a game day snack, or go all out with the spooky shapes for a kids’ party. The possibilities are endless, and that’s what makes this recipe so special. Honestly, every time I make them, I think back to that panicked Halloween night, and I smile. They turned a potential disaster into one of my favorite hosting memories.
Now, I want to hear from you! Have you tried these? Did you add your own twist? Drop a comment below and let me know how they turned out. And if you loved them, share this recipe with a friend who needs a little Halloween magic in their life. Happy baking, and happy Halloween!
Frequently Asked Questions
Can I use homemade pie crust instead of store-bought?
Absolutely! Homemade pie crust works beautifully in this recipe. Just make sure to roll it out to about 1/8-inch thickness. The baking time should remain the same. I’ve used both, and honestly, the store-bought version is just as good for this application.
Why did my filling leak out of the pies?
This usually happens for two reasons: the edges weren’t sealed tightly enough, or the pies were overfilled. Make sure you crimp the edges well with a fork and leave a little space at the top of each cup. Also, ensure the filling has cooled completely before adding it to the crust.
Can I make these ahead of time for a party?
Yes! You have two options. You can assemble the pies completely and freeze them unbaked. Then, bake them directly from frozen, adding 3-5 minutes to the baking time. Alternatively, you can bake them a day ahead and store them in an airtight container at room temperature. Reheat them in the oven for 5 minutes before serving.
Can I use a different type of squash or sweet potato?
Definitely. Butternut squash, acorn squash, or sweet potato all work well as substitutes. Just make sure to roast or steam them until tender, then puree them until smooth. You may need to adjust the sugar based on the natural sweetness of your chosen squash.
How do I prevent the crust from getting soggy?
The key is to cook the filling on the stove first to remove excess moisture. This concentrates the flavor and thickens the mixture. Also, make sure the filling is completely cool before adding it to the crust. A hot filling will steam the dough and make it soggy.
Pin This Recipe!
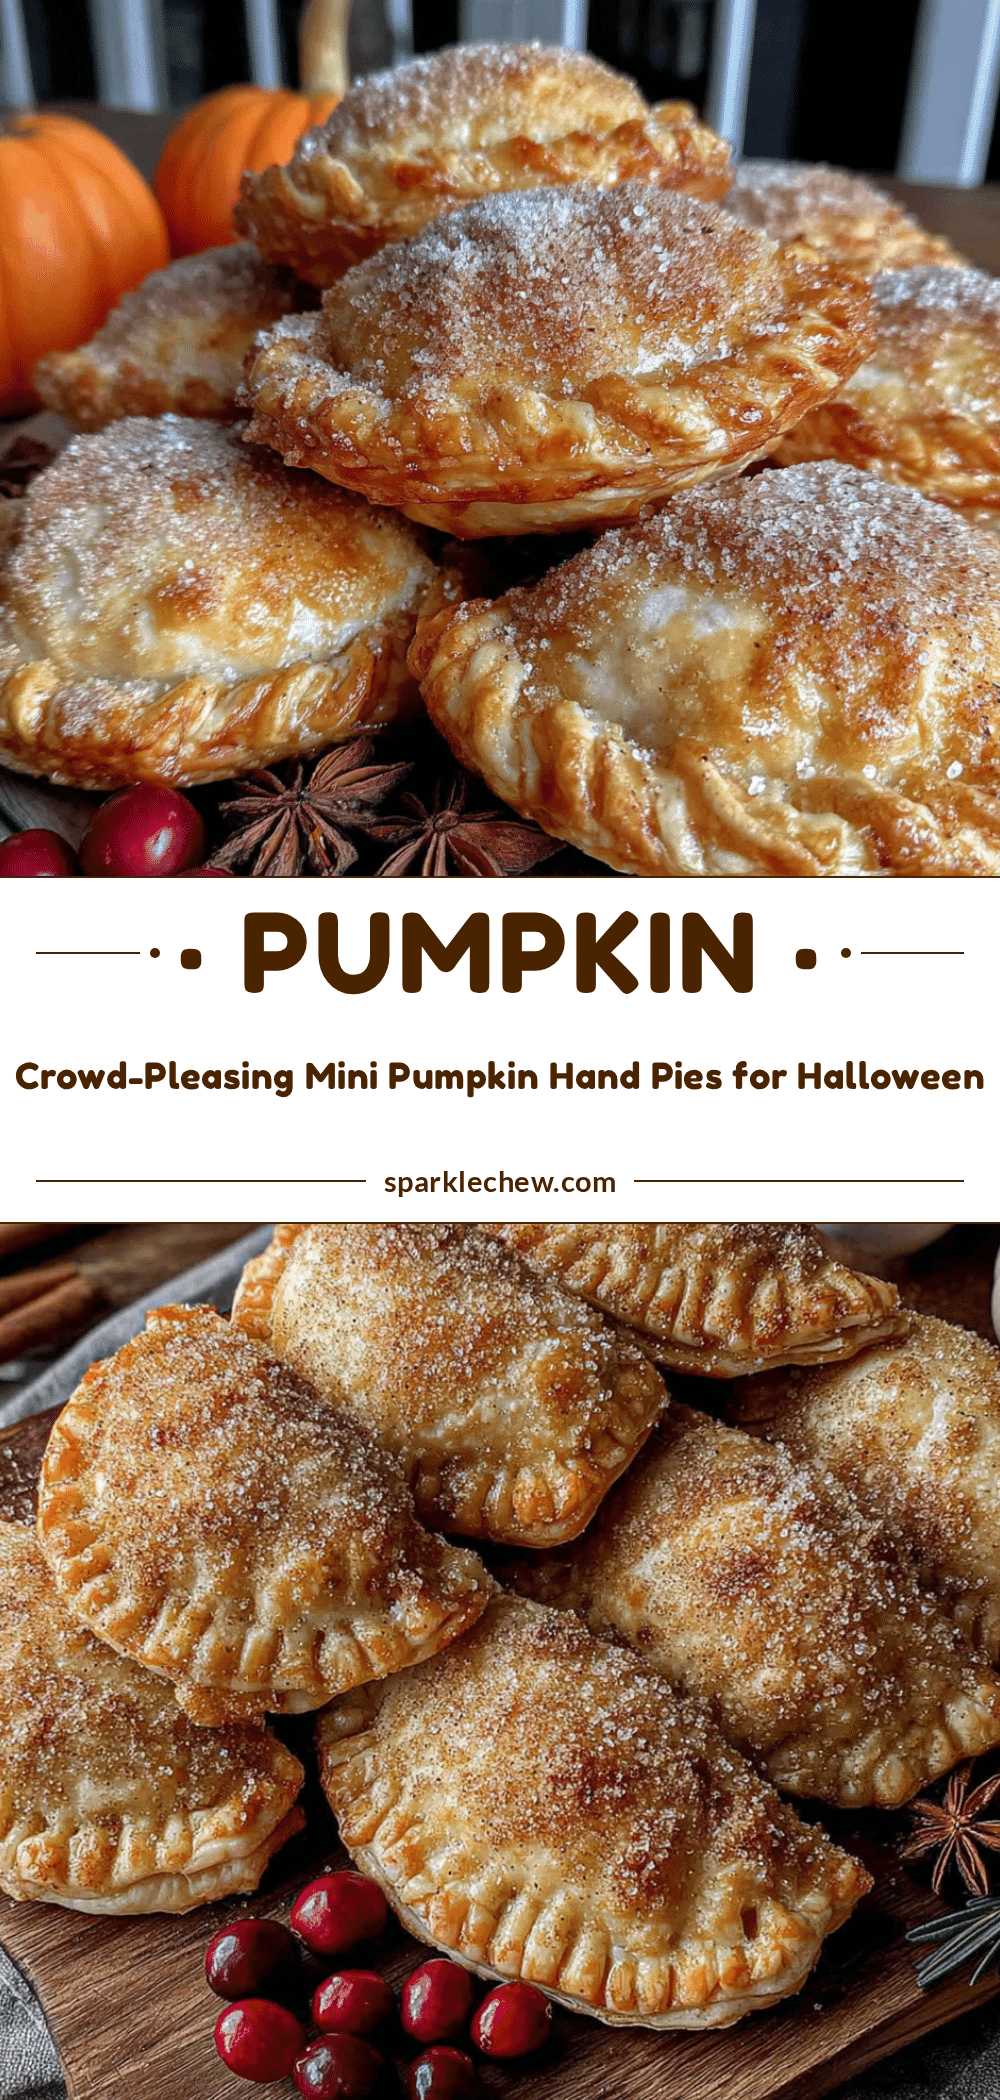
Easy Mini Pumpkin Hand Pies for Halloween Fun
These mini pumpkin hand pies are a lifesaver for any host who wants to impress without the stress. They are cute, delicious, and surprisingly easy to make, perfect for Halloween gatherings.
- Prep Time: 20 minutes
- Cook Time: 22 minutes
- Total Time: 45 minutes
- Yield: 12 servings 1x
- Category: Dessert
- Cuisine: American
Ingredients
- 1 cup (240g) pumpkin puree (not pumpkin pie filling)
- 1/3 cup (65g) packed light brown sugar
- 1 large egg yolk
- 1 teaspoon pumpkin pie spice
- 1/2 teaspoon vanilla extract
- 1/4 teaspoon salt
- 1 box (14.1 oz) refrigerated pie crusts
- 1 tablespoon unsalted butter, melted
- 1 tablespoon granulated sugar
- 1/2 teaspoon cinnamon
Instructions
- Preheat your oven to 375°F (190°C). Place a baking sheet on the middle rack. Lightly grease your mini muffin tin with non-stick spray or butter.
- Make the filling: In a small saucepan over medium heat, combine the pumpkin puree, brown sugar, egg yolk, pumpkin pie spice, vanilla extract, and salt. Whisk together until smooth. Cook for 3-4 minutes, stirring constantly, until the mixture thickens slightly and starts to pull away from the sides of the pan. Remove from heat and let it cool completely.
- Prepare the crust: Unroll the pie crusts onto a lightly floured surface. If they crack, press the cracks back together with your fingers. Use your rolling pin to gently roll the crust to about 1/8-inch thickness.
- Cut out the circles: Using a 2.5-inch round cookie cutter, cut out as many circles as you can from the first crust. You should get about 10-12 circles per crust. Gather the scraps, gently press them together, and re-roll to cut more circles. You’ll need 24 circles total to make 12 hand pies.
- Assemble the pies: Gently press one dough circle into each cup of the mini muffin tin. Make sure the dough comes up the sides a little. Spoon about 1 tablespoon of the cooled pumpkin filling into each cup. Place another dough circle on top. Use your fingers to press the edges of the top and bottom crusts together to seal. Then, take a fork and crimp the edges all around. Poke a small slit in the top of each pie with the fork tines to let steam escape.
- Bake the pies: Place the muffin tin on the preheated baking sheet. Bake for 18-22 minutes, or until the crusts are golden brown and the filling is bubbling slightly through the slits. Let them cool in the tin for 5 minutes.
- Finish with the topping: While the pies are still warm, carefully remove them from the tin and place them on a wire rack. Brush the tops with the melted butter. Immediately sprinkle the cinnamon sugar mixture over the tops.
Notes
Don’t skip cooling the filling; warm filling creates steam and makes the crust soggy. Use cold crusts for flakier layers. Seal edges well to prevent leakage. For a dairy-free version, use a vegan pie crust and substitute butter with coconut oil or vegan butter. For a gluten-free version, use a gluten-free pie crust mix.
Nutrition
- Serving Size: 1 hand pie
- Calories: 190
- Sugar: 12
- Sodium: 180
- Fat: 10
- Saturated Fat: 4
- Carbohydrates: 22
- Fiber: 2
- Protein: 3
Keywords: mini pumpkin hand pies, Halloween dessert, pumpkin hand pies, easy pumpkin recipe, fall dessert, hand pies


