Love this? Save it for later!
Share the inspiration with your friends
I was digging through my freezer last Tuesday, looking for something—anything—that didn’t require a trip to the grocery store, when my fingers brushed against a bag of frozen pizza dough balls I’d stashed weeks ago. And just like that, I was eight years old again, standing in my Aunt Lena’s cramped kitchen while she pulled a baking sheet out of the oven. The smell of melted cheese and warm bread hit me so hard I almost dropped the bag. She’d make these little pizza roll things for Halloween every year, except she called them “spider snacks” because she thought mummies were too morbid for kids. She passed away three years ago, and I haven’t thought about those snacks in maybe a decade. But standing there in my own kitchen, freezer door open, I knew I had to try to recreate that feeling—not just the taste, but the way she’d wink at me while sneaking an extra piece of mozzarella into each one.
Now, I’m not gonna pretend these are fancy. They’re not. They’re silly, messy, and honestly, they look a little ridiculous when they come out of the oven. But that’s kind of the point, isn’t it? These Cozy Mozzarella Mummy Pizza Bites are exactly what you need when you want something warm and comforting without taking yourself too seriously. The first batch I made, I forgot to leave holes for the “eyes,” and they just looked like sad bread blobs. My husband ate three of them anyway and said they were the best mistakes I’d ever made. So I tried again, this time remembering the olive eyes, and let me tell you—when those little mummy faces stared back at me from the baking sheet, I actually laughed out loud. Maybe you’ve been there, chasing a memory through a recipe, hoping you’ll get it right. These bites? They’re worth the chase.
Why You’ll Love This Recipe
Let’s be real for a second—Halloween snacks can be a pain. Between the complicated decorating and the specialty ingredients that cost a fortune, it’s easy to end up frustrated instead of festive. These Cozy Mozzarella Mummy Pizza Bites flip that script completely. They’re the kind of recipe that makes you feel like a kitchen genius without actually having to be one.
- Quick & Easy : From start to finish, these come together in under 30 minutes. I’m talking preheat-the-oven, roll-the-dough, stuff-the-cheese, and done. Perfect for those evenings when the kids are bouncing off the walls and you need a win.
- Simple Ingredients : You probably have everything already. Pizza dough, mozzarella sticks, marinara, and olives. That’s it. No weird Halloween-themed products that you’ll never use again.
- Perfect for Cozy Nights : These were made for October evenings when the air gets crisp and you just want to curl up with something warm. They’re great for Halloween parties, sure, but honestly? I make them on random Tuesdays too.
- Crowd-Pleaser : I’ve served these to kids, adults, picky eaters, and that one friend who “doesn’t do themed food.” They all disappeared within minutes. There’s something about melted cheese wrapped in bread that transcends age.
- Unbelievably Delicious : The texture is what gets me. The outside gets this gorgeous golden crisp while the inside stays soft and gooey. And when you bite into that mozzarella? It stretches for days. Pure comfort.
What makes these different from every other Halloween snack out there is the simplicity. I’m not asking you to pipe frosting or sculpt fondant. You’re just wrapping dough around cheese and baking it. But the result—those little mummy faces with their olive eyes peeking out—feels special. It feels like you put in effort, even though you really didn’t. And isn’t that the best kind of cooking?
This recipe isn’t just good—it’s the kind that makes you close your eyes after the first bite. It’s comfort food in its purest form: warm, cheesy, and wrapped in a hug of bread. Perfect for a slow evening at home, a cold snap, or a rough day that needs fixing. Trust me on this one.
What Ingredients You Will Need
This recipe uses simple, pantry-friendly ingredients to deliver big flavor and that cozy, comforting texture we’re after. No fancy shopping trips required—just the basics, done right.
- Pizza dough – 1 pound (about 450 grams), store-bought or homemade. I prefer Pillsbury refrigerated pizza dough for convenience, but any brand works. If using frozen, thaw it overnight in the fridge. You want it soft and pliable, not cold and stiff.
- Mozzarella string cheese – 8 sticks, each cut in half crosswise. This gives you 16 pieces, perfect for 16 mummy bites. I recommend Frigo or Polly-O for that perfect stretchy texture. Don’t use fresh mozzarella balls—they’re too wet and will make the dough soggy.
- Pizza sauce or marinara – ½ cup (120 ml) for dipping. Use your favorite jarred sauce or make a quick one with canned tomatoes, garlic, and oregano. I’m partial to Rao’s because it’s thick and doesn’t make the bites soggy.
- Black olives – 16 whole olives, pitted, for the mummy eyes. You can also use sliced olives and just place two slices per mummy. Green olives work too, but the black ones look more like actual eyes.
- Egg wash – 1 large egg beaten with 1 tablespoon (15 ml) of water. This gives the bites that gorgeous golden-brown finish. Skip it if you’re in a hurry, but the color won’t be as nice.
- Optional seasonings – Garlic powder, dried oregano, or everything bagel seasoning for sprinkling on top before baking. I sometimes add a pinch of red pepper flakes for a little heat.
- Butter – 2 tablespoons (28 grams), melted, for brushing after baking. This adds richness and keeps the tops soft. Not strictly necessary, but highly recommended.
- Flour – For dusting your work surface. Just a light sprinkle to keep the dough from sticking.
For the dipping sauce, you can get creative. I’ve used pesto, garlic butter, and even ranch dressing. But classic marinara is where it’s at—it cuts through the richness of the cheese and ties the whole thing together. If you’re feeling fancy, warm the sauce before serving. It makes a difference.
One thing I learned the hard way: don’t overstuff these. I tried adding pepperoni inside once, and the dough wouldn’t seal properly. The cheese leaked out, and I ended up with greasy little blobs instead of cute mummies. Keep it simple—just the cheese inside, and save the extras for dipping.
Equipment Needed
You don’t need a fully stocked kitchen for these, which is part of the charm. Here’s what you’ll need:
- Baking sheet – A standard half-sheet pan works perfectly. Line it with parchment paper for easy cleanup. I’ve used foil in a pinch, but the bottoms don’t get as golden.
- Rolling pin – For flattening the dough into strips. No rolling pin? A wine bottle works. I speak from experience.
- Pizza cutter or sharp knife – To cut the dough into strips. A pizza cutter makes cleaner cuts, but a knife does the job.
- Pastry brush – For applying egg wash and melted butter. A silicone brush is my go-to—it doesn’t shed bristles like some natural ones do.
- Small bowl – For the egg wash. Any bowl works, but a shallow one makes dipping easier.
- Cutting board – For prepping the olives and cutting the cheese. Keep it clean and dry.
- Cooling rack – Optional, but it helps keep the bottoms from getting soggy. I use a wire rack set inside the baking sheet.
If you don’t have a pastry brush, you can use a paper towel to dab on the egg wash. It’s not as even, but it works. And if you’re really in a bind, just skip the wash entirely—the bites will still taste great, they just won’t be as pretty. I’ve done it, and nobody complained.
Preparation Method

- Preheat your oven to 400°F (200°C). Line a baking sheet with parchment paper. Getting the oven hot before you start is crucial—you want that immediate blast of heat to crisp the outside while the cheese melts inside.
- Prepare the dough. Lightly flour your work surface. Roll out the pizza dough into a rectangle about 12×8 inches (30×20 cm). Don’t stress about perfect measurements; just get it reasonably even. If the dough keeps snapping back, let it rest for 5 minutes—it’s just being stubborn.
- Cut the dough into strips. Using a pizza cutter, slice the dough lengthwise into 16 strips, each about ½ inch (1.25 cm) wide. They don’t have to be perfect—some will be thicker, some thinner. That’s fine. The imperfect ones look more like actual mummy wrappings anyway.
- Prepare the cheese. Cut each mozzarella string cheese stick in half crosswise. You should have 16 pieces total. Set them aside. If they’re cold from the fridge, let them sit at room temperature for 5 minutes—they’ll stretch better when baked.
- Wrap the mummies. Take one strip of dough and wrap it around a piece of mozzarella, slightly overlapping as you go. Leave a small gap at the top for the “eyes.” Don’t wrap too tightly—the cheese needs room to expand as it melts. Place each wrapped mummy seam-side down on the prepared baking sheet, spacing them about 1 inch (2.5 cm) apart.
- Add the eyes. Cut the black olives in half lengthwise. Press two olive halves gently into the exposed dough at the top of each mummy, positioning them like eyes. Don’t push too hard—they’ll sink into the dough as it bakes. If you’re using sliced olives, just place two slices per mummy.
- Apply egg wash. In a small bowl, beat the egg with 1 tablespoon of water. Brush this mixture lightly over the exposed dough strips. Don’t drown them—a thin, even coat is all you need. This is what gives them that beautiful golden-brown color.
- Bake. Place the baking sheet in the preheated oven and bake for 12-15 minutes, or until the dough is golden brown and the cheese is bubbly. Keep an eye on them after the 12-minute mark—ovens vary, and you don’t want burnt mummies. The kitchen will smell incredible at this point.
- Brush with butter. As soon as they come out of the oven, brush the tops with melted butter. This adds flavor and keeps the dough soft. Let them cool on the baking sheet for 2 minutes before transferring to a cooling rack. The cheese inside will be molten hot, so give them a minute.
- Serve warm. Arrange the mummy bites on a platter with a small bowl of warm marinara sauce for dipping. Watch them disappear. Seriously, I’ve seen a full batch vanish in under 5 minutes at a party.
One thing I’ve learned: don’t skip the cooling step. I was impatient once and bit into one straight from the oven, and the molten cheese burned the roof of my mouth. I couldn’t taste anything for two days. Let them rest—it’s worth the wait.
Cooking Tips & Techniques
After making these more times than I care to admit, I’ve picked up a few tricks that make a real difference. First, don’t overwork the dough. When you’re rolling it out, handle it gently. Over-kneading or rolling too aggressively will make the dough tough, and nobody wants a tough mummy. If the dough starts to resist, just let it rest for a few minutes before continuing.
The wrapping technique matters more than you’d think. I used to wrap the dough strips really tight, thinking it would look neater. But what actually happens is the cheese bursts through the seams as it melts, and you end up with cheese volcanoes instead of mummies. Leave a little slack. Let the dough overlap naturally. The imperfections are what make them look like actual mummies.
Here’s a mistake I made more than once: using wet mozzarella. Fresh mozzarella balls are delicious, but they’re too watery for this recipe. The excess moisture makes the dough soggy, and the mummies collapse before they even get to the table. Stick with string cheese—it’s drier, saltier, and melts beautifully without turning everything into a mess.
For even baking, rotate your baking sheet halfway through. I know it’s annoying, but ovens have hot spots, and the mummies in the back will brown faster than the ones in the front. A quick rotation at the 7-minute mark ensures everyone gets equal love.
If you’re making these ahead of time, assemble them on the baking sheet, cover loosely with plastic wrap, and refrigerate for up to 4 hours before baking. Add an extra minute or two to the baking time since they’ll be cold from the fridge. I’ve done this for parties, and it’s a lifesaver.
And finally, double the recipe. Seriously. I’ve never made a batch that was enough. They’re addictive in the way that all warm, cheesy things are. Make 32 instead of 16. Your future self will thank you.
Variations & Adaptations
These Cozy Mozzarella Mummy Pizza Bites are surprisingly versatile. Here are some ways to switch things up:
Gluten-Free Version : Use gluten-free pizza dough. Most brands work well, though they can be a bit stickier. Just flour your surface generously and handle the dough gently. The baking time might need an extra minute or two. I’ve tried Caulipower brand, and it holds up nicely.
Vegetarian Upgrade : Add a small basil leaf or a sliver of roasted red pepper inside each mummy before wrapping. It adds color and a pop of flavor without complicating things. I did this once on a whim, and it’s become my go-to version.
Spicy Kick : Sprinkle red pepper flakes into the dough before wrapping, or mix a pinch of cayenne into the marinara dipping sauce. For extra heat, use pepper jack cheese instead of mozzarella. Just be warned—the pepper jack melts differently and can be a bit oilier.
Herb-Infused : Brush the baked mummies with garlic butter instead of plain butter. Mix ¼ teaspoon of garlic powder and ½ teaspoon of dried oregano into the melted butter before brushing. It takes about 30 seconds and adds so much flavor.
Air Fryer Method : Cook at 350°F (175°C) for 8-10 minutes, checking halfway through. The air fryer gives them an extra-crispy exterior. I’ve tested this, and they come out perfectly—just don’t overcrowd the basket. Work in batches if needed.
Dip Variations : Beyond marinara, try garlic aioli, creamy ranch, or even a drizzle of balsamic glaze. My personal favorite is a quick cheese sauce made from melted cheddar and a splash of milk. It’s indulgent, but hey—it’s Halloween.
One variation I tried that didn’t work: adding pepperoni inside the wrap. The grease from the pepperoni made the dough slide off the cheese, and I ended up with naked cheese sticks and sad, greasy dough strips. Stick with the simple version, and save the extras for dipping.
Serving & Storage Suggestions
These are best served warm, straight from the oven. The cheese is stretchy, the dough is crisp on the outside and soft inside, and the olives add that little briny pop. Arrange them on a platter with a bowl of warm marinara in the center. For a Halloween party, I like to serve them on a black platter with fake spiderwebs underneath—it’s cheesy but fun.
They pair beautifully with a simple side salad if you’re serving them as a meal, or with roasted pumpkin seeds for a snack spread. For drinks, a warm apple cider or a cold dark beer works wonderfully. The richness of the cheese calls for something crisp or tart to balance it out.
For storage, let any leftovers cool completely, then place them in an airtight container. They’ll keep in the refrigerator for up to 3 days. But honestly, they’re best within 24 hours. The dough loses its crispness over time, and the olives can get a bit soggy.
To reheat, pop them in a 350°F (175°C) oven for 5-7 minutes, or until warmed through. The microwave works in a pinch, but the dough will be soft rather than crisp. I’ve also reheated them in an air fryer at 300°F (150°C) for 3 minutes, and they came out almost as good as fresh.
One thing I’ve noticed: the flavors actually develop a bit overnight. The garlic and herbs meld together, and the cheese sets slightly, giving them a different but still delicious texture. I’ve been known to eat them cold straight from the fridge the next morning. No judgment, please.
Nutritional Information & Benefits
Per serving (2 mummy bites): approximately 280 calories, 12g fat, 30g carbohydrates, 14g protein, 2g fiber, 5g sugar, 580mg sodium. These numbers are estimates and will vary based on the specific ingredients you use.
While these aren’t exactly health food, they do have some redeeming qualities. The mozzarella provides a good amount of protein and calcium, which supports bone health. The olive oil in most pizza doughs adds healthy monounsaturated fats. And the tomato sauce offers lycopene, an antioxidant linked to heart health.
For dietary considerations, these are vegetarian as written. To make them gluten-free, use gluten-free pizza dough. For a lower-calorie version, use reduced-fat mozzarella string cheese and skip the butter wash. I’ve tried this, and while it’s not as indulgent, it’s still pretty satisfying.
Potential allergens include wheat (gluten), dairy (milk), and eggs (in the wash). If you’re serving a crowd, it’s worth labeling them or asking about allergies beforehand. I’ve made a dairy-free version using vegan mozzarella, and while the texture is different, the flavor is still solid.
My personal take: these are a treat, not a staple. They’re meant to be enjoyed on cozy nights, special occasions, or whenever you need a little comfort. Balance them with veggies and lean proteins the rest of the day, and you’re golden.
Conclusion
These Cozy Mozzarella Mummy Pizza Bites are everything I love about cooking: simple ingredients, a little bit of whimsy, and a whole lot of comfort. They’re the kind of recipe that brings people together, whether it’s a Halloween party, a quiet night in, or just a Tuesday that needed a little extra warmth. Every time I make them, I think of Aunt Lena and her spider snacks, and I smile. That’s what food should do—connect us to the people and moments we love.
I hope you give these a try. Don’t stress about making them perfect. Let the dough be a little uneven. Let the cheese peek out. The imperfections are what make them look like mummies, and honestly, they’re what make them feel like yours. Customize them however you like—spicier, cheesier, herbier—and make them your own.
If you make these, I’d love to hear about it. Leave a comment below and let me know how they turned out, or share your own twist on the recipe. Tag me in your photos on social media—I’m always looking for inspiration. And if you’re craving more cozy recipes, check out my Creamy Tuscan Garlic Chicken or my Easy Homemade Focaccia for more warm, comforting bites.
Until next time, happy cooking—and may your cheese always be stretchy.
Frequently Asked Questions
Can I use homemade pizza dough for this recipe?
Absolutely. Homemade dough works beautifully, just make sure it’s at room temperature before rolling. If it’s too cold, it’ll be difficult to stretch and may tear while wrapping. I’ve used my favorite no-knead recipe, and the results were fantastic.
How do I prevent the cheese from leaking out during baking?
Make sure the dough strips overlap slightly as you wrap, and place the mummies seam-side down on the baking sheet. Don’t wrap too tightly—give the cheese room to expand without bursting through. Also, using string cheese instead of fresh mozzarella helps, as it has less moisture.
Can I make these ahead of time for a party?
Yes! Assemble the mummies on the baking sheet, cover with plastic wrap, and refrigerate for up to 4 hours before baking. Add 1-2 minutes to the baking time since they’ll be cold. You can also bake them fully, then reheat in a 350°F oven for 5 minutes before serving.
What can I use instead of black olives for the eyes?
You can use sliced green olives, small pieces of roasted red pepper, or even a dot of pesto for the eyes. For a non-olive option, try capers or small pieces of sun-dried tomato. Just make sure whatever you use is small enough to stay in place during baking.
Can I freeze these mummy pizza bites?
Yes, but with a caveat. Bake them first, let them cool completely, then freeze in a single layer on a baking sheet. Once frozen, transfer to a freezer bag. They’ll keep for up to 2 months. Reheat directly from frozen in a 350°F oven for 8-10 minutes. The texture won’t be quite as crisp, but they’re still delicious.
Pin This Recipe!
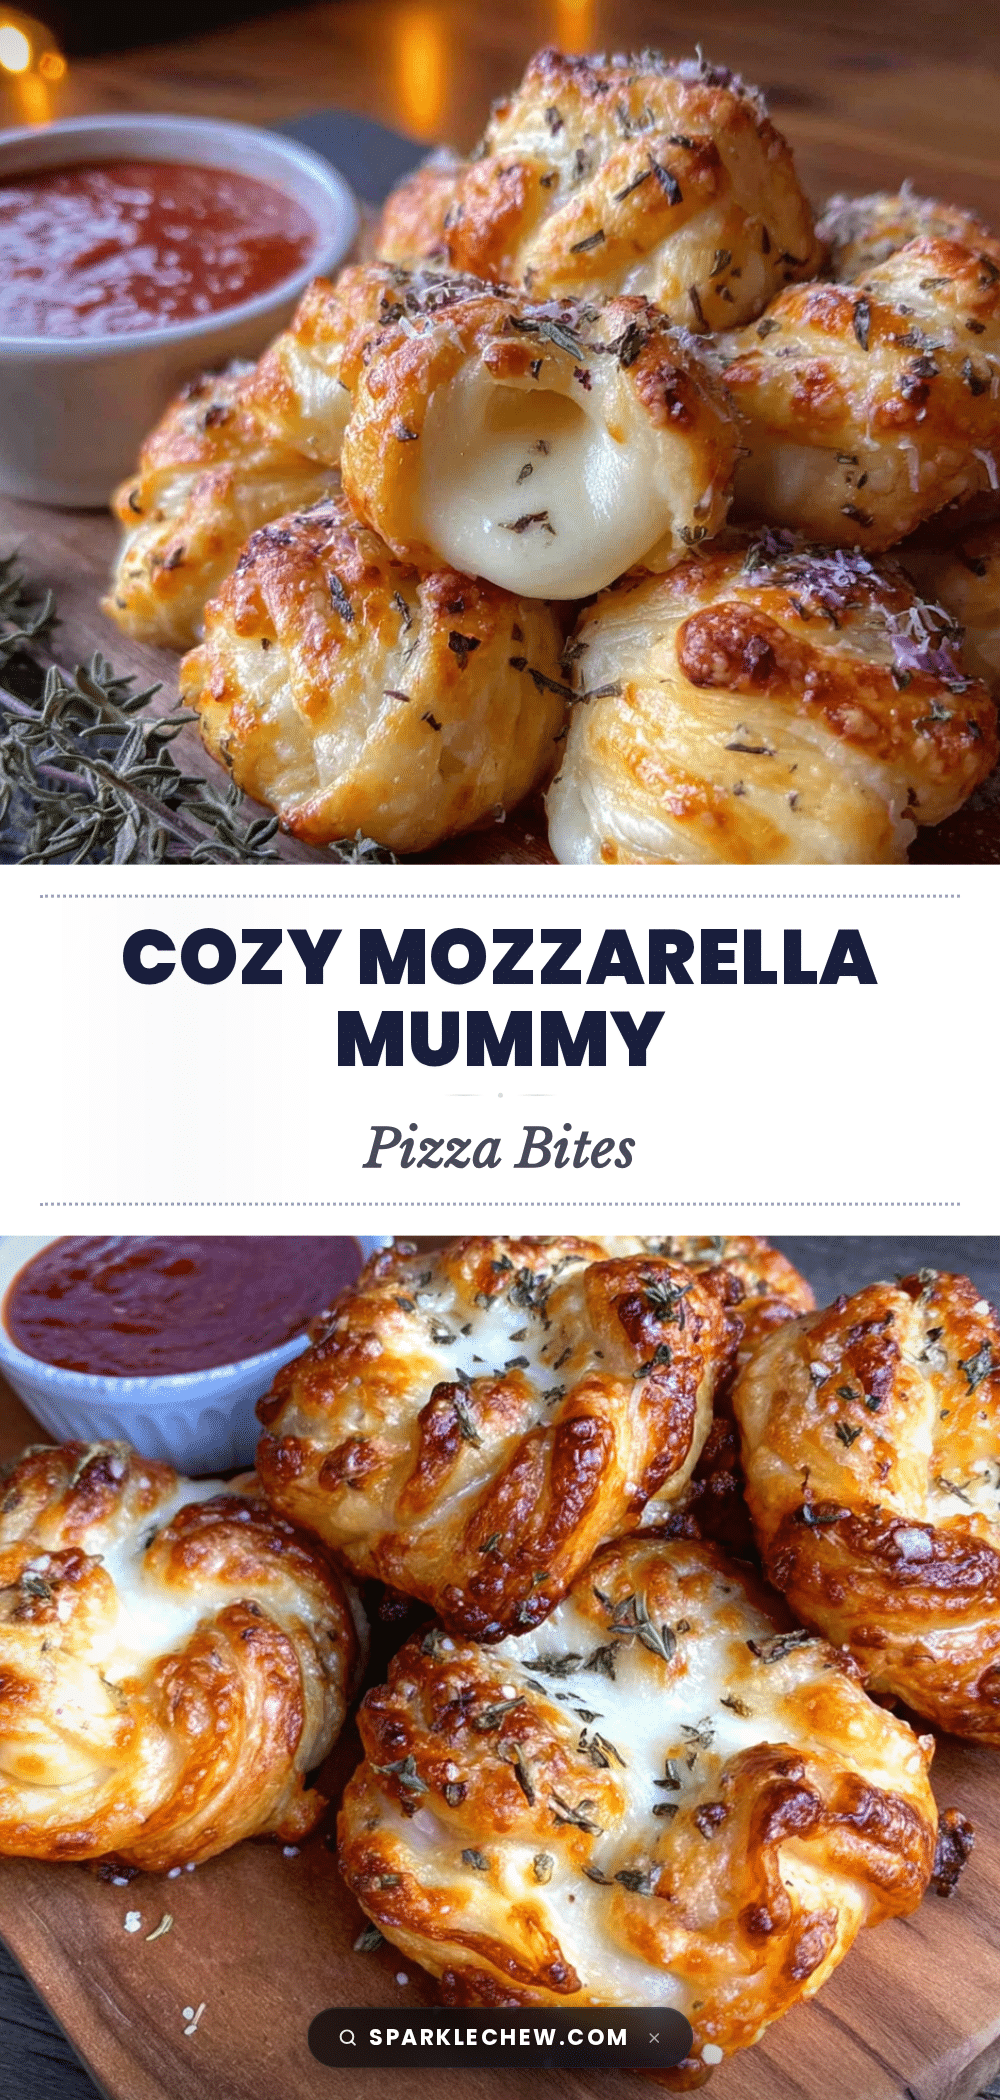
Easy Mozzarella Mummy Pizza Bites: Best Cozy Halloween Snack

These Cozy Mozzarella Mummy Pizza Bites are a quick and easy Halloween snack made with pizza dough, mozzarella string cheese, and black olives. Perfect for cozy nights, they come together in under 30 minutes and are sure to be a crowd-pleaser.
- Prep Time: 15 minutes
- Cook Time: 15 minutes
- Total Time: 30 minutes
- Yield: 8 servings (2 mummy bites per serving) 1x
- Category: Appetizer
- Cuisine: American
Ingredients
- 1 pound (about 450 grams) pizza dough, store-bought or homemade
- 8 mozzarella string cheese sticks, each cut in half crosswise
- ½ cup (120 ml) pizza sauce or marinara, for dipping
- 16 whole black olives, pitted
- 1 large egg, beaten with 1 tablespoon (15 ml) water (for egg wash)
- Optional: garlic powder, dried oregano, or everything bagel seasoning for sprinkling
- 2 tablespoons (28 grams) butter, melted (for brushing after baking)
- Flour, for dusting work surface
Instructions
- Preheat your oven to 400°F (200°C). Line a baking sheet with parchment paper.
- Lightly flour your work surface. Roll out the pizza dough into a rectangle about 12×8 inches (30×20 cm).
- Using a pizza cutter, slice the dough lengthwise into 16 strips, each about ½ inch (1.25 cm) wide.
- Cut each mozzarella string cheese stick in half crosswise to get 16 pieces total.
- Take one strip of dough and wrap it around a piece of mozzarella, slightly overlapping as you go. Leave a small gap at the top for the ‘eyes.’ Place each wrapped mummy seam-side down on the prepared baking sheet, spacing them about 1 inch (2.5 cm) apart.
- Cut the black olives in half lengthwise. Press two olive halves gently into the exposed dough at the top of each mummy, positioning them like eyes.
- In a small bowl, beat the egg with 1 tablespoon of water. Brush this mixture lightly over the exposed dough strips.
- Bake for 12-15 minutes, or until the dough is golden brown and the cheese is bubbly.
- As soon as they come out of the oven, brush the tops with melted butter. Let them cool on the baking sheet for 2 minutes before transferring to a cooling rack.
- Serve warm with a small bowl of warm marinara sauce for dipping.
Notes
Don’t overstuff the dough; use string cheese instead of fresh mozzarella to avoid sogginess. For best results, let the mummies rest for 2 minutes after baking to avoid burning your mouth on molten cheese. Double the recipe if serving a crowd.
Nutrition
- Serving Size: 2 mummy bites
- Calories: 280
- Sugar: 5
- Sodium: 580
- Fat: 12
- Saturated Fat: 6
- Carbohydrates: 30
- Fiber: 2
- Protein: 14
Keywords: Halloween snack, mummy pizza bites, mozzarella bites, easy appetizer, cozy snack, pizza dough recipe