Love this? Save it for later!
Share the inspiration with your friends
The church potluck was in four hours and I’d completely forgotten. Everyone else would be bringing those towering, perfectly latticed pies their grandmothers had taught them to make. I had a can of pumpkin puree in my pantry, a box of graham crackers, and maybe forty-five minutes before I had to leave. Let me tell you, I stood there staring into my fridge like it owed me money. Honestly, I almost just grabbed a store-bought pie and called it a day. But then I remembered my neighbor Sally, who always brings something incredible, and I just couldn’t show up with a sad grocery store dessert.
So I did what any slightly desperate person would do. I started throwing things together. I mean, I had butter, cream cheese, and some sugar. The easy no-bake pumpkin pie idea hit me like a lightning bolt. I crushed those graham crackers with a rolling pin—maybe a little aggressively, but the stress needed an outlet—and mixed up a filling that I prayed would set in time. The whole thing came together in about twenty minutes, which gave me just enough time to change out of my flour-covered jeans.
Here’s the thing, and maybe you’ve been there: I walked into that potluck feeling like a fraud. My pie was sitting there in a regular old pie dish, no fancy crimped edges, no decorative leaves made of dough. But when everyone started eating, something unexpected happened. People kept coming back for seconds. Someone asked for the recipe. Then someone else. By the end of the night, Sally herself had asked me to text it to her. That’s when I knew this easy no-bake pumpkin pie was something special. It’s the recipe that taught me you don’t need hours in the kitchen or a pastry degree to make something that stops people mid-conversation.
Why You’ll Love This Recipe
This isn’t just another pumpkin pie recipe. This easy no-bake pumpkin pie has been tested in my own kitchen more times than I can count, and I’ve tweaked it until the texture is absolutely perfect. Let me tell you why this one is different from all the rest.
- No Oven Required: I know, right? No preheating, no blind baking, no worrying about a cracked filling. This pie sets up beautifully in the refrigerator while you do literally anything else.
- Simple Ingredients: You probably have most of these in your kitchen right now. No weird specialty items, no trips to three different stores. Just real, honest ingredients that work together perfectly.
- Perfect for Fall Gatherings: Whether it’s Thanksgiving, a Friendsgiving party, or just a cozy Tuesday night, this pie fits right in. It’s impressive enough for company but easy enough for a random weeknight craving.
- Crowd-Pleaser: I’ve served this to pumpkin pie purists and pumpkin skeptics alike. The creamy texture and buttery crust win everyone over. Even the kids love it, which is saying something.
- Unbelievably Delicious: The secret is in the texture. By blending cream cheese with pumpkin puree and a touch of warm spices, you get a filling that’s rich, smooth, and absolutely decadent. It tastes like you spent hours on it. You didn’t.
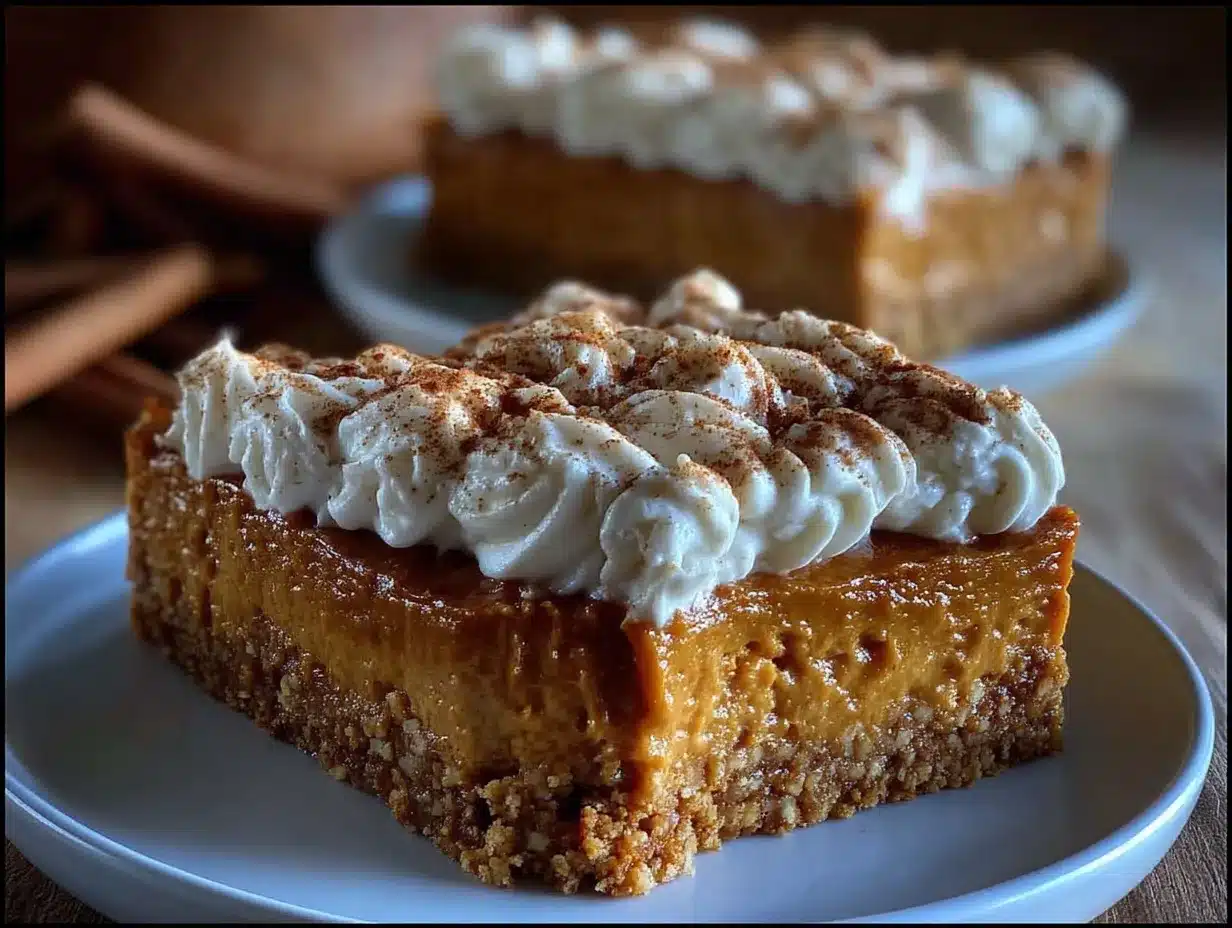
What makes this easy no-bake pumpkin pie stand out is the method. Most no-bake pumpkin pies use instant pudding mix, which gives them that artificial texture and flavor. Instead, I use a simple cream cheese base that creates a silky, mousse-like filling. The graham cracker crust is pressed in by hand—no rolling pins, no fuss—and the whole thing comes together in under thirty minutes of active time. It’s comfort food at its finest, made simpler and faster without sacrificing any of the soul-soothing satisfaction.
What Ingredients You Will Need
This easy no-bake pumpkin pie uses simple, wholesome ingredients to deliver that classic pumpkin flavor with a creamy, dreamy texture. Most of these are pantry staples, which makes this recipe perfect for those last-minute dessert emergencies.
For the Graham Cracker Crust
- Graham crackers, 1 ½ cups crushed (about 12 full sheets) — You can use store-bought crumbs if you’re in a hurry, but I prefer crushing my own for better texture
- Unsalted butter, 6 tablespoons melted — Adds richness and helps the crust hold together. I recommend using a good quality butter like Kerrygold for the best flavor
- Granulated sugar, ¼ cup — Just enough sweetness to balance the buttery crackers
- Pinch of salt — Don’t skip this! It really brings out the flavors
For the Pumpkin Filling
- Cream cheese, 8 ounces, softened to room temperature — This is the key to that silky texture. Let it sit out for at least 30 minutes before starting
- Pumpkin puree, 1 ½ cups (one 15-ounce can) — Make sure you get pure pumpkin puree, not pumpkin pie filling. Libby’s is my go-to brand
- Powdered sugar, ½ cup — It dissolves more easily than granulated sugar, keeping the filling smooth
- Heavy cream, ½ cup — Whipped and folded in for lightness. You can use cold heavy cream straight from the fridge
- Vanilla extract, 1 teaspoon — Pure vanilla is best, but imitation works in a pinch
- Pumpkin pie spice, 1 ½ teaspoons — Or make your own blend with cinnamon, nutmeg, ginger, and cloves
- Ground cinnamon, ½ teaspoon — For that extra warm spice kick
For the Topping (Optional)
- Whipped cream, 1 cup — Store-bought or homemade, either works beautifully
- Ground cinnamon, for dusting — Just a light sprinkle on top looks gorgeous
- Pecans or walnuts, chopped — Adds a lovely crunch if you’re feeling fancy
If you’re looking for a dairy-free option, you can use vegan cream cheese and coconut cream instead of heavy cream. The texture will be slightly different, but it still tastes amazing. For a gluten-free version, simply use gluten-free graham crackers—they work exactly the same way.
Equipment Needed
You don’t need a fancy kitchen to make this easy no-bake pumpkin pie. Here’s what you’ll need:
- 9-inch pie dish — Glass or ceramic works best. I use a standard Pyrex dish and it’s perfect every time
- Mixing bowls — One large bowl for the filling and one medium bowl for the crust
- Electric mixer — A hand mixer is fine, but a stand mixer makes things even easier. You can also mix by hand if you have strong arms!
- Rolling pin or food processor — For crushing the graham crackers. A zip-top bag and a rolling pin works great if you don’t have a food processor
- Rubber spatula — For scraping every last bit of filling into the crust
- Measuring cups and spoons — Precision matters, especially for the spices
- Plastic wrap — To cover the pie while it chills
I’ve made this recipe with a cheap hand mixer I bought at a discount store, and it worked just fine. Don’t let fancy equipment stop you from making this pie. The most important tool you have is your hands—pressing that crust into the dish is oddly satisfying, honestly.
Preparation Method
Let me walk you through this easy no-bake pumpkin pie step by step. I’ve made this so many times that I’ve got the process down to a science, and I’ll share all my little tricks along the way.
Step 1: Make the Crust
Start by crushing your graham crackers. If you’re using a food processor, pulse them until you get fine crumbs. If you’re doing it the old-fashioned way, put the crackers in a zip-top bag and go to town with a rolling pin. I actually prefer the bag method—it’s a great way to work out any frustration! You want about 1 ½ cups of crumbs. Pour the crumbs into a medium bowl, add the melted butter, sugar, and salt, and stir until everything looks like wet sand. Press this mixture firmly into your 9-inch pie dish. Use the bottom of a measuring cup to really pack it down—this is crucial for a crust that holds together when you slice it. Pop the crust in the fridge while you make the filling.
Step 2: Whip the Cream
In a separate bowl, pour in your cold heavy cream. Using your electric mixer, whip the cream on medium-high speed until soft peaks form. This usually takes about 2-3 minutes. You’ll know it’s ready when the cream holds its shape when you lift the beaters, but it’s still soft and pillowy. Set this aside in the fridge for a moment.
Step 3: Make the Filling Base
In a large mixing bowl, beat your softened cream cheese with the electric mixer until it’s smooth and fluffy—about 2 minutes. Make sure there are no lumps. Add the powdered sugar, vanilla extract, pumpkin pie spice, and cinnamon, and beat until everything is well combined. Scrape down the sides of the bowl with your spatula. Now add the pumpkin puree and mix on low speed until it’s fully incorporated. The mixture should be smooth and a beautiful orange color.
Step 4: Fold in the Whipped Cream
Here’s where the magic happens. Take your whipped cream out of the fridge and add it to the pumpkin mixture. Using your rubber spatula, gently fold the whipped cream into the pumpkin base. Don’t stir—fold. You want to keep as much air in the mixture as possible, which is what gives this pie its light, mousse-like texture. Fold until you don’t see any white streaks, but stop as soon as it’s combined. Overmixing will deflate the cream and make the filling dense.
Step 5: Assemble and Chill
Take your crust out of the fridge. Spoon the filling into the crust and spread it evenly with your spatula. Give the pie dish a gentle tap on the counter to settle any air bubbles. Cover the pie loosely with plastic wrap and place it in the refrigerator. Here’s the hard part: you need to let it chill for at least 6 hours, but overnight is best. I know it’s tempting to dig in early, but trust me—the texture needs time to set properly. The first time I made this, I tried to serve it after 4 hours and it was a little too soft. Patience pays off here.
Step 6: Garnish and Serve
Once the pie is fully set, it’s time to make it pretty. Spread or pipe whipped cream over the top, then dust with a generous sprinkle of cinnamon. If you’re using nuts, scatter them around the edges. Slice with a sharp knife, wiping the blade clean between cuts for those picture-perfect slices.
Cooking Tips & Techniques
After making this easy no-bake pumpkin pie more times than I can count, I’ve picked up a few tricks that make the difference between a good pie and a great one.
Don’t skip softening the cream cheese. I learned this the hard way. Cold cream cheese creates lumps that are nearly impossible to get out, and nobody wants lumpy pumpkin pie. Leave it on the counter for at least 30 minutes, or if you’re in a rush, microwave it in 10-second bursts until it’s soft but not melted.
Pack that crust tight. Seriously, use your knuckles or the bottom of a glass. If the crust is too loose, it will crumble when you try to serve the pie. I like to chill the crust for 15 minutes before adding the filling, which helps it firm up even more.
Taste as you go. Everyone’s palate is different. Some people love a heavy hand with cinnamon, others prefer more nutmeg. Once you’ve mixed the filling, taste a small spoonful and adjust the spices to your liking. Just remember you’ll be adding the whipped cream, which will mellow the flavors slightly.
Use room temperature ingredients. This applies to the cream cheese, but also to the pumpkin puree. Cold pumpkin can seize up the cream cheese mixture, making it harder to fold in the whipped cream. Let everything sit out while you make the crust.
Don’t over-whip the cream. If you whip it too far, it will start to separate and turn into butter. Stop as soon as you see soft peaks. The cream should be billowy and soft, not stiff and grainy.
Chill overnight for the best texture. I know I said this already, but it bears repeating. The filling needs time to set and the flavors need time to meld. A full 8-hour chill produces a pie that slices cleanly and tastes like it was made with hours of effort.
Variations & Adaptations
One of the best things about this easy no-bake pumpkin pie is how versatile it is. Here are some variations I’ve tried and loved.
Vegan Version
Use vegan cream cheese and coconut cream instead of heavy cream. I like the brand Miyoko’s for the cream cheese—it has a similar tang and texture. For the crust, use a vegan butter stick. The filling will be slightly less firm, so plan to chill it for a full 12 hours.
Gluten-Free Option
Simply swap the regular graham crackers for gluten-free ones. Most grocery stores carry them now, or you can use gluten-free digestive biscuits. Everything else in the recipe is naturally gluten-free, so this is an easy adaptation.
Chocolate Pumpkin Swirl
This is my personal favorite variation. Melt ¼ cup of semi-sweet chocolate chips and let it cool slightly. After you’ve spread the filling in the crust, drizzle the melted chocolate over the top and use a knife to swirl it through the filling. It looks gorgeous and the chocolate-pumpkin combo is incredible.
Maple Pecan Crust
Add ¼ cup of finely chopped pecans and 2 tablespoons of maple syrup to the crust mixture before pressing it into the dish. The maple flavor pairs beautifully with the pumpkin, and the pecans add a wonderful crunch.
Individual Mini Pies
Use a muffin tin instead of a pie dish. Press the crust into each cup, fill with the pumpkin mixture, and chill. These are perfect for parties or portion control. You’ll get about 8-10 mini pies from this recipe.
Serving & Storage Suggestions
This easy no-bake pumpkin pie is best served cold, straight from the refrigerator. The texture is at its peak when it’s well-chilled—creamy, firm, and sliceable. I like to let it sit at room temperature for about 10 minutes before slicing, which takes the chill off without compromising the texture.
For a stunning presentation, top each slice with a dollop of whipped cream, a sprinkle of cinnamon, and a few candied pecans. It pairs beautifully with a hot cup of coffee or a spiced chai latte. If you’re serving it at a holiday gathering, arrange it on a cake stand for that wow factor.
Storage: Cover the pie tightly with plastic wrap or aluminum foil and store it in the refrigerator for up to 5 days. The crust will stay crisp and the filling will remain creamy. I’ve found that the flavors actually deepen after a day or two, so leftovers are a real treat.
Freezing: This pie freezes beautifully. Wrap the entire pie (or individual slices) in plastic wrap, then in aluminum foil, and freeze for up to 3 months. To thaw, transfer it to the refrigerator overnight. Don’t thaw at room temperature, or the texture will become watery. The graham cracker crust might soften slightly after freezing, but it’s still delicious.
Reheating: Honestly, I don’t recommend reheating this pie. It’s meant to be served cold. If you absolutely must have a warm dessert, microwave a slice for about 10 seconds, but be aware that the filling will soften significantly.
Nutritional Information & Benefits
While this easy no-bake pumpkin pie is definitely a treat, it has some surprising nutritional perks. Here’s the breakdown per slice (based on 8 servings):
| Nutrient | Amount Per Serving |
|---|---|
| Calories | 320 |
| Total Fat | 22g |
| Saturated Fat | 13g |
| Cholesterol | 65mg |
| Sodium | 280mg |
| Total Carbohydrates | 28g |
| Dietary Fiber | 2g |
| Sugars | 18g |
| Protein | 4g |
| Vitamin A | 180% DV |
| Vitamin C | 4% DV |
| Calcium | 6% DV |
| Iron | 6% DV |
Pumpkin is packed with vitamin A, which is great for eye health and immune function. It’s also a good source of fiber, which helps with digestion. The cream cheese and heavy cream add calcium and protein, making this a more balanced dessert than you might expect. If you’re watching your sugar intake, you can reduce the powdered sugar to ⅓ cup without sacrificing too much sweetness.
Conclusion
This easy no-bake pumpkin pie has become my secret weapon for fall gatherings, holiday dinners, and those random Tuesday nights when I need a little pumpkin in my life. It’s proof that you don’t need to spend hours in the kitchen or stress over a finicky pastry crust to make something truly memorable. The creamy, spiced filling and buttery graham cracker crust come together in a way that feels both nostalgic and fresh.
I love that this recipe is forgiving. You can tweak the spices, swap the crust, or make it ahead of time without any fuss. It’s the kind of dessert that makes you look like a hero with minimal effort. Honestly, I’ve brought this to so many events that people now expect it from me. And I’m happy to deliver.
Now I want to hear from you! Have you tried making this easy no-bake pumpkin pie? Did you add your own twist? Drop a comment below and let me know how it turned out. And if you loved it, share this recipe with a friend who needs a stress-free dessert in their life. Happy baking—or rather, happy no-baking!
Frequently Asked Questions
Can I use fresh pumpkin instead of canned?
Absolutely! If you have fresh pumpkin, roast it until tender, then puree it in a food processor. Just make sure to drain off any excess liquid—fresh pumpkin tends to be more watery than canned. You want the puree to be thick, not runny. If it seems too wet, let it sit in a fine-mesh strainer for about 30 minutes before using.
Why did my pie turn out runny?
This usually happens for one of two reasons. Either the cream cheese wasn’t softened properly, or the pie didn’t chill long enough. Make sure your cream cheese is at room temperature before mixing, and give the pie a full 6-8 hours to set in the refrigerator. If you’re in a hurry, you can pop it in the freezer for 2 hours, but watch it carefully so it doesn’t freeze solid.
Can I make this pie dairy-free?
Yes! Use vegan cream cheese, coconut cream (the thick part from a can of full-fat coconut milk), and a plant-based butter for the crust. The texture will be slightly different—a bit lighter and less firm—but the flavor is still fantastic. I recommend chilling it for at least 8 hours for the best results.
How far in advance can I make this pie?
You can make this easy no-bake pumpkin pie up to 3 days in advance. In fact, I think it tastes better on day two or three because the flavors have had time to meld together. Just keep it covered in the refrigerator until you’re ready to serve. If you’re making it for a holiday, this is the perfect make-ahead dessert.
Can I use a store-bought graham cracker crust?
You can, and it will save you about 10 minutes. But honestly, the homemade crust is so much better. Store-bought crusts tend to be thinner and less buttery. If you’re short on time, go ahead and use one—just know that the crust-to-filling ratio will be different, and the texture won’t be quite as satisfying.
Pin This Recipe!
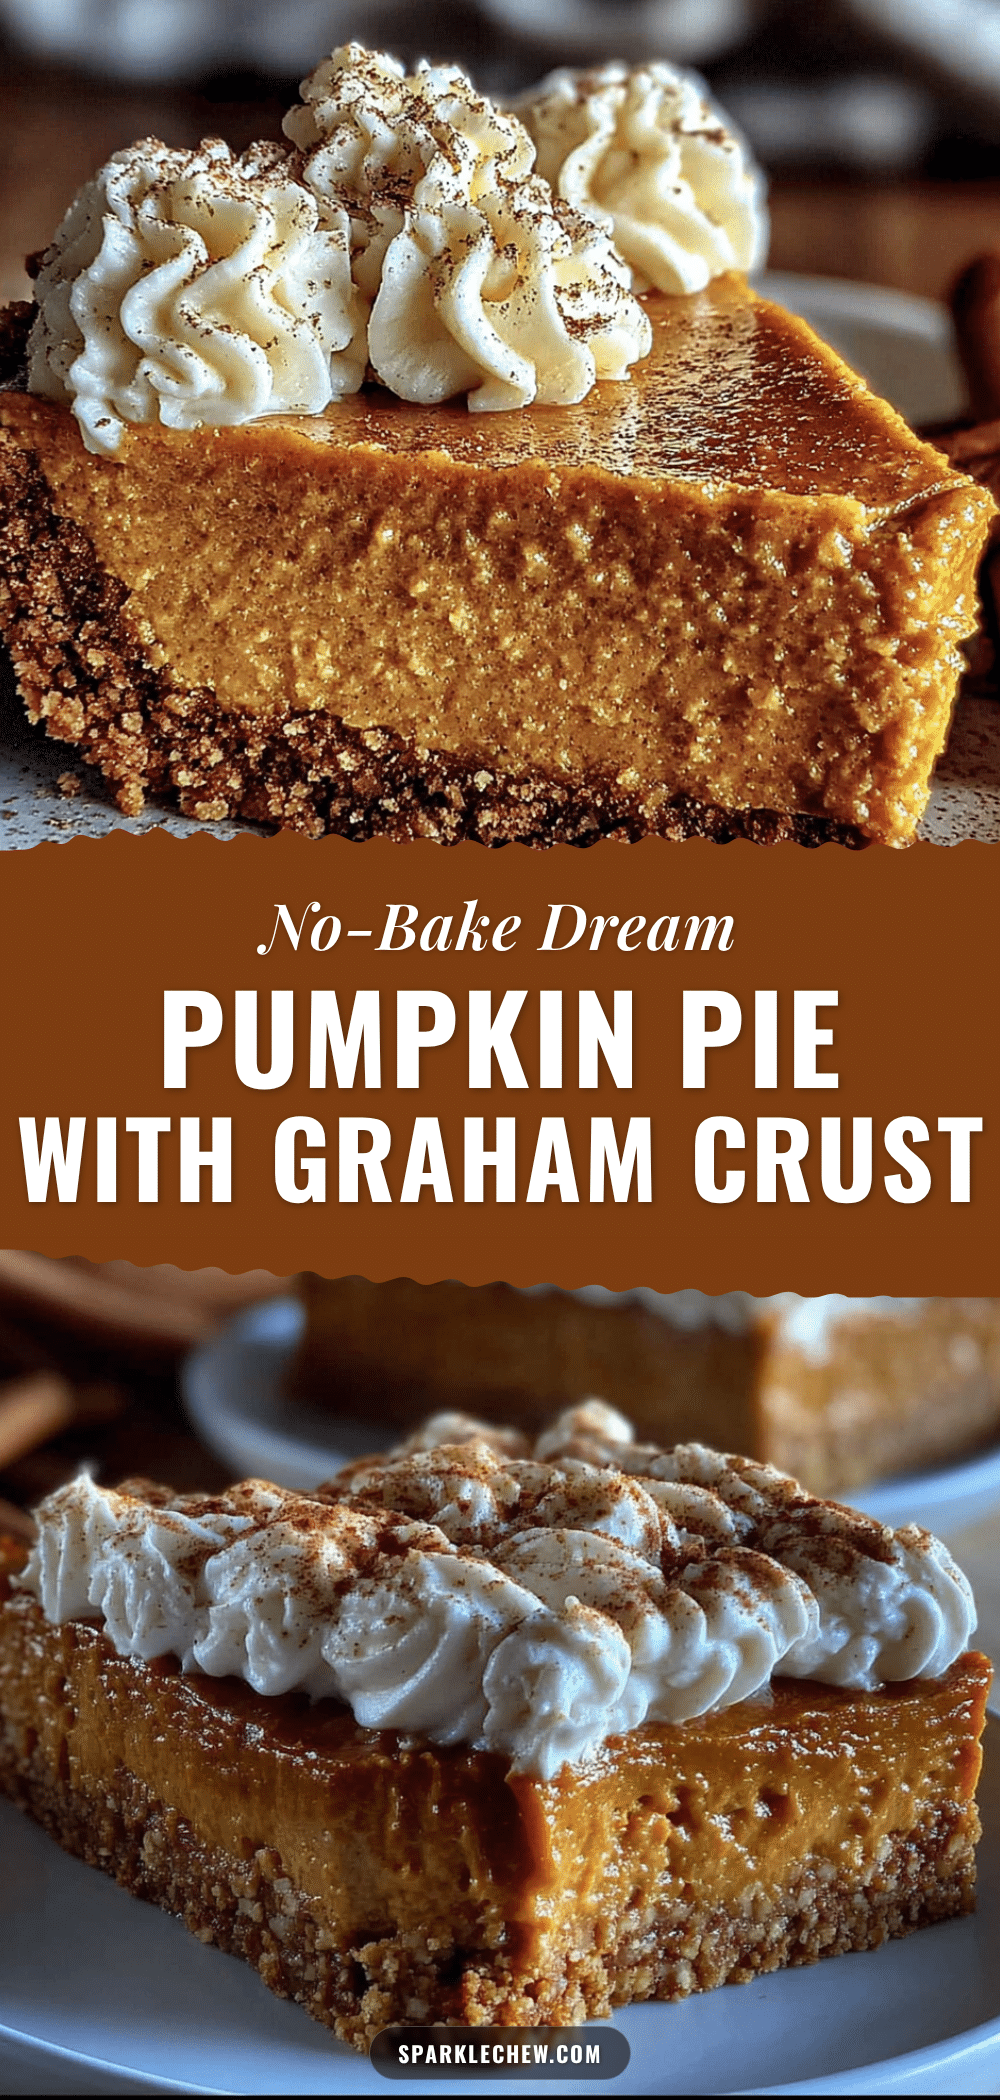
Easy No-Bake Pumpkin Pie with Perfect Graham Cracker Crust
A creamy, no-bake pumpkin pie with a buttery graham cracker crust that comes together in under 30 minutes. Perfect for fall gatherings, this dessert is a crowd-pleaser and requires no oven.
- Prep Time: 20 minutes
- Cook Time: 0 minutes
- Total Time: 6 hours 20 minutes (includes chilling)
- Yield: 8 servings 1x
- Category: Dessert
- Cuisine: American
Ingredients
- 1 ½ cups crushed graham crackers (about 12 full sheets)
- 6 tablespoons unsalted butter, melted
- ¼ cup granulated sugar
- Pinch of salt
- 8 ounces cream cheese, softened to room temperature
- 1 ½ cups pumpkin puree (one 15-ounce can)
- ½ cup powdered sugar
- ½ cup heavy cream, cold
- 1 teaspoon vanilla extract
- 1 ½ teaspoons pumpkin pie spice
- ½ teaspoon ground cinnamon
- 1 cup whipped cream (for topping, optional)
- Ground cinnamon for dusting (optional)
- Chopped pecans or walnuts (optional)
Instructions
- Crush graham crackers into fine crumbs using a food processor or a zip-top bag and rolling pin. In a medium bowl, combine crumbs with melted butter, sugar, and salt until mixture resembles wet sand. Press firmly into a 9-inch pie dish using the bottom of a measuring cup. Refrigerate crust while preparing filling.
- In a separate bowl, whip cold heavy cream with an electric mixer on medium-high speed until soft peaks form, about 2-3 minutes. Set aside in the refrigerator.
- In a large mixing bowl, beat softened cream cheese until smooth and fluffy, about 2 minutes. Add powdered sugar, vanilla extract, pumpkin pie spice, and cinnamon; beat until well combined. Add pumpkin puree and mix on low speed until fully incorporated.
- Gently fold the whipped cream into the pumpkin mixture using a rubber spatula, being careful not to deflate the mixture. Fold until no white streaks remain.
- Remove crust from refrigerator. Spoon filling into crust and spread evenly. Tap the pie dish gently on the counter to settle air bubbles. Cover loosely with plastic wrap and refrigerate for at least 6 hours, preferably overnight.
- Before serving, top with whipped cream, dust with cinnamon, and sprinkle with nuts if desired. Slice with a sharp knife, wiping blade clean between cuts.
Notes
For best texture, chill the pie overnight. Use room temperature cream cheese to avoid lumps. Pack the crust firmly to prevent crumbling. For a dairy-free version, use vegan cream cheese and coconut cream. For gluten-free, use gluten-free graham crackers.
Nutrition
- Serving Size: 1 slice
- Calories: 320
- Sugar: 18
- Sodium: 280
- Fat: 22
- Saturated Fat: 13
- Carbohydrates: 28
- Fiber: 2
- Protein: 4
Keywords: no-bake pumpkin pie, easy pumpkin pie, graham cracker crust, fall dessert, Thanksgiving dessert, no-bake dessert


