Love this? Save it for later!
Share the inspiration with your friends
My daughter claimed to hate peppermint for nine years. Nine years. She’d pick the striped candy cane out of a stocking, hand it back, and say “too spicy, Mama.” I believed her, honestly. I mean, kids have their quirks, right? So I stopped buying peppermint anything. Then last December, I found her standing on a stool at the counter, face dusted in flour, eating raw cookie dough straight from the mixer paddle. The dough was peppermint hot chocolate flavored. I hadn’t even baked it yet. She just looked at me, mid-lick, and said, “This is the best thing you’ve ever made.”
That moment changed everything. I hadn’t planned to make these cookies for her. I was testing a recipe for a holiday baking roundup, fully expecting to give them away to neighbors. But there she was, my self-proclaimed peppermint hater, caught red-handed. Or green-handed, I guess, since the dough had those little crushed candy bits in it. Maybe you’ve been there—that moment when a kid proves you wrong in the best possible way. It made me realize that sometimes we just need to find the right delivery system. A cookie, apparently, is that delivery system.
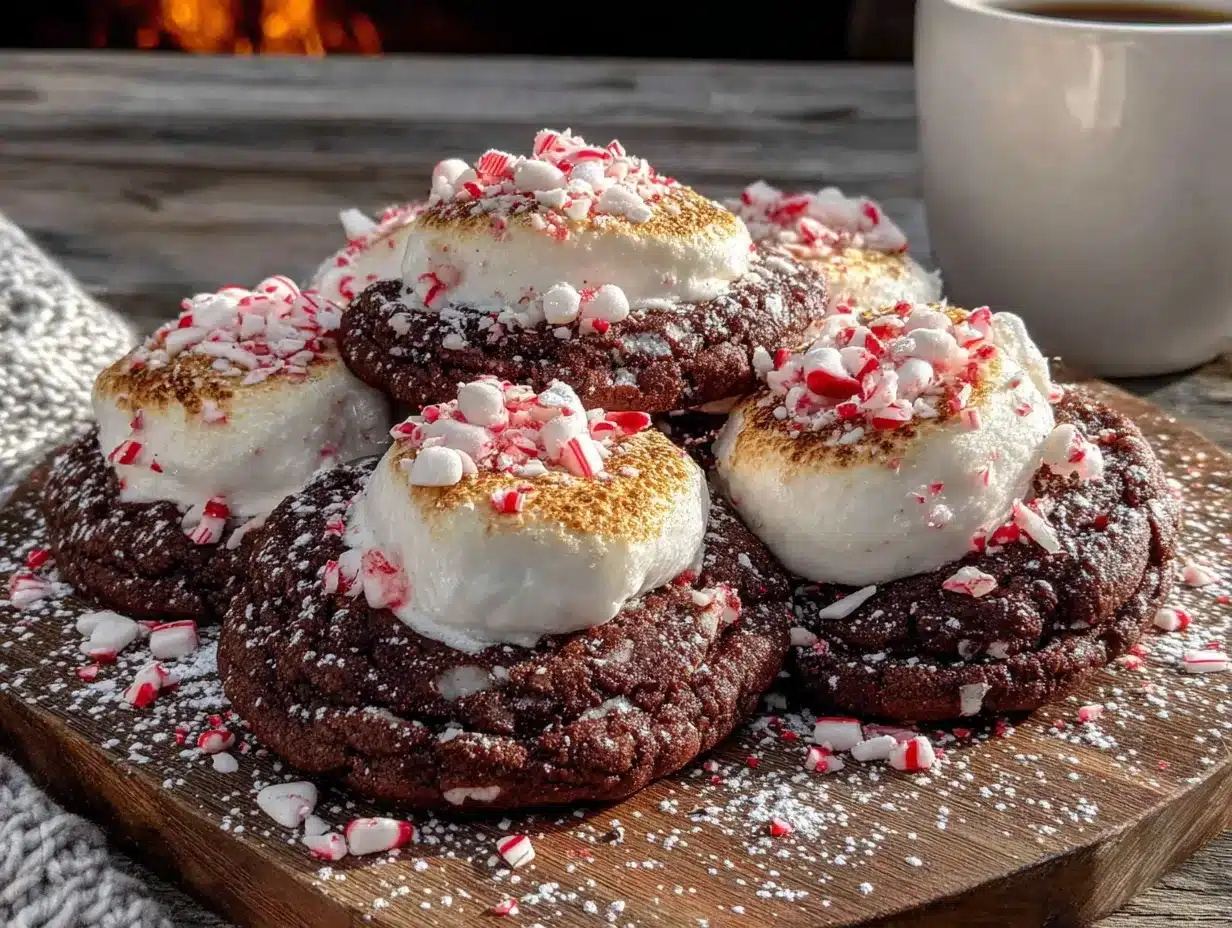
These Kid-Approved Peppermint Hot Chocolate Cookies are now a staple in our house. They’re soft, chewy, and taste exactly like a warm mug of hot cocoa but in cookie form. The peppermint is subtle, not overpowering, which is probably why my daughter finally came around. I’ve made them for school bake sales, holiday parties, and random Tuesday afternoons when we need a little joy. They always disappear fast. And honestly, I keep making them because watching someone take that first bite and realize how good they are never gets old.
Why You’ll Love This Recipe
These cookies are the kind of recipe that makes you look like a hero without actually doing much work. Let me break down why they work so well for real families.
- Quick & Easy: From start to finish, these take about 25 minutes. Mix the dough in one bowl, scoop, and bake. No chilling required, which is huge when you have impatient little helpers.
- Simple Ingredients: You probably already have butter, sugar, eggs, and flour in your pantry. The special touches—cocoa powder, peppermint extract, and crushed candy canes—are easy to find at any grocery store this time of year.
- Perfect for Family Baking: This is a great recipe to make with kids. They can help measure, mix, and crush the candy canes (in a bag with a rolling pin—so fun). It’s messy but worth it.
- Crowd-Pleaser: I’ve served these to picky eaters, adults who “don’t do sweets,” and everyone in between. They always get devoured. The flavor is familiar enough to feel comforting but special enough to feel like a treat.
- Unbelievably Delicious: The texture is soft and slightly fudgy in the middle, with crispy edges. The peppermint adds a cool freshness that balances the rich chocolate. It’s like drinking hot cocoa and eating a cookie at the same time.
What makes these different from other chocolate cookies? It’s the combination of melted butter and a touch of cornstarch that gives them that bakery-style chewiness. Plus, the crushed candy canes melt slightly into the dough, creating little pockets of minty sweetness. This isn’t just another chocolate cookie recipe—it’s your new holiday go-to.
What Ingredients You Will Need
This recipe uses straightforward ingredients, but each one plays an important role in getting that perfect texture and flavor. Here’s what you’ll need and why it matters.
- Unsalted butter, melted (1 cup / 2 sticks): Melting the butter instead of creaming it gives these cookies a denser, chewier texture. It also makes the dough come together faster. I use unsalted so I can control the salt level.
- Granulated sugar (1 cup / 200g): Sugar does more than sweeten—it helps with spreading and creates those crispy edges. Don’t reduce it or the texture will change.
- Light brown sugar, packed (½ cup / 100g): Brown sugar adds moisture and a hint of molasses flavor. It makes the cookies softer and gives them a deeper, almost caramel-like taste.
- Large eggs (2, room temperature): Eggs bind everything together and add structure. Room temperature eggs mix in more evenly, which helps the dough come together smoothly.
- Vanilla extract (2 teaspoons): Vanilla rounds out the chocolate flavor and adds warmth. I prefer pure vanilla extract, but imitation works fine too.
- Peppermint extract (½ teaspoon): This is the star of the show. A little goes a long way. Too much and it tastes like toothpaste. Stick to ½ teaspoon for a subtle, natural mint flavor.
- All-purpose flour (2 cups / 250g): Standard all-purpose flour gives the cookies structure without making them tough. Spoon and level your flour—don’t scoop directly from the bag or you’ll end up with dry cookies.
- Unsweetened cocoa powder (½ cup / 50g): I use Dutch-process cocoa for a richer, darker chocolate flavor. Natural cocoa works too, but the cookies will be slightly lighter in color and a bit more bitter.
- Baking soda (1 teaspoon): Baking soda helps the cookies spread and gives them a slightly chewy texture. Make sure it’s fresh—old baking soda won’t work as well.
- Cornstarch (1 tablespoon): This is my secret ingredient. Cornstarch softens the protein in the flour, resulting in a more tender, delicate crumb. It’s what makes these cookies feel bakery-quality.
- Salt (½ teaspoon): Salt enhances the chocolate flavor and balances the sweetness. Don’t skip it—it makes a big difference.
- Semi-sweet chocolate chips (1 cup / 175g): I prefer semi-sweet because it’s not too sugary and pairs well with the peppermint. Dark chocolate chips are great too if you want a more intense chocolate hit.
- Crushed candy canes or peppermint candies (½ cup / about 6 candy canes): These add the signature peppermint crunch. Crush them yourself—pre-crushed ones are often too fine. I put them in a zip-top bag and smash them with a rolling pin. It’s a great job for kids.
- Optional: Extra crushed candy canes for topping (2 tablespoons): Sprinkling a few pieces on top right after baking makes the cookies look festive and adds a little extra crunch.
For the best results, use a good quality cocoa powder like Ghirardelli or Hershey’s Special Dark. And if you can find organic candy canes, they tend to have a more natural peppermint flavor that isn’t as harsh.
Equipment Needed
You don’t need fancy tools to make these cookies. Here’s what you’ll need and a few budget-friendly alternatives.
- Large mixing bowl: Any big bowl works. I use a glass mixing bowl because it’s easy to see when everything is combined.
- Whisk: For mixing the wet ingredients. A fork works in a pinch.
- Rubber spatula or wooden spoon: For folding in the dry ingredients and chocolate chips. A sturdy spoon is fine.
- Measuring cups and spoons: Accurate measurements matter in baking. If you don’t have a full set, use a kitchen scale for the most precise results.
- Baking sheets (2): Standard rimmed baking sheets work perfectly. If you only have one, let it cool completely between batches.
- Parchment paper or silicone baking mat: Parchment paper prevents sticking and makes cleanup easy. Silicone mats are reusable and work great too. Avoid greasing the pan directly—it can cause the cookies to spread too much.
- Cookie scoop (about 2 tablespoons): A scoop ensures uniform cookies that bake evenly. If you don’t have one, use two spoons to drop dough balls.
- Cooling rack: Letting cookies cool on a rack prevents soggy bottoms. A wire cooling rack is ideal, but you can use a clean countertop or a cutting board.
- Zip-top bag and rolling pin: For crushing candy canes. A hammer or the bottom of a heavy pan also works. Just be careful not to pulverize them into dust—you want small chunks.
I’ve made these cookies with a cheap baking sheet from the dollar store and they still turned out great. Don’t stress about having professional equipment. The key is to work with what you have and have fun.
Preparation Method
Let’s get baking. This recipe comes together quickly, so read through all the steps before you start. Preheat your oven to 350°F (175°C) and line two baking sheets with parchment paper.
- Crush the candy canes. Place the candy canes in a zip-top bag and seal it. Use a rolling pin or heavy pan to crush them into small pieces. You want a mix of fine crumbs and small chunks—not powder. Set aside 2 tablespoons for topping if desired.
- Melt the butter. In a microwave-safe bowl, melt the butter in 30-second increments until just melted. Don’t let it boil. Let it cool for 2-3 minutes—you don’t want it hot enough to cook the eggs.
- Mix the wet ingredients. In a large mixing bowl, whisk together the melted butter, granulated sugar, and brown sugar until smooth. It should look like a thick paste. Add the eggs, vanilla extract, and peppermint extract. Whisk vigorously for about 30 seconds until the mixture is pale and slightly thickened. This step is important—it helps create that crackly top.
- Combine the dry ingredients. In a separate bowl, whisk together the flour, cocoa powder, baking soda, cornstarch, and salt. Make sure there are no lumps. The cocoa powder can be stubborn, so really whisk it well.
- Add dry to wet. Pour the dry ingredients into the wet mixture. Use a rubber spatula to fold everything together until just combined. Don’t overmix—stop as soon as you no longer see streaks of flour. Overmixing develops gluten and makes cookies tough.
- Fold in the mix-ins. Gently fold in the chocolate chips and crushed candy canes (save the 2 tablespoons for topping). The dough will be thick and slightly sticky. That’s perfect.
- Scoop the dough. Using a 2-tablespoon cookie scoop or two spoons, drop rounded balls of dough onto the prepared baking sheets, spacing them about 2 inches apart. They will spread, so give them room. For larger cookies, use a 3-tablespoon scoop and bake 1-2 minutes longer.
- Bake. Bake one sheet at a time on the middle rack for 9-11 minutes. The cookies should look puffed and slightly cracked on top, with set edges but soft centers. They will look underdone—that’s good. Overbaking dries them out.
- Cool on the pan. Let the cookies rest on the baking sheet for 5 minutes. During this time, they’ll continue to set. If you try to move them immediately, they’ll fall apart. After 5 minutes, sprinkle the reserved crushed candy canes on top if desired.
- Transfer to a rack. Use a spatula to transfer the cookies to a cooling rack. Let them cool completely before storing. The smell in your kitchen right now is absolutely incredible.
One thing I learned the hard way: don’t skip the 5-minute rest on the pan. I was impatient once and tried to move them after 2 minutes. Total disaster. They crumbled everywhere. Patience pays off with these cookies.
Cooking Tips & Techniques
After making these cookies more times than I can count, I’ve picked up a few tricks that make a real difference. Here’s what I wish someone had told me.
Don’t overmix the dough. This is the most common mistake. Once you add the flour, mix only until it disappears. Overmixing develops gluten, which makes cookies tough and cakey instead of tender and chewy. I’ve ruined batches by getting distracted and mixing too long. Learn from my mistakes.
Use a cookie scoop for uniform size. Cookies that are the same size bake evenly. If some are bigger than others, you’ll end up with burned edges and raw centers. A scoop costs a few dollars and makes the process faster. Worth it.
Chill the dough if your kitchen is warm. If your butter was really melty or your kitchen is hot, the dough might be too soft. Pop it in the fridge for 15-20 minutes before scooping. This prevents excessive spreading and gives you thicker cookies.
Rotate the pan halfway through. Every oven has hot spots. Halfway through baking, rotate the pan 180 degrees. This ensures even browning and prevents one side from burning while the other is still pale.
Test for doneness visually, not by time. Ovens vary. Start checking at 9 minutes. The cookies are done when the edges are set and the tops look slightly cracked but the centers still look soft and underdone. They will continue to cook on the hot pan after you pull them out.
Let them cool completely before storing. Warm cookies release moisture, which can make them soggy in a container. Let them cool fully on a rack before transferring to an airtight container. They stay soft for up to 5 days this way.
I once forgot the cornstarch entirely. The cookies were still good, but they were flatter and less tender. That tablespoon really makes a difference. Don’t skip it.
Variations & Adaptations
One of the best things about this recipe is how easy it is to adapt. Here are a few ways to make it your own.
Double Chocolate Mint Cookies: Swap ¼ cup of the chocolate chips for white chocolate chips. The contrast between dark chocolate and white chocolate with the peppermint is amazing. I tried this for a friend who loves chocolate mint ice cream and she said it was even better.
Gluten-Free Version: Replace the all-purpose flour with a 1:1 gluten-free baking flour blend that contains xanthan gum. I’ve used Bob’s Red Mill and King Arthur brands with great results. The texture is slightly more delicate but still delicious. Add an extra tablespoon of cornstarch to help with tenderness.
Dairy-Free Option: Use vegan butter sticks (like Earth Balance) and dairy-free chocolate chips. The cookies will spread a bit more, so chill the dough for 20 minutes before baking. I’ve made these for a dairy-free friend and she couldn’t tell the difference.
Peppermint Hot Chocolate Cookie Sandwiches: Bake the cookies slightly smaller (1 tablespoon of dough each). Let them cool completely, then sandwich two cookies with a dollop of whipped cream or vanilla buttercream. Roll the edges in extra crushed candy canes. These are showstoppers for holiday parties.
Less Sweet Version: Reduce the granulated sugar to ¾ cup and use dark chocolate chips with at least 70% cocoa. The bitterness of the dark chocolate balances the sweetness. My husband prefers this version—he says it tastes more grown-up.
Add Marshmallows: Gently fold in ½ cup of mini marshmallows along with the chocolate chips. They melt into gooey pockets. Just know that the marshmallows can make the cookies stickier, so use parchment paper and let them cool completely before moving.
I once made a batch with crushed starlight mints instead of candy canes. It worked fine, but the mint flavor was stronger and more artificial. Stick with real peppermint candy canes if you can.
Serving & Storage Suggestions
These cookies are best served slightly warm, when the chocolate chips are still melty and the peppermint aroma fills the air. Let them cool for 5 minutes on the pan, then transfer to a plate and serve immediately. They’re also fantastic at room temperature with a cold glass of milk.
For a festive presentation, arrange the cookies on a platter and dust with powdered sugar (it looks like snow). Add a few whole candy canes on the side for decoration. These make wonderful gifts—stack them in a tin lined with parchment paper and tie with a ribbon.
Storage: Store cooled cookies in an airtight container at room temperature for up to 5 days. Place a slice of plain bread in the container—it absorbs excess moisture and keeps the cookies soft. Replace the bread every 2 days. I learned this trick from my grandmother and it works like magic.
Freezing: These cookies freeze beautifully. Place cooled cookies in a single layer on a baking sheet and freeze for 1 hour. Transfer to a freezer-safe bag or container. They’ll keep for up to 3 months. Thaw at room temperature for 15 minutes or warm in a 300°F oven for 5 minutes.
Freezing the dough: Scoop the dough into balls and place on a parchment-lined baking sheet. Freeze until solid, then transfer to a freezer bag. Bake from frozen, adding 2-3 minutes to the baking time. This is perfect for when you want fresh cookies on a whim.
The flavors actually develop and deepen after a day or two. The peppermint mellows and blends with the chocolate, creating a more balanced taste. So don’t worry if they’re not all eaten immediately—they’ll be even better tomorrow.
Nutritional Information & Benefits
These cookies are a treat, so I won’t pretend they’re health food. But here’s the honest breakdown. One cookie (based on 30 cookies per batch) contains approximately 160 calories, 8g fat, 22g carbohydrates, 1g fiber, 14g sugar, and 2g protein.
The cocoa powder is actually good for you—it’s rich in antioxidants called flavanols that support heart health. Dark chocolate has more of these than milk chocolate, so using semi-sweet chips gives you a small boost. Peppermint is known for aiding digestion and can help soothe an upset stomach. So there’s that.
If you’re watching your sugar intake, you can reduce the granulated sugar to ¾ cup without major texture changes. The brown sugar adds moisture, so I wouldn’t reduce that. For a lower-fat option, replace half the butter with unsweetened applesauce. The cookies will be more cake-like but still tasty.
These cookies contain gluten, dairy, and eggs. For allergen-friendly versions, see the variations section above. I always label my cookies clearly when bringing them to shared events, just in case.
Honestly, these cookies are about joy, not nutrition. They’re for holiday mornings, after-school treats, and moments when you need a little sweetness. And that’s okay.
Conclusion
These Kid-Approved Peppermint Hot Chocolate Cookies have become a December tradition in my house. They’re the cookie that converted my peppermint-hating daughter, the one that disappears fastest at bake sales, and the recipe I’m most proud to share. They’re simple enough for a Tuesday but special enough for Christmas morning.
I hope you make them your own. Add extra chocolate chips, crush the candy canes finer or chunkier, or double the batch because trust me, one batch won’t be enough. The beauty of this recipe is that it’s forgiving and flexible. You really can’t mess it up.
I’d love to hear how they turn out for you. Did your kids love them? Did you try a variation that worked? Drop a comment below and let me know. And if you snap a photo, tag me—I love seeing your baking adventures. Happy baking, friends. May your kitchen smell like chocolate and peppermint and your heart feel full.
Frequently Asked Questions
Can I use peppermint oil instead of extract?
Yes, but be very careful. Peppermint oil is much more concentrated than extract. Start with just ⅛ teaspoon and taste the dough. Too much will make the cookies taste like mouthwash. I prefer extract for this reason—it’s harder to overdo it.
Why did my cookies spread too much?
This usually happens if the butter was too warm or the dough wasn’t chilled. Next time, melt the butter and let it cool for 5 minutes before mixing. If your kitchen is warm, chill the dough for 20 minutes before baking. Also, make sure your baking soda is fresh—old baking soda loses its power.
Can I make these cookies ahead of time?
Absolutely. You can bake them up to 5 days ahead and store them in an airtight container. Or freeze the baked cookies for up to 3 months. For the freshest cookies, scoop the dough into balls, freeze them on a baking sheet, then transfer to a freezer bag. Bake from frozen whenever you want fresh cookies.
Can I skip the crushed candy canes?
You can, but they won’t be peppermint hot chocolate cookies anymore—they’ll just be chocolate cookies. If you want the peppermint flavor without the crunch, add an extra ¼ teaspoon of peppermint extract and skip the candy canes. The cookies will be softer and smoother.
How do I crush candy canes without making a mess?
Put the candy canes in a sturdy zip-top bag and place the bag on a cutting board. Fold a kitchen towel over the bag (this muffles the sound and prevents punctures). Use a rolling pin or the bottom of a heavy pan to gently crush them. Don’t go crazy—you want small pieces, not dust. I let my kids do this step and they love it.
PrintEasy Peppermint Hot Chocolate Cookies Kids Love

These soft, chewy cookies taste exactly like a warm mug of hot cocoa but in cookie form. With a subtle peppermint flavor and crushed candy cane crunch, they’re a kid-approved holiday treat that comes together in just 25 minutes with no chilling required.
- Prep Time: 15 minutes
- Cook Time: 10 minutes
- Total Time: 25 minutes
- Yield: 30 cookies 1x
- Category: Dessert
- Cuisine: American
Ingredients
- 1 cup (2 sticks) unsalted butter, melted
- 1 cup (200g) granulated sugar
- ½ cup (100g) packed light brown sugar
- 2 large eggs, room temperature
- 2 teaspoons vanilla extract
- ½ teaspoon peppermint extract
- 2 cups (250g) all-purpose flour
- ½ cup (50g) unsweetened cocoa powder (Dutch-process preferred)
- 1 teaspoon baking soda
- 1 tablespoon cornstarch
- ½ teaspoon salt
- 1 cup (175g) semi-sweet chocolate chips
- ½ cup crushed candy canes or peppermint candies (about 6 candy canes)
- 2 tablespoons extra crushed candy canes for topping (optional)
Instructions
- Preheat oven to 350°F (175°C). Line two baking sheets with parchment paper.
- Crush the candy canes: Place candy canes in a zip-top bag and crush with a rolling pin into small pieces (mix of crumbs and chunks). Set aside 2 tablespoons for topping if desired.
- Melt the butter in a microwave-safe bowl in 30-second increments until just melted. Let cool for 2-3 minutes.
- In a large mixing bowl, whisk together melted butter, granulated sugar, and brown sugar until smooth and paste-like.
- Add eggs, vanilla extract, and peppermint extract. Whisk vigorously for about 30 seconds until pale and slightly thickened.
- In a separate bowl, whisk together flour, cocoa powder, baking soda, cornstarch, and salt until no lumps remain.
- Pour dry ingredients into wet mixture. Fold with a rubber spatula until just combined (do not overmix).
- Gently fold in chocolate chips and crushed candy canes (reserving 2 tablespoons for topping). Dough will be thick and slightly sticky.
- Using a 2-tablespoon cookie scoop or two spoons, drop rounded balls of dough onto prepared baking sheets, spacing 2 inches apart.
- Bake one sheet at a time on the middle rack for 9-11 minutes. Cookies should look puffed and slightly cracked on top with set edges but soft centers.
- Let cookies rest on the baking sheet for 5 minutes. Sprinkle reserved crushed candy canes on top if desired.
- Transfer to a cooling rack and let cool completely before storing.
Notes
Don’t overmix the dough once flour is added to avoid tough cookies. If your kitchen is warm, chill the dough for 15-20 minutes before baking to prevent excessive spreading. The 5-minute rest on the pan after baking is essential for the cookies to set properly. For best results, use fresh baking soda and Dutch-process cocoa powder. Cookies stay soft for up to 5 days in an airtight container with a slice of bread to absorb moisture.
Nutrition
- Serving Size: 1 cookie
- Calories: 160
- Sugar: 14
- Sodium: 95
- Fat: 8
- Saturated Fat: 5
- Carbohydrates: 22
- Fiber: 1
- Protein: 2
Keywords: peppermint hot chocolate cookies, Christmas cookies, holiday baking, kid-friendly cookies, chocolate peppermint cookies, easy cookie recipe, no chill cookies