Love this? Save it for later!
Share the inspiration with your friends
I was standing in the baking aisle of my local grocery store last October when a kid walked past me holding one of those plastic pumpkin pails—you know, the cheap orange ones that come with Halloween costumes. And just like that, the smell of cheap orange plastic mixed with the faint scent of cinnamon from the bulk spice section hit me, and suddenly I was seven years old at my Aunt Margie’s kitchen table. She wasn’t my real aunt—she was my mom’s best friend from work—but she made the best cookies I have ever tasted. She’d pull out this dented metal cookie tin, and inside would be these soft, pillowy cookies dusted with cinnamon sugar that practically melted on your tongue. I’d sit there swinging my legs, trying to be patient while she poured me a glass of milk, and honestly, I’d eat four before my mom even noticed.
I haven’t seen Aunt Margie in fifteen years. She moved to Arizona after her husband retired, and we lost touch somewhere between my high school graduation and my first real job. But every fall, when the air gets that crisp edge and the pumpkin spice everything starts showing up, I think about those cookies. The thing is, I could never get her exact recipe—she was one of those bakers who cooked by feel, you know? A pinch of this, a handful of that. So I spent the last three autumns trying to recreate them. I burned through probably six batches before I got it right.
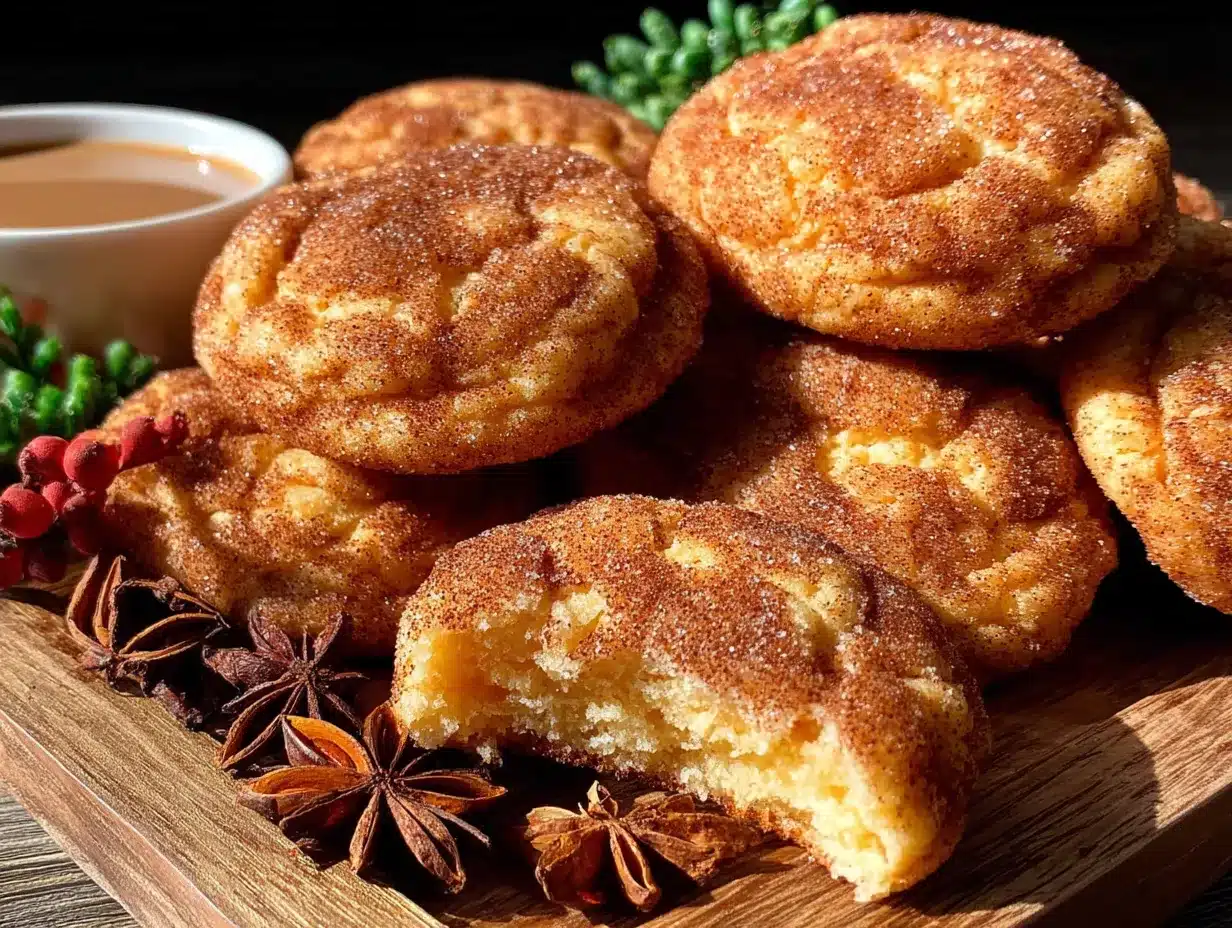
These Soft Baked Pumpkin Snickerdoodle Cookies are the result of all that trial and error. They’ve got that same tender, almost cloud-like texture I remember from Aunt Margie’s kitchen, but with a warm pumpkin twist that makes them perfect for fall. Maybe you’ve been there—chasing a taste from your past that you can’t quite pin down. Well, I’m telling you, this is it. These cookies are the reason I keep baking every single October.
Why You’ll Love This Recipe
Let me be straight with you—I’ve tested this recipe more times than I care to admit. Like, I had neighbors knocking on my door asking if everything was okay because I kept dropping off cookies. But you know what? It was worth every single batch. Here is why these Soft Baked Pumpkin Snickerdoodle Cookies are going to become your new fall obsession:
- Quick & Easy: From start to finish, these come together in about 30 minutes. No chilling required, no complicated techniques. Perfect for those random Tuesday cravings or when you need a last-minute treat for a potluck.
- Simple Ingredients: You probably already have most of these in your pantry. Pumpkin puree, butter, sugar, flour, cinnamon—nothing fancy, nothing hard to find. I promise you won’t need to visit three different stores.
- Perfect for Fall Gatherings: These cookies scream autumn. They’re great for Halloween parties, Thanksgiving dessert tables, or just cozying up on the couch with a hot cider. Everyone always asks for the recipe.
- Crowd-Pleaser: Kids love them, adults love them, even my picky neighbor who “doesn’t like pumpkin” ate three before admitting they were good. They’re just that kind of cookie.
- Unbelievably Delicious: The texture is what gets me every time. Soft, almost tender in the middle with that signature cinnamon-sugar crunch on the outside. It’s like a snickerdoodle and a pumpkin pie had a baby, and that baby is perfect.
What makes this version different from all the other pumpkin snickerdoodle recipes out there? It’s the technique. I use a combination of melted butter and pumpkin puree that creates this incredibly soft, moist crumb without making the cookies cakey or greasy. Plus, I add a touch of cream of tartar—yes, the old-school snickerdoodle trick—to give them that subtle tang that balances the sweetness. This isn’t just another pumpkin cookie. This is the one that makes you close your eyes after the first bite.
What Ingredients You Will Need
This recipe uses simple, wholesome ingredients that work together to create something truly special. Most of these are pantry staples, which means you can whip up a batch whenever the mood strikes. Here is everything you will need:
For the Cookies
- 1/2 cup unsalted butter, melted (I use Land O’Lakes—it has a consistent butterfat content that gives reliable results)
- 3/4 cup granulated sugar (adds sweetness and helps create that soft texture)
- 1/2 cup pumpkin puree (not pumpkin pie filling—make sure it’s 100% pure pumpkin. Libby’s is my go-to brand)
- 1 large egg, room temperature (cold eggs can seize the batter, so let it sit out for 15 minutes)
- 1 teaspoon vanilla extract (pure vanilla extract makes a difference, but imitation works in a pinch)
- 2 cups all-purpose flour (spoon and level it—don’t scoop directly from the bag or you’ll end up with dry cookies)
- 1 teaspoon cream of tartar (this is the secret to that classic snickerdoodle tang—don’t skip it)
- 1/2 teaspoon baking soda (helps the cookies puff up just enough)
- 1/2 teaspoon salt (balances the sweetness and enhances the pumpkin flavor)
- 1 teaspoon ground cinnamon (warm and aromatic—the backbone of any good snickerdoodle)
- 1/2 teaspoon ground nutmeg (adds that cozy fall depth)
- 1/4 teaspoon ground ginger (a little kick that wakes up the whole cookie)
- 1/4 teaspoon ground cloves (optional, but I love the complexity it adds)
For the Cinnamon Sugar Coating
- 1/4 cup granulated sugar
- 1 tablespoon ground cinnamon (I prefer Saigon cinnamon for its bold, sweet flavor)
Ingredient Selection Tips: When choosing pumpkin puree, look for cans that are firm and not dented. The puree should have a deep orange color and smell sweet, not metallic. If you’re using fresh pumpkin, make sure to drain it well after pureeing—excess moisture is the enemy of soft cookies. For the spices, try to use ones that are less than six months old for the best flavor. Spices lose their potency over time, and trust me, stale cinnamon makes a sad cookie.
Substitution Guidance: If you’re dairy-free, you can substitute the butter with a good quality vegan butter stick (not the spreadable kind in a tub). For a gluten-free version, use a 1:1 gluten-free flour blend that contains xanthan gum. I’ve tested this with Bob’s Red Mill 1:1 and it works beautifully. You can also swap the pumpkin puree with sweet potato puree for a slightly different but equally delicious cookie.
Equipment Needed
You don’t need a fancy kitchen to make these cookies. Here is what you will need:
- Large mixing bowl (any bowl will do, but a wide one makes mixing easier)
- Medium mixing bowl (for the dry ingredients)
- Whisk (for combining the dry ingredients evenly)
- Wooden spoon or rubber spatula (for mixing the dough—don’t overmix with an electric mixer)
- Measuring cups and spoons (accurate measurements matter in baking)
- Baking sheets (I prefer light-colored aluminum sheets for even browning)
- Parchment paper or silicone baking mat (prevents sticking and makes cleanup a breeze)
- Cookie scoop (a 1.5-tablespoon scoop gives consistent cookies—mine is from OXO and it’s worth every penny)
- Wire cooling rack (essential for cooling cookies properly so they don’t get soggy)
Budget-Friendly Options: If you don’t have a cookie scoop, use two spoons to portion the dough. No parchment paper? Grease the baking sheet lightly with butter or cooking spray. A silicone mat is a nice investment if you bake often, but parchment paper works just as well. And if you don’t have a wire cooling rack, you can cool the cookies on a clean kitchen towel—just flip them after a few minutes to prevent sticking.
Preparation Method
Alright, let’s get to the good part. Follow these steps carefully, and you will have the softest, most delicious pumpkin snickerdoodles you have ever tasted.
- Preheat your oven to 350°F (175°C). Line two baking sheets with parchment paper or silicone mats. This is important—don’t skip the parchment unless you want to spend twenty minutes scraping cookie bits off your pans.
- Melt the butter. In a large microwave-safe bowl, melt the 1/2 cup of butter in 20-second intervals until just melted. You don’t want it hot—just liquid. Let it cool for a minute while you gather the other ingredients. I once used butter that was too hot and it partially cooked the egg when I added it. Not a disaster, but the texture wasn’t quite right.
- Mix the wet ingredients. Add the 3/4 cup granulated sugar to the melted butter and whisk until combined. It will look a little grainy—that’s fine. Add the pumpkin puree, egg, and vanilla extract. Whisk until everything is smooth and well incorporated. The mixture should be a beautiful pale orange color. If it looks separated, keep whisking—it will come together.
- Combine the dry ingredients. In a separate medium bowl, whisk together the flour, cream of tartar, baking soda, salt, cinnamon, nutmeg, ginger, and cloves. Whisking ensures the spices and leavening agents are evenly distributed. Nobody wants a cookie with a pocket of baking soda—trust me on this one.
- Add dry ingredients to wet ingredients. Pour the dry mixture into the wet mixture and stir with a wooden spoon or rubber spatula until just combined. Stop as soon as you don’t see any more streaks of flour. Overmixing at this stage will develop gluten and make your cookies tough. We want soft, tender cookies, so be gentle. The dough will be soft and slightly sticky—that’s exactly what you want.
- Make the cinnamon sugar coating. In a small bowl, stir together the 1/4 cup granulated sugar and 1 tablespoon ground cinnamon. Set aside.
- Shape the cookies. Using a cookie scoop or two spoons, portion out rounded tablespoons of dough. Roll each portion between your palms to form a smooth ball. The dough will be soft, so work quickly and don’t worry if they’re not perfect. Drop each ball into the cinnamon sugar mixture and roll to coat completely. Place on the prepared baking sheets, spacing them about 2 inches apart. They spread a little, so give them room to breathe.
- Bake. Bake for 10-12 minutes, or until the edges are set and the tops look slightly cracked. The centers will look soft and puffy—that’s good! Don’t wait for them to look fully done because they’ll continue baking on the hot pan. I usually check at 10 minutes and go from there. For softer cookies, aim for 10 minutes. For slightly firmer cookies, go to 12.
- Cool. Let the cookies cool on the baking sheet for 5 minutes. This is crucial—they need this time to set up. After 5 minutes, transfer them to a wire cooling rack to cool completely. If you try to move them too soon, they’ll fall apart. I learned this the hard way when I got impatient and ended up with a plate of cookie crumbles.
Sensory Cues: When the cookies are done, your kitchen will smell like a fall candle factory exploded. The edges should be lightly golden, and the tops will have a delicate cracked surface. If you gently touch the center, it should spring back slightly—like a memory foam pillow. The cinnamon sugar coating will be fragrant and slightly crunchy against the soft interior.
Cooking Tips & Techniques
After making these cookies approximately seventeen thousand times (okay, maybe twenty), I’ve picked up a few tricks that make a real difference. Here are my best tips:
Don’t overmix the dough. This is the number one mistake I see. When you add the flour, stir just until it disappears. A few streaks are fine. Overmixing develops gluten, and gluten makes cookies tough. Think of it like this—you want a gentle hug, not a wrestling match.
Measure your flour correctly. Spoon the flour into your measuring cup and level it off with a knife. Scooping directly from the bag packs the flour down and you can end up with 20% more flour than you need. That extra flour will suck the moisture right out of your cookies and leave you with dry, crumbly disappointments.
Use room temperature ingredients. Cold egg can seize the butter and create a lumpy batter. Cold pumpkin puree can do the same. Take everything out of the fridge about 20 minutes before you start baking. If you forget, place the egg in a bowl of warm water for 5 minutes and microwave the pumpkin puree for 15 seconds.
Chill the dough if it’s too sticky. Sometimes, depending on the humidity or your specific pumpkin puree, the dough can be too soft to roll. If that happens, pop the bowl in the fridge for 15-20 minutes. It will firm up nicely and be much easier to handle. I’ve had to do this on humid summer days when my kitchen felt like a swamp.
Rotate your baking sheets halfway through. Ovens have hot spots, and rotating the pans halfway through baking ensures even cooking. I once forgot to do this and ended up with half a batch of perfectly baked cookies and half a batch of overdone ones. Lesson learned.
Let them cool properly. I know it’s tempting to eat one right out of the oven, but these cookies need that 5-minute rest on the baking sheet. During this time, they finish setting up and develop that perfect soft texture. If you move them too soon, they’ll fall apart. If you leave them too long, they might stick. Five minutes is the sweet spot.
Variations & Adaptations
One of the best things about this recipe is how versatile it is. Here are some ways to make it your own:
Pumpkin Chocolate Chip Snickerdoodles: Add 1/2 cup of semi-sweet chocolate chips to the dough along with the dry ingredients. The chocolate pairs beautifully with the pumpkin and spices. I tried this on a whim one night when I was craving something sweet, and now it’s my husband’s favorite version.
Vegan Pumpkin Snickerdoodles: Substitute the butter with vegan butter (I like Earth Balance), replace the egg with a flax egg (1 tablespoon ground flaxseed mixed with 3 tablespoons water, let sit for 5 minutes), and use a dairy-free milk alternative if needed. The texture will be slightly different—a bit more cakey—but still delicious.
Gluten-Free Version: Use a 1:1 gluten-free flour blend that contains xanthan gum. I’ve tested this with King Arthur Measure for Measure and Bob’s Red Mill 1:1, and both work well. The cookies might spread a little more, so chill the dough for 20 minutes before baking.
Pumpkin Cream Cheese Frosting: For an extra indulgent treat, whip up a quick cream cheese frosting (4 oz cream cheese, 2 tablespoons butter, 1 cup powdered sugar, 1/2 teaspoon vanilla) and spread it on top of cooled cookies. These become more of a dessert than a cookie, but sometimes you need that.
Spice It Up: Play with the spice blend. Add a pinch of cardamom for a floral note, or swap the ginger for allspice. I once made a batch with a teaspoon of pumpkin pie spice instead of the individual spices, and it turned out great. Use what you have.
Cookie Sandwiches: Make smaller cookies (1 teaspoon of dough each) and sandwich them with a layer of vanilla buttercream or cream cheese frosting. Perfect for parties or when you want to impress someone.
Serving & Storage Suggestions
These cookies are best served slightly warm, when the centers are still soft and the cinnamon sugar coating is at its most fragrant. I like to serve them with a cold glass of milk or a hot cup of chai tea. They also pair beautifully with a pumpkin spice latte—because when in Rome, right?
For a dessert board, arrange the cookies on a platter with apple slices, caramel dip, and a few cinnamon sticks for decoration. They look gorgeous on a rustic wooden board or a simple white plate. The orange and brown colors are so autumnal that they practically scream “fall vibes.”
Storage: Store these cookies in an airtight container at room temperature for up to 5 days. Place a slice of bread in the container to help keep them soft—the bread absorbs excess air and releases moisture. Replace the bread slice every other day. I know it sounds weird, but it works like magic.
Freezing Instructions: These cookies freeze beautifully. You can freeze the baked cookies in a single layer on a baking sheet, then transfer them to a freezer-safe bag for up to 3 months. Thaw at room temperature for about 30 minutes before serving. Alternatively, you can freeze the unbaked dough balls (coated in cinnamon sugar) on a baking sheet, then transfer to a freezer bag. Bake from frozen, adding 2-3 minutes to the baking time.
Reheating: To revive day-old cookies, pop them in a 300°F oven for 3-4 minutes. They’ll come out tasting almost fresh from the oven. You can also microwave them for 10-15 seconds, but be careful—they can get too soft and fall apart.
Flavor Development: Here’s something interesting—these cookies actually taste better the next day. The spices have time to meld and mellow, and the texture becomes even more tender. So if you can resist eating them all on day one, you’re in for a treat on day two.
Nutritional Information & Benefits
Let’s be real—these are cookies, not health food. But they do have some redeeming qualities. Here is the approximate nutritional breakdown per cookie (based on 24 cookies):
| Nutrient | Amount per Cookie |
|---|---|
| Calories | 135 |
| Total Fat | 6g |
| Saturated Fat | 3.5g |
| Cholesterol | 20mg |
| Sodium | 85mg |
| Total Carbohydrates | 19g |
| Dietary Fiber | 1g |
| Sugars | 11g |
| Protein | 2g |
| Vitamin A | 35% DV |
Health Benefits: Pumpkin is packed with vitamin A (beta-carotene), which supports eye health and immune function. It’s also a good source of fiber, which helps with digestion. The cinnamon in the coating has anti-inflammatory properties and may help regulate blood sugar. So while these aren’t a superfood, they’re definitely a more nutritious option than your average cookie.
Dietary Considerations: This recipe contains gluten, dairy, and eggs. For gluten-free and vegan adaptations, see the variations section above. The cookies are nut-free as written, making them safe for school lunches and parties.
My Perspective: I believe in balance. These cookies are a treat, and there’s nothing wrong with treats in moderation. I’d rather have one really good, homemade cookie made with real ingredients than a box of processed ones. Plus, the act of baking itself is good for the soul. So go ahead, enjoy a couple, and don’t feel guilty about it.
Conclusion
These Soft Baked Pumpkin Snickerdoodle Cookies are everything I love about fall baking. They’re warm, spiced, comforting, and just the right amount of sweet. The texture is that perfect balance of soft and chewy, with a cinnamon sugar coating that adds a little crunch. Every time I make them, I think about Aunt Margie and her dented cookie tin, and I smile.
But more than that, I think about all the new memories these cookies can create. Maybe you’ll make them for a Halloween party and watch your kids devour them. Maybe you’ll bring them to a Friendsgiving and become the hero of the dessert table. Or maybe you’ll just make them for yourself on a quiet Sunday afternoon, with a cup of coffee and a good book. However you choose to enjoy them, I hope they bring you as much joy as they’ve brought me.
I’d love to hear how yours turn out! Leave a comment below and let me know if you tried any variations, or tag me in your photos on social media. Did you add chocolate chips? Make them vegan? Bake them with your kids? I want to hear all about it. And if you have any questions, don’t hesitate to ask—I’m always here to help.
Happy baking, friends. May your cookies be soft, your kitchen smell amazing, and your fall be filled with all the warm, cozy things.
Frequently Asked Questions
Why are my pumpkin snickerdoodle cookies cakey?
Cakey cookies usually mean too much pumpkin puree or overmixing. Make sure you’re measuring the pumpkin accurately—1/2 cup is plenty. Also, mix the dough just until the flour disappears. Overmixing develops gluten and creates a cake-like texture.
Can I use pumpkin pie filling instead of pumpkin puree?
No, please don’t! Pumpkin pie filling has added sugar and spices, plus it’s usually thicker and more processed. It will throw off the sweetness and texture of the cookies. Stick with 100% pure pumpkin puree for the best results.
Why did my cookies spread too much?
Excessive spreading can happen if the butter was too warm, the dough wasn’t chilled, or there wasn’t enough flour. Try chilling the dough for 20 minutes before baking, and make sure you’re measuring your flour correctly by spooning and leveling it.
Can I make these cookies without cream of tartar?
You can substitute the cream of tartar with 1/2 teaspoon of lemon juice or white vinegar. The cream of tartar gives snickerdoodles their signature tang and helps with texture, but the acid in lemon juice or vinegar will serve a similar purpose. The cookies might be slightly less tangy, but they’ll still be delicious.
How do I know when the cookies are done baking?
Look for set edges and slightly cracked tops. The centers will look soft and puffy—that’s normal. They should spring back slightly when touched gently. If you wait until they look fully done, they’ll be overbaked. Remember, they continue cooking on the hot pan for 5 minutes after you take them out of the oven.
Pin This Recipe!
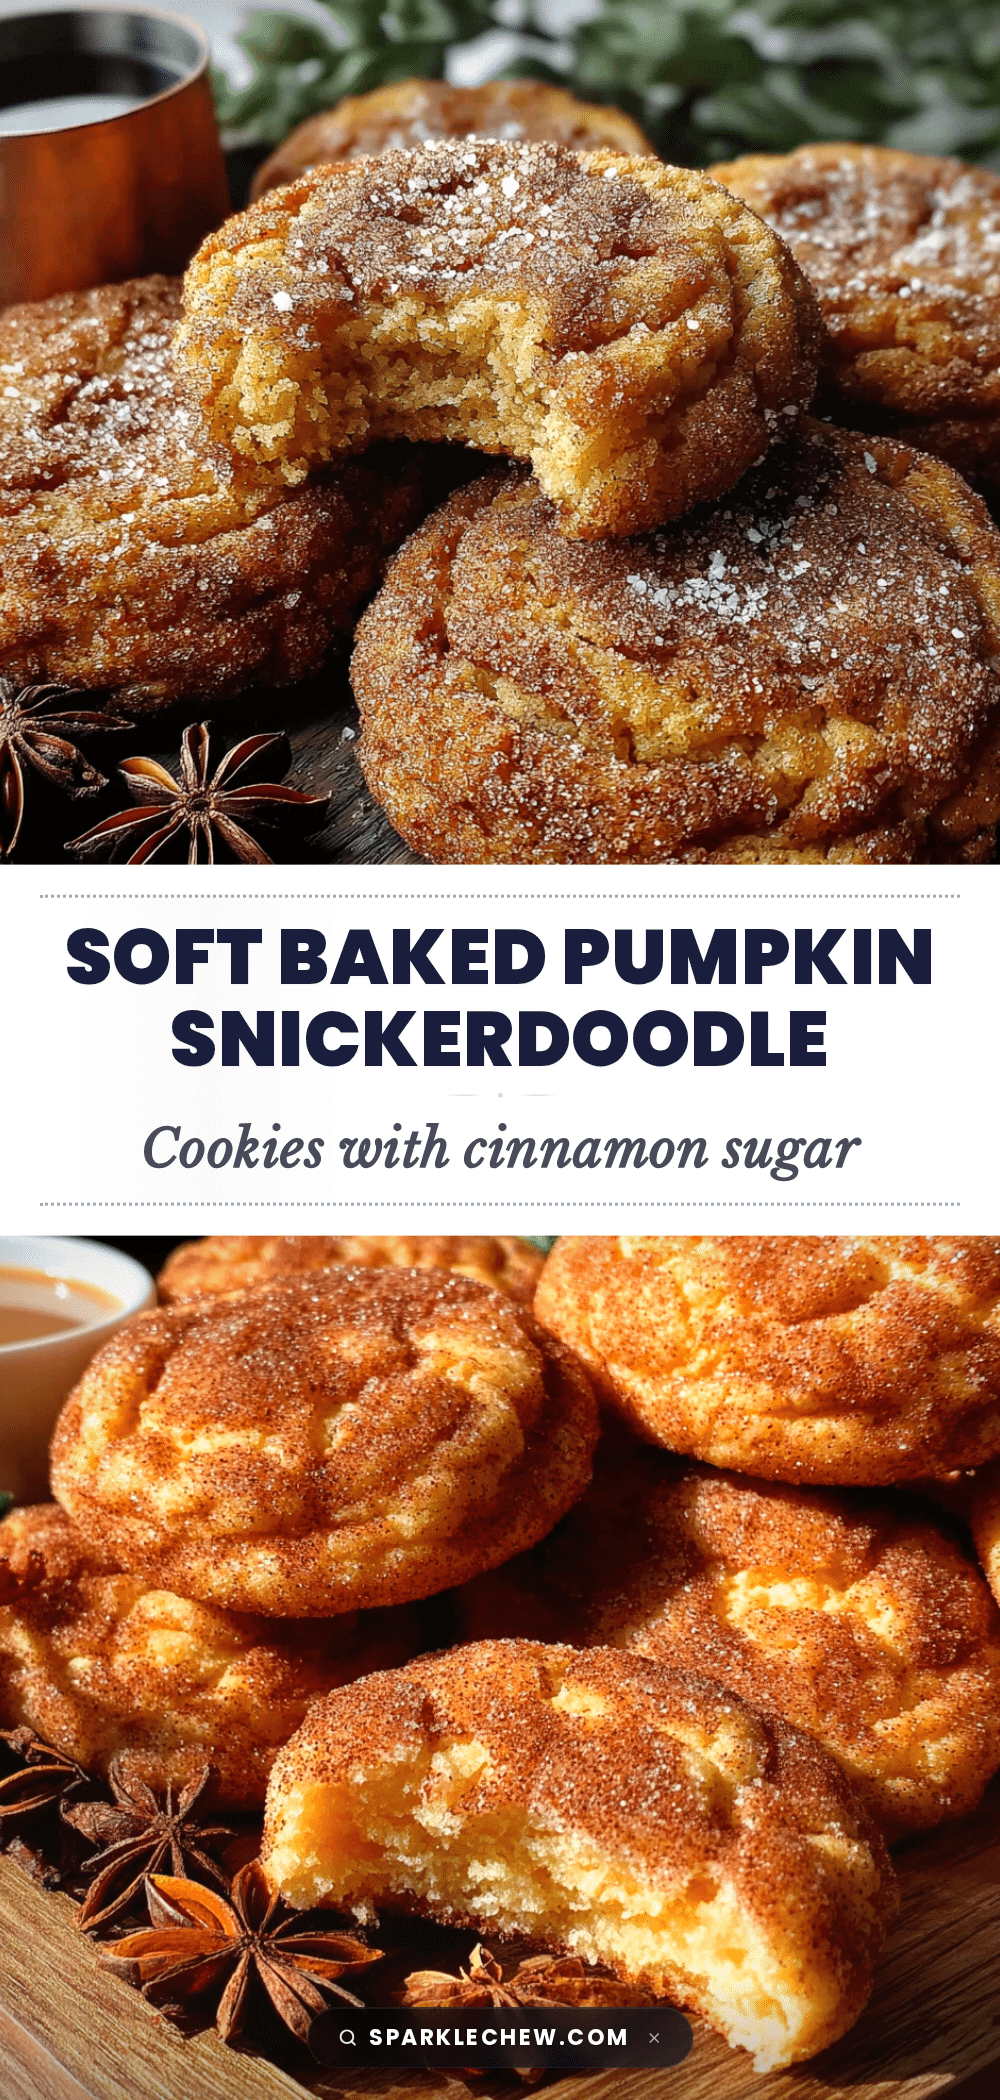
Easy Soft Baked Pumpkin Snickerdoodle Cookies Recipe
These Soft Baked Pumpkin Snickerdoodle Cookies are warm, spiced, and perfectly soft with a cinnamon sugar coating. They’re quick and easy to make, using simple ingredients, and are perfect for fall gatherings or cozy nights in.
- Prep Time: 15 minutes
- Cook Time: 12 minutes
- Total Time: 27 minutes
- Yield: 24 cookies 1x
- Category: Dessert
- Cuisine: American
Ingredients
- 1/2 cup unsalted butter, melted
- 3/4 cup granulated sugar
- 1/2 cup pumpkin puree (not pumpkin pie filling)
- 1 large egg, room temperature
- 1 teaspoon vanilla extract
- 2 cups all-purpose flour (spooned and leveled)
- 1 teaspoon cream of tartar
- 1/2 teaspoon baking soda
- 1/2 teaspoon salt
- 1 teaspoon ground cinnamon
- 1/2 teaspoon ground nutmeg
- 1/4 teaspoon ground ginger
- 1/4 teaspoon ground cloves (optional)
- 1/4 cup granulated sugar (for coating)
- 1 tablespoon ground cinnamon (for coating)
Instructions
- Preheat your oven to 350°F (175°C). Line two baking sheets with parchment paper or silicone mats.
- Melt the butter in a large microwave-safe bowl in 20-second intervals until just melted. Let it cool for a minute.
- Add the 3/4 cup granulated sugar to the melted butter and whisk until combined. Add the pumpkin puree, egg, and vanilla extract. Whisk until smooth and well incorporated.
- In a separate medium bowl, whisk together the flour, cream of tartar, baking soda, salt, cinnamon, nutmeg, ginger, and cloves.
- Pour the dry mixture into the wet mixture and stir with a wooden spoon or rubber spatula until just combined. Do not overmix.
- In a small bowl, stir together the 1/4 cup granulated sugar and 1 tablespoon ground cinnamon for the coating.
- Using a cookie scoop or two spoons, portion out rounded tablespoons of dough. Roll each portion into a smooth ball, then roll in the cinnamon sugar mixture to coat completely. Place on prepared baking sheets, spacing about 2 inches apart.
- Bake for 10-12 minutes, until edges are set and tops look slightly cracked. The centers will look soft and puffy.
- Let the cookies cool on the baking sheet for 5 minutes, then transfer to a wire cooling rack to cool completely.
Notes
For best results, use room temperature ingredients. If dough is too sticky, chill for 15-20 minutes. Rotate baking sheets halfway through baking for even cooking. Cookies taste even better the next day as flavors meld.
Nutrition
- Serving Size: 1 cookie
- Calories: 135
- Sugar: 11
- Sodium: 85
- Fat: 6
- Saturated Fat: 3.5
- Carbohydrates: 19
- Fiber: 1
- Protein: 2
Keywords: pumpkin snickerdoodle, soft baked cookies, fall cookies, pumpkin cookies, snickerdoodle recipe, easy cookie recipe


