Love this? Save it for later!
Share the inspiration with your friends
I wasn’t supposed to be in my neighbor’s kitchen that Tuesday. I’d stopped by to grab a package that got delivered to her house by mistake, and I was already running late for a work call. But then I smelled it. Not toast, not a sandwich exactly, but something warm and toasty with a hint of sweetness that stopped me mid-step in her hallway. “What is that?” I asked, probably sounding a little ridiculous. She just shrugged and pointed to a plate on the counter. “Just a snack for the kids,” she said, like it was nothing. But these weren’t just any snacks. They were these perfect little sealed pockets of sunflower butter and jam, golden and crisp on the outside, and honestly? They looked like the most satisfying thing I’d seen all week.
She called them “uncrustables,” which I later learned was a whole thing, but hers were homemade and somehow better. She wasn’t trying to impress me—she had a toddler tugging at her pant leg and a sink full of dishes. She was just feeding her family. But the way she pressed those edges with a fork, the way she didn’t even measure the sunflower butter, the casual confidence of it all? That stuck with me. I stood there for maybe five minutes, watching her make a second batch, and I kept thinking, “I need to learn how to do this.” Maybe you’ve been there too—watching someone make something so simple look so effortlessly perfect that you just know you’ll be thinking about it for days.
So I went home, dug out my bread, and tried to recreate what I saw. The first batch was a mess, honestly. The sunflower butter leaked out, the bread got soggy, and I burned the edges. But I kept at it, because there was something about those little sandwiches that felt like a secret weapon for busy mornings. Now, after a dozen trials and a few happy accidents, I’ve got it down. This easy sunflower butter and jelly uncrustable-style sandwich recipe is the one I keep coming back to, and I think you will too. It’s quick, it’s forgiving, and it tastes like the kind of thing you’d pay way too much for at a fancy café.
Why You’ll Love This Recipe
Let me tell you why this easy sunflower butter and jelly uncrustable-style sandwich recipe has become a staple in my kitchen. I’ve tested it on tired mornings, rushed afternoons, and even as a late-night snack, and it delivers every single time.
- Quick & Easy: We’re talking five minutes from start to finish. No joke. This is faster than deciding what to order for takeout.
- Simple Ingredients: You probably have everything in your pantry right now. Bread, sunflower butter, jelly, and butter. That’s it.
- Perfect for Busy Mornings: If you’ve got kids, a job, or just a general lack of patience in the morning, this recipe is your new best friend.
- Crowd-Pleaser: I’ve served these to picky toddlers, hangry teenagers, and grown adults who claimed they “don’t do sandwiches.” They all disappeared.
- Unbelievably Delicious: The contrast between the crispy, buttery exterior and the soft, gooey interior is next-level comfort food.
What makes this recipe different from the store-bought version? First, you control the ingredients—no preservatives, no weird additives, just real food. Second, the texture is better. The bread gets perfectly crisp on the outside while staying soft inside, which is something the frozen version just can’t replicate. And third, you get to customize it exactly how you like it. More jelly? Less sunflower butter? A sprinkle of cinnamon? It’s all up to you.
This isn’t just another sandwich recipe. It’s the kind that makes you close your eyes after the first bite because it’s so unexpectedly satisfying. It’s comfort food reimagined—simpler, faster, but with the same soul-soothing satisfaction. Perfect for impressing your kids without stress, or turning a chaotic morning into something a little more manageable.
What Ingredients You Will Need
This recipe uses simple, pantry-friendly ingredients to deliver big flavor without any fuss. Here’s what you’ll need to make these easy sunflower butter and jelly uncrustable-style sandwiches:
For the Sandwiches
- 8 slices of bread (white, whole wheat, or brioche; I prefer a soft sandwich bread for best results)
- 1/2 cup sunflower butter (creamy or crunchy; I recommend SunButter brand for a smooth, nut-free option)
- 1/4 cup jelly or jam (strawberry, grape, or raspberry work beautifully; use a seedless variety for smoother texture)
- 2 tablespoons unsalted butter, softened (for brushing the outside of the sandwiches)
Optional Add-Ins
- 1/2 teaspoon cinnamon (sprinkle on the inside for a warm, spiced note)
- 1 tablespoon chia seeds (adds a little crunch and extra fiber)
- 1/4 cup dark chocolate chips (because why not? Sunflower butter and chocolate are a dream team)
A few notes on ingredient selection: Look for a sunflower butter that’s well-stirred and not too oily on top. If it’s separated, give it a good mix before using. For the jelly, I prefer a fruit-forward jam with visible fruit pieces, but a smooth jelly works great if you want a more uniform texture. If you’re using frozen bread, let it thaw completely first—frozen bread doesn’t seal as well and can get soggy.
Substitution guidance: For a gluten-free option, use your favorite gluten-free bread. Coconut oil can replace butter for a dairy-free version, though the texture will be slightly less crispy. And if you’re avoiding sugar, look for a no-sugar-added jam or make your own chia seed jam at home.
Equipment Needed
You don’t need fancy equipment for this recipe, which is part of the beauty. Here’s what you’ll need:
- Rolling pin (or a clean wine bottle in a pinch—I’ve used both)
- Round cookie cutter or biscuit cutter (about 3-4 inches in diameter; a mason jar lid works too)
- Fork (for crimping the edges)
- Non-stick skillet or griddle (cast iron works beautifully if you have one)
- Spatula (thin and flexible for flipping)
- Pastry brush (for buttering the bread; a paper towel works in a pinch)
I’ve made these with a fancy sandwich sealer before, and honestly? The fork method works just as well. The key is to press firmly so the edges seal completely. If you’re using a cookie cutter, make sure it’s sharp enough to cut cleanly through the bread without squishing it. My first attempt with a dull cutter was a disaster—the bread just kind of tore instead of cutting cleanly. Learn from my mistakes!
Preparation Method
Let’s get to the good part. Follow these steps carefully, and you’ll have perfect easy sunflower butter and jelly uncrustable-style sandwiches in about five minutes.
- Prepare your bread. Take 8 slices of bread and use a rolling pin to flatten each one slightly. You want them about 1/4 inch thick. This helps the bread seal better and creates a more even texture. Don’t press too hard—you’re not trying to make crackers, just flatten the air pockets a bit.
- Cut out rounds. Using your round cutter, press down firmly on each slice of bread to create a circle. Discard the crusts (or save them for breadcrumbs—I’m not wasteful, but I’m also not judging if you eat them as a snack). You should have 8 rounds total.
- Spread the sunflower butter. Take 4 of the bread rounds and spread about 1 tablespoon of sunflower butter on each one. Leave a small border around the edge, about 1/4 inch, so the seal holds. Don’t go too thick—the filling will spread as you cook it.
- Add the jelly. Spoon about 1/2 tablespoon of jelly on top of the sunflower butter on each round. Spread it gently, keeping it away from the edges. If you’re adding any optional extras like cinnamon or chocolate chips, sprinkle them on now.
- Top with remaining bread. Place the remaining 4 bread rounds on top of the filled ones. Press down gently around the edges to start sealing them together.
- Crimp the edges. Here’s where the magic happens. Take a fork and press down firmly around the edges of each sandwich, creating a sealed border. Go all the way around, making sure the fork marks overlap. This creates a tight seal that keeps the filling inside during cooking. I usually go around twice to make sure it’s secure.
- Brush with butter. Using your pastry brush, lightly coat both sides of each sandwich with softened butter. Don’t soak them—just a thin, even layer. This is what gives them that golden, crispy exterior.
- Heat your skillet. Place your non-stick skillet over medium heat. Let it warm up for about 30 seconds. You want it hot enough to sizzle when the bread hits the pan, but not so hot that the butter burns.
- Cook the sandwiches. Place 2-3 sandwiches in the skillet, leaving space between them. Cook for 2-3 minutes on the first side, until golden brown and crispy. Flip carefully with a spatula and cook for another 2-3 minutes on the second side. The bread should be golden and the filling should be warm and slightly gooey.
- Cool slightly before serving. Transfer the cooked sandwiches to a plate and let them rest for 1-2 minutes. The filling will be very hot right out of the pan, and this short rest helps it set slightly so you don’t burn your mouth. Trust me on this one—I’ve learned the hard way.
A few sensory cues to watch for: When the bread hits the pan, you should hear a gentle sizzle. As it cooks, the edges will start to turn golden. The smell of toasting bread and warm sunflower butter will fill your kitchen—that’s how you know it’s working. When you flip the sandwich, the cooked side should be an even golden brown with darker spots where the butter caramelized.
Cooking Tips & Techniques
After making these easy sunflower butter and jelly uncrustable-style sandwiches more times than I can count, I’ve picked up a few tricks that make all the difference.
Don’t overfill. I know it’s tempting to pile on the sunflower butter and jelly, but less is more here. Too much filling will leak out during cooking, and you’ll end up with a mess in your pan. Stick to about 1 tablespoon of sunflower butter and 1/2 tablespoon of jelly per sandwich. You want a thin, even layer.
Seal it tight. The fork crimping is crucial. If the edges aren’t sealed properly, the filling will escape and burn in the pan. I learned this the hard way when I got distracted and only did a half-hearted crimp. The sunflower butter oozed out everywhere and started smoking. Not my finest moment.
Watch your heat. Medium heat is your friend. If the pan is too hot, the bread will burn before the filling warms through. Too low, and the bread will dry out before it gets crispy. I usually start at medium and adjust down slightly if the butter starts browning too quickly.
Use room-temperature butter. Cold butter doesn’t spread evenly on the bread. Let it sit out for 10-15 minutes before you start, or microwave it for 5 seconds. You want it spreadable, not melted.
Make a batch and freeze. These sandwiches freeze beautifully. Make a double batch, let them cool completely, then wrap each one individually in plastic wrap and store in a freezer bag. To reheat, just pop them in a toaster or skillet for a few minutes. They’re perfect for grab-and-go breakfasts.
Variations & Adaptations
One of the best things about this recipe is how easy it is to adapt. Here are some variations I’ve tried and loved:
Nut-Free and Allergy-Friendly
This recipe is naturally nut-free if you use sunflower butter, making it perfect for school lunches or nut-free households. For a seed-free option, try using WowButter (made from soy) or even cookie butter for a sweet twist. Just keep an eye on the texture—some alternatives are runnier than sunflower butter.
Seasonal Fruit Swaps
In summer, I love using fresh berry jam or even mashed fresh strawberries mixed with a little honey. In fall, try apple butter or pumpkin butter for a cozy seasonal flavor. The key is to keep the consistency thick enough that it doesn’t leak out during cooking.
Savory Version
Believe it or not, this technique works for savory fillings too. Try sunflower butter with a drizzle of honey and a sprinkle of sea salt for a sweet-salty combo. Or go full savory with sunflower butter, sliced banana, and a pinch of cinnamon. It’s weirdly good.
Chocolate Lover’s Twist
Swap the jelly for chocolate-hazelnut spread (if nuts are okay) or use sunflower butter with a handful of dark chocolate chips. The chocolate melts into the sunflower butter, creating a rich, gooey filling that’s dangerously addictive.
Vegan Option
Use a plant-based butter or coconut oil for brushing the bread. Most breads are vegan, but check the label to be sure. The texture will be slightly different, but still delicious.
Serving & Storage Suggestions
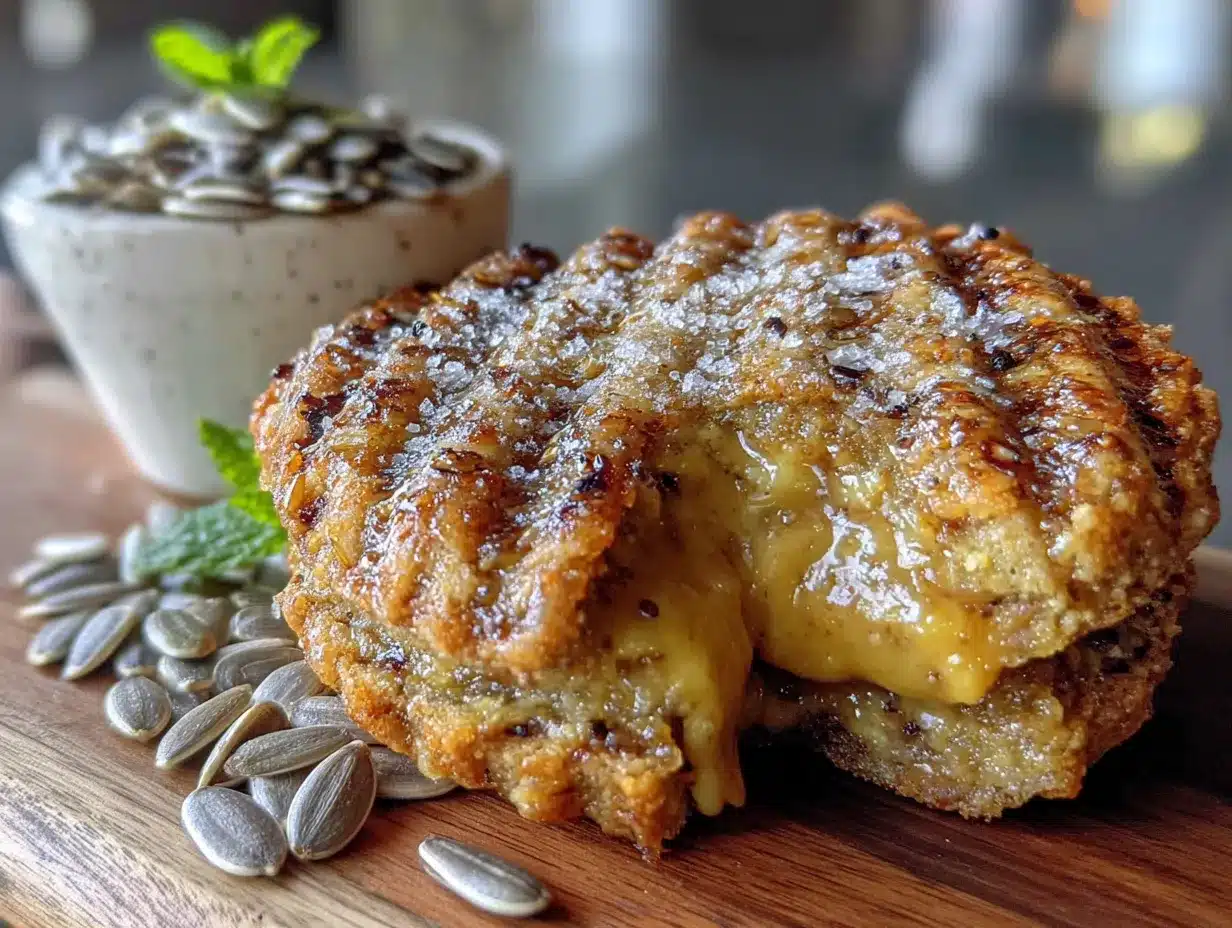
These easy sunflower butter and jelly uncrustable-style sandwiches are best served warm, right off the skillet. The contrast between the crispy exterior and the soft, gooey interior is at its peak within the first few minutes. I like to cut them in half to show off the beautiful swirl of sunflower butter and jelly inside.
For a complete meal, serve them with a side of fresh fruit, a handful of baby carrots, or a small cup of yogurt. They’re also perfect on their own as a quick breakfast or snack. If you’re packing them for lunch, let them cool completely before wrapping—otherwise, the steam will make the bread soggy.
Storage: Store leftover sandwiches in an airtight container in the refrigerator for up to 3 days. To reheat, place them in a toaster oven or skillet over medium heat for 2-3 minutes per side. You can also microwave them for 15-20 seconds, but they won’t be as crispy. For longer storage, freeze them as described above—they’ll keep for up to 3 months.
One thing I’ve noticed: the flavors actually meld together a bit after a day in the fridge. The sunflower butter and jelly sort of marry together, creating a more uniform taste. It’s different from fresh, but still really good. My kids actually prefer them cold, straight from the fridge. To each their own!
Nutritional Information & Benefits
Here’s an approximate nutritional breakdown per sandwich (using white bread, sunflower butter, and strawberry jam):
| Nutrient | Amount per Serving |
|---|---|
| Calories | 280 |
| Total Fat | 14g |
| Saturated Fat | 3g |
| Carbohydrates | 32g |
| Fiber | 3g |
| Sugar | 12g |
| Protein | 8g |
| Sodium | 220mg |
Sunflower butter is a nutritional powerhouse. It’s rich in vitamin E, magnesium, and healthy fats that support heart health. It’s also a great source of plant-based protein, making these sandwiches more satisfying than your average PB&J. The bread provides complex carbohydrates for steady energy, and the jelly adds a touch of quick energy from natural fruit sugars.
This recipe is naturally nut-free, making it safe for school lunches and nut-free environments. It’s also vegetarian and can easily be made vegan. If you’re watching your sugar intake, opt for a no-sugar-added jam or make your own with fresh fruit and chia seeds.
Conclusion
This easy sunflower butter and jelly uncrustable-style sandwich recipe has honestly changed my morning routine. It’s one of those rare recipes that’s both incredibly simple and genuinely satisfying. No complicated techniques, no hard-to-find ingredients, just good food that comes together in minutes. I love that I can make a batch on Sunday and have breakfast sorted for the whole week. I love that my kids actually eat them without complaint. And I love that they remind me of that Tuesday morning in my neighbor’s kitchen, watching her make something so ordinary feel so special.
I hope you give these a try and make them your own. Maybe you’ll add a sprinkle of cinnamon, swap the jelly for honey, or experiment with different fillings. That’s the beauty of this recipe—it’s a template, not a rulebook. So go ahead, get creative, and let me know how it goes. I’d love to hear about your favorite variations in the comments below. Happy cooking!
Frequently Asked Questions
Can I use a different nut or seed butter?
Absolutely! Almond butter, cashew butter, or even tahini work great. Just keep in mind that different butters have different consistencies—some are runnier than others. If your butter is very oily, stir it well before using and consider using slightly less to prevent leakage.
Can I make these in an air fryer?
Yes! Preheat your air fryer to 350°F (175°C). Place the sandwiches in a single layer and cook for 4-5 minutes, flipping halfway through. They won’t be as evenly golden as stovetop versions, but they’ll still be delicious and crispy.
How do I prevent the filling from leaking out?
The key is a good seal. Make sure you leave a border around the edges when spreading the filling, and crimp firmly with a fork. Also, don’t overfill—less really is more here. If you’re still having trouble, try chilling the assembled sandwiches for 10 minutes before cooking to firm up the filling.
Can I use gluten-free bread?
Yes, but gluten-free bread can be more delicate and prone to breaking. Look for a sturdy gluten-free bread, and consider toasting it lightly before assembling to help it hold together. You may also need to press the edges more gently to avoid tearing.
How long do these keep in the fridge?
Cooked sandwiches will keep in an airtight container in the refrigerator for up to 3 days. They’re best reheated in a toaster or skillet to restore crispiness. Uncooked, assembled sandwiches can be frozen for up to 3 months—just cook them straight from frozen, adding a minute or two to the cooking time.
Pin This Recipe!
Easy Sunflower Butter & Jelly Uncrustables: 5-Min Recipe

These homemade sunflower butter and jelly uncrustable-style sandwiches are quick, easy, and perfect for busy mornings. With a crispy, buttery exterior and a soft, gooey interior, they’re a crowd-pleasing twist on a classic comfort food.
- Prep Time: 5 minutes
- Cook Time: 6 minutes
- Total Time: 11 minutes
- Yield: 4 servings 1x
- Category: Snack
- Cuisine: American
Ingredients
- 8 slices of bread (white, whole wheat, or brioche)
- 1/2 cup sunflower butter (creamy or crunchy)
- 1/4 cup jelly or jam (strawberry, grape, or raspberry)
- 2 tablespoons unsalted butter, softened
- 1/2 teaspoon cinnamon (optional)
- 1 tablespoon chia seeds (optional)
- 1/4 cup dark chocolate chips (optional)
Instructions
- Prepare your bread: Take 8 slices of bread and use a rolling pin to flatten each one slightly to about 1/4 inch thick.
- Cut out rounds: Using a round cutter (3-4 inches in diameter), press down firmly on each slice to create a circle. Discard the crusts.
- Spread the sunflower butter: Take 4 of the bread rounds and spread about 1 tablespoon of sunflower butter on each, leaving a 1/4-inch border around the edge.
- Add the jelly: Spoon about 1/2 tablespoon of jelly on top of the sunflower butter on each round. Spread gently, keeping it away from the edges. Add optional extras if desired.
- Top with remaining bread: Place the remaining 4 bread rounds on top of the filled ones. Press down gently around the edges to start sealing.
- Crimp the edges: Use a fork to press down firmly around the edges of each sandwich, creating a sealed border. Go all the way around, overlapping the fork marks.
- Brush with butter: Lightly coat both sides of each sandwich with softened butter using a pastry brush.
- Heat your skillet: Place a non-stick skillet over medium heat and let it warm up for about 30 seconds.
- Cook the sandwiches: Place 2-3 sandwiches in the skillet, leaving space between them. Cook for 2-3 minutes on the first side until golden brown and crispy. Flip carefully and cook for another 2-3 minutes on the second side.
- Cool slightly before serving: Transfer cooked sandwiches to a plate and let them rest for 1-2 minutes before serving.
Notes
For a vegan option, use plant-based butter or coconut oil. For gluten-free, use sturdy gluten-free bread. To freeze, let sandwiches cool completely, wrap individually in plastic wrap, and store in a freezer bag for up to 3 months. Reheat in a toaster or skillet.
Nutrition
- Serving Size: 1 sandwich
- Calories: 280
- Sugar: 12
- Sodium: 220
- Fat: 14
- Saturated Fat: 3
- Carbohydrates: 32
- Fiber: 3
- Protein: 8
Keywords: sunflower butter, jelly, uncrustables, sandwich, quick breakfast, nut-free, kid-friendly, easy recipe


