Love this? Save it for later!
Share the inspiration with your friends
My neighbor Carol wasn’t trying to impress anyone. I’d stopped by to borrow a lug wrench—my car had made that horrible grinding noise on the way home from the grocery store—and this deep, floral, almost wine-like smell hit me before I even got past her screen door. She was standing at her stove, stirring a dark purple pot that looked like something out of a medieval apothecary, wearing the same stained apron she’s had since I moved in. “Oh, this?” she said when I asked, waving her wooden spoon like it was nothing. “Just my winter gunk. Keeps the kids from getting everything.”
She poured the mixture into little silicone molds without even measuring, talking about her daughter’s soccer practice the whole time. Honestly, I was mesmerized. The way the liquid moved—thick and glossy, catching the afternoon light—made me forget why I’d even come over. She popped one out of the mold and handed it to me without missing a beat. “Taste it. It’s not candy, but it’s not medicine either.” She was right. It was chewy and tart-sweet with this warm honey finish that lingered. I stood in her kitchen eating three more while she found the lug wrench in her garage.
That night, I couldn’t stop thinking about those little purple gems. I mean, I make a lot of things from scratch—bread, yogurt, even my own granola—but homemade elderberry gummies with honey had never crossed my mind. They seemed like something you bought at a fancy health food store, not something you whipped up on a Tuesday afternoon. But Carol made it look so ridiculously simple that I felt almost foolish for not trying it sooner. Maybe you’ve been there—you watch someone do something effortlessly and you think, “Wait, that’s all it takes?”
I called her the next morning and made her walk me through it while I took notes on the back of an envelope. She laughed at me for writing everything down. “It’s not brain surgery,” she said. “It’s just juice, honey, and gelatin.” But I wanted to get it right. I wanted that same deep color, that perfect bouncy texture, that feeling of eating something that was actually good for me without tasting like a chore. So I made my first batch that weekend, and let me tell you—I’ve been making them every two weeks since. This is the recipe that came out of that phone call and about five slightly-too-firm batches. It’s Carol’s casual genius, translated into something you can make in your own kitchen.
Why You’ll Love This Recipe
These homemade elderberry gummies with honey are the kind of recipe that makes you feel like you’ve hacked the system. You get the immune-boosting power of elderberries—something I’ve researched pretty thoroughly after that first batch—wrapped in a chewy, satisfying little treat that actually tastes good. No weird aftertaste, no chalky texture, no forcing yourself to swallow something unpleasant. These are legitimately delicious.
- Quick & Easy: From start to finish, you’re looking at about 20 minutes of active work. The hardest part is waiting for them to set in the fridge. Perfect for a Sunday afternoon prep session.
- Simple Ingredients: You need exactly five things—dried elderberries, water, honey, gelatin, and lemon juice. That’s it. No weird supplements, no specialty powders, nothing you can’t find at a regular grocery store or online.
- Perfect for Cold Season: I start making these in September and don’t stop until March. They’re my go-to for school lunches, afternoon snacks, and those moments when you feel that little tickle in your throat and want to head it off.
- Crowd-Pleaser: My kids actually ask for these. My husband packs them in his lunch. I’ve given jars to friends and they’ve texted me for the recipe within a week. Even picky eaters seem to love them.
- Unbelievably Delicious: The honey and elderberry combo is honestly perfect. The elderberry gives this deep, almost berry-wine flavor, and the honey rounds it out with warmth. The lemon brightens everything up. It’s way more sophisticated than a gummy bear has any right to be.
What makes this recipe different from all the others I tried? It’s the ratio. I tested this about seven times before I got it right—too much gelatin and you’re chewing for five minutes, too little and they never set. This version hits that sweet spot where they’re firm enough to hold their shape but soft enough to be pleasant. Plus, I figured out that letting the elderberries simmer for exactly 30 minutes gets the most flavor and immune-boosting compounds out of them without making the syrup bitter. It’s a small detail, but it makes a big difference.
This isn’t just another health food recipe. It’s the kind that makes you feel good about what you’re eating—and actually look forward to it. I make these every single week during cold season, and I genuinely miss them when summer comes and I take a break. That’s how you know a recipe is a keeper.
What Ingredients You Will Need
This recipe uses simple, wholesome ingredients that work together to create something both functional and delicious. Most of these are pantry staples for anyone who does even a little bit of from-scratch cooking, and the ones that aren’t are easy to find online or at health food stores.
- Dried elderberries (¾ cup or about 85g): These are the star of the show. Look for organic dried elderberries from a reputable brand—I personally use Starwest Botanicals because their berries are consistently plump and aromatic. You can find them online or at natural food stores. Don’t use fresh elderberries for this recipe; they need to be cooked down to release their beneficial compounds and flavor.
- Water (3 cups or 710ml): Filtered water is best if you have it. Tap water with a strong chlorine taste can affect the final flavor, though honestly, I’ve used tap water in a pinch and it was fine.
- Raw honey (½ cup or 170g): This is where the magic happens. Raw, local honey is ideal—it has its own immune-supporting properties and adds a floral sweetness that pairs beautifully with the elderberries. I use honey from a farmer’s market near my house, but any good-quality raw honey will work. Don’t use the stuff in the plastic bear; it’s usually blended with corn syrup and won’t give you the same depth of flavor.
- Gelatin (½ cup or about 60g): Grass-fed beef gelatin is my preference. I use Vital Proteins brand because it dissolves cleanly and has no weird aftertaste. You can also use porcine gelatin if that’s what you have, but avoid flavored or sweetened gelatins—they’ll throw off the taste. This is not optional; the gummies won’t set without it.
- Fresh lemon juice (2 tablespoons or 30ml): This does two things—it brightens the flavor and helps preserve the gummies. Fresh is non-negotiable here; bottled lemon juice has a flat, metallic taste that you’ll definitely notice.
That’s the complete list. Five ingredients. I love recipes like this because there’s nowhere to hide—each ingredient has to earn its place. The elderberries bring the immune support and that deep, complex flavor. The honey adds sweetness and its own health benefits. The gelatin gives you that perfect chewy texture and adds protein. The lemon ties everything together. It’s simple, but it works.
If you’re looking for a gelatin-free version, this recipe won’t work as written—you’d need to use agar agar or another plant-based thickener, and the ratios would be completely different. I haven’t tested that version enough to share it with confidence, so I’ll stick with what I know works.
Equipment Needed
You don’t need much to make these homemade elderberry gummies with honey, which is part of why I make them so often. Here’s what you’ll need:
- Medium saucepan: Any 2-3 quart pot will do. I use my trusty stainless steel one because it heats evenly and doesn’t react with the acidic lemon juice.
- Fine-mesh strainer or cheesecloth: You need something to strain out the cooked elderberries. A fine-mesh strainer works great, but if you want a super clear gummy, line it with a couple layers of cheesecloth. I usually just use the strainer because I don’t mind a little sediment.
- Silicone gummy molds: These are worth the investment. I have a set of bear-shaped ones and a set of small rectangle ones. Silicone is essential because the gummies pop right out without sticking. You can find them cheap on Amazon or at craft stores.
- Liquid measuring cup with spout: Something with a pour spout makes filling the molds so much easier. I use a 2-cup Pyrex measuring cup.
- Whisk: For mixing the gelatin into the warm liquid. A fork works in a pinch, but a whisk is smoother and faster.
- Small bowl: For blooming the gelatin before you add it to the hot liquid.
- Dropper or small pipette: Optional, but helpful for getting the liquid into the tiny molds without making a mess. I got a set of food-grade pipettes for about $5 and they’ve been a game-changer.
If you don’t have silicone molds, you can pour the mixture into a small glass dish and cut it into squares once it’s set. It won’t look as cute, but it tastes exactly the same. I’ve done both and honestly, the squares are easier for packing in lunchboxes.
Preparation Method
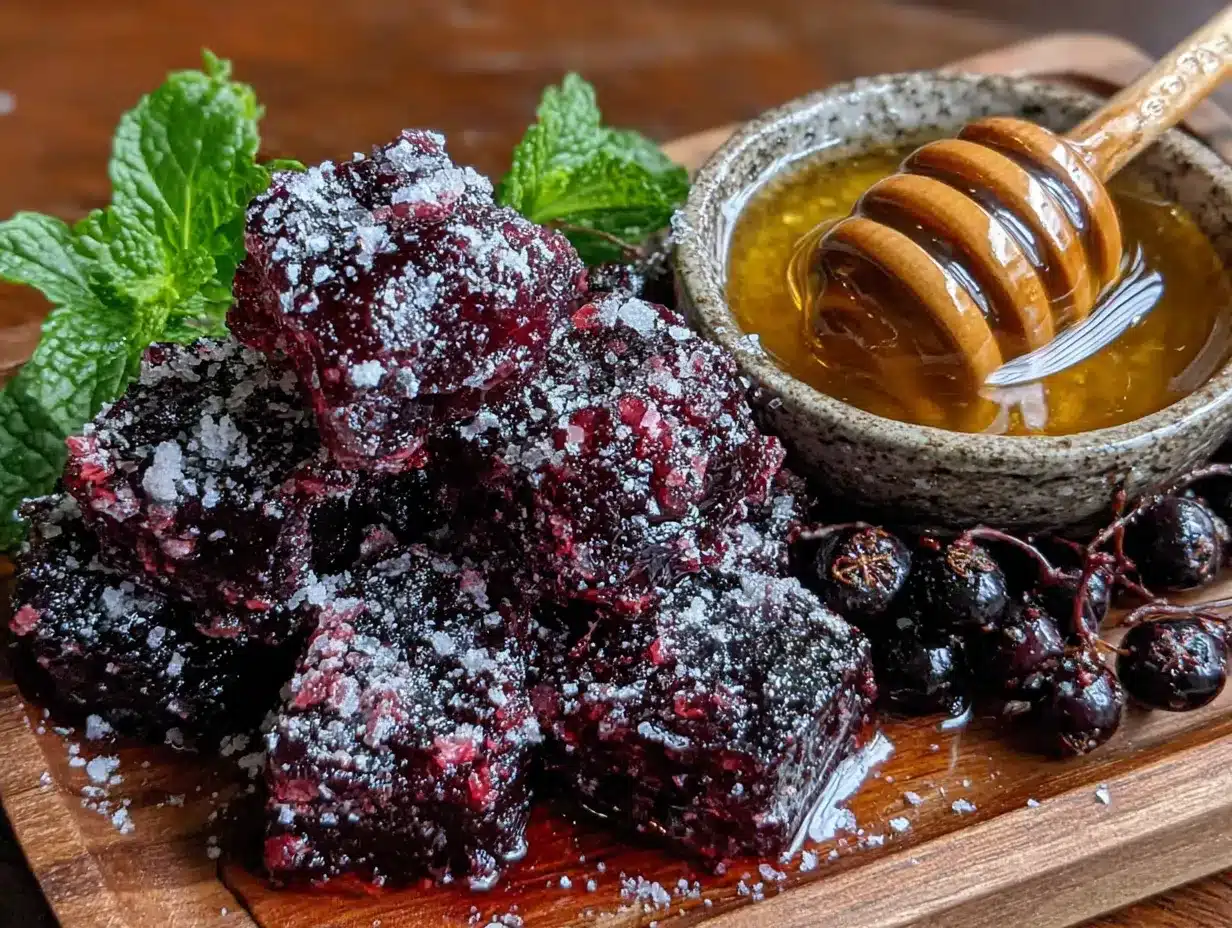
- Simmer the elderberries: Combine the dried elderberries and water in your medium saucepan. Bring to a boil over medium-high heat, then reduce to a simmer. Let it bubble away gently for 30 minutes. You’ll see the water turn a deep, almost black-purple color, and your kitchen will start smelling like a cross between a forest and a fancy tea shop. Don’t skip this time—30 minutes is the sweet spot for extracting both flavor and those beneficial compounds without making the syrup bitter.
- Strain the liquid: Place your fine-mesh strainer over a large bowl or liquid measuring cup. Pour the elderberry mixture through the strainer, pressing gently on the berries with the back of a spoon to get every last drop of that gorgeous purple liquid. You should end up with about 1½ cups of concentrated elderberry syrup. Discard the spent berries—they’ve given you everything they’ve got.
- Cool the syrup slightly: Let the strained syrup cool for about 5-10 minutes. You want it warm but not hot—around 130-140°F if you’re using a thermometer, or until you can hold your finger in it for a few seconds without discomfort. This is important because if the liquid is too hot, it can damage the beneficial enzymes in the raw honey.
- Bloom the gelatin: While the syrup is cooling, put the gelatin in a small bowl and add about ¼ cup of the warm elderberry syrup. Whisk it quickly until it’s smooth and there are no lumps. Let it sit for 2-3 minutes. This step, called blooming, ensures the gelatin dissolves evenly and gives you a smooth texture without any gritty bits.
- Combine everything: Pour the bloomed gelatin mixture into the remaining warm elderberry syrup and whisk until completely smooth. Add the raw honey and lemon juice, whisking again until everything is fully incorporated. The honey will take a moment to dissolve fully—just keep whisking. Taste the mixture at this point. It should be sweet-tart with a deep berry flavor. If it’s not sweet enough for your taste, you can add a little more honey.
- Fill the molds: Pour the mixture into your liquid measuring cup with a spout (or use a dropper for tiny molds). Carefully fill each cavity of your silicone molds. Don’t overfill—leave just a tiny bit of space at the top. If you get bubbles on the surface, pop them with a toothpick or the tip of a knife. Work relatively quickly here because the mixture will start to thicken as it cools.
- Set in the refrigerator: Place the filled molds on a flat surface in your refrigerator. Let them set for at least 4 hours, but overnight is better if you have the time. I know it’s tempting to check them after an hour, but trust me—they need the full time to develop that perfect bouncy texture.
- Pop them out: Once they’re fully set, gently push the gummies out of the molds. They should release easily from the silicone. If any are stubborn, you can flex the mold a little or pop them in the freezer for 5 minutes to firm them up further.
One thing I learned the hard way—don’t try to speed up the cooling process by putting the mixture in the freezer before it goes in the molds. I did that once and ended up with a half-set, lumpy mess. Patience is genuinely the secret to these gummies.
Cooking Tips & Techniques
I’ve made this recipe enough times to have a pretty good sense of what can go wrong and how to fix it. Here are the things I wish someone had told me before my first few attempts:
Don’t boil the honey. Raw honey has natural enzymes and beneficial properties that get destroyed by high heat. That’s why you let the elderberry syrup cool before adding it. I learned this one the hard way when I got impatient and dumped the honey into a boiling pot—the gummies were still tasty, but I felt like I’d wasted the good honey.
Temperature matters more than you think. If your elderberry syrup is too hot when you add the gelatin, you’ll get a weird, rubbery texture. If it’s too cold, the gelatin won’t dissolve properly and you’ll end up with grainy gummies. The sweet spot is warm enough that you can comfortably hold your finger in it for a few seconds—around 130°F. I don’t always use a thermometer, but I did for the first few batches until I got a feel for it.
Work in small batches. If you try to double this recipe, the mixture will cool too quickly while you’re filling the molds and you’ll end up with a half-set mess. I speak from experience. Make one batch at a time, and if you need more, just do two batches back to back. It takes the same amount of time and the results are much more consistent.
Pop those bubbles. When you pour the mixture into the molds, you’ll inevitably get some air bubbles on the surface. Take a toothpick or a skewer and pop them before you put the molds in the fridge. Otherwise, you’ll end up with gummies that have little holes in them. They’ll still taste fine, but they won’t look as pretty.
Storage is key. These gummies need to stay refrigerated. They’ll last about 2-3 weeks in an airtight container in the fridge. If you leave them out at room temperature, they’ll get soft and sticky within a few hours. I keep mine in a little glass jar in the fridge door so I don’t forget about them.
Variations & Adaptations
One of the best things about this recipe is how easy it is to customize. I’ve tried quite a few variations over the years, and here are my favorites:
Spiced Elderberry Gummies: Add a cinnamon stick, a few cloves, and a slice of fresh ginger to the pot while the elderberries are simmering. It adds this warming, cozy flavor that’s perfect for winter. Strain everything out along with the berries. I made a batch of these for a holiday party and they disappeared faster than the cookies.
Citrus Elderberry Gummies: Replace the lemon juice with fresh orange juice and add a tablespoon of finely grated orange zest to the mixture. The orange flavor pairs beautifully with the elderberries and honey. My kids especially love this version—it tastes like a fancy fruit snack.
Elderberry and Rose Gummies: Add 1 tablespoon of dried culinary rose petals to the simmering elderberries. Strain them out with the berries. The rose adds a subtle floral note that makes these feel extra special. I made these for a friend’s birthday and she said they were the prettiest gummies she’d ever seen.
Lower Sugar Version: If you’re watching your sugar intake, you can reduce the honey to ¼ cup. The gummies will be less sweet and a bit more tart, but they’ll still set perfectly. I’ve done this when I’m out of honey and it works fine—just adjust to your taste.
Vegan Version (Experimental): I’ve tried making these with agar agar powder instead of gelatin, and honestly, the texture is different—more jelly-like than gummy. But if you’re vegan, it’s worth experimenting with. Use about 2 tablespoons of agar agar powder and follow the package directions for blooming and setting. I haven’t perfected this version yet, so consider it a work in progress.
Don’t be afraid to play around with the flavors. The basic ratio of elderberry syrup to honey to gelatin is pretty forgiving, and as long as you keep that core structure intact, you can add pretty much any complementary flavor you like.
Serving & Storage Suggestions
These homemade elderberry gummies with honey are best served cold, straight from the fridge. The texture is perfect when they’re chilled—firm and bouncy with just the right amount of chew. If they sit out for more than 15-20 minutes, they’ll start to soften, so I usually keep the jar in the fridge and grab a few as needed.
I like to take 2-3 gummies in the morning as part of my daily routine, especially during cold season. My kids take one in their lunchboxes every day (I pack it in a small container with an ice pack). My husband keeps a jar at his desk at work and pops one whenever he feels like his immune system needs a little support. They’re also great for travel—I’ve taken them on flights and road trips, just keeping the container in a cooler bag.
For storage, an airtight glass jar is your best friend. I use a 16-ounce mason jar and it holds about a full batch perfectly. Layer the gummies in the jar with a piece of parchment paper between layers if you want to keep them from sticking together, though honestly, I don’t usually bother and they’re fine. They’ll keep in the refrigerator for 2-3 weeks, though they rarely last that long in my house.
You can also freeze these gummies for longer storage. Spread them out on a parchment-lined baking sheet and freeze until solid, then transfer to a freezer-safe bag or container. They’ll keep for up to 3 months in the freezer. To thaw, just move them to the refrigerator overnight. The texture stays surprisingly good—I’ve done this several times with no issues.
One thing to note: the flavor actually gets better after a day or two in the fridge. The honey and elderberry flavors meld together and become more rounded. So if you can resist eating them all on day one, you’ll be rewarded with even better gummies on day two.
Nutritional Information & Benefits
These homemade elderberry gummies with honey aren’t just delicious—they’re genuinely good for you. Here’s a rough breakdown per serving (about 4 gummies, depending on the size of your molds):
| Nutrient | Amount Per Serving |
|---|---|
| Calories | 45-55 |
| Protein | 3-4g |
| Carbohydrates | 8-10g |
| Sugar | 7-9g (from honey) |
| Vitamin C | 2-4mg (from lemon and elderberries) |
| Antioxidants | High (from elderberries) |
The real benefits go beyond the basic numbers. Elderberries are packed with antioxidants and flavonoids that support immune function. Studies have shown they can help reduce the duration and severity of cold symptoms. The raw honey adds its own antimicrobial properties and soothes sore throats. The gelatin provides collagen, which supports joint health, skin elasticity, and gut health. And the lemon juice gives you a little vitamin C boost.
These gummies are naturally gluten-free, dairy-free, and nut-free, making them safe for most common dietary restrictions. The only potential allergen to watch for is the gelatin, which is derived from animal sources. If you’re vegetarian or vegan, you’ll want to look into the agar agar version I mentioned earlier.
I’m not a doctor or a nutritionist, so I always recommend checking with your healthcare provider before adding any new supplement to your routine, especially if you have underlying health conditions or are taking medications. But for most people, these gummies are a safe, delicious way to support your immune system during cold season.
Conclusion
These homemade elderberry gummies with honey have become such a staple in my kitchen that I honestly can’t imagine cold season without them. They’re simple to make, genuinely delicious, and they give me that little bit of peace of mind knowing I’m doing something proactive for my family’s health. Every time I open the fridge and see that jar of purple gummies, I smile a little—partly because they’re pretty, and partly because I know how good they are.
I hope you’ll give this recipe a try. Don’t worry if your first batch isn’t perfect—mine certainly wasn’t. The important thing is to start, to experiment, and to find the version that works best for you. Maybe you’ll love them plain, or maybe you’ll add cinnamon and ginger like I do sometimes. Maybe you’ll make them for your kids, or maybe you’ll keep them all for yourself. There’s no wrong way to do this.
If you make these gummies, I’d love to hear how they turn out. Drop a comment below and let me know what variations you tried, or tag me in your photos on social media. And if you’re looking for another immune-supporting recipe to add to your rotation, you might also enjoy my elderberry syrup recipe—it uses the same base ingredients but in a different form, perfect for adding to tea or drizzling over yogurt.
Happy cooking, and here’s to a healthy, cozy season ahead!
Frequently Asked Questions
Can I use fresh elderberries instead of dried?
I don’t recommend it for this recipe. Fresh elderberries need to be cooked thoroughly because they can be toxic when raw, and they have a much higher water content than dried berries, which will throw off the liquid ratios. Dried elderberries are more consistent and easier to work with.
Why did my gummies turn out too hard or too soft?
Texture issues usually come down to the gelatin ratio or the temperature of your liquid. If they’re too hard, you might have used too much gelatin or cooked the mixture too long. If they’re too soft, you might not have used enough gelatin, or your liquid was too hot when you added it, which can damage the gelatin’s setting ability.
Can I use a different sweetener instead of honey?
You can, but the results will be different. Maple syrup works in a pinch—use the same amount—but it has a stronger flavor that will compete with the elderberries. Granulated sugar or coconut sugar would need to be dissolved in the hot liquid, and you’d lose the immune-boosting benefits of the raw honey.
How many gummies should I take per day?
I’m not a medical professional, so I can’t give specific dosage advice. Generally, 2-4 gummies per day is a reasonable amount for immune support during cold season. Start with a smaller amount to see how your body responds, and always check with your doctor if you have concerns.
Can I make these without special gummy molds?
Absolutely! Pour the mixture into a small glass dish or baking pan lined with parchment paper, let it set in the fridge, then cut it into small squares with a sharp knife. The texture is the same, and honestly, squares are easier to pack in lunchboxes anyway.
Pin This Recipe!
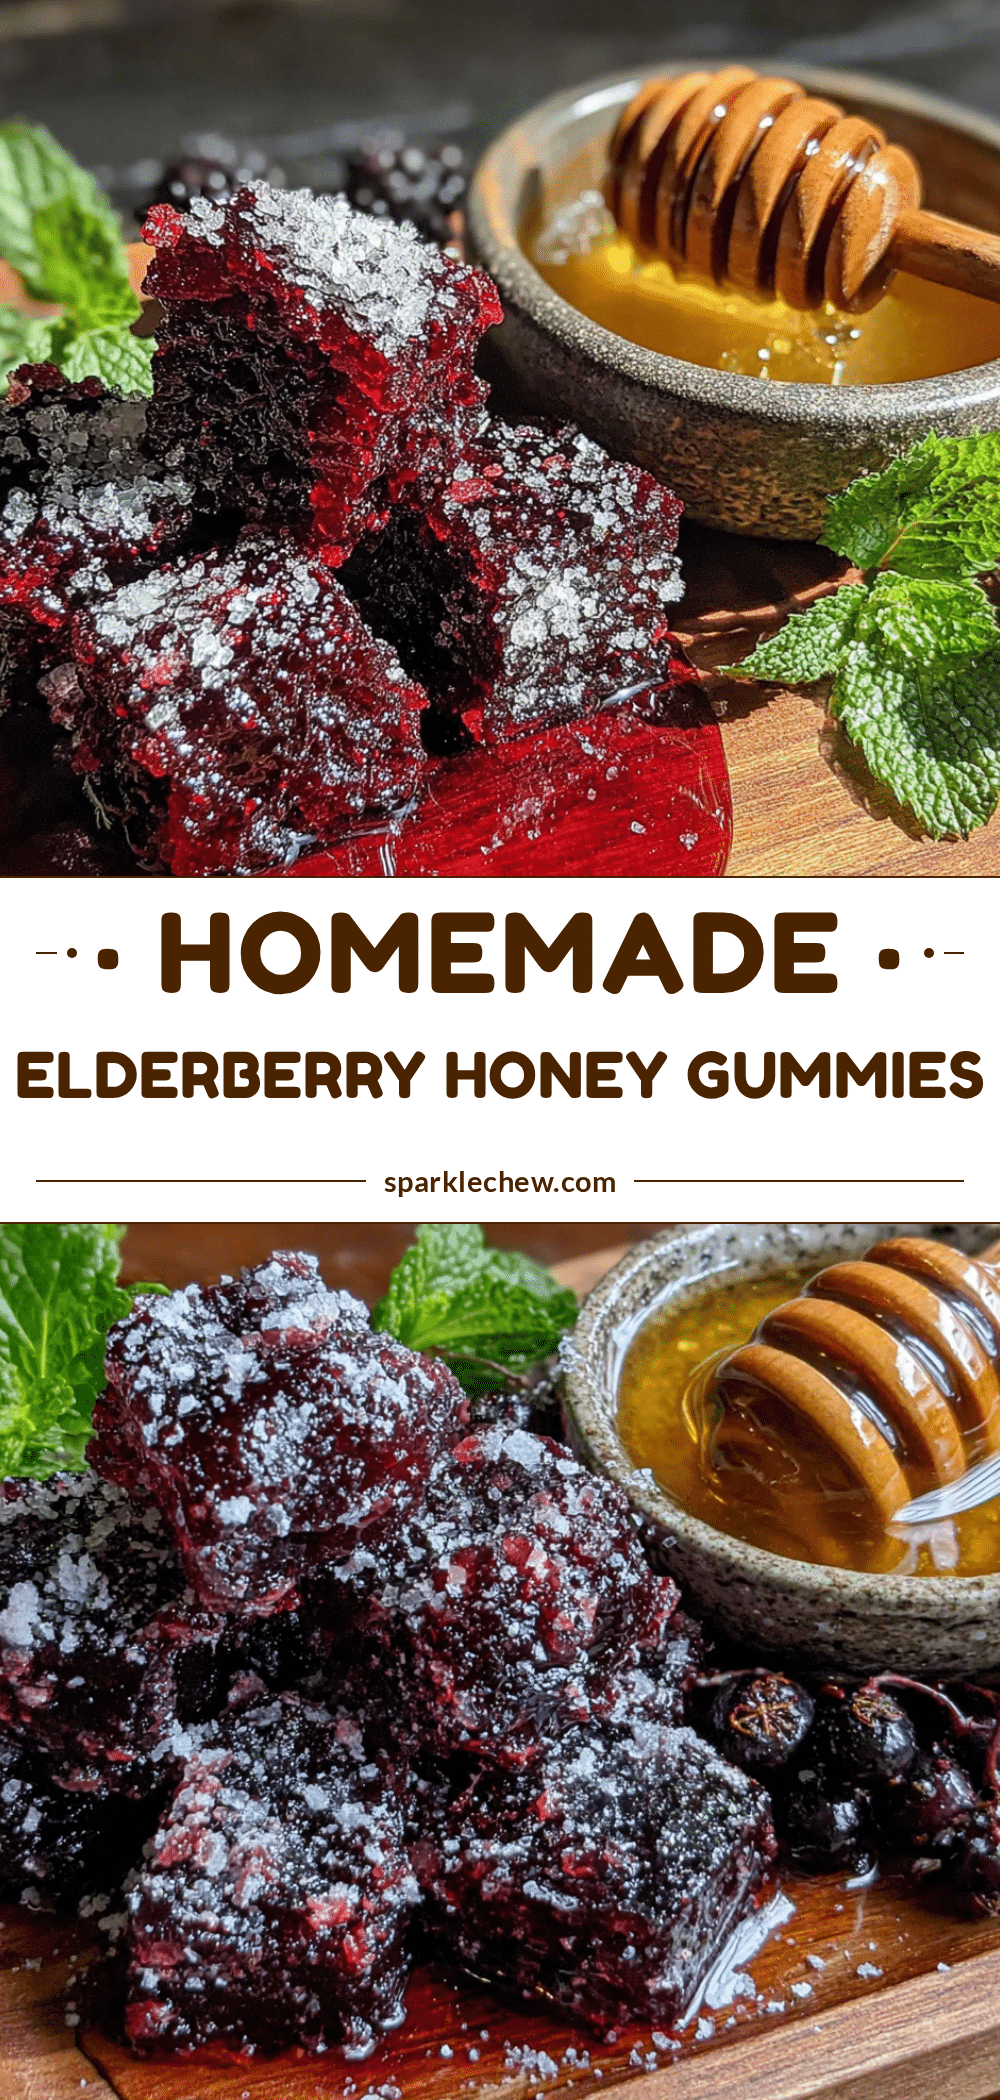
Homemade Elderberry Gummies with Honey: Easy Immune Boosting Recipe
These homemade elderberry gummies with honey are a delicious and immune-boosting treat made with just five simple ingredients. They’re quick to prepare, perfect for cold season, and loved by both kids and adults.
- Prep Time: 20 minutes
- Cook Time: 30 minutes
- Total Time: 4 hours 50 minutes (includes setting time)
- Yield: 4 servings 1x
- Category: Snack
- Cuisine: American
Ingredients
- ¾ cup (85g) dried elderberries
- 3 cups (710ml) water
- ½ cup (170g) raw honey
- ½ cup (60g) gelatin (grass-fed beef gelatin recommended)
- 2 tablespoons (30ml) fresh lemon juice
Instructions
- Combine the dried elderberries and water in a medium saucepan. Bring to a boil over medium-high heat, then reduce to a simmer. Let it simmer gently for 30 minutes.
- Place a fine-mesh strainer over a large bowl or liquid measuring cup. Pour the elderberry mixture through the strainer, pressing gently on the berries with the back of a spoon to extract as much liquid as possible. You should have about 1½ cups of concentrated elderberry syrup. Discard the spent berries.
- Let the strained syrup cool for 5-10 minutes until it is warm but not hot (around 130-140°F, or until you can hold your finger in it for a few seconds without discomfort).
- While the syrup is cooling, put the gelatin in a small bowl and add about ¼ cup of the warm elderberry syrup. Whisk quickly until smooth and let it sit for 2-3 minutes to bloom.
- Pour the bloomed gelatin mixture into the remaining warm elderberry syrup and whisk until completely smooth. Add the raw honey and lemon juice, whisking again until fully incorporated.
- Pour the mixture into a liquid measuring cup with a spout (or use a dropper for tiny molds). Carefully fill each cavity of silicone gummy molds, leaving a tiny bit of space at the top. Pop any surface bubbles with a toothpick or knife tip.
- Place the filled molds on a flat surface in the refrigerator. Let them set for at least 4 hours, preferably overnight.
- Once fully set, gently push the gummies out of the molds. They should release easily from the silicone.
Notes
Don’t boil the honey to preserve its beneficial enzymes. Temperature matters: the elderberry syrup should be warm but not hot (around 130°F) when adding gelatin. Work in small batches to avoid the mixture cooling too quickly. Pop air bubbles in the molds for prettier gummies. Store in an airtight container in the refrigerator for 2-3 weeks. Can be frozen for up to 3 months.
Nutrition
- Serving Size: 4 gummies
- Calories: 4555
- Sugar: 79
- Carbohydrates: 810
- Protein: 34
Keywords: elderberry gummies, homemade gummies, immune boosting, honey gummies, elderberry recipe, healthy snacks, cold season remedy


