Love this? Save it for later!
Share the inspiration with your friends
There used to be a little bakery two blocks from my daughter’s elementary school that made the most incredible Halloween treats. Every October, they’d fill their front window with ghost-shaped cookies, pumpkin cupcakes with cream cheese frosting, and these little witch hat brownie bites that my kids would beg for every single day after school. When the bakery closed suddenly last spring – the owner retired and moved to Florida – my youngest, Leo, asked me every week for months if I could make those witch hats. After seven tries – the first batch had hats that slid right off, and the second tasted more like cardboard than brownie – I finally cracked the code. I mean, honestly, it took me longer than I want to admit to figure out that the chocolate ganache needed to cool just a little before I piped it on. But now? These are better than the bakery’s ever were. And let me tell you, when Leo took his first bite and his eyes went wide, I knew I had something special. Maybe you’ve been there – trying to recreate a memory for your kids and feeling the pressure to get it exactly right. This recipe is that memory, made simple enough for a Tuesday afternoon.
Why You’ll Love This Recipe
These witch hat brownie bites are the kind of Halloween treat that makes everyone smile. And honestly? They’re way easier than they look. Here’s why this recipe works so well for busy families:
- Quick & Easy: From start to finish, you’re looking at about 45 minutes. That’s less time than it takes to argue about costumes.
- Simple Ingredients: You probably have most of this stuff in your pantry right now. No weird specialty items that cost a fortune.
- Perfect for Halloween: Class parties, trick-or-treat night, or just a fun weekend project with the kids. They fit everywhere.
- Crowd-Pleaser: I’ve brought these to three different school events and not a single one came home. Kids and adults both go crazy for them.
- Unbelievably Delicious: The fudgy brownie base with that creamy chocolate ganache and crunchy cookie hat? It’s the perfect combination of textures.
What makes these different from other Halloween treats is the technique. Most recipes have you struggle with frosting that won’t hold its shape or hats that slide off sideways. I figured out that letting the ganache set for exactly 8 minutes before piping gives you that perfect, stable cone shape every time. Plus, using mini brownie bites instead of full-sized cupcakes means less sugar per serving – and fewer arguments about eating too many sweets.
This isn’t just another Halloween recipe. It’s the kind that makes your kid say, “Mom, these are even better than the bakery ones.” And honestly? That’s the best compliment you can get.
What Ingredients You Will Need
This recipe uses simple, pantry-friendly ingredients to create something that looks fancy without the fuss. I’ve tested these with different brands and substitutions, so I’ll share what works best.
- For the Brownie Bites:
- 1 box (18.4 oz) fudge brownie mix (I prefer Duncan Hines for the fudgiest texture)
- 1/2 cup vegetable oil
- 1/4 cup water
- 2 large eggs (room temperature helps them mix in better)
- 1/2 cup semi-sweet chocolate chips (optional, but adds extra fudginess)
- For the Ganache Frosting:
- 1 cup semi-sweet chocolate chips (Ghirardelli gives the smoothest melt)
- 1/2 cup heavy cream (use full-fat for the best consistency)
- 2 tablespoons unsalted butter (softened to room temp)
- 1/2 teaspoon vanilla extract
- For the Witch Hats:
- 24 Hershey’s Kisses (unwrapped – get the kids to help with this!)
- 24 chocolate wafer cookies (like Oreo thins or chocolate graham crackers)
- Orange and black sprinkles (for decorating)
- 1 tube black decorating gel (for adding the hat band detail)
A few notes on ingredients: If you want to make these gluten-free, use a gluten-free brownie mix and gluten-free wafer cookies. For a dairy-free version, swap the heavy cream with full-fat coconut cream and use dairy-free chocolate chips. I’ve tried both substitutions and they work surprisingly well – the coconut cream adds a slight tropical note that actually pairs nicely with the chocolate.
For the wafer cookies, I’ve found that the thin, crisp ones work better than the thicker chocolate graham crackers. Keebler makes a good option that’s easy to find in most grocery stores. And if you can’t find Hershey’s Kisses, any cone-shaped chocolate candy will do – just make sure they’re small enough to look like a witch hat.
Equipment Needed
You don’t need a lot of fancy equipment for this recipe. Here’s what you’ll need:
- Mini muffin tin (24 cups) – I got mine at Target for like $12
- Mixing bowls (one large, one medium)
- Whisk and rubber spatula
- Piping bag or zip-top bag (for the ganache)
- Small saucepan (for making the ganache)
- Wire cooling rack
- Measuring cups and spoons
If you don’t have a piping bag, don’t worry. A regular zip-top bag with the corner snipped off works just as well. I actually prefer the zip-top bag method because there’s less cleanup. Just make sure you don’t cut too big of a hole – you want about a 1/4-inch opening.
For the mini muffin tin, you can use a regular muffin tin if that’s all you have, but you’ll need to adjust the baking time by about 5 minutes. The mini bites are just the right size for little hands, though, so I’d recommend picking up a mini muffin tin if you can. They’re cheap and useful for all kinds of things.
Preparation Method
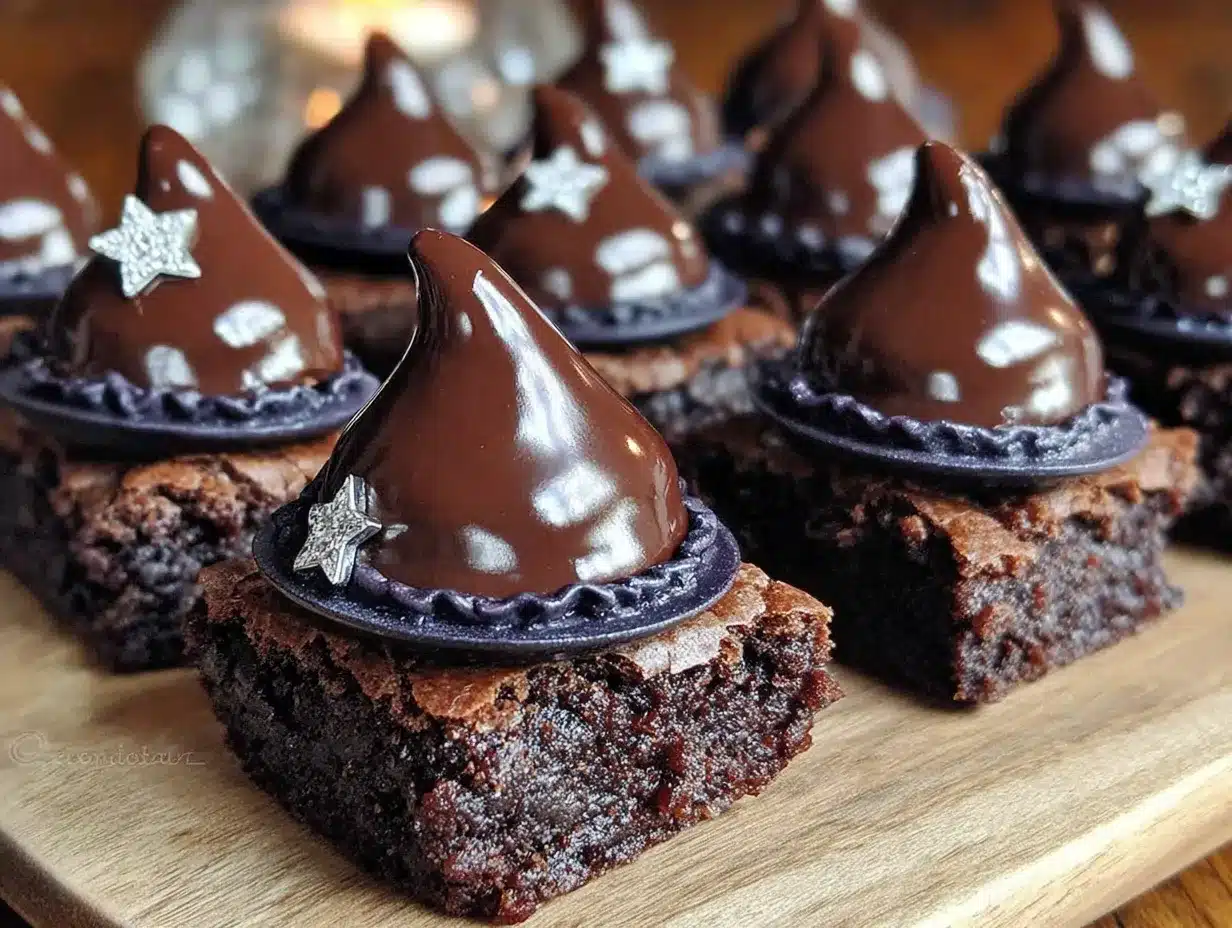
Alright, let’s get to the fun part. Here’s how to make these witch hat brownie bites step by step.
- Preheat your oven to 350°F (175°C). Spray your mini muffin tin with non-stick cooking spray. I like to use the kind with flour in it – Baker’s Joy is my go-to – because it really helps the brownies release cleanly.
- Make the brownie batter. In a large bowl, combine the brownie mix, oil, water, and eggs. Stir until just combined – about 50 strokes. Don’t overmix, or your brownies will be tough. Fold in the chocolate chips if you’re using them. The batter should be thick and glossy.
- Fill the muffin cups. Using a small cookie scoop or a teaspoon, fill each muffin cup about 2/3 full. You want them to rise just above the rim but not overflow. I use a 1-tablespoon scoop and it’s perfect.
- Bake the brownie bites. Bake for 12-14 minutes, or until a toothpick inserted in the center comes out with just a few moist crumbs. The edges should be set but the center should still look slightly underdone. Don’t overbake – these are supposed to be fudgy!
- Cool completely. Let the brownie bites cool in the pan for 5 minutes, then transfer them to a wire rack to cool completely. This is crucial – if you try to frost them while they’re warm, the ganache will melt and slide right off. I learned this the hard way.
- Make the ganache. While the brownies cool, heat the heavy cream in a small saucepan over medium heat until it just starts to simmer. Don’t let it boil – you want small bubbles around the edges. Pour the hot cream over the chocolate chips in a medium bowl. Let it sit for 2 minutes, then stir gently until smooth. Add the butter and vanilla and stir until everything is silky and combined.
- Let the ganache set. This is the secret step. Let the ganache cool at room temperature for about 8 minutes. You want it to be thick enough to hold its shape but still soft enough to pipe. If it gets too thick, microwave it for 10 seconds and stir.
- Pipe the ganache. Spoon the ganache into a piping bag or zip-top bag. Snip off the corner and pipe a small swirl on top of each cooled brownie bite. You want it to look like a little witch hat brim – about the size of a quarter.
- Add the hat. While the ganache is still wet, place a Hershey’s Kiss on top of each swirl, pointed end up. Press gently so it sticks. Then add a chocolate wafer cookie on top of the Kiss – this is the hat brim. Yes, the cookie goes on top of the candy. It sounds weird, but it looks exactly like a witch hat!
- Decorate. Use the black decorating gel to pipe a thin line around the base of each Kiss – this is the hat band. Sprinkle orange and black sprinkles over the ganache while it’s still tacky. Let everything set for about 15 minutes before serving.
One thing I want to mention – don’t stress if the first few look a little messy. Mine always do. By the third or fourth one, you’ll get the hang of it. And honestly, kids don’t care if they look perfect. They just care that they taste good.
Cooking Tips & Techniques
Here are some things I’ve learned from making these witch hat brownie bites more times than I care to admit.
Don’t overbake the brownies. I can’t say this enough. Fudgy brownies are what make this recipe work. If you overbake them, they’ll be dry and crumbly, and the ganache won’t stick properly. Set a timer and check them at 12 minutes. You’d rather have them slightly underdone than overdone.
Temperature matters. The ganache needs to be at the right temperature to pipe properly. Too hot and it’ll run off the brownie. Too cold and it’ll be too stiff to pipe. I let mine sit for exactly 8 minutes, then test a small amount on the back of a spoon. It should hold its shape but still be soft enough to spread.
Work in an assembly line. Once you start decorating, work quickly. Pipe all the ganache swirls first, then add all the Kisses, then all the cookies. This way, the ganache stays at the same consistency throughout. I learned this after my first batch where the last few hats were sliding off because the ganache had set too much.
Use a damp paper towel. If the decorating gel gets clogged, wipe the tip with a damp paper towel. This happens to me every single time, and it’s an easy fix.
Let the kids help with unwrapping. This is a great way to get little hands involved. Just be prepared for a few Kisses to disappear into small mouths before they make it onto the brownies. That’s part of the fun.
Variations & Adaptations
These witch hat brownie bites are pretty flexible. Here are some ways to change them up.
Peanut Butter Witch Hats: Swap the Hershey’s Kisses for peanut butter cups. Use a small knife to shape the peanut butter cup into a cone – or just leave them as is for a more casual look. My husband actually prefers these because he’s a peanut butter fanatic.
White Chocolate Version: Use white chocolate chips for the ganache and add a drop of orange food coloring. It gives the hats a more colorful look and tastes great. Just be careful with the food coloring – a little goes a long way.
Gluten-Free Option: As I mentioned earlier, use a gluten-free brownie mix and gluten-free wafer cookies. I’ve tested this with King Arthur’s gluten-free brownie mix and it works perfectly. Just make sure to check the labels on everything.
Mini Cupcake Version: If you don’t have a mini muffin tin, use regular muffin cups. Bake for 18-20 minutes instead of 12-14. You’ll get bigger brownie bases, which means bigger hats – and bigger smiles.
Spooky Spider Web Design: Instead of the witch hat design, use the black decorating gel to pipe spider webs on top of the brownies. Add a little plastic spider for a fun surprise. I did this for my son’s Halloween party last year and the kids went nuts.
I’ve also tried these with dark chocolate Kisses instead of milk chocolate, and they’re a little less sweet but still delicious. If you’re feeding a crowd that includes adults, that might be the way to go.
Serving & Storage Suggestions
These witch hat brownie bites are best served at room temperature. Take them out of the fridge about 15 minutes before you want to serve them so the ganache softens up a bit.
For presentation, I like to arrange them on a black platter or a Halloween-themed serving tray. A few fake spider webs around the edges and some plastic spiders scattered around make them look extra festive. If you’re bringing them to a party, arrange them in a single layer in a shallow container so the hats don’t get squished.
These pair beautifully with a glass of cold milk for the kids or a hot cup of coffee for the adults. I’ve also served them alongside vanilla ice cream for a more indulgent dessert – the warm brownie with cold ice cream is a killer combination.
Storage Instructions: Store any leftovers in an airtight container at room temperature for up to 3 days. Don’t refrigerate them unless you absolutely have to – the fridge can make the brownies dry and the ganache hard. If you do refrigerate them, let them come to room temperature before serving.
Freezer Instructions: You can freeze the undecorated brownie bites for up to 3 months. Just wrap them tightly in plastic wrap and then foil. When you’re ready to use them, thaw at room temperature and then decorate. I’ve done this for Halloween parties where I wanted to prep ahead, and it works great.
The flavors actually get better after a day or two. The brownies become even more fudgy and the ganache sets perfectly. So don’t worry about making them a day ahead – they’ll be just as good, if not better.
Nutritional Information & Benefits
Here’s the approximate nutritional breakdown for one witch hat brownie bite (based on 24 servings):
- Calories: 185
- Total Fat: 11g
- Saturated Fat: 5g
- Carbohydrates: 22g
- Sugar: 16g
- Protein: 3g
- Sodium: 95mg
Now, I’m not going to pretend these are health food. They’re a treat, and that’s okay. But there are a few redeeming qualities. The dark chocolate in the ganache contains antioxidants, and the eggs provide a little protein. Plus, because they’re mini, it’s easier to practice portion control – one or two feels satisfying without going overboard.
For families with dietary concerns: these contain dairy, eggs, and gluten. The gluten-free and dairy-free substitutions I mentioned earlier work well. Also, if you’re watching sugar intake, you can use a sugar-free brownie mix and sugar-free chocolate chips. I’ve tested this and the texture is slightly different, but the taste is still good.
I always tell my kids that treats like this are part of a balanced life. We eat healthy most of the time, and then on Halloween, we enjoy something special. It’s about teaching moderation, not restriction.
Conclusion
These kid-approved witch hat brownie bites are the Halloween treat you’ve been looking for. They’re fun to make, delicious to eat, and impressive enough to bring to any party. And honestly? They’re simple enough that you can make them with your kids without losing your mind.
I love this recipe because it brings back that memory of the bakery that closed – but now it’s our memory, not someone else’s. Every time I make these, Leo says, “Remember when we couldn’t get these anymore and you figured out how to make them?” And I smile every single time.
Don’t be afraid to customize these to your family’s taste. Use different sprinkles, try different candies, or experiment with the brownie base. The beauty of this recipe is that it’s forgiving. Even if your hats aren’t perfectly straight, they’ll still taste amazing.
So grab your kids, preheat that oven, and make some memories. And if you try these, I’d love to hear how they turned out! Drop a comment below or tag me in your photos. Happy Halloween, friends!
Frequently Asked Questions
Can I make these witch hat brownie bites ahead of time?
Absolutely! You can make the brownie bites up to 3 days in advance and store them in an airtight container at room temperature. Decorate them the day you plan to serve them for the best presentation. The ganache stays fresh for about 2 days after decorating.
Can I use homemade brownie mix instead of boxed?
Yes, you can definitely use a homemade brownie recipe. Just make sure it’s a fudgy recipe, not a cakey one. You want the brownies to be dense enough to hold the hat without crumbling. I’ve used a from-scratch recipe before and it works great – just adjust the baking time as needed.
How do I keep the Hershey’s Kisses from falling off?
The key is to press the Kiss into the ganache while it’s still wet. If the ganache has started to set, the Kiss won’t stick as well. Work quickly once you start decorating, and don’t be afraid to press down firmly. Also, make sure your brownie bites are completely cool before you start.
Can I freeze the decorated brownie bites?
I don’t recommend freezing them after they’re decorated because the ganache can get grainy and the decorations might fall off. However, you can freeze the undecorated brownie bites for up to 3 months. Just thaw them at room temperature and decorate when you’re ready.
What if I can’t find chocolate wafer cookies?
No problem! You can use regular chocolate graham crackers broken into small squares, or even round chocolate cookies like Oreo Thins. The shape doesn’t have to be perfect – the kids won’t notice. I’ve even used chocolate sandwich cookies with the cream filling scraped off in a pinch.
Pin This Recipe!
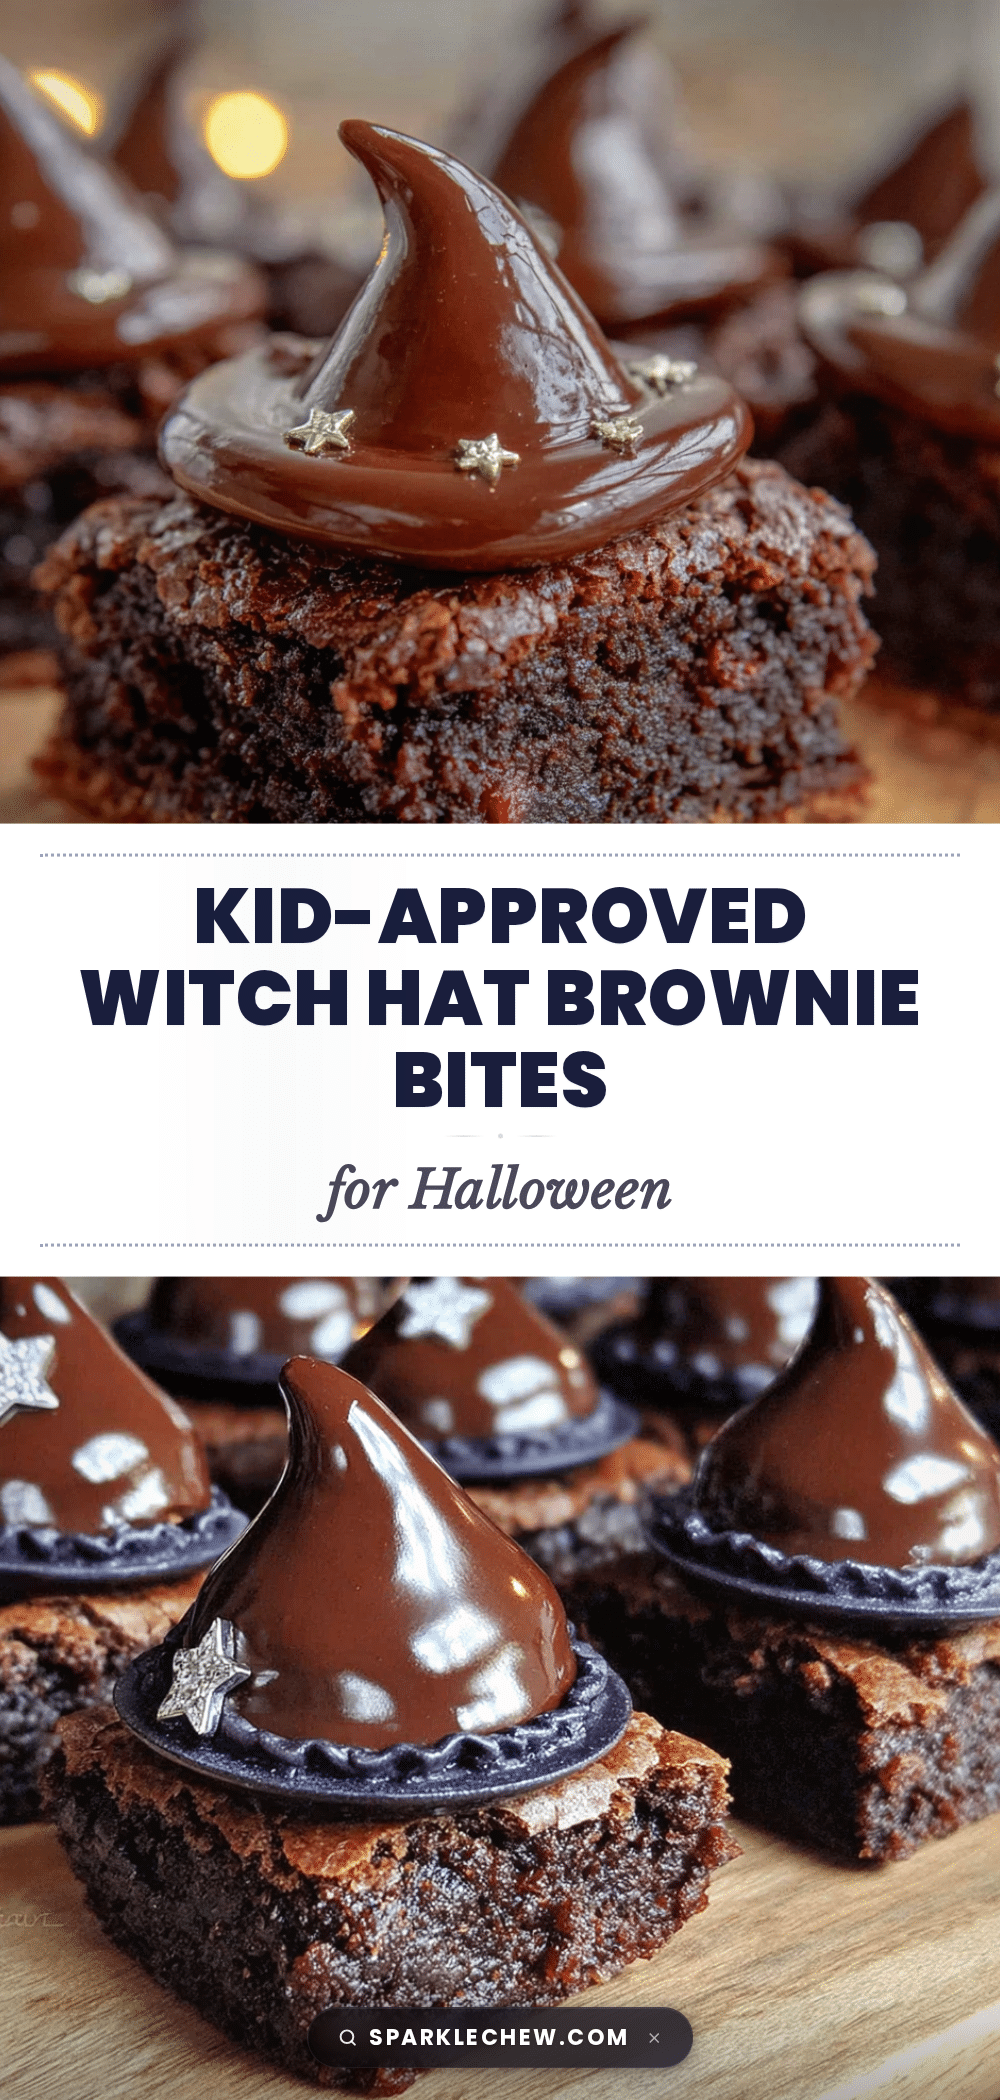
Kid-Approved Witch Hat Brownie Bites: Easy Halloween Treat
These fudgy brownie bites topped with chocolate ganache, a Hershey’s Kiss, and a wafer cookie look just like little witch hats. They’re easy to make, perfect for Halloween parties, and sure to be a hit with kids and adults alike.
- Prep Time: 15 minutes
- Cook Time: 14 minutes
- Total Time: 45 minutes
- Yield: 24 servings 1x
- Category: Dessert
- Cuisine: American
Ingredients
- 1 box (18.4 oz) fudge brownie mix (e.g., Duncan Hines)
- 1/2 cup vegetable oil
- 1/4 cup water
- 2 large eggs (room temperature)
- 1/2 cup semi-sweet chocolate chips (optional)
- 1 cup semi-sweet chocolate chips (for ganache, e.g., Ghirardelli)
- 1/2 cup heavy cream (full-fat)
- 2 tablespoons unsalted butter (softened to room temp)
- 1/2 teaspoon vanilla extract
- 24 Hershey’s Kisses (unwrapped)
- 24 chocolate wafer cookies (e.g., Oreo thins or chocolate graham crackers)
- Orange and black sprinkles (for decorating)
- 1 tube black decorating gel (for hat band detail)
Instructions
- Preheat your oven to 350°F (175°C). Spray a mini muffin tin (24 cups) with non-stick cooking spray (preferably with flour, like Baker’s Joy).
- In a large bowl, combine the brownie mix, oil, water, and eggs. Stir until just combined (about 50 strokes). Fold in the chocolate chips if using. The batter should be thick and glossy.
- Using a small cookie scoop or teaspoon, fill each muffin cup about 2/3 full (about 1 tablespoon per cup).
- Bake for 12-14 minutes, or until a toothpick inserted in the center comes out with just a few moist crumbs. The edges should be set but the center slightly underdone. Do not overbake.
- Let the brownie bites cool in the pan for 5 minutes, then transfer them to a wire rack to cool completely.
- While the brownies cool, make the ganache: Heat the heavy cream in a small saucepan over medium heat until it just starts to simmer (small bubbles around the edges, do not boil). Pour the hot cream over the chocolate chips in a medium bowl. Let it sit for 2 minutes, then stir gently until smooth. Add the butter and vanilla and stir until silky and combined.
- Let the ganache cool at room temperature for about 8 minutes. It should be thick enough to hold its shape but still soft enough to pipe. If it gets too thick, microwave for 10 seconds and stir.
- Spoon the ganache into a piping bag or zip-top bag. Snip off the corner and pipe a small swirl (about the size of a quarter) on top of each cooled brownie bite.
- While the ganache is still wet, place a Hershey’s Kiss on top of each swirl, pointed end up. Press gently so it sticks. Then place a chocolate wafer cookie on top of the Kiss (this is the hat brim).
- Use the black decorating gel to pipe a thin line around the base of each Kiss (the hat band). Sprinkle orange and black sprinkles over the ganache while it’s still tacky. Let everything set for about 15 minutes before serving.
Notes
Don’t overbake the brownies; they should be fudgy. Let the ganache set for exactly 8 minutes before piping for the best consistency. Work in an assembly line: pipe all ganache swirls first, then add all Kisses, then all cookies. If the decorating gel gets clogged, wipe the tip with a damp paper towel. Let kids help with unwrapping Hershey’s Kisses. Store leftovers in an airtight container at room temperature for up to 3 days. Freeze undecorated brownie bites for up to 3 months.
Nutrition
- Serving Size: 1 brownie bite
- Calories: 185
- Sugar: 16
- Sodium: 95
- Fat: 11
- Saturated Fat: 5
- Carbohydrates: 22
- Fiber: 1
- Protein: 3
Keywords: Halloween treats, witch hat brownie bites, easy Halloween dessert, kid-friendly Halloween recipe, brownie bites, chocolate ganache, Hershey's Kisses, Halloween party food