Love this? Save it for later!
Share the inspiration with your friends
It was 11:47 PM on a random Wednesday in October, and I had a pumpkin problem. Not the good kind where you’ve got a cute gourd on your porch—the kind where a half-opened can of pumpkin puree was staring at me from the fridge, and the clock was ticking before it turned into a science experiment. I’d already made pumpkin soup that week. Pumpkin oatmeal too. I wanted something that felt like a reward, not a vegetable disguised as breakfast. But here’s the thing—I didn’t have cream cheese. I mean, I had some cream cheese, but not the two whole blocks my brain was convinced a proper cheesecake needed. What I did have was a tub of Greek yogurt that was about to hit its expiration date and a sudden, slightly unhinged idea: what if I made a lighter cheesecake? One that didn’t leave you feeling like you swallowed a brick?
I pulled out my food processor, fully expecting disaster. Honestly, I was tired. It had been one of those days where the dog ate a sock and my kid asked me the same question seventeen times. But there’s something about cooking late at night—the kitchen is quiet, the pressure is off, and you’re just making stuff up as you go. I blended the pumpkin with the yogurt, added a little cream cheese for richness, and crossed my fingers. The first bite? Let me tell you, I actually laughed out loud. It was creamy, tangy, and had that perfect pumpkin spice warmth without being heavy. I’d accidentally made something I actually wanted to eat again. Maybe you’ve been there—staring into the fridge at 11 PM, craving dessert but not wanting to feel terrible afterward. These Light & Creamy Pumpkin Cheesecake Bars are that moment, perfected.
Why You’ll Love This Recipe
I’ve tested this recipe about six times now—not because I had to, but because I kept finding excuses to make it. Each time, I tweaked something small: a little more yogurt here, a pinch less sugar there. What I landed on is a dessert that actually delivers on its promises. Here’s why these bars are different from every other pumpkin cheesecake recipe out there.
- Quick & Easy: From start to fridge, you’re looking at about 30 minutes of active work. The oven does the rest, and then you just wait (impatiently) for them to chill. Perfect for those weeknights when you want something special but don’t have the energy for a project.
- Simple Ingredients: No weird specialty items. You probably have most of this in your kitchen right now—pumpkin puree, Greek yogurt, a block of cream cheese, and basic pantry staples. No trips to three different stores.
- Perfect for Fall Gatherings: These bars are the unsung hero of Thanksgiving dessert tables. Everyone gravitates toward the pumpkin pie, but these? They disappear first. Great for potlucks, Friendsgiving, or just a Tuesday that needs a little seasonal magic.
- Crowd-Pleaser: My neighbor Karen, who “doesn’t really like cheesecake,” asked for the recipe. My kid, who survives on air and goldfish crackers, ate two. The texture is so light and creamy that even people who find regular cheesecake too dense come back for seconds.
- Unbelievably Delicious: Here’s the thing—you won’t miss the extra cream cheese. The Greek yogurt adds this incredible tanginess that pairs perfectly with the pumpkin and warm spices. It’s comfort food reimagined: lighter, brighter, but with the same soul-soothing satisfaction that makes you close your eyes after the first bite.
What makes this recipe stand out is the technique. By blending cottage cheese (yes, cottage cheese!) into the filling, you get that ultra-smooth, creamy texture without needing a ton of heavy cream or extra blocks of cream cheese. It’s a trick I picked up from a pastry chef friend, and honestly, it works like magic. This isn’t just another pumpkin cheesecake bar—it’s your new favorite fall dessert.
What Ingredients You Will Need
This recipe uses simple, wholesome ingredients to deliver that rich, creamy pumpkin flavor without weighing you down. Most of these are pantry staples or easy to find at any grocery store. Let me walk you through each one and why it matters.
For the Crust
- Graham cracker crumbs, 1 ½ cups (about 12 full sheets, crushed) — You can use store-bought crumbs or pulse whole crackers in a food processor. I prefer the texture when I crush them myself—it feels more rustic.
- Unsalted butter, 5 tablespoons, melted — Adds richness and helps the crust hold together. If you only have salted butter, just skip adding any extra salt to the crust.
- Granulated sugar, 2 tablespoons — Just a touch to sweeten the crust.
- Ground cinnamon, ½ teaspoon — This is optional, but I love the extra warmth it adds to the base layer.
For the Pumpkin Cheesecake Filling
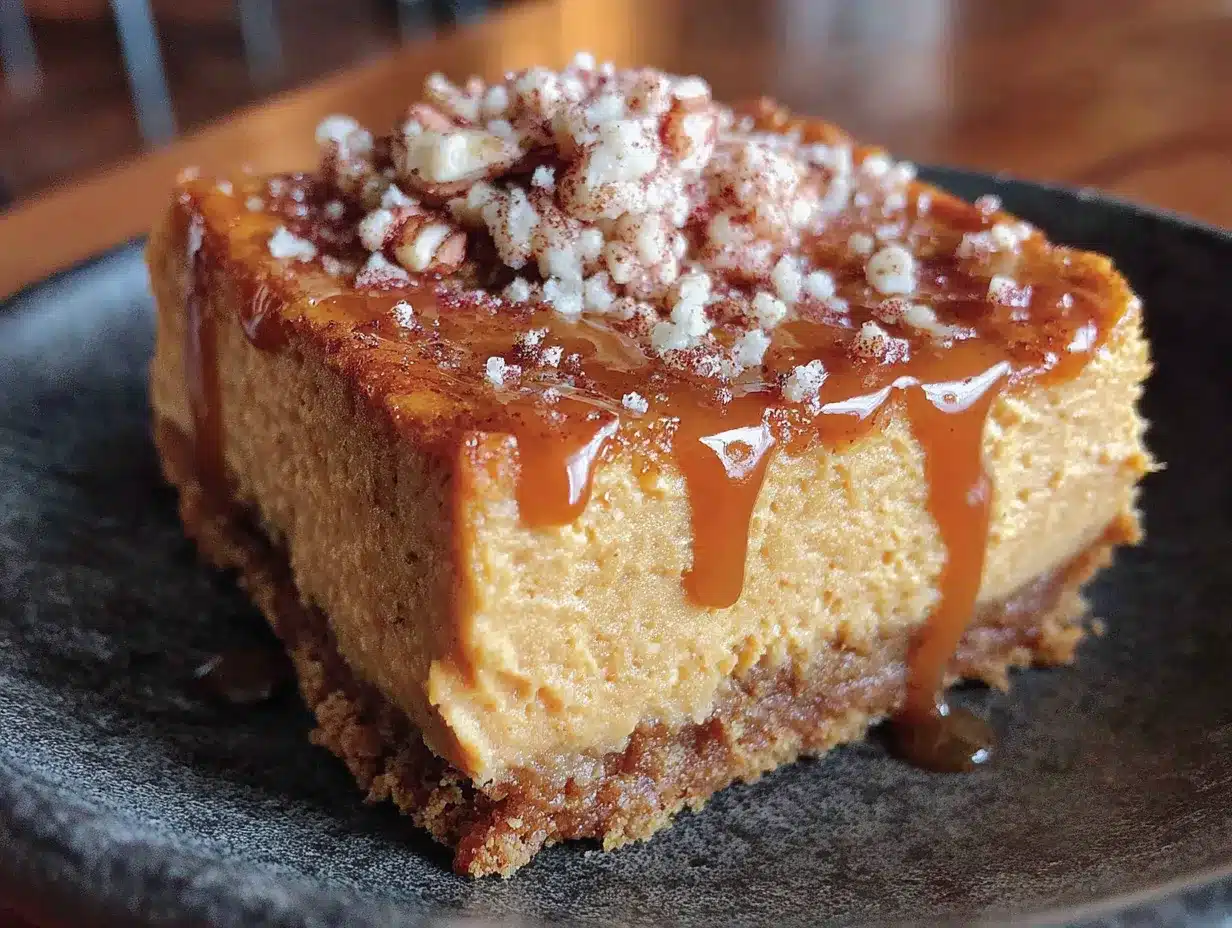
- Reduced-fat cream cheese, 8 ounces (one block), softened — Don’t use the whipped kind in a tub; it has too much air and water. The block-style cream cheese gives you that classic tangy richness.
- Plain Greek yogurt, ½ cup (full-fat or 2% works best) — This is the secret to the light texture. It adds creaminess without the heaviness of extra cream cheese. I like Fage or Chobani for thickness.
- Cottage cheese, ½ cup (small-curd, low-fat) — I know it sounds weird, but trust me. When blended, it becomes silky smooth and adds protein. You won’t taste it at all.
- Pumpkin puree, 1 cup (not pumpkin pie filling) — Make sure you grab the 100% pure pumpkin. Libby’s is my go-to brand because it’s consistently thick and not watery.
- Light brown sugar, ½ cup, packed — Adds a deeper, molasses-like sweetness that pairs beautifully with pumpkin.
- Granulated sugar, ¼ cup — Balances the tanginess of the cream cheese and yogurt.
- Large eggs, 2, at room temperature — Room temperature eggs blend more smoothly into the batter, giving you a silkier texture.
- Vanilla extract, 1 teaspoon — Enhances all the warm flavors.
- Pumpkin pie spice, 1 ½ teaspoons — You can use store-bought or make your own with cinnamon, nutmeg, ginger, and cloves. I sometimes add an extra ¼ teaspoon of cinnamon because I’m obsessed.
- Salt, ¼ teaspoon — Sounds counterintuitive for a dessert, but salt balances the sweetness and makes the pumpkin flavor pop.
For the Topping (Optional but Recommended)
- Light whipped topping, ½ cup (like Cool Whip or homemade stabilized whipped cream) — Adds a final cloud-like finish.
- Pumpkin seeds (pepitas), 2 tablespoons, toasted — For a little crunch and visual appeal.
- Ground cinnamon, for dusting — Just a light sprinkle on top before serving.
Equipment Needed
You don’t need a fancy kitchen to pull these off. Here’s what you’ll need, along with some honest notes from my own trials.
- 8×8-inch baking pan — This is the perfect size for these bars. If you only have a 9×9-inch pan, the bars will be slightly thinner and may bake a few minutes faster. A 9×13-inch pan will give you very thin bars, so adjust accordingly.
- Food processor or high-speed blender — You need this to blend the cottage cheese until completely smooth. A regular blender works too, but you might need to scrape down the sides a few times. I’ve made the mistake of skipping this step and ended up with lumpy filling—don’t be like me.
- Electric hand mixer or stand mixer — For beating the cream cheese and sugars until fluffy. You can do this by hand with a whisk, but your arm will definitely feel it the next day.
- Mixing bowls — At least two: one for the crust ingredients and one for the filling.
- Parchment paper — This is non-negotiable. Line your pan with parchment paper, leaving overhang on two sides. It makes lifting the bars out so much easier, and you won’t scratch your pan.
- Measuring cups and spoons — For accuracy. Baking is a science, even when you’re being flexible.
- Rubber spatula — For scraping every last bit of filling into the pan. Waste not, want not.
Preparation Method
Alright, let’s make these bars. I’ve broken everything down into clear steps so you don’t miss a thing. Trust the process—it’s worth it.
Step 1: Prep Your Pan and Preheat
Preheat your oven to 325°F (163°C). Line your 8×8-inch baking pan with parchment paper, leaving about 2 inches of overhang on two opposite sides. This creates little handles that make lifting the bars out a breeze later. Lightly spray the parchment with non-stick cooking spray, just to be safe.
Step 2: Make the Crust
In a medium bowl, combine 1 ½ cups graham cracker crumbs, 2 tablespoons granulated sugar, and ½ teaspoon ground cinnamon. Pour in 5 tablespoons of melted unsalted butter and stir with a fork until the mixture looks like wet sand and holds together when you squeeze it. Dump the mixture into your prepared pan and press it down firmly and evenly. I use the bottom of a flat measuring cup for this—it gives you a nice, even surface. Bake the crust for 8 minutes, then set it aside to cool slightly while you make the filling. You’ll notice the crust will smell amazing already.
Step 3: Blend the Cottage Cheese
This is the step that makes these bars light and creamy. Add ½ cup cottage cheese to your food processor or blender. Blend on high for about 30-45 seconds, scraping down the sides once, until the mixture is completely smooth with no lumps. You should have a thick, creamy liquid. Set it aside. Taste it if you’re curious—it just tastes like mild cream.
Step 4: Beat the Cream Cheese and Sugars
In a large mixing bowl, beat 8 ounces of softened reduced-fat cream cheese with an electric mixer on medium speed until it’s smooth and fluffy—about 2 minutes. Add ½ cup packed light brown sugar and ¼ cup granulated sugar, and beat for another 2 minutes until the mixture is light and airy. Scrape down the sides and bottom of the bowl with a rubber spatula. Don’t rush this step; proper creaming gives you a better texture.
Step 5: Add the Wet Ingredients
Add 1 cup pumpkin puree, ½ cup Greek yogurt, the blended cottage cheese, 1 teaspoon vanilla extract, 1 ½ teaspoons pumpkin pie spice, and ¼ teaspoon salt. Beat on medium speed until everything is well combined and smooth. The mixture will look thick and luscious—like a pumpkin milkshake, honestly.
Step 6: Add the Eggs
Add the 2 room-temperature eggs, one at a time, beating on low speed just until each one is incorporated. Overmixing at this stage can incorporate too much air and cause cracks in your cheesecake. You want a smooth, unified batter. Give it a final stir with your spatula to make sure everything is mixed from the bottom up.
Step 7: Assemble and Bake
Pour the filling over the pre-baked crust. Use your spatula to spread it evenly to the edges. Give the pan a gentle tap on the counter to release any air bubbles. Bake at 325°F (163°C) for 35-40 minutes. The edges should be set and slightly puffed, but the center should still have a slight jiggle when you gently shake the pan. Don’t overbake—the residual heat will finish cooking the center as it cools. Your kitchen will smell like a fall candle factory, in the best way possible.
Step 8: Cool and Chill
Place the pan on a wire rack and let it cool completely at room temperature—about 1 hour. Then, cover the pan with plastic wrap and refrigerate for at least 4 hours, but overnight is really best. This is the hardest part, I know. The chilling time allows the cheesecake to set properly and the flavors to meld together. Trust me, it’s worth the wait.
Step 9: Slice and Serve
Once fully chilled, use the parchment overhang to lift the entire block of bars out of the pan. Place it on a cutting board. Use a sharp knife to cut into 16 even bars (4 rows by 4 rows). For clean slices, wipe the knife clean between cuts. Serve cold or at room temperature, topped with a dollop of whipped topping, a sprinkle of toasted pumpkin seeds, and a dusting of cinnamon.
Cooking Tips & Techniques
I’ve made my share of mistakes so you don’t have to. Here are the things I wish someone had told me before my first attempt.
- Don’t skip the cottage cheese step: I know it feels weird. I almost skipped it myself the first time because I was lazy. But that blended cottage cheese is the reason these bars are light and creamy instead of dense and heavy. It’s non-negotiable.
- Room temperature ingredients matter: Cold cream cheese and cold eggs will give you a lumpy batter. Set everything out on the counter about 30 minutes before you start. If you forget (I do, constantly), you can microwave the cream cheese in 10-second bursts until it’s soft but not melted.
- The jiggle test is your friend: When you take the bars out of the oven, the center should wobble slightly when you shake the pan. If it’s completely firm, you’ve overbaked it. The center will set as it cools. This is the number one tip for any cheesecake.
- Use a water bath if you’re nervous about cracking: I don’t always use one because I’m lazy, but if you want a perfectly smooth top, place your pan inside a larger baking dish and pour hot water halfway up the sides of the smaller pan. This creates a humid environment that prevents cracks.
- Patience with chilling: I once tried to cut these after only 2 hours in the fridge. It was a mess. The bars were still soft and the crust crumbled everywhere. Give them the full 4 hours minimum, or better yet, overnight. Your future self will thank you.
- Sharp knife for clean cuts: Use a long, sharp knife and wipe it clean with a damp paper towel between each cut. This gives you those beautiful, bakery-style bars that photograph well and impress your friends.
Variations & Adaptations
One of the best things about this recipe is how flexible it is. Here are some ways I’ve adapted it over the years.
- Gluten-Free Version: Swap the graham cracker crumbs for gluten-free graham crackers or use crushed gluten-free shortbread cookies. The rest of the recipe is naturally gluten-free. I’ve used Schär brand graham-style crackers with great results.
- Dairy-Free Version: Use a dairy-free cream cheese alternative (like Kite Hill or Tofutti), dairy-free Greek yogurt (coconut or soy-based), and a dairy-free butter substitute. The texture will be slightly less creamy, but still delicious. I’ve tried this with Miyoko’s cream cheese and it worked surprisingly well.
- Maple Pumpkin Spice Twist: Replace the brown sugar with ½ cup pure maple syrup (reduce the Greek yogurt by 2 tablespoons to balance the moisture). Add an extra ¼ teaspoon of cinnamon. The maple flavor pairs beautifully with pumpkin and gives it a cozy, autumn feel.
- Low-Carb / Keto Option: Use a crust made from almond flour, butter, and a low-carb sweetener like erythritol. Replace the sugars in the filling with a granulated monk fruit blend. The texture will be a bit denser, but the flavor is still spot-on.
- Chocolate Pumpkin Swirl: Melt ¼ cup of dark chocolate chips and drizzle it over the filling before baking. Use a knife to gently swirl it through the batter. The chocolate and pumpkin combo is unexpectedly amazing—think pumpkin chocolate chip bread, but better.
Serving & Storage Suggestions
These bars are versatile enough for any occasion. Here’s how to serve and store them like a pro.
- Serving Temperature: I personally love them straight from the fridge—cold and firm. But they’re also wonderful at room temperature, which brings out the pumpkin spice flavors more. Try both and decide which you prefer.
- Presentation Ideas: Cut them into neat squares and arrange on a white platter for contrast. Top each bar with a small dollop of whipped cream, a sprinkle of cinnamon, and a few toasted pumpkin seeds. For a fancier look, drizzle with caramel sauce.
- Complementary Dishes: Serve alongside a warm cup of spiced chai, a pumpkin spice latte, or even a scoop of vanilla ice cream for an extra indulgent treat. They also pair beautifully with a simple green salad for a sweet-savory brunch spread.
- Refrigerator Storage: Store in an airtight container in the refrigerator for up to 5 days. Place a sheet of parchment paper between layers to prevent sticking. The flavors actually deepen after a day or two, so don’t be afraid to make them ahead.
- Freezer Storage: These bars freeze beautifully! Wrap individual bars tightly in plastic wrap, then place them in a freezer-safe bag or container. They’ll keep for up to 3 months. To thaw, transfer to the refrigerator overnight or let sit at room temperature for about 20 minutes.
- Reheating: I don’t recommend reheating these—they’re meant to be served cold or at room temperature. But if you want a warm dessert, try microwaving a single bar for about 10 seconds. It softens the texture slightly without melting it.
Nutritional Information & Benefits
I’m not a nutritionist, but I do care about what goes into my body. Here’s the breakdown for one bar (based on 16 servings, using the ingredients listed).
- Calories: Approximately 185 calories per bar
- Protein: 6 grams — Thanks to the Greek yogurt, cottage cheese, and eggs, these bars pack a surprising protein punch.
- Carbohydrates: 22 grams
- Fat: 9 grams (mostly from the cream cheese and butter)
- Fiber: 1 gram
- Sugar: 14 grams (less than half of a traditional cheesecake bar)
Health Benefits: Pumpkin is packed with vitamin A and antioxidants, which support eye health and your immune system. Greek yogurt and cottage cheese add protein and probiotics for gut health. By using reduced-fat cream cheese and less sugar than traditional recipes, these bars are a smarter choice for satisfying your sweet tooth without derailing your goals.
Dietary Considerations: This recipe is vegetarian. For gluten-free or dairy-free options, see the variations section above. It is not vegan or nut-free in its standard form.
FAQs
Can I use pumpkin pie filling instead of pumpkin puree?
I wouldn’t recommend it. Pumpkin pie filling is already sweetened and spiced, so it will throw off the sugar and spice balance in this recipe. Stick with 100% pure pumpkin puree for the best results.
Why did my cheesecake crack on top?
Cracks usually happen from overbaking or a sudden temperature change. Make sure you don’t overbake—the center should still jiggle slightly. Also, let the bars cool gradually at room temperature before refrigerating. If cracks do appear, just cover them with whipped cream. No one will ever know!
Can I make these bars in a 9×13-inch pan?
Yes, but the bars will be much thinner. You’ll need to reduce the baking time to about 20-25 minutes. The crust will also be thinner, so you might want to use slightly less graham cracker mixture. Keep an eye on them—thin bars bake fast.
Can I use a different type of yogurt?
Plain Greek yogurt works best because it’s thick and tangy. Regular plain yogurt will work, but it has more water content, which could make the filling slightly less firm. If you use regular yogurt, consider draining it through a cheesecloth for 30 minutes first to remove excess liquid.
How do I know when the bars are done baking?
Look for set edges and a slightly jiggly center. The surface should look matte, not shiny or wet. If you insert a toothpick near the center, it should come out mostly clean with a few moist crumbs. If it’s completely clean, you’ve overbaked it.
Conclusion
These Light & Creamy Pumpkin Cheesecake Bars have become my go-to fall dessert for a reason. They’re everything I want in a seasonal treat—warm, spiced, creamy, and satisfying—without the heavy feeling that usually comes after a slice of traditional cheesecake. Honestly, they’ve ruined me for other pumpkin desserts. Every time I make them, I’m reminded of that late-night kitchen experiment where I just went for it, and it actually worked out. I hope they become that recipe for you too—the one you make on a whim, the one that impresses people without stressing you out, the one that tastes like fall in the best possible way.
I’d love to hear how yours turn out! Did you try any of the variations? Did you invent your own twist? Drop a comment below and let me know. Tag me in your photos on social media—I’m always looking for new pumpkin inspiration. And if you’re craving more lightened-up fall desserts, check out my healthy pumpkin muffins and apple crisp with oat topping for more seasonal goodness. Happy baking, friends!
Pin This Recipe!
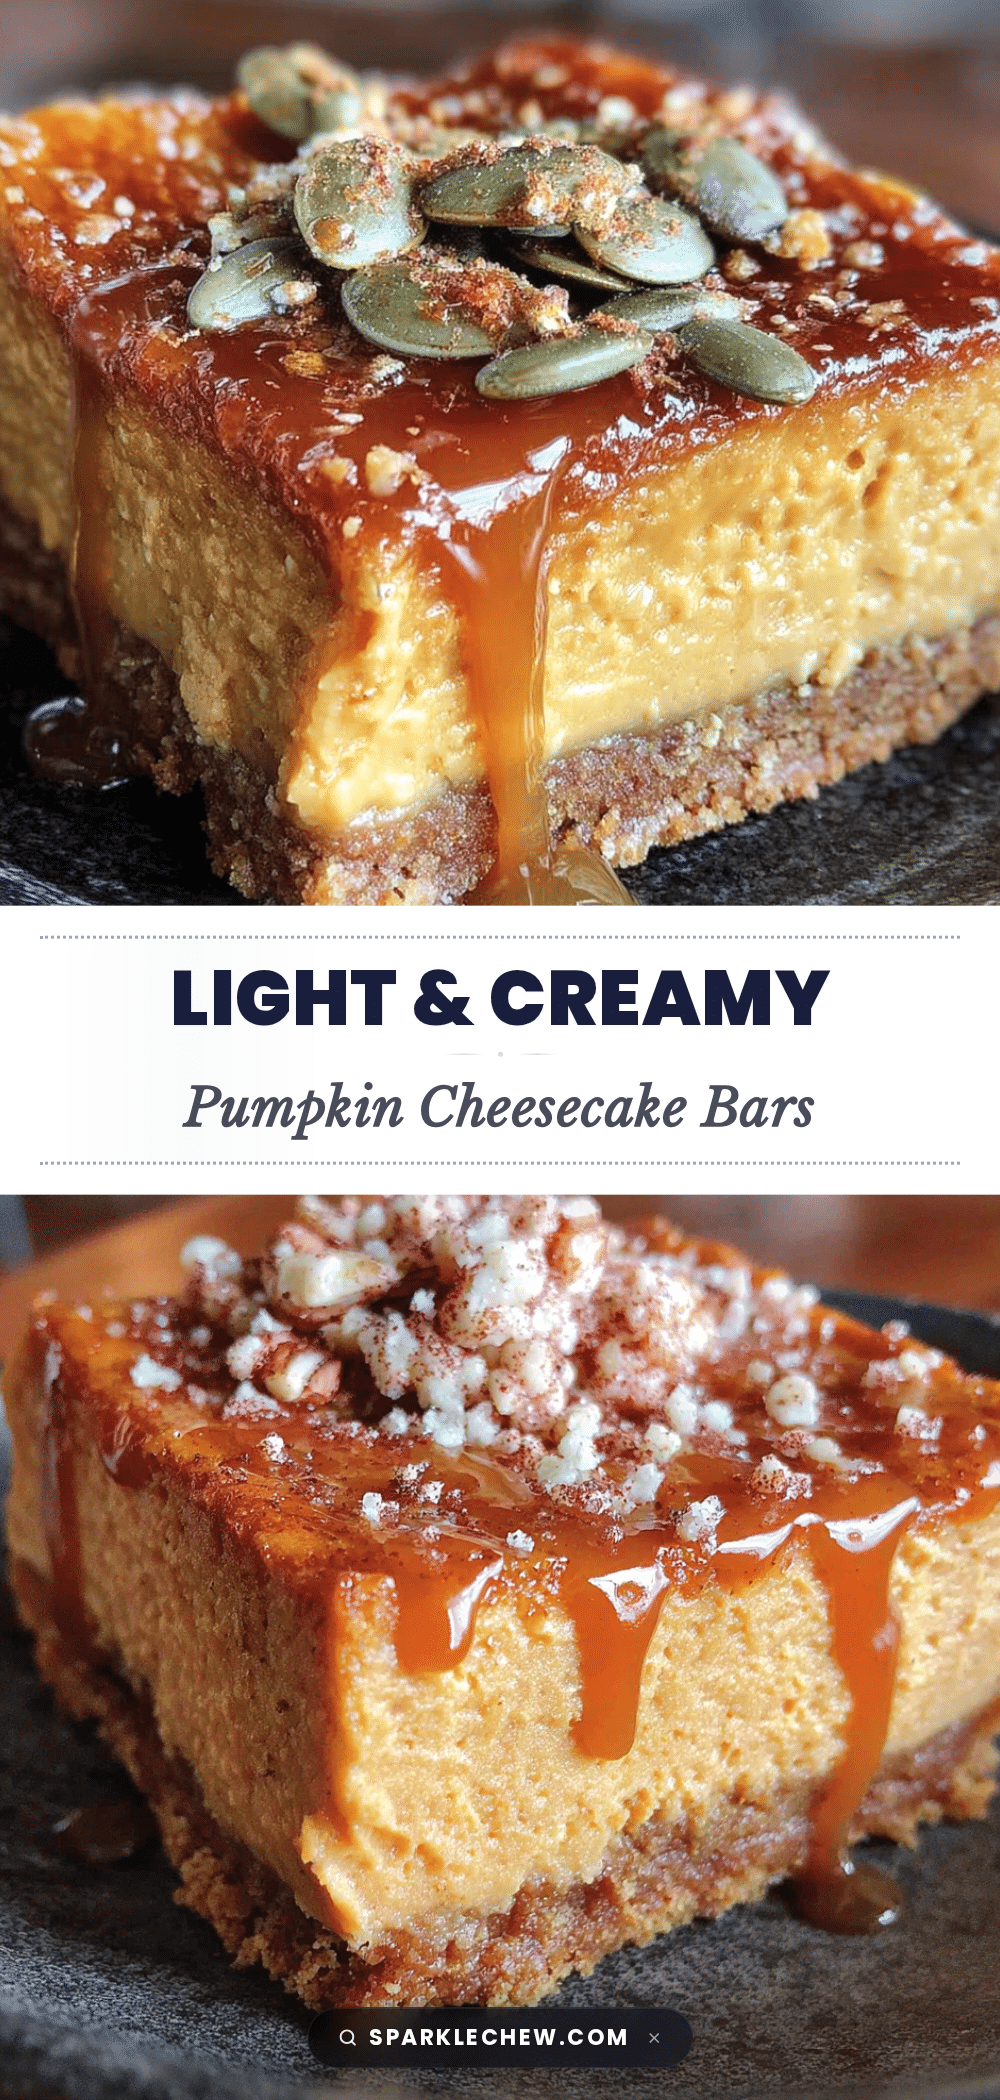
Light & Creamy Pumpkin Cheesecake Bars: Easy Fall Dessert
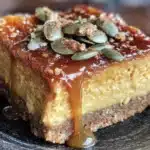
These light and creamy pumpkin cheesecake bars are the perfect fall dessert, made with Greek yogurt and cottage cheese for a lighter texture without sacrificing flavor. Quick to prepare and perfect for gatherings, they’re a crowd-pleaser that tastes like autumn in every bite.
- Prep Time: 30 minutes
- Cook Time: 35-40 minutes
- Total Time: 5 hours 10 minutes (including chilling)
- Yield: 16 bars 1x
- Category: Dessert
- Cuisine: American
Ingredients
- 1 ½ cups graham cracker crumbs (about 12 full sheets, crushed)
- 5 tablespoons unsalted butter, melted
- 2 tablespoons granulated sugar
- ½ teaspoon ground cinnamon
- 8 ounces reduced-fat cream cheese (one block), softened
- ½ cup plain Greek yogurt (full-fat or 2%)
- ½ cup small-curd low-fat cottage cheese
- 1 cup pumpkin puree (not pumpkin pie filling)
- ½ cup light brown sugar, packed
- ¼ cup granulated sugar
- 2 large eggs, at room temperature
- 1 teaspoon vanilla extract
- 1 ½ teaspoons pumpkin pie spice
- ¼ teaspoon salt
- ½ cup light whipped topping (optional, for serving)
- 2 tablespoons toasted pumpkin seeds (pepitas, optional, for serving)
- Ground cinnamon for dusting (optional, for serving)
Instructions
- Preheat oven to 325°F (163°C). Line an 8×8-inch baking pan with parchment paper, leaving 2 inches of overhang on two opposite sides. Lightly spray with non-stick cooking spray.
- Make the crust: In a medium bowl, combine graham cracker crumbs, 2 tablespoons granulated sugar, and ½ teaspoon cinnamon. Pour in melted butter and stir until mixture resembles wet sand. Press firmly and evenly into the prepared pan using the bottom of a flat measuring cup. Bake for 8 minutes, then set aside to cool slightly.
- Blend the cottage cheese: In a food processor or high-speed blender, blend ½ cup cottage cheese on high for 30-45 seconds until completely smooth. Set aside.
- Beat cream cheese and sugars: In a large mixing bowl, beat softened cream cheese with an electric mixer on medium speed until smooth and fluffy (about 2 minutes). Add brown sugar and ¼ cup granulated sugar, beat for another 2 minutes until light and airy. Scrape down sides and bottom of bowl.
- Add wet ingredients: Add pumpkin puree, Greek yogurt, blended cottage cheese, vanilla extract, pumpkin pie spice, and salt. Beat on medium speed until well combined and smooth.
- Add eggs: Add eggs one at a time, beating on low speed just until each is incorporated. Do not overmix. Give a final stir with a rubber spatula.
- Assemble and bake: Pour filling over pre-baked crust and spread evenly. Tap pan gently on counter to release air bubbles. Bake at 325°F for 35-40 minutes, until edges are set and center has a slight jiggle when shaken.
- Cool and chill: Place pan on a wire rack and cool completely at room temperature (about 1 hour). Cover with plastic wrap and refrigerate for at least 4 hours, preferably overnight.
- Slice and serve: Use parchment overhang to lift bars out of pan. Place on cutting board and cut into 16 even bars (4×4). Wipe knife clean between cuts. Serve cold or at room temperature, topped with whipped topping, pumpkin seeds, and cinnamon if desired.
Notes
Don’t skip blending the cottage cheese—it’s key to the light, creamy texture. Use room temperature ingredients for best results. The jiggle test is crucial: center should wobble slightly when done. For clean cuts, chill overnight and use a sharp knife wiped clean between cuts. If cracks appear, cover with whipped cream.
Nutrition
- Serving Size: 1 bar
- Calories: 185
- Sugar: 14
- Sodium: 180
- Fat: 9
- Saturated Fat: 5
- Carbohydrates: 22
- Fiber: 1
- Protein: 6
Keywords: pumpkin cheesecake bars, light cheesecake, fall dessert, pumpkin dessert, easy cheesecake bars, healthy cheesecake, Greek yogurt cheesecake