Love this? Save it for later!
Share the inspiration with your friends
My neighbor Margaret watched me wrestling with a wobbly, cracked pie plate on my back porch last November. I was trying to salvage a store-bought crust that had gone soggy, and honestly, I was losing the battle. She didn’t say anything at first, just shook her head with a knowing smile. Then she walked over to the fence and said, “You’re working too hard. Come over tomorrow, and I’ll show you the pie that actually works.”
The next afternoon, I found myself in her sunny kitchen, and she handed me a gingersnap cookie straight from the package. “That’s your crust,” she said. I thought she was joking. She wasn’t. That day, she shared her secret for a lighter, less fussy pumpkin pie—one that swapped the heavy cream for something unexpected and used brown butter to add depth without the guilt. I scribbled notes on a napkin while her cat wound around my ankles.
I’ve made this lighter brown butter pumpkin pie with gingersnap crust every year since. It’s the kind of recipe that makes you wonder why you ever bothered with the traditional version. The filling is silky, not dense, and the brown butter brings this nutty, caramelized warmth that pairs perfectly with the spicy crunch of the crust. Maybe you’ve been there—staring at a complicated dessert recipe and thinking, “Is this really worth the stress?” This one isn’t. It’s forgiving, adaptable, and somehow feels both special and totally doable on a busy holiday morning.
What I love most is how it became our thing. Margaret moved away two years ago, but every Thanksgiving, I make this pie and text her a photo. She always responds with a cookie emoji. That’s the kind of recipe this is—one that sticks with you, not just on your plate, but in your memory.
Why You’ll Love This Recipe
This isn’t just another pumpkin pie. It’s the one that solves all the little frustrations you’ve had with traditional versions, without asking you to sacrifice any of the flavor you crave.
- Quick & Easy : Comes together in under an hour of active time, perfect for busy holiday mornings or last-minute dessert decisions.
- Simple Ingredients : No fancy grocery trips needed. You likely have everything in your pantry except maybe the fresh pumpkin puree.
- Perfect for Thanksgiving : Great for the main event, but honestly, I make it for fall dinners and random Tuesday nights too.
- Crowd-Pleaser : Always gets rave reviews from kids and adults alike. Even the traditionalists in my family ask for seconds.
- Unbelievably Delicious : The texture and flavor combo is next-level comfort food. The brown butter adds a richness that makes you forget it’s lighter.
What sets this recipe apart is the technique. By using evaporated milk instead of heavy cream, you get a custard that’s creamy without being heavy. And browning the butter first? That’s the secret move. It adds a deep, nutty flavor that makes the filling taste more complex than it actually is. This isn’t just another version—it’s your best version, the one you’ll reach for year after year.
This recipe is the kind that makes you close your eyes after the first bite. It’s comfort food reimagined—healthier, faster, but with the same soul-soothing satisfaction. Perfect for impressing guests without stress, or turning a simple meal into something memorable.
What Ingredients You Will Need
This recipe uses simple, wholesome ingredients to deliver bold flavor and satisfying texture without the fuss. Most of these are pantry staples, which makes this pie an easy last-minute option when you need something impressive.
- For the Gingersnap Crust:
- 1 ½ cups finely crushed gingersnap cookies (about 30 cookies) – I prefer the texture of Nabisco’s brand, but store-brand works fine too
- ¼ cup unsalted butter, melted (adds richness and helps the crust hold together)
- 2 tablespoons granulated sugar (optional, if your gingersnaps aren’t very sweet)
- Pinch of salt (balances the sweetness)
- For the Brown Butter Pumpkin Filling:
- ¼ cup unsalted butter (for browning)
- 1 can (15 oz) pumpkin puree (not pumpkin pie filling) – I recommend Libby’s for consistent results
- ½ cup packed light brown sugar (adds moisture and depth)
- ¼ cup granulated sugar
- 2 large eggs, room temperature (helps create a smooth custard)
- 1 teaspoon vanilla extract (use pure, not imitation)
- 1 teaspoon ground cinnamon
- ½ teaspoon ground ginger
- ¼ teaspoon ground nutmeg
- ¼ teaspoon ground cloves
- ½ teaspoon salt
- 1 can (12 oz) evaporated milk (the secret to a lighter, creamy filling)
Ingredient Selection Tips: Look for firm, small-curd evaporated milk for best texture. If you can find it, use fresh pumpkin puree in the fall for a brighter flavor. For the gingersnaps, avoid the super hard, rock-like ones—you want cookies that crush easily into fine crumbs. I’ve used both homemade and store-bought gingersnaps, and honestly, the store-bought ones work perfectly here. They’re more consistent in texture and sweetness.
Substitution Guidance: Use almond milk or oat milk instead of evaporated milk for a dairy-free option—just note the filling will be slightly less creamy. For a gluten-free crust, use gluten-free gingersnap cookies. If you don’t have individual spices, substitute 2 teaspoons of pumpkin pie spice for the cinnamon, ginger, nutmeg, and cloves.
Equipment Needed
You don’t need a fancy kitchen to pull off this pie. Here’s what you’ll need:
- 9-inch pie plate (glass or ceramic works best for even baking)
- Mixing bowls (one medium, one large)
- Whisk
- Rubber spatula
- Measuring cups and spoons
- Small saucepan (for browning the butter)
- Rolling pin or food processor (for crushing gingersnaps)
- Plastic wrap (for chilling the crust)
- Cooling rack
Alternative Suggestions: If you don’t have a food processor, place the gingersnaps in a zip-top bag and crush them with a rolling pin. It’s a little messy, but it works. No pie plate? Use a 9-inch tart pan with a removable bottom for a more elegant presentation. I’ve also made this in a cast-iron skillet, which gives the crust a lovely crisp edge.
Maintenance Tip: If you use a glass pie plate, avoid putting it directly on a cold surface after baking—the temperature shock can crack it. Let it cool on a wire rack instead.
Preparation Method
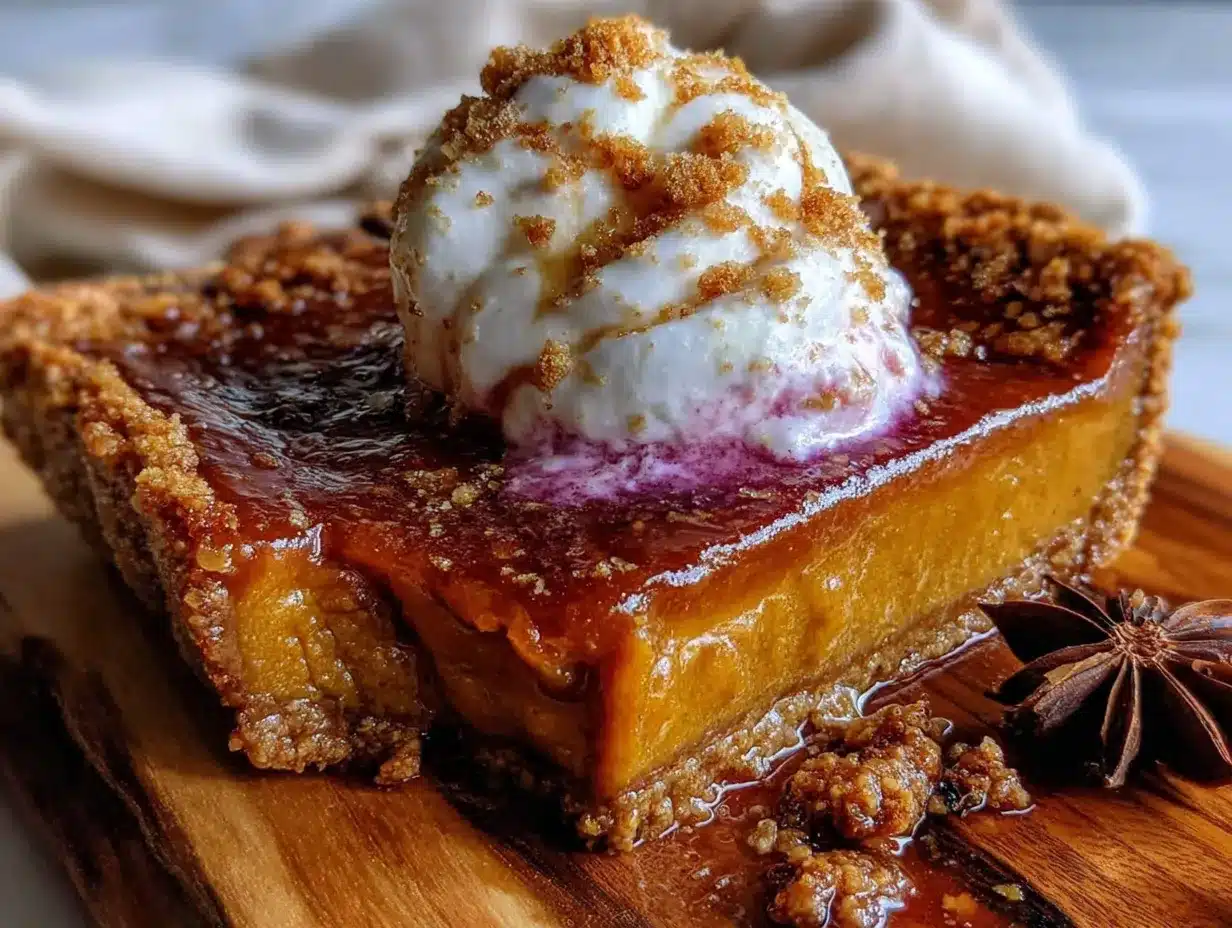
- Preheat and Prepare: Preheat your oven to 350°F (175°C). Place a rack in the middle position. If you’re using a dark metal pie pan, reduce the temperature by 25°F—it absorbs heat faster and can over-brown the crust.
- Crush the Gingersnaps: Place the gingersnap cookies in a food processor and pulse until you have fine, uniform crumbs. You need about 1 ½ cups of crumbs. If you’re using the bag-and-rolling-pin method, make sure there are no large chunks—they’ll create weak spots in the crust. The crumbs should look like wet sand when you’re done.
- Make the Crust: In a medium bowl, combine the gingersnap crumbs, melted butter, sugar (if using), and salt. Stir with a fork until the mixture looks like damp sand and holds together when you press it in your fist. Don’t overmix—you just want everything evenly moistened.
- Press the Crust: Transfer the crumb mixture to your pie plate. Use the bottom of a measuring cup or a flat-bottomed glass to press it firmly and evenly into the bottom and up the sides. Start with the bottom, then work your way up. Make sure the edges are thick enough—about ¼ inch—so they don’t crumble when you cut slices. Place the crust in the refrigerator while you prepare the filling (at least 15 minutes).
- Brown the Butter: In a small saucepan over medium heat, melt the ¼ cup of butter. Swirl the pan occasionally. The butter will foam, then turn golden, then develop brown specks at the bottom. This takes about 5-7 minutes. Watch it carefully—it can go from perfect to burnt in seconds. When it smells nutty and looks like light caramel, remove it from the heat immediately. Pour it into a heatproof bowl to stop the cooking process.
- Mix the Filling: In a large bowl, whisk together the pumpkin puree, brown sugar, and granulated sugar until smooth. Add the eggs one at a time, whisking well after each addition. Stir in the vanilla extract and the browned butter (make sure it’s not too hot—you don’t want to scramble the eggs).
- Add the Spices and Milk: Whisk in the cinnamon, ginger, nutmeg, cloves, and salt. Slowly pour in the evaporated milk while whisking gently. The mixture should be smooth, golden, and slightly thick. Don’t overmix—you don’t want to incorporate too much air, which can cause cracks during baking.
- Assemble and Bake: Remove the crust from the refrigerator. Place it on a baking sheet (this makes it easier to handle and catches any spills). Pour the filling into the crust. Bake for 45-50 minutes, or until the edges are set and the center jiggles slightly when you gently shake the pan. The center should look like set Jell-O, not liquid. A knife inserted about 2 inches from the edge should come out clean.
- Cool Completely: Transfer the pie to a wire rack and let it cool to room temperature, about 2 hours. The filling will continue to set as it cools. Don’t rush this step—cutting into a warm pie will result in a runny mess. Once cool, refrigerate for at least 4 hours or overnight before serving.
Sensory Cue: When the pie is done, the kitchen will smell like a fall candle exploded—warm, spicy, and nutty from the brown butter. The surface should be matte, not glossy, and the edges will have a slight crackle.
Cooking Tips & Techniques
I’ve made this pie more times than I can count, and I’ve learned a few things the hard way. Here’s what I wish I’d known from the start.
Don’t Skip Chilling the Crust: I once tried to speed things up and skipped refrigerating the crust. The result? A crumbly, falling-apart mess that mixed into the filling. Chilling solidifies the butter, which helps the crust hold its shape during baking. Trust me on this one—15 minutes in the fridge makes all the difference.
Watch the Butter Like a Hawk: Browning butter is one of those techniques that seems simple but can go wrong fast. The first time I tried it, I got distracted by my phone and ended up with black, bitter butter. It ruined the whole pie. Now I set a timer for 5 minutes and watch it like a hawk. The butter will foam up, then subside, and that’s when the brown specks start forming. That’s your window.
Room Temperature Eggs Matter: Cold eggs can seize the browned butter and create a lumpy filling. Leave your eggs on the counter for 30 minutes before starting, or place them in a bowl of warm water for 5 minutes. It’s a small step that makes a big difference in texture.
Don’t Overbake: The biggest mistake people make with pumpkin pie is overbaking. The center should still jiggle slightly when you pull it out of the oven. It will continue to set as it cools. If you wait until the center is completely firm, you’ll end up with a dry, cracked filling. I learned this after serving a pie that looked like a desert landscape.
Timing Strategy: Make this pie a day ahead. The flavors meld and deepen overnight, and it takes the stress out of holiday cooking. I usually make the crust and filling the night before, bake it, and let it cool in the fridge. The next day, I just pull it out, slice, and serve.
Variations & Adaptations
This recipe is surprisingly flexible. Here are a few ways I’ve adapted it over the years.
Dairy-Free Version: Use coconut oil or vegan butter in the crust, and substitute the evaporated milk with full-fat coconut milk. The filling will be slightly less creamy, but the coconut flavor actually pairs beautifully with the brown butter and spices. I made this for a friend with dairy allergies, and she said it was the best pumpkin pie she’d ever had.
Gluten-Free Option: Swap the gingersnaps for gluten-free gingersnap cookies. Most major brands now offer a gluten-free version that works perfectly. Just make sure to check the label—some gluten-free cookies are harder and need more crushing.
Spice It Up: For a bolder flavor, add a pinch of black pepper or cayenne to the filling. It sounds strange, but the heat cuts through the sweetness and adds a surprising warmth. I tried this after a friend suggested it, and now I do it every time.
Individual Servings: Instead of a large pie, make mini pies in a muffin tin. Press the crust into greased muffin cups, fill with the custard, and bake for 20-25 minutes. They’re perfect for parties or portion control. Just watch the baking time—they cook faster than a full pie.
Maple Twist: Replace half the brown sugar with pure maple syrup for a deeper, more complex sweetness. Reduce the evaporated milk by 2 tablespoons to compensate for the extra liquid. The result is a pie that tastes like autumn in a slice.
Serving & Storage Suggestions
This pie is best served cold or at room temperature. I prefer it straight from the fridge—the filling firms up beautifully, and the crust stays crisp. If you want to serve it warm, let individual slices sit at room temperature for 10 minutes before serving.
Presentation Ideas: Top each slice with a dollop of lightly sweetened whipped cream or a scoop of vanilla ice cream. For a fancier touch, drizzle with caramel sauce and sprinkle with crushed gingersnaps. I once served this at a Friendsgiving, and someone said it looked like a magazine cover.
Complementary Dishes: This pie pairs beautifully with a cup of strong coffee or a glass of cold milk. For a full holiday spread, serve it alongside roasted turkey, mashed potatoes, and green bean casserole. The spicy crust and creamy filling balance out the savory dishes perfectly.
Storage Instructions: Cover the pie loosely with plastic wrap or aluminum foil and refrigerate for up to 5 days. The crust will soften slightly over time, but the flavor actually improves. To freeze, wrap the cooled pie tightly in plastic wrap, then in foil, and freeze for up to 3 months. Thaw overnight in the refrigerator before serving.
Reheating Tips: If you prefer your pie warm, reheat individual slices in a 300°F (150°C) oven for 10 minutes. Avoid the microwave—it will make the crust soggy and the filling rubbery.
Flavor Development: The brown butter flavor becomes more pronounced after a day or two in the fridge. I actually think this pie tastes better on day two. The spices mellow and meld, and the crust absorbs just a hint of moisture from the filling, creating a perfect texture.
Nutritional Information & Benefits
This lighter version of pumpkin pie has about 280 calories per slice (based on 8 servings), compared to 350-400 for a traditional recipe. The swap from heavy cream to evaporated milk saves about 50 calories and 5 grams of fat per serving without sacrificing creaminess.
Health Benefits of Key Ingredients: Pumpkin is packed with vitamin A, fiber, and antioxidants. It’s naturally low in calories and adds moisture without extra fat. The ginger in the crust and filling aids digestion—a welcome bonus after a heavy holiday meal. Brown butter adds depth with less fat than traditional butter-based crusts.
Dietary Considerations: This recipe is vegetarian-friendly. For a gluten-free version, use gluten-free gingersnaps. For a dairy-free version, substitute the butter and evaporated milk as noted above. The recipe is naturally low in added sugar compared to most pumpkin pie recipes, thanks to the sweetness of the gingersnap crust.
Potential Allergens: Contains dairy (butter, evaporated milk), gluten (gingersnaps), and eggs. Check your gingersnap labels for potential cross-contamination if you have severe allergies.
I love that this pie lets me enjoy a holiday tradition without the post-dessert food coma. It’s indulgent enough to feel like a treat, but light enough that you can go back for seconds without guilt.
Conclusion
This lighter brown butter pumpkin pie with gingersnap crust is the dessert you didn’t know you needed. It solves all the little problems of traditional pumpkin pie—the soggy crust, the heavy filling, the stress of making pastry from scratch—while delivering flavor that’s actually better. The brown butter adds a nutty richness that makes you forget it’s lighter, and the gingersnap crust is so easy you’ll never go back to rolling dough.
I hope you’ll make this recipe your own. Maybe you’ll add a pinch of cayenne like I do, or swap the spices for your favorite blend. Maybe you’ll make mini pies for a party or double the recipe for a crowd. However you adapt it, I promise it will become a staple in your fall rotation.
I’d love to hear how it turns out. Drop a comment below and let me know if you tried any variations, or share a photo of your pie on Pinterest. And if you’re looking for more holiday inspiration, check out our healthy Thanksgiving sides or this maple pecan pie for another twist on tradition.
Happy baking, friends. May your crust be crisp, your filling be silky, and your kitchen smell like autumn.
Frequently Asked Questions
Can I use fresh pumpkin instead of canned?
Absolutely. Roast a small sugar pumpkin at 400°F (200°C) for 45 minutes, then scoop out the flesh and puree it in a food processor. Just make sure to drain off any excess liquid—fresh pumpkin can be more watery than canned. You’ll need about 2 cups of puree for this recipe.
Why did my crust fall apart?
This usually happens when the crust isn’t pressed firmly enough or wasn’t chilled before baking. Make sure you’re using enough butter to bind the crumbs, and press the mixture firmly into the pie plate with a flat-bottomed glass. Chilling for at least 15 minutes helps the butter solidify and hold everything together.
Can I make this pie ahead of time?
Yes, and I actually recommend it. The pie can be made 1-2 days in advance and stored in the refrigerator. The flavors meld and deepen overnight, and it takes the stress out of holiday cooking. Just cover it loosely with plastic wrap once it’s completely cool.
How do I know when the pie is done baking?
The edges should be set and slightly puffed, while the center should jiggle like set Jell-O when you gently shake the pan. A knife inserted about 2 inches from the edge should come out clean. Don’t wait until the center is completely firm—it will continue to set as it cools.
Can I freeze this pie?
Yes. Let the pie cool completely, then wrap it tightly in plastic wrap, followed by a layer of aluminum foil. Freeze for up to 3 months. Thaw overnight in the refrigerator before serving. The crust may soften slightly, but the flavor will still be excellent.
Pin This Recipe!
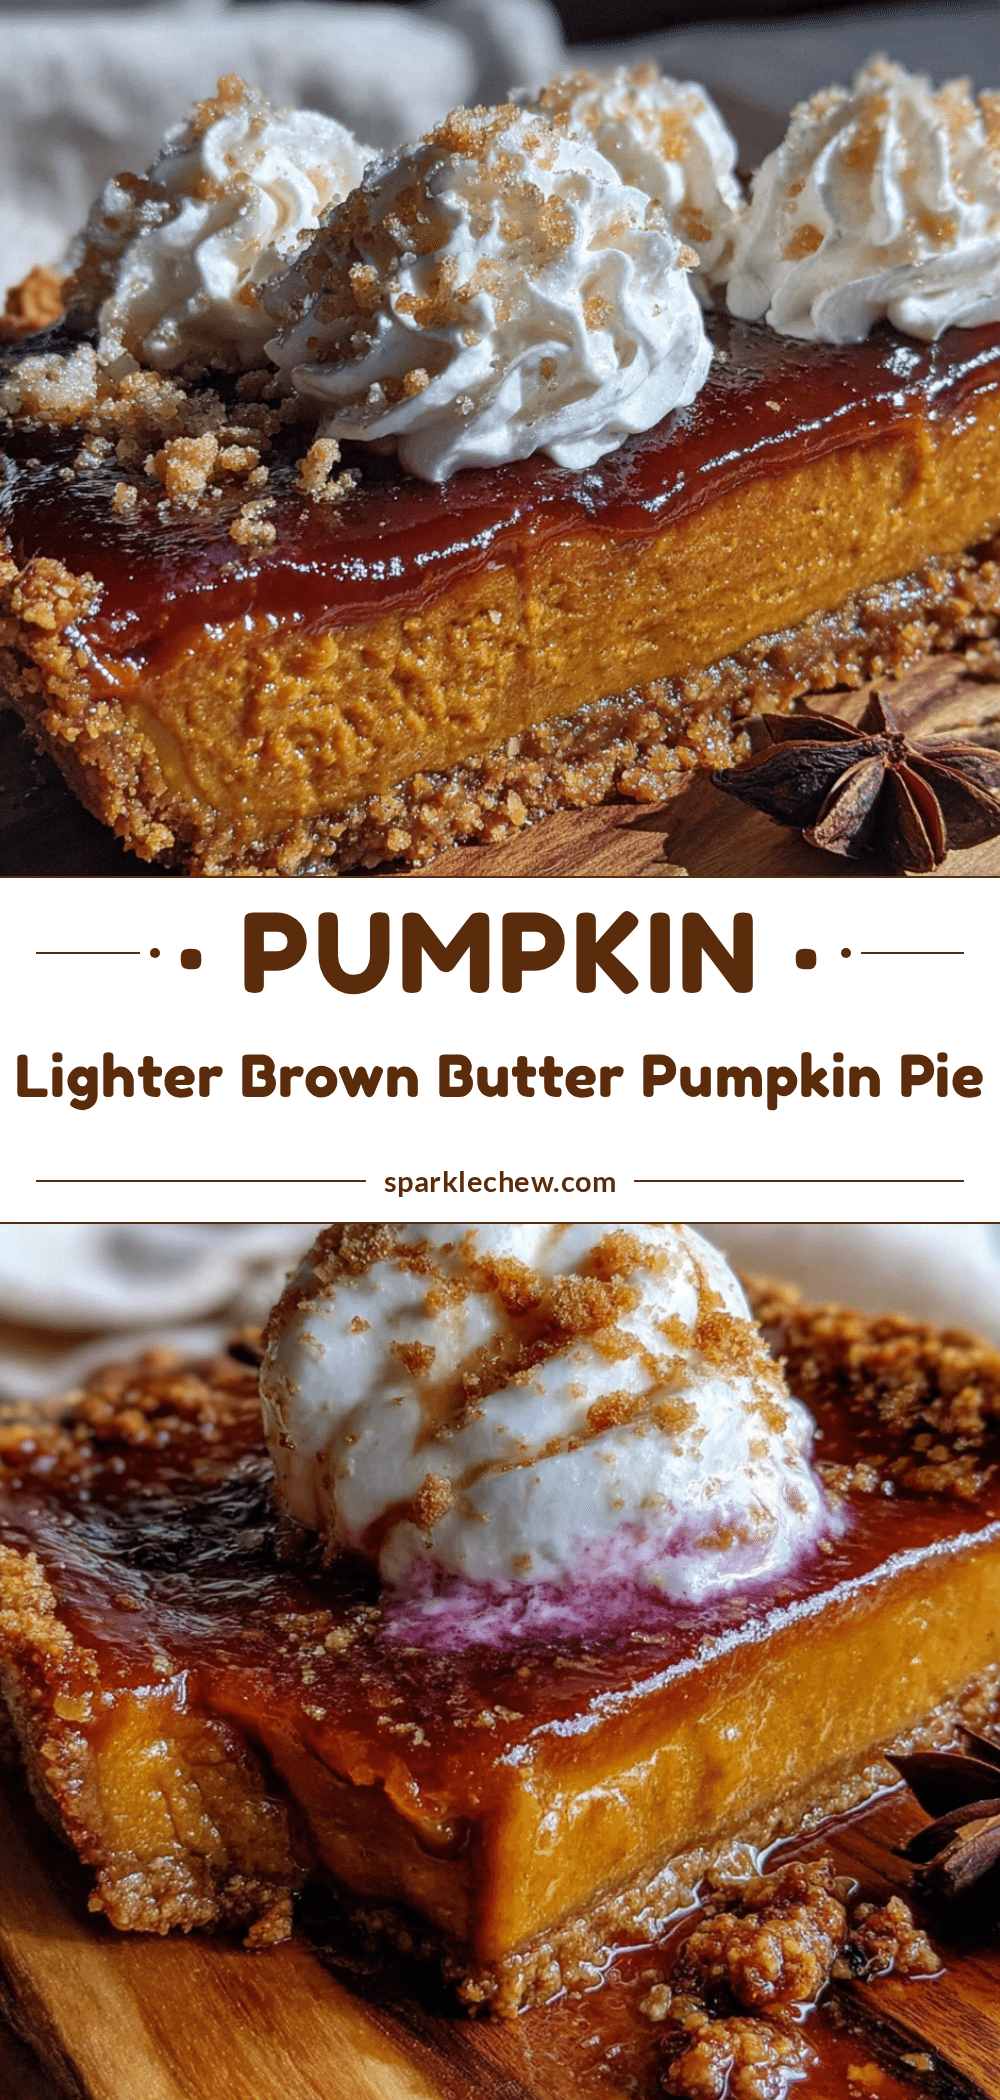
Lighter Brown Butter Pumpkin Pie with Gingersnap Crust
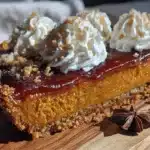
A lighter, less fussy pumpkin pie with a gingersnap crust and brown butter filling that’s silky, not dense. This forgiving recipe swaps heavy cream for evaporated milk and uses brown butter to add depth without the guilt.
- Prep Time: 20 minutes
- Cook Time: 50 minutes
- Total Time: 2 hours 10 minutes (plus chilling time)
- Yield: 8 servings 1x
- Category: Dessert
- Cuisine: American
Ingredients
- 1 ½ cups finely crushed gingersnap cookies (about 30 cookies)
- ¼ cup unsalted butter, melted
- 2 tablespoons granulated sugar (optional)
- Pinch of salt
- ¼ cup unsalted butter (for browning)
- 1 can (15 oz) pumpkin puree
- ½ cup packed light brown sugar
- ¼ cup granulated sugar
- 2 large eggs, room temperature
- 1 teaspoon vanilla extract
- 1 teaspoon ground cinnamon
- ½ teaspoon ground ginger
- ¼ teaspoon ground nutmeg
- ¼ teaspoon ground cloves
- ½ teaspoon salt
- 1 can (12 oz) evaporated milk
Instructions
- Preheat your oven to 350°F (175°C). Place a rack in the middle position. If using a dark metal pie pan, reduce the temperature by 25°F.
- Crush the gingersnap cookies in a food processor until you have fine, uniform crumbs (about 1 ½ cups). Alternatively, place cookies in a zip-top bag and crush with a rolling pin.
- In a medium bowl, combine the gingersnap crumbs, melted butter, sugar (if using), and salt. Stir with a fork until the mixture looks like damp sand and holds together when pressed.
- Transfer the crumb mixture to a 9-inch pie plate. Use the bottom of a measuring cup or flat-bottomed glass to press it firmly and evenly into the bottom and up the sides. Make sure the edges are about ¼ inch thick. Refrigerate the crust for at least 15 minutes.
- In a small saucepan over medium heat, melt the ¼ cup of butter. Swirl the pan occasionally. The butter will foam, then turn golden, then develop brown specks at the bottom (about 5-7 minutes). When it smells nutty and looks like light caramel, remove from heat immediately and pour into a heatproof bowl.
- In a large bowl, whisk together the pumpkin puree, brown sugar, and granulated sugar until smooth. Add the eggs one at a time, whisking well after each addition. Stir in the vanilla extract and the browned butter (make sure it’s not too hot).
- Whisk in the cinnamon, ginger, nutmeg, cloves, and salt. Slowly pour in the evaporated milk while whisking gently. The mixture should be smooth, golden, and slightly thick.
- Remove the crust from the refrigerator. Place it on a baking sheet. Pour the filling into the crust. Bake for 45-50 minutes, or until the edges are set and the center jiggles slightly when you gently shake the pan.
- Transfer the pie to a wire rack and let it cool to room temperature, about 2 hours. Once cool, refrigerate for at least 4 hours or overnight before serving.
Notes
Don’t skip chilling the crust. Watch the butter carefully when browning—it can go from perfect to burnt in seconds. Use room temperature eggs to prevent lumpy filling. Don’t overbake; the center should still jiggle slightly when removed from the oven. Make this pie a day ahead for best flavor.
Nutrition
- Serving Size: 1 slice (1/8 of pie)
- Calories: 280
- Sugar: 24
- Sodium: 320
- Fat: 12
- Saturated Fat: 7
- Carbohydrates: 38
- Fiber: 2
- Protein: 5
Keywords: pumpkin pie, brown butter, gingersnap crust, lighter pumpkin pie, Thanksgiving dessert, fall dessert, easy pumpkin pie