Love this? Save it for later!
Share the inspiration with your friends
Jen wasn’t trying to impress anyone. I’d stopped by to drop off a book I’d borrowed, and the smell hit me before I even got through the door. It was minty, but not in that sharp, toothpaste way. It was warm and sweet, like crushed candy canes melting into something buttery. She was standing at the counter in her worn-out slippers, flour dusted across her favorite sweater, and she just shrugged when I asked what she was making. “Oh, just some cookies for the kids’ class party,” she said, like it was nothing. But let me tell you, one bite of those green-speckled, powdered sugar-dusted cookies, and I knew I wasn’t leaving without the recipe. They were soft, fudgy, and had that perfect crinkle on top that makes a cookie look like it just came out of a bakery window. Honestly, I think I ate four before I even sat down.
That was a few years ago, and I’ve been tweaking that recipe ever since. The original was a sugar bomb, and while I loved the idea of a Grinch-themed cookie, I wanted one that felt a little lighter—something I could make on a Tuesday night without feeling like I needed a nap afterward. You know that feeling when a cookie is so rich you can only eat one? These aren’t those cookies. These are the kind you can have two of, maybe three, and still feel good about it. I swapped out some of the butter, cut back on the sugar, and used whole wheat pastry flour for a little fiber. The result? A mint chocolate crinkle cookie that’s festive, fun, and actually fits into a balanced eating plan. Maybe you’ve been there, staring at a holiday cookie recipe and wishing it wasn’t quite so heavy. Well, this one’s for you.
What I love most about these cookies is how they bring people together. I’ve made them for cookie swaps, for movie nights, and even just for myself on a snowy afternoon. They have this way of making everything feel a little more special without being fussy. And let’s face it—anything that looks like the Grinch’s heart grew three sizes that day is bound to bring a smile to someone’s face. So grab your mixing bowls, preheat that oven, and let’s make some magic happen.
Why You’ll Love This Recipe
I’ve tested this recipe more times than I care to admit, and I can honestly say it’s the best version of a Grinch cookie I’ve ever made. Here’s why you’ll love it too:
- Quick & Easy: These cookies come together in about 30 minutes of active time, plus a quick chill. Perfect for when you need a last-minute dessert for a holiday party or a fun weekend baking project with the kids.
- Simple Ingredients: You probably already have most of these in your pantry. No weird extracts or hard-to-find flours. Just good, wholesome ingredients that work together beautifully.
- Perfect for the Holidays: The bright green color and snowy powdered sugar make these a showstopper on any cookie platter. They’re great for Christmas parties, school events, or just for fun.
- Crowd-Pleaser: I’ve served these to kids, adults, and even picky eaters, and they disappear every single time. The mint-chocolate combo is a classic for a reason.
- Unbelievably Delicious: Despite being lighter, these cookies are still rich, fudgy, and satisfying. The texture is soft in the center with a slightly crisp edge, and the crinkle top is just gorgeous.
What makes this recipe different from the rest? It’s the balance. I’ve spent a lot of time figuring out how to reduce the calories and sugar without sacrificing flavor or texture. The secret is using a combination of cocoa powder and melted dark chocolate for depth, plus a touch of Greek yogurt to keep things moist without all the butter. It’s not just another version—it’s my best version, and I’m so excited to share it with you.
Honestly, this recipe is the kind that makes you close your eyes after the first bite. It’s comfort food reimagined—healthier, faster, but with the same soul-soothing satisfaction. Perfect for impressing guests without stress, or turning a simple Tuesday into something memorable.
What Ingredients You Will Need
This recipe uses simple, wholesome ingredients to deliver bold flavor and satisfying texture without the fuss. Most of these are pantry staples, which makes this a great go-to recipe when you’re craving something sweet.
- All-purpose flour (1 ½ cups, 180g) – I use unbleached all-purpose flour for the best texture. You can substitute whole wheat pastry flour for a lighter, fiber-rich option.
- Unsweetened cocoa powder (½ cup, 40g) – I recommend a good quality brand like Ghirardelli or Hershey’s Special Dark for a rich, deep chocolate flavor.
- Baking powder (1 teaspoon) – Make sure it’s fresh for the best rise.
- Salt (½ teaspoon) – Just a pinch to balance the sweetness.
- Granulated sugar (¾ cup, 150g) – I’ve cut back from the traditional 1 cup, and you honestly won’t miss it.
- Light butter (4 tablespoons, 56g, softened) – I use a light butter spread with about 40% less fat. It works perfectly here.
- Large egg (1) – Room temperature for better incorporation.
- Plain Greek yogurt (¼ cup, 60g) – This replaces some of the butter and adds moisture and protein. I prefer 2% or full-fat Greek yogurt for the best texture.
- Vanilla extract (1 teaspoon) – Pure vanilla extract makes a difference.
- Peppermint extract (½ teaspoon) – Look for pure peppermint extract, not peppermint oil, which can be too strong.
- Green gel food coloring (about 10-12 drops) – Gel coloring works best because it doesn’t add extra liquid. I like the AmeriColor brand.
- Dark chocolate chips (½ cup, 90g) – I use miniature dark chocolate chips for even distribution. You can also chop up a dark chocolate bar.
- Powdered sugar (½ cup, 60g) – For rolling. The fine, snowy coating is what gives these cookies their signature crinkle look.
Ingredient Selection Tips: When choosing cocoa powder, look for one that’s dark and rich. I personally prefer Dutch-processed cocoa for a smoother, less acidic flavor. For the peppermint extract, a little goes a long way—start with ½ teaspoon and adjust to your taste. If you’re using a different brand of food coloring, add it drop by drop until you reach the desired shade of Grinch green.
Substitution Guidance: For a gluten-free option, use a 1:1 gluten-free baking flour blend. For a dairy-free version, substitute the light butter with a vegan butter stick and use a dairy-free Greek yogurt alternative. The cookies will still be delicious, though the texture may be slightly different.
Equipment Needed
You don’t need anything fancy for these cookies, which is part of why I love them. Here’s what you’ll need:
- Mixing bowls: One large and one medium. I use a set of glass nesting bowls that I’ve had for years.
- Electric hand mixer or stand mixer: A hand mixer works great for creaming the butter and sugar. You can also do it by hand with a wooden spoon if you need a little arm workout.
- Measuring cups and spoons: For accuracy. I prefer metal measuring cups for dry ingredients and glass for liquids.
- Baking sheets: Two large, light-colored baking sheets work best. Dark sheets can cause the bottoms to brown too quickly.
- Parchment paper or silicone baking mat: This prevents sticking and makes cleanup a breeze. I use parchment paper because it’s easy to find.
- Cooling rack: A wire rack allows the cookies to cool evenly without getting soggy on the bottom.
- Spatula: A silicone spatula is great for folding in the chocolate chips.
- Small bowl: For the powdered sugar for rolling.
Budget-Friendly Options: If you don’t have a hand mixer, you can cream the butter and sugar by hand—it just takes a little more elbow grease. And if you don’t have a cooling rack, you can let the cookies cool on the baking sheet for a few minutes, then transfer them to a plate. It’s not perfect, but it works in a pinch.
Preparation Method
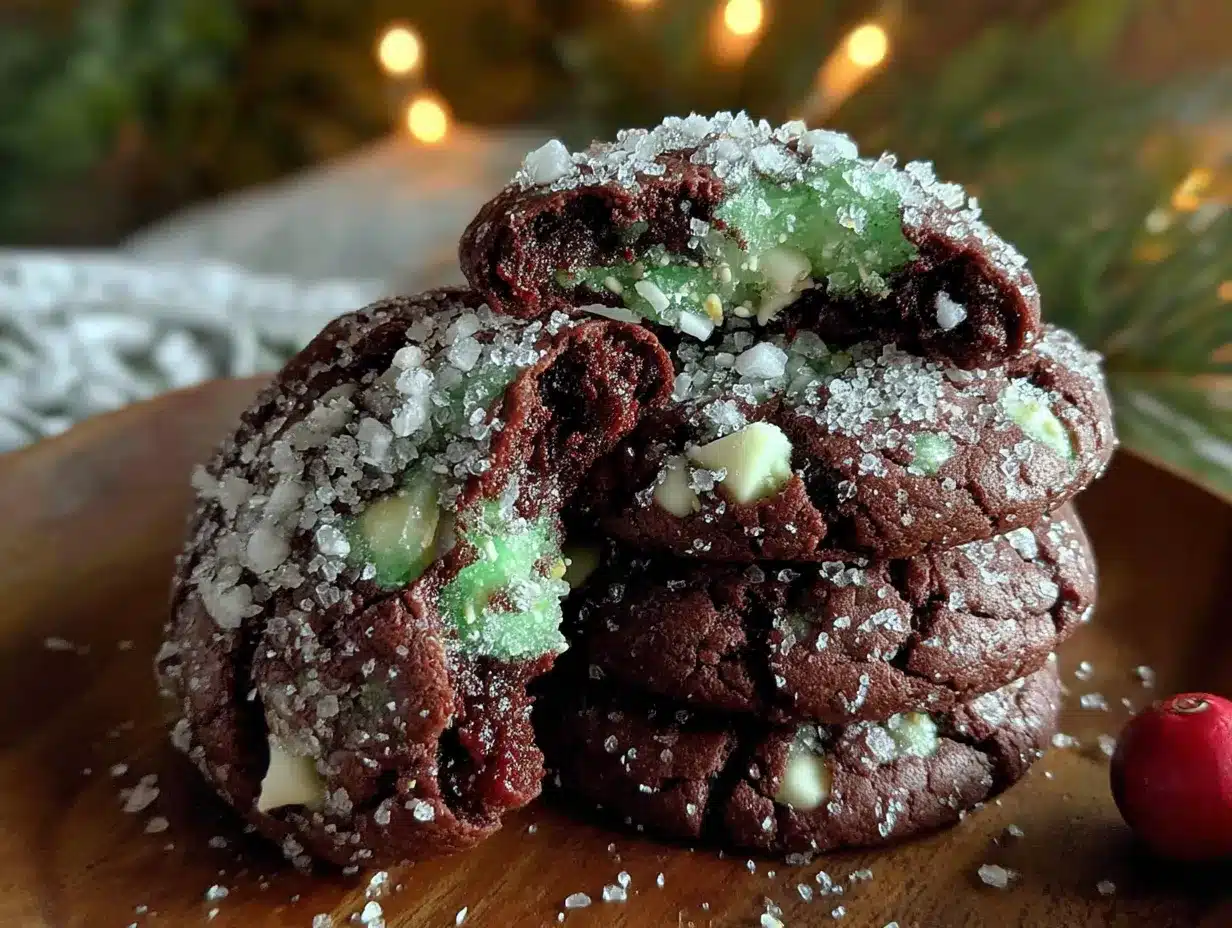
Alright, let’s get baking! Follow these steps carefully, and you’ll have a batch of gorgeous Grinch mint cookies in no time.
- Preheat and prep. Preheat your oven to 350°F (175°C). Line two baking sheets with parchment paper or silicone mats. This step is crucial for even baking and easy cleanup.
- Whisk dry ingredients. In a medium bowl, whisk together the all-purpose flour, unsweetened cocoa powder, baking powder, and salt. Make sure there are no lumps. Set this aside for now.
- Cream butter and sugar. In a large bowl, beat the softened light butter and granulated sugar together with an electric hand mixer on medium speed until light and fluffy, about 2-3 minutes. The mixture should look pale and slightly increased in volume. If you’re doing this by hand, it will take a bit longer—just keep at it until it’s well combined.
- Add wet ingredients. Beat in the egg, Greek yogurt, vanilla extract, and peppermint extract until everything is smooth and well incorporated. The mixture might look a little curdled at this point, but that’s okay—it will come together once you add the dry ingredients.
- Add food coloring. Add the green gel food coloring drop by drop, mixing well after each addition. You want a vibrant Grinch green, but not so dark that it looks artificial. I usually use about 10-12 drops, but it depends on the brand. Remember, the color will darken slightly as the cookies bake.
- Combine wet and dry. Gradually add the dry ingredients to the wet mixture, mixing on low speed until just combined. Be careful not to overmix, or the cookies will be tough. You want to stop as soon as you no longer see streaks of flour.
- Fold in chocolate chips. Using a silicone spatula, gently fold in the miniature dark chocolate chips until they’re evenly distributed throughout the dough. The dough will be quite sticky—that’s normal.
- Chill the dough. Cover the bowl with plastic wrap and refrigerate for at least 30 minutes. This step is important because it makes the dough easier to handle and prevents the cookies from spreading too much in the oven. You can chill it for up to 24 hours if you want to prep ahead.
- Shape and coat. Place the powdered sugar in a small bowl. Using a cookie scoop or a tablespoon, portion out about 1.5 tablespoons of dough (about 25g) and roll it into a ball with your hands. The dough will be slightly sticky, so you might want to lightly wet your hands. Roll the ball in the powdered sugar until it’s completely coated. Make sure to coat it generously—this is what creates the beautiful crinkle effect.
- Bake. Place the coated dough balls on the prepared baking sheets, spacing them about 2 inches apart. Bake for 10-12 minutes, or until the edges are set and the tops have cracked. The centers will still look slightly soft and underdone—that’s exactly what you want. Overbaking will make them dry.
- Cool. Let the cookies cool on the baking sheet for 5 minutes. This allows them to set up properly. Then, transfer them to a wire rack to cool completely. The crinkles will become more pronounced as they cool.
Sensory Cues: When you take the cookies out of the oven, they should look puffy and cracked, with the powdered sugar creating a beautiful snowy effect. The edges should be firm, but the centers will be soft. You’ll smell a wonderful combination of mint and chocolate—it’s absolutely intoxicating. If you gently press the center of a cookie, it should spring back slightly.
Cooking Tips & Techniques
I’ve made these cookies more times than I can count, and I’ve learned a few things along the way. Here are my best tips for perfect results every time.
Don’t skip the chill. I know it’s tempting to skip this step when you’re in a hurry, but trust me on this one. Chilling the dough for at least 30 minutes firms up the butter and allows the flavors to meld together. If you bake the dough right away, the cookies will spread into flat, sad discs instead of staying thick and puffy. I learned this the hard way when I was rushing to make a batch for a party, and they turned into cookie pancakes. Not my finest moment.
Use a cookie scoop for uniform size. A cookie scoop ensures that all your cookies are the same size, which means they’ll bake evenly. I use a #40 scoop, which holds about 1.5 tablespoons. If you don’t have a scoop, use a tablespoon measure and level it off.
Coat generously with powdered sugar. The crinkle effect comes from the dough expanding and cracking as it bakes, revealing the green dough underneath. If you don’t use enough powdered sugar, the cookies won’t crack as much. I like to roll the dough ball in the powdered sugar, then roll it again to make sure it’s completely covered. It might look like a snowball, but that’s the goal.
Watch the baking time. Every oven is different, so start checking your cookies at the 10-minute mark. You want the edges to be set and the tops to have cracks, but the centers should still look soft. If you wait until the centers look fully baked, the cookies will be overdone and dry. Remember, they’ll continue to cook on the hot baking sheet for a few minutes after you take them out.
Let them cool properly. This is another step you don’t want to rush. Let the cookies cool on the baking sheet for exactly 5 minutes before transferring them to a wire rack. If you try to move them too soon, they’ll fall apart. If you leave them on the sheet too long, they might stick or become too firm.
Variations & Adaptations
One of the best things about this recipe is how versatile it is. Here are a few ways to make it your own.
Gluten-Free Version: Substitute the all-purpose flour with a 1:1 gluten-free baking flour blend. I’ve tried this with Bob’s Red Mill and King Arthur brands, and both work well. Just make sure the blend contains xanthan gum for structure. The texture will be slightly more delicate, but still delicious.
Vegan Version: Use a flax egg (1 tablespoon ground flaxseed mixed with 3 tablespoons water, let sit for 5 minutes) instead of the egg, and substitute the Greek yogurt with a dairy-free alternative like coconut yogurt. Use vegan butter sticks instead of light butter. The cookies will be a bit more cake-like, but the flavor is still spot-on.
White Chocolate Peppermint Twist: Swap the dark chocolate chips for white chocolate chips or chopped white chocolate. The combination of green dough, white chocolate, and peppermint is absolutely divine. I made this version for a holiday party last year, and it was the first thing to disappear from the dessert table.
Extra Minty: If you’re a mint lover like me, add a few crushed candy canes to the dough along with the chocolate chips. Just crush them into small pieces (not powder) and fold them in. This adds a nice little crunch and an extra burst of mint flavor.
Nutty Addition: Fold in ¼ cup of finely chopped pecans or walnuts along with the chocolate chips. The nuts add a lovely texture and a savory note that balances the sweetness.
Serving & Storage Suggestions
These Grinch crinkle cookies are best served at room temperature, but they’re also delicious slightly warm when the chocolate chips are still a little melty. I like to arrange them on a festive platter with a few sprigs of fresh mint for garnish—it makes them look extra special.
What to Serve With Them: A glass of cold milk is the classic pairing, but they’re also wonderful with a cup of hot cocoa, peppermint tea, or even a warm chai latte. For a fun dessert board, serve them alongside other holiday treats like gingerbread cookies, sugar cookies, and chocolate truffles.
Storage Instructions: Store the cookies in an airtight container at room temperature for up to 5 days. To keep them soft, add a slice of bread to the container—it will absorb excess moisture and keep the cookies from drying out. I’ve done this for years, and it works like a charm.
Freezing Instructions: These cookies freeze beautifully. You can freeze the baked cookies for up to 3 months. Just place them in a single layer in a freezer-safe container, with parchment paper between layers. When you’re ready to enjoy them, let them thaw at room temperature for about 30 minutes. You can also freeze the unbaked dough balls—just roll them, coat them in powdered sugar, and place them on a baking sheet in the freezer. Once frozen solid, transfer them to a freezer bag. Bake from frozen, adding 1-2 minutes to the baking time.
How Flavors Develop: Honestly, these cookies taste even better the next day. The mint and chocolate flavors meld together overnight, creating a more complex and satisfying taste. So if you can resist eating them all on day one, you’re in for a treat.
Nutritional Information & Benefits
I know we’re talking about cookies here, but I love that this recipe is a little lighter than traditional versions without sacrificing any of the joy. Here’s the estimated nutritional breakdown per cookie (based on 24 cookies):
| Nutrient | Amount per Cookie |
|---|---|
| Calories | 98 |
| Total Fat | 3.5g |
| Saturated Fat | 2g |
| Cholesterol | 12mg |
| Sodium | 65mg |
| Total Carbohydrates | 16g |
| Dietary Fiber | 1.5g |
| Sugars | 9g |
| Protein | 2g |
Health Benefits of Key Ingredients: Dark chocolate is rich in antioxidants and can help improve heart health. Greek yogurt adds protein and probiotics, which are great for digestion. And cocoa powder contains flavonoids that may help reduce inflammation. So while these are still a treat, you can feel a little better about indulging.
Dietary Considerations: These cookies are nut-free (unless you add nuts) and can easily be made gluten-free or vegan with the substitutions mentioned above. They are not suitable for those with dairy allergies unless you use the vegan adaptations.
Conclusion
I hope you love these Lighter Grinch Mint Chocolate Crinkle Cookies as much as I do. They’re festive, fun, and surprisingly easy to make. Whether you’re baking them for a holiday party, a cookie swap, or just because you want something sweet, they’re guaranteed to bring a smile to your face. The combination of mint and chocolate is a classic for a reason, and the bright green color makes them perfect for spreading holiday cheer.
I’d love to hear how they turn out for you! Did you try any of the variations? Did you add your own twist? Leave a comment below and let me know. And if you share them on social media, tag me so I can see your beautiful creations. Happy baking, my friends—may your cookies be perfectly crinkled and your heart grow three sizes this holiday season.
Frequently Asked Questions
Can I use natural food coloring instead of gel?
Yes, you can use natural food coloring, but you’ll need to use more drops to achieve the same vibrant green color. Just be aware that liquid food coloring can add extra moisture to the dough, which might affect the texture slightly. Start with 15-20 drops and add more as needed.
Why did my cookies not crack?
If your cookies didn’t develop the signature crinkle look, it’s usually because they weren’t coated in enough powdered sugar. Make sure to roll the dough balls generously, covering every surface. Also, check that your oven is at the right temperature—if it’s too cool, the cookies will spread before they set, preventing the cracks from forming.
Can I make the dough ahead of time?
Absolutely! You can prepare the dough up to 24 hours in advance and keep it covered in the refrigerator. When you’re ready to bake, let it sit at room temperature for about 10 minutes to soften slightly, then proceed with rolling and coating. You can also freeze the dough balls for up to 3 months.
How do I make these cookies more or less minty?
Start with ½ teaspoon of peppermint extract for a balanced mint flavor. If you want a stronger mint kick, increase it to ¾ teaspoon. If you prefer a milder mint flavor, reduce it to ¼ teaspoon. Remember, a little goes a long way, so it’s always better to start with less and add more to taste.
Can I use regular butter instead of light butter?
Yes, you can use regular unsalted butter if you prefer. The cookies will be slightly richer and may spread a tiny bit more. If using regular butter, you might want to chill the dough for an extra 10-15 minutes to help prevent spreading. The nutritional values will also be slightly higher in calories and fat.
Pin This Recipe!
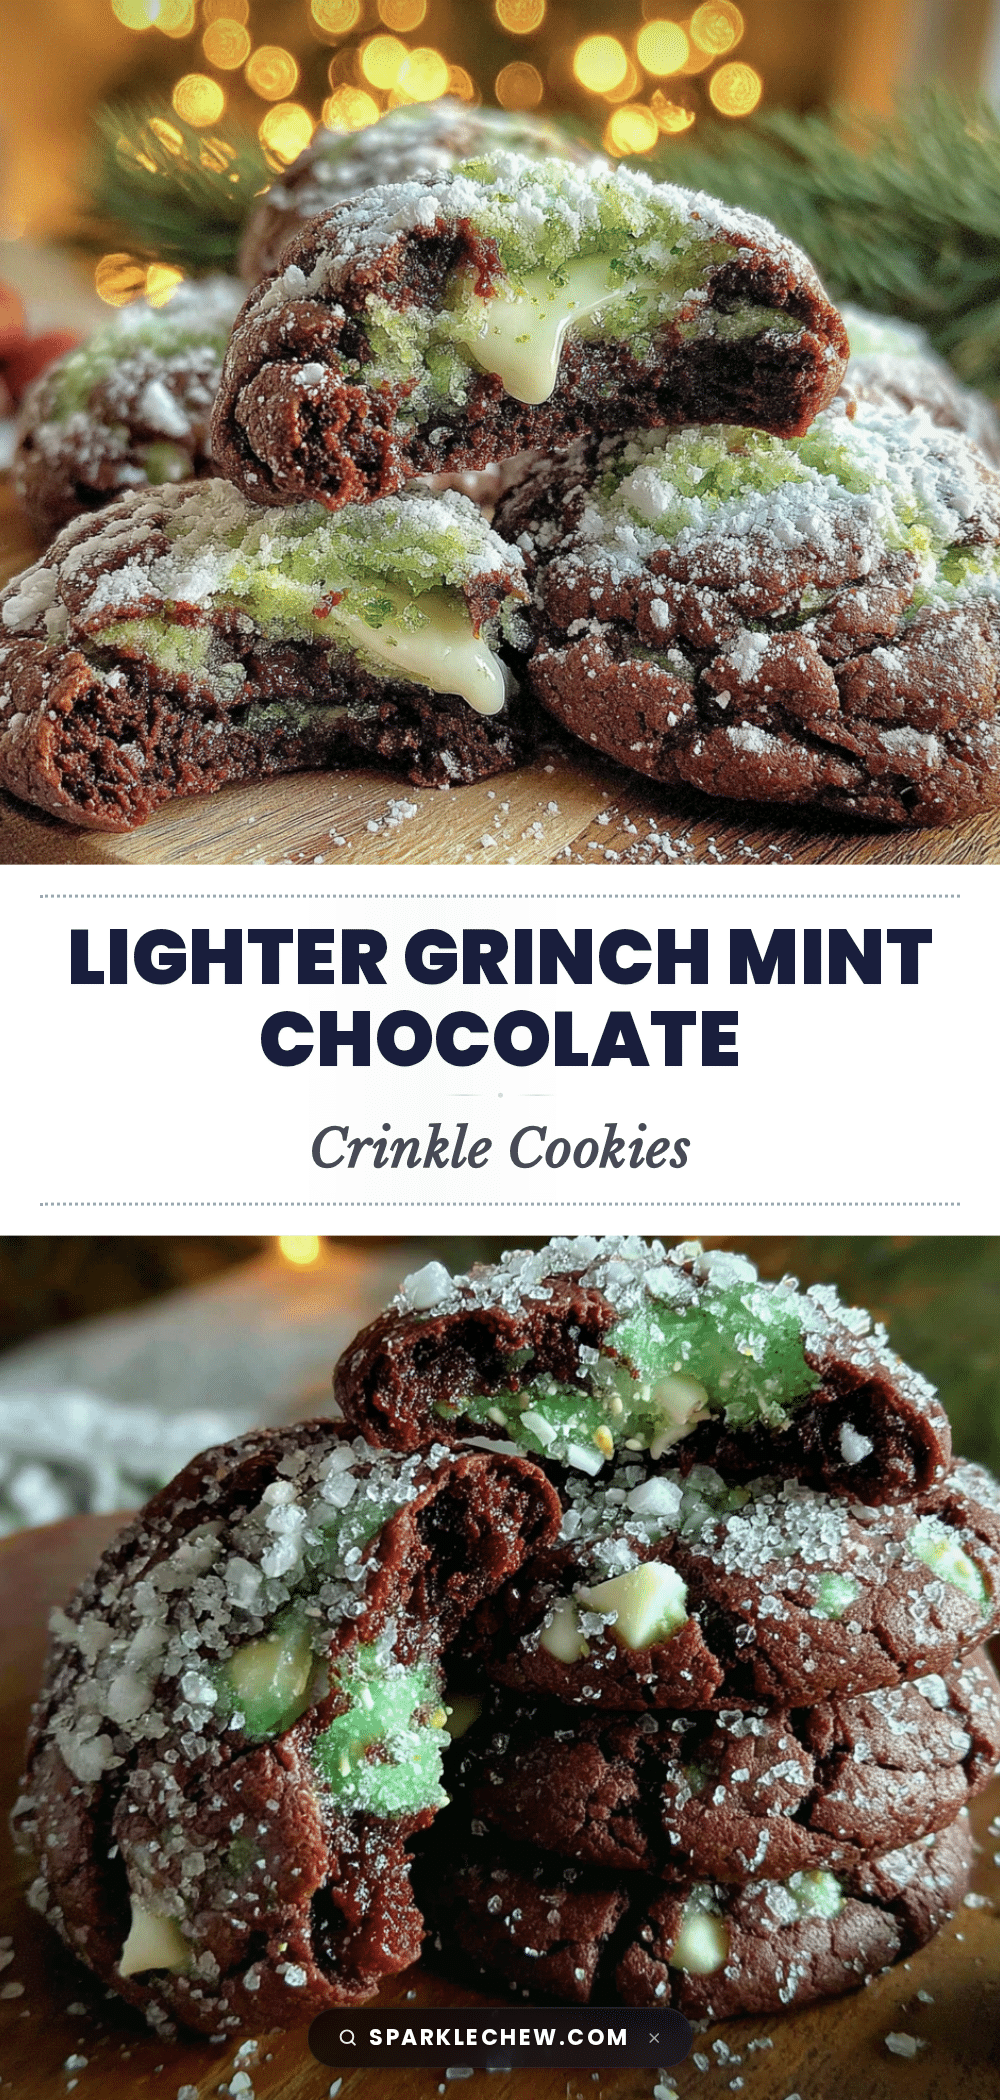
Lighter Grinch Mint Chocolate Crinkle Cookies (Easy Recipe)

These festive Grinch mint chocolate crinkle cookies are soft, fudgy, and lighter than traditional versions. Made with simple ingredients like Greek yogurt and dark chocolate, they’re perfect for holiday cookie swaps, parties, or a cozy night in.
- Prep Time: 30 minutes
- Cook Time: 12 minutes
- Total Time: 1 hour 12 minutes (includes 30 minutes chilling)
- Yield: 24 cookies 1x
- Category: Dessert
- Cuisine: American
Ingredients
- 1 ½ cups (180g) all-purpose flour
- ½ cup (40g) unsweetened cocoa powder
- 1 teaspoon baking powder
- ½ teaspoon salt
- ¾ cup (150g) granulated sugar
- 4 tablespoons (56g) light butter, softened
- 1 large egg, room temperature
- ¼ cup (60g) plain Greek yogurt (2% or full-fat)
- 1 teaspoon vanilla extract
- ½ teaspoon peppermint extract
- 10–12 drops green gel food coloring
- ½ cup (90g) miniature dark chocolate chips
- ½ cup (60g) powdered sugar (for rolling)
Instructions
- Preheat oven to 350°F (175°C). Line two baking sheets with parchment paper or silicone mats.
- In a medium bowl, whisk together flour, cocoa powder, baking powder, and salt. Set aside.
- In a large bowl, beat softened light butter and granulated sugar with an electric hand mixer on medium speed until light and fluffy, about 2-3 minutes.
- Beat in egg, Greek yogurt, vanilla extract, and peppermint extract until smooth and well incorporated.
- Add green gel food coloring drop by drop, mixing well after each addition, until desired Grinch green color is achieved (about 10-12 drops).
- Gradually add dry ingredients to wet mixture, mixing on low speed until just combined. Do not overmix.
- Gently fold in miniature dark chocolate chips with a silicone spatula until evenly distributed. Dough will be sticky.
- Cover bowl with plastic wrap and refrigerate for at least 30 minutes (up to 24 hours).
- Place powdered sugar in a small bowl. Using a cookie scoop or tablespoon, portion about 1.5 tablespoons (25g) of dough and roll into a ball. Roll ball generously in powdered sugar until completely coated.
- Place coated dough balls on prepared baking sheets, spacing 2 inches apart. Bake for 10-12 minutes, until edges are set and tops have cracked. Centers should still look soft.
- Let cookies cool on baking sheet for 5 minutes, then transfer to a wire rack to cool completely. Crinkles will become more pronounced as they cool.
Notes
Chilling the dough is essential to prevent spreading and achieve the crinkle effect. Coat dough balls generously with powdered sugar for best crinkles. Cookies can be stored in an airtight container at room temperature for up to 5 days, or frozen for up to 3 months. For gluten-free, use a 1:1 gluten-free baking flour blend. For vegan, use a flax egg and dairy-free yogurt and butter.
Nutrition
- Serving Size: 1 cookie
- Calories: 98
- Sugar: 9
- Sodium: 65
- Fat: 3.5
- Saturated Fat: 2
- Carbohydrates: 16
- Fiber: 1.5
- Protein: 2
Keywords: Grinch cookies, mint chocolate crinkle cookies, lighter cookies, holiday cookies, Christmas cookies, easy cookie recipe