Love this? Save it for later!
Share the inspiration with your friends
My neighbor Karen wasn’t trying to impress anyone. I’d stopped by to borrow a ladder on a rainy Tuesday afternoon, and the smell hit me before I even got through the screen door. It was that unmistakable, cozy scent of pumpkin and warm spices, but with something deeper—something nutty and almost caramel-like underneath. She was standing at her counter in sweatpants, licking brown butter off a spatula, and just said, “Oh, these? They’re just muffins.” Just muffins. Let me tell you, I nearly dropped her ladder right there on the porch.
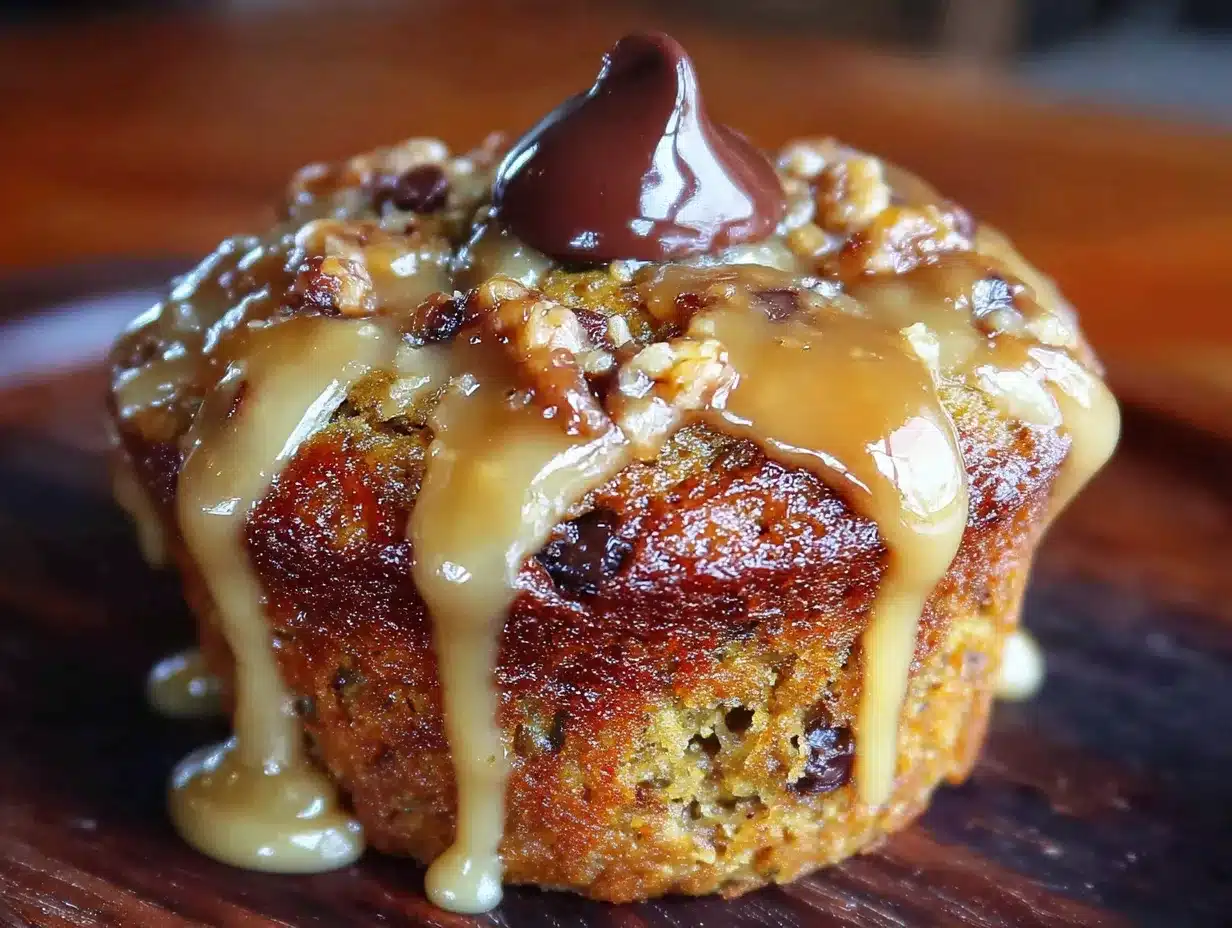
I stood in her kitchen, watching her pull a tray of the most perfectly domed, golden-brown muffins I’d ever seen out of the oven. They were studded with melty chocolate chips, and she casually drizzled this glossy brown butter glaze over the top like it was no big deal. I mean, I was genuinely speechless. She handed me one while it was still warm, and that first bite was honestly a little ridiculous. The muffin was so moist and tender, the chocolate was all gooey, and that glaze—oh, that glaze—had this nutty, toasty flavor that I just couldn’t get over.
I asked her for the recipe, and she shrugged and scribbled it down on a napkin. “It’s nothing special,” she said. But it was. It was one of those recipes that just works, you know? The kind where every single element is perfectly balanced. I’ve made these Perfect Chocolate Chip Pumpkin Muffins with Brown Butter Glaze at least a dozen times since that rainy Tuesday, and every single time, someone asks for the recipe. That’s why I’m sharing it with you today—because some recipes are too good to keep to yourself.
Why You’ll Love This Recipe
Look, I’ve tested a lot of pumpkin muffin recipes over the years. Some are too dense, some are too dry, and some just don’t have enough flavor. These Perfect Chocolate Chip Pumpkin Muffins with Brown Butter Glaze are different. They’re the result of my own kitchen trials—burned batches, flat muffins, and one particularly sad attempt where I forgot the sugar entirely. After all that, I can tell you with confidence: this is the one.
- Quick & Easy: These come together in about 35 minutes from start to finish. Perfect for a lazy Sunday morning or a last-minute bake sale contribution.
- Simple Ingredients: No weird specialty flours or hard-to-find extracts here. You probably have most of this stuff in your pantry already.
- Perfect for Fall: Pumpkin and chocolate are a match made in heaven, and that brown butter glaze just screams cozy sweater weather.
- Crowd-Pleaser: I’ve brought these to potlucks, office parties, and family gatherings. They disappear fast. Like, suspiciously fast.
- Unbelievably Delicious: The texture is incredibly moist and fluffy, the chocolate chips add little pockets of melty goodness, and that glaze is honestly next-level.
What makes these different from every other pumpkin muffin recipe out there? It’s the brown butter glaze. I mean, brown butter is basically liquid gold. It adds this deep, nutty, almost toffee-like flavor that regular butter just can’t touch. Paired with the warm pumpkin spices and the rich chocolate, it creates this flavor combo that’s honestly unforgettable. These aren’t just good muffins—they’re the kind that make you close your eyes after the first bite.
What Ingredients You Will Need
This recipe uses simple, everyday ingredients to create something truly special. Most of these are pantry staples, which makes these muffins perfect for those spontaneous baking moods.
For the Muffins
- All-purpose flour – 1 ¾ cups (220g). Spoon and level it for best results. I’ve had good luck with King Arthur Flour for consistent texture.
- Granulated sugar – ¾ cup (150g). Adds sweetness and helps create that tender crumb.
- Light brown sugar – ½ cup (100g), packed. Adds moisture and a hint of molasses flavor.
- Pumpkin puree – 1 cup (240g). Make sure it’s 100% pure pumpkin, not pumpkin pie filling. Libby’s is my go-to brand.
- Vegetable oil – ½ cup (120ml). Keeps the muffins incredibly moist. You can use melted coconut oil if you prefer.
- Large eggs – 2, at room temperature. Room temperature eggs incorporate better into the batter.
- Vanilla extract – 1 teaspoon. Pure vanilla is best, but imitation works in a pinch.
- Baking soda – 1 teaspoon. Helps the muffins rise and get that nice dome.
- Baking powder – ½ teaspoon. Extra lift for fluffy muffins.
- Salt – ½ teaspoon. Balances the sweetness.
- Pumpkin pie spice – 2 teaspoons. You can use 1 teaspoon cinnamon, ½ teaspoon ginger, ¼ teaspoon nutmeg, and ¼ teaspoon cloves if you don’t have the blend.
- Semi-sweet chocolate chips – 1 cup (175g). I prefer Ghirardelli for the best melt, but any brand works. Dark chocolate chips are also fantastic here.
For the Brown Butter Glaze
- Unsalted butter – ¼ cup (½ stick or 57g). Don’t use salted butter here—you want to control the salt level.
- Powdered sugar – 1 cup (120g), sifted if it’s lumpy.
- Vanilla extract – ½ teaspoon.
- Milk – 2 to 3 tablespoons. Whole milk gives the creamiest glaze, but any milk works. Start with 2 tablespoons and add more if needed.
- Pinch of salt – Just a tiny one, to balance the sweetness.
Ingredient Substitution Guide: Need a gluten-free option? Swap the all-purpose flour with a 1:1 gluten-free baking blend. For a dairy-free version, use coconut oil in the muffins and a dairy-free butter alternative for the glaze (just know the brown butter flavor won’t be as deep). If you’re out of pumpkin pie spice, mix cinnamon, ginger, nutmeg, and allspice to taste. And if you’re not a chocolate fan (are you okay?), you can swap the chocolate chips for dried cranberries or chopped pecans.
Equipment Needed
You don’t need a fancy bakery setup to make these Perfect Chocolate Chip Pumpkin Muffins with Brown Butter Glaze. Here’s what you’ll need:
- Standard 12-cup muffin tin – This is non-negotiable. I’ve tried making these in a jumbo muffin tin, and the baking time gets tricky.
- Paper liners – I prefer the parchment-style liners because they peel off cleanly. Regular paper liners work fine too.
- Two mixing bowls – One large, one medium. You’ll need separate bowls for the wet and dry ingredients.
- Whisk – For mixing the dry ingredients and for the glaze.
- Rubber spatula – For folding in the chocolate chips without overmixing.
- Small saucepan – For browning the butter. Light-colored pans work best so you can see the butter change color.
- Cooling rack – Essential for letting the muffins cool evenly before glazing.
- Cookie scoop or ice cream scoop – Not required, but it makes filling the muffin cups so much cleaner and more consistent.
Budget-friendly tip: If you don’t have a cooling rack, you can use the wire rack from your oven (just make sure it’s clean) or even a clean, empty egg carton turned upside down. I’ve done that in a pinch, and it works surprisingly well.
Preparation Method
Alright, let’s get baking. I’ll walk you through every step so you get perfect results on your first try.
- Preheat your oven to 350°F (175°C). Line your muffin tin with paper liners. This is a good time to bring your eggs to room temperature if you forgot—just place them in a bowl of warm water for 5 minutes.
- Brown the butter first. In a small saucepan over medium heat, melt the ¼ cup of unsalted butter. Once it’s melted, keep stirring. It’ll start to foam and bubble, and then you’ll see little brown specks forming at the bottom. This is the milk solids toasting—that’s where all the flavor comes from. Once it smells nutty and turns a warm amber color (about 5-7 minutes), take it off the heat immediately. Pour it into a small heatproof bowl and let it cool while you make the muffin batter. Don’t skip this cooling step—hot butter will melt the chocolate chips later.
- Mix the dry ingredients. In a medium bowl, whisk together the flour, baking soda, baking powder, salt, and pumpkin pie spice. Make sure everything is evenly distributed. I like to use a whisk for this—it aerates the flour and breaks up any clumps.
- Mix the wet ingredients. In a large bowl, whisk together the granulated sugar, brown sugar, pumpkin puree, vegetable oil, eggs, and vanilla extract. Whisk until everything is smooth and well combined. The mixture should be a beautiful deep orange color. Honestly, this step always makes me feel like fall has officially arrived.
- Combine wet and dry. Pour the dry ingredients into the wet ingredients. Use your rubber spatula to fold everything together gently. Stop mixing as soon as you don’t see any more streaks of flour. Overmixing will make your muffins tough and dense—we want them light and fluffy.
- Fold in the chocolate chips. Add the chocolate chips and fold them in with just a few strokes. Reserve about 2 tablespoons of chocolate chips to sprinkle on top of the muffins before baking—it makes them look prettier and gives you those melty chocolate bits on top.
- Fill the muffin cups. Use your cookie scoop or a spoon to divide the batter evenly among the 12 muffin cups. Fill each cup about ¾ full. I promise you, this is the perfect amount. Sprinkle the reserved chocolate chips on top of each muffin.
- Bake for 18-22 minutes. The muffins are done when a toothpick inserted into the center comes out clean or with just a few moist crumbs. The tops should be golden and spring back when you lightly touch them. My oven runs hot, so I start checking at 18 minutes. Every oven is different, so trust your toothpick more than the timer.
- Cool in the pan for 5 minutes. This is important—if you try to move them too soon, they might fall apart. After 5 minutes, transfer the muffins to a cooling rack to cool completely. I know it’s tempting to glaze them while they’re warm, but the glaze will just slide right off. Patience, my friend.
- Make the glaze. While the muffins are cooling, take your cooled brown butter. It should be solid but soft at this point. In a small bowl, whisk together the brown butter, powdered sugar, vanilla extract, and 2 tablespoons of milk. Whisk until smooth. If the glaze is too thick, add the remaining tablespoon of milk. If it’s too thin, add a little more powdered sugar. The perfect consistency is thick but pourable—it should slowly drip off your whisk.
- Glaze the muffins. Once the muffins are completely cool, drizzle the glaze over the tops. I like to use a spoon and let it drip naturally, but you can also use a piping bag with a small tip cut off for more control. Let the glaze set for about 10 minutes before serving. Or, you know, just eat one right away. I won’t judge.
Cooking Tips & Techniques
Over the years, I’ve made my fair share of mistakes with pumpkin muffins. Here’s what I’ve learned so you don’t have to make the same ones.
Don’t overmix the batter. This is the number one mistake people make with muffin recipes. Mix until the flour just disappears. A few small lumps are totally fine. Overmixing develops the gluten, which leads to tough, rubbery muffins instead of light, tender ones.
Use room temperature ingredients. I know it’s annoying to wait, but room temperature eggs and pumpkin puree incorporate much more smoothly into the batter. Cold ingredients can cause the batter to seize up or create an uneven texture. If you’re in a rush, place your eggs in a bowl of warm water for 5 minutes.
Watch the brown butter carefully. I cannot stress this enough. Brown butter goes from perfect to burnt in about 30 seconds. Once you see those brown specks and smell that nutty aroma, take it off the heat immediately. Pour it into a separate bowl to stop the cooking process. I once got distracted by a phone call and ended up with black butter. It smelled like burnt popcorn. Not great.
Check your pumpkin puree. Make sure you’re using 100% pure pumpkin, not pumpkin pie filling. Pumpkin pie filling has added sugar and spices, which will throw off the balance of this recipe completely. I learned this the hard way when I accidentally grabbed the wrong can and ended up with overly sweet, weirdly spiced muffins.
Let the muffins cool completely before glazing. I know it’s hard to wait, but trust me on this. If you glaze warm muffins, the glaze will melt and soak into the muffin instead of sitting beautifully on top. You’ll end up with a sticky, messy situation instead of those gorgeous glossy tops.
Variations & Adaptations
One of the best things about this recipe is how versatile it is. Here are some ways to make it your own.
Gluten-Free Version: Substitute the all-purpose flour with a 1:1 gluten-free baking blend that contains xanthan gum. I’ve tested this with Bob’s Red Mill 1:1 Baking Flour, and the texture is almost identical to the original. Just be careful not to overmix—gluten-free batters can get gummy if you work them too much.
Dairy-Free Version: Use melted coconut oil or a neutral vegetable oil instead of butter in the muffins. For the glaze, use a dairy-free butter alternative like Miyoko’s or Earth Balance. The brown butter flavor won’t be as intense, but it’ll still be delicious. You can also use canned coconut milk instead of regular milk in the glaze.
Add Some Crunch: Fold in ½ cup of toasted pecans or walnuts along with the chocolate chips. The nuts add a lovely crunch and earthy flavor that pairs beautifully with the pumpkin and brown butter. Toast them in a dry pan for 3-4 minutes before adding to the batter for extra flavor.
Spice It Up: If you love warm spices, add an extra teaspoon of cinnamon and a pinch of cardamom to the dry ingredients. Cardamom has this amazing floral, slightly citrusy note that makes the muffins taste even more special. I tried this on a whim one morning, and now I can’t go back.
Make Them Mini: Use a mini muffin tin and bake for 10-12 minutes instead of 18-22. You’ll get about 36 mini muffins. They’re perfect for parties or for packing in lunchboxes. Just reduce the glaze amount slightly since you won’t need as much.
Serving & Storage Suggestions
These Perfect Chocolate Chip Pumpkin Muffins with Brown Butter Glaze are best served slightly warm or at room temperature. The glaze should be fully set, but the muffin itself should be tender and moist. If you can resist eating them all right away, here’s how to store them.
At Room Temperature: Store the muffins in an airtight container at room temperature for up to 3 days. Place a paper towel at the bottom of the container to absorb any excess moisture, and another paper towel on top. This keeps the muffins from getting soggy. I’ve found that the flavors actually develop and deepen on the second day—if they last that long.
In the Refrigerator: You can refrigerate them for up to a week, but the muffins will firm up a bit. Let them come to room temperature before serving, or microwave them for 10-15 seconds to restore some of that fresh-from-the-oven softness.
In the Freezer: These muffins freeze beautifully. Place them in a single layer on a baking sheet and freeze until solid (about 1 hour). Then transfer them to a freezer-safe bag or container. They’ll keep for up to 3 months. To thaw, leave them at room temperature for about an hour, or microwave for 20-30 seconds. I like to freeze them without the glaze and add the glaze after thawing for the freshest taste.
Reheating: For that just-baked experience, reheat a muffin in a 300°F oven for 5-7 minutes. The outside gets slightly crisp while the inside stays tender. A microwave works in a pinch, but the texture won’t be as good.
What to Serve With Them: These muffins are fantastic on their own, but they’re even better with a hot cup of coffee or a cold glass of milk. For a real treat, serve them warm with a pat of salted butter melting into the middle. I also love them alongside a pumpkin spice latte for the ultimate fall breakfast.
Nutritional Information & Benefits
Let’s be real—these are indulgent muffins, not health food. But they do have some redeeming qualities, and knowing what’s in them helps you enjoy them mindfully.
Estimated Nutritional Values (per muffin):
| Nutrient | Amount |
|---|---|
| Calories | 320 |
| Total Fat | 16g |
| Saturated Fat | 7g |
| Cholesterol | 45mg |
| Sodium | 240mg |
| Total Carbohydrates | 44g |
| Dietary Fiber | 2g |
| Sugars | 28g |
| Protein | 4g |
Health Benefits: Pumpkin is packed with vitamin A, which is great for your eyes and immune system. It’s also a good source of fiber, which helps with digestion. The chocolate chips contain antioxidants (yes, really), and the eggs provide high-quality protein. Of course, these benefits come with a fair amount of sugar and butter, so these muffins are best enjoyed as an occasional treat rather than an everyday breakfast. But honestly, sometimes you need a little indulgence, and that’s perfectly okay.
Dietary Considerations: This recipe contains gluten, dairy, and eggs. It can be adapted for gluten-free and dairy-free diets using the substitutions mentioned above. It is not suitable for vegan diets as written, but you can try using flax eggs and plant-based butter alternatives (just know the texture will be different).
Conclusion
These Perfect Chocolate Chip Pumpkin Muffins with Brown Butter Glaze are honestly everything I want in a fall recipe. They’re cozy, they’re indulgent, and they make your whole kitchen smell like a pumpkin spice dream. That nutty brown butter glaze takes them from “good” to “I need the recipe right now” territory, and the combination of tender pumpkin muffin with melty chocolate chips is just unbeatable.
I love that this recipe is forgiving enough for beginner bakers but special enough to impress even the most seasoned dessert lovers. Whether you’re making them for a lazy weekend breakfast, a holiday brunch, or just because you need a little comfort in your life, these muffins deliver every single time.
Now I want to hear from you! Have you tried making these Perfect Chocolate Chip Pumpkin Muffins with Brown Butter Glaze? Did you add any fun variations? Drop a comment below and let me know how they turned out. And if you snap a photo, tag me on social media—I love seeing your baking adventures. Happy baking, friends!
Frequently Asked Questions
Can I use fresh pumpkin instead of canned?
Absolutely, but you’ll need to roast and puree it first. Fresh pumpkin has more water content than canned, so you might need to drain the puree through a cheesecloth or paper towel to remove excess moisture. Otherwise, your muffins could turn out too wet. I’ve done it with fresh pumpkin, and the flavor is lovely, but canned is definitely more convenient and consistent.
Why did my brown butter turn out burnt?
Brown butter can go from perfect to burnt very quickly. The key is to watch for the color change and smell. Once you see golden brown specks forming and smell a nutty aroma, take it off the heat immediately. Pour it into a separate bowl to stop the cooking process. If your brown butter tastes bitter or smells like burnt popcorn, unfortunately you’ll need to start over.
Can I make these muffins ahead of time?
Yes! You can make the muffin batter up to 24 hours in advance and store it in the refrigerator. Just bring it to room temperature before baking. You can also bake the muffins a day ahead and store them in an airtight container. Add the glaze on the day you plan to serve them for the best presentation. The muffins also freeze beautifully for up to 3 months.
Why did my muffins stick to the liners?
This can happen for a few reasons. First, make sure you’re using good-quality paper liners—cheap ones tend to stick more. Second, let the muffins cool completely in the pan before trying to remove them. Third, the moisture from the pumpkin can sometimes cause sticking. Using parchment-style liners instead of regular paper liners usually solves this problem. You can also spray the liners lightly with non-stick cooking spray before filling them.
Can I leave out the chocolate chips?
Of course! If you’re not a chocolate fan, you can leave the chocolate chips out entirely, or swap them for an equal amount of dried cranberries, chopped nuts, or even white chocolate chips. The muffins will still be delicious with just the pumpkin and brown butter glaze. If you omit the chocolate chips, you might want to add an extra ¼ cup of flour to maintain the right batter consistency.
Pin This Recipe!
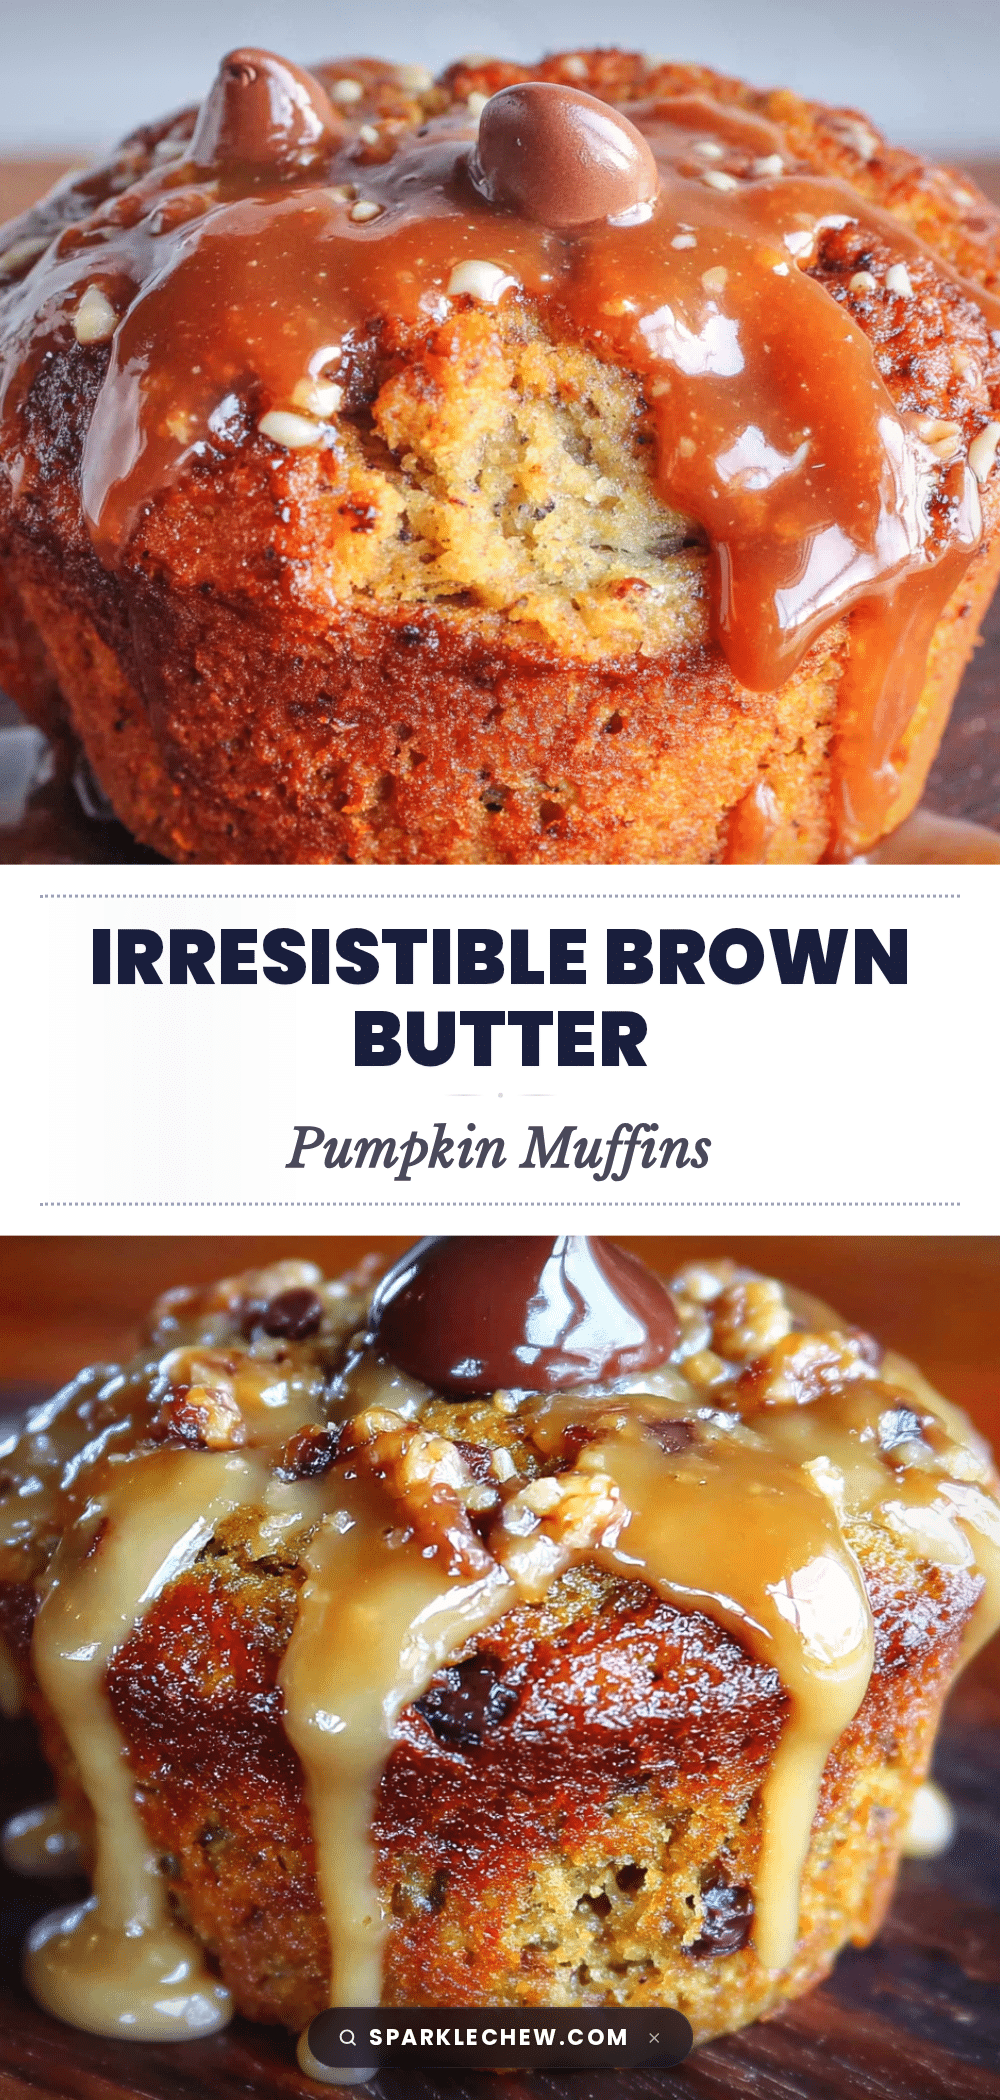
Perfect Chocolate Chip Pumpkin Muffins with Brown Butter Glaze
These incredibly moist and fluffy pumpkin muffins are studded with melty chocolate chips and topped with a nutty brown butter glaze. They’re the perfect fall treat that will have everyone asking for the recipe.
- Prep Time: 15 minutes
- Cook Time: 20 minutes
- Total Time: 35 minutes
- Yield: 12 servings 1x
- Category: Dessert
- Cuisine: American
Ingredients
- 1 ¾ cups (220g) all-purpose flour
- ¾ cup (150g) granulated sugar
- ½ cup (100g) light brown sugar, packed
- 1 cup (240g) pumpkin puree (100% pure pumpkin)
- ½ cup (120ml) vegetable oil
- 2 large eggs, at room temperature
- 1 teaspoon vanilla extract
- 1 teaspoon baking soda
- ½ teaspoon baking powder
- ½ teaspoon salt
- 2 teaspoons pumpkin pie spice
- 1 cup (175g) semi-sweet chocolate chips
- ¼ cup (½ stick or 57g) unsalted butter (for glaze)
- 1 cup (120g) powdered sugar, sifted (for glaze)
- ½ teaspoon vanilla extract (for glaze)
- 2 to 3 tablespoons milk (for glaze)
- Pinch of salt (for glaze)
Instructions
- Preheat your oven to 350°F (175°C). Line a 12-cup muffin tin with paper liners.
- Brown the butter: In a small saucepan over medium heat, melt ¼ cup unsalted butter. Stir constantly until it foams, bubbles, and turns a warm amber color with brown specks (about 5-7 minutes). Remove from heat immediately and pour into a small heatproof bowl to cool.
- Mix dry ingredients: In a medium bowl, whisk together flour, baking soda, baking powder, salt, and pumpkin pie spice.
- Mix wet ingredients: In a large bowl, whisk together granulated sugar, brown sugar, pumpkin puree, vegetable oil, eggs, and vanilla extract until smooth.
- Combine wet and dry: Pour dry ingredients into wet ingredients. Fold gently with a rubber spatula until just combined (do not overmix).
- Fold in chocolate chips: Add chocolate chips and fold in with a few strokes. Reserve about 2 tablespoons of chips to sprinkle on top.
- Fill muffin cups: Divide batter evenly among the 12 muffin cups, filling each about ¾ full. Sprinkle reserved chocolate chips on top.
- Bake for 18-22 minutes, until a toothpick inserted into the center comes out clean or with a few moist crumbs. Cool in the pan for 5 minutes, then transfer to a cooling rack to cool completely.
- Make the glaze: In a small bowl, whisk together cooled brown butter, powdered sugar, vanilla extract, and 2 tablespoons of milk until smooth. Add more milk if needed for a thick but pourable consistency.
- Glaze the muffins: Once muffins are completely cool, drizzle glaze over the tops. Let set for about 10 minutes before serving.
Notes
Don’t overmix the batter to avoid tough muffins. Use room temperature ingredients for best results. Watch the brown butter carefully as it can burn quickly. Let muffins cool completely before glazing to prevent the glaze from melting off.
Nutrition
- Serving Size: 1 muffin
- Calories: 320
- Sugar: 28
- Sodium: 240
- Fat: 16
- Saturated Fat: 7
- Carbohydrates: 44
- Fiber: 2
- Protein: 4
Keywords: pumpkin muffins, chocolate chip muffins, brown butter glaze, fall baking, pumpkin recipes, easy muffins


