Love this? Save it for later!
Share the inspiration with your friends
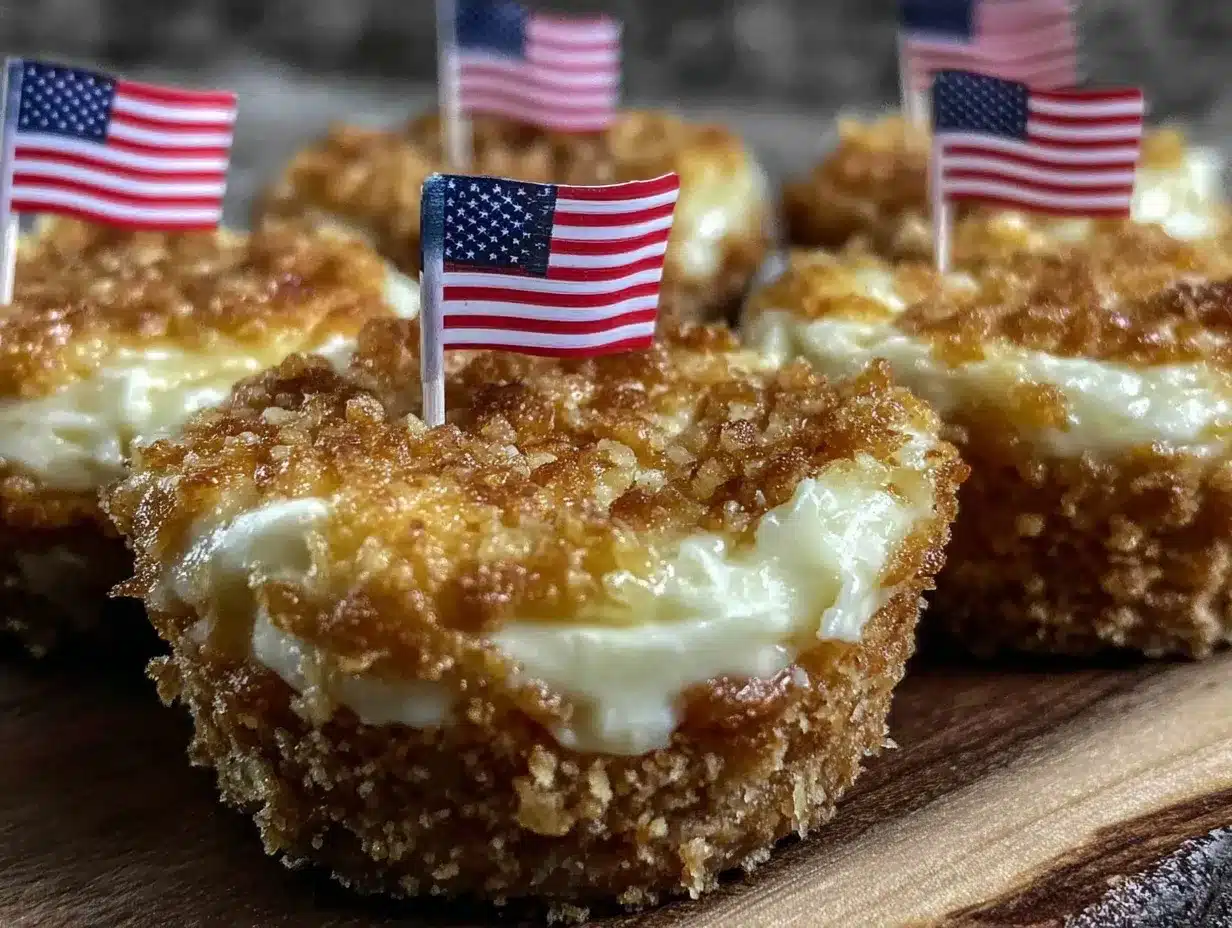
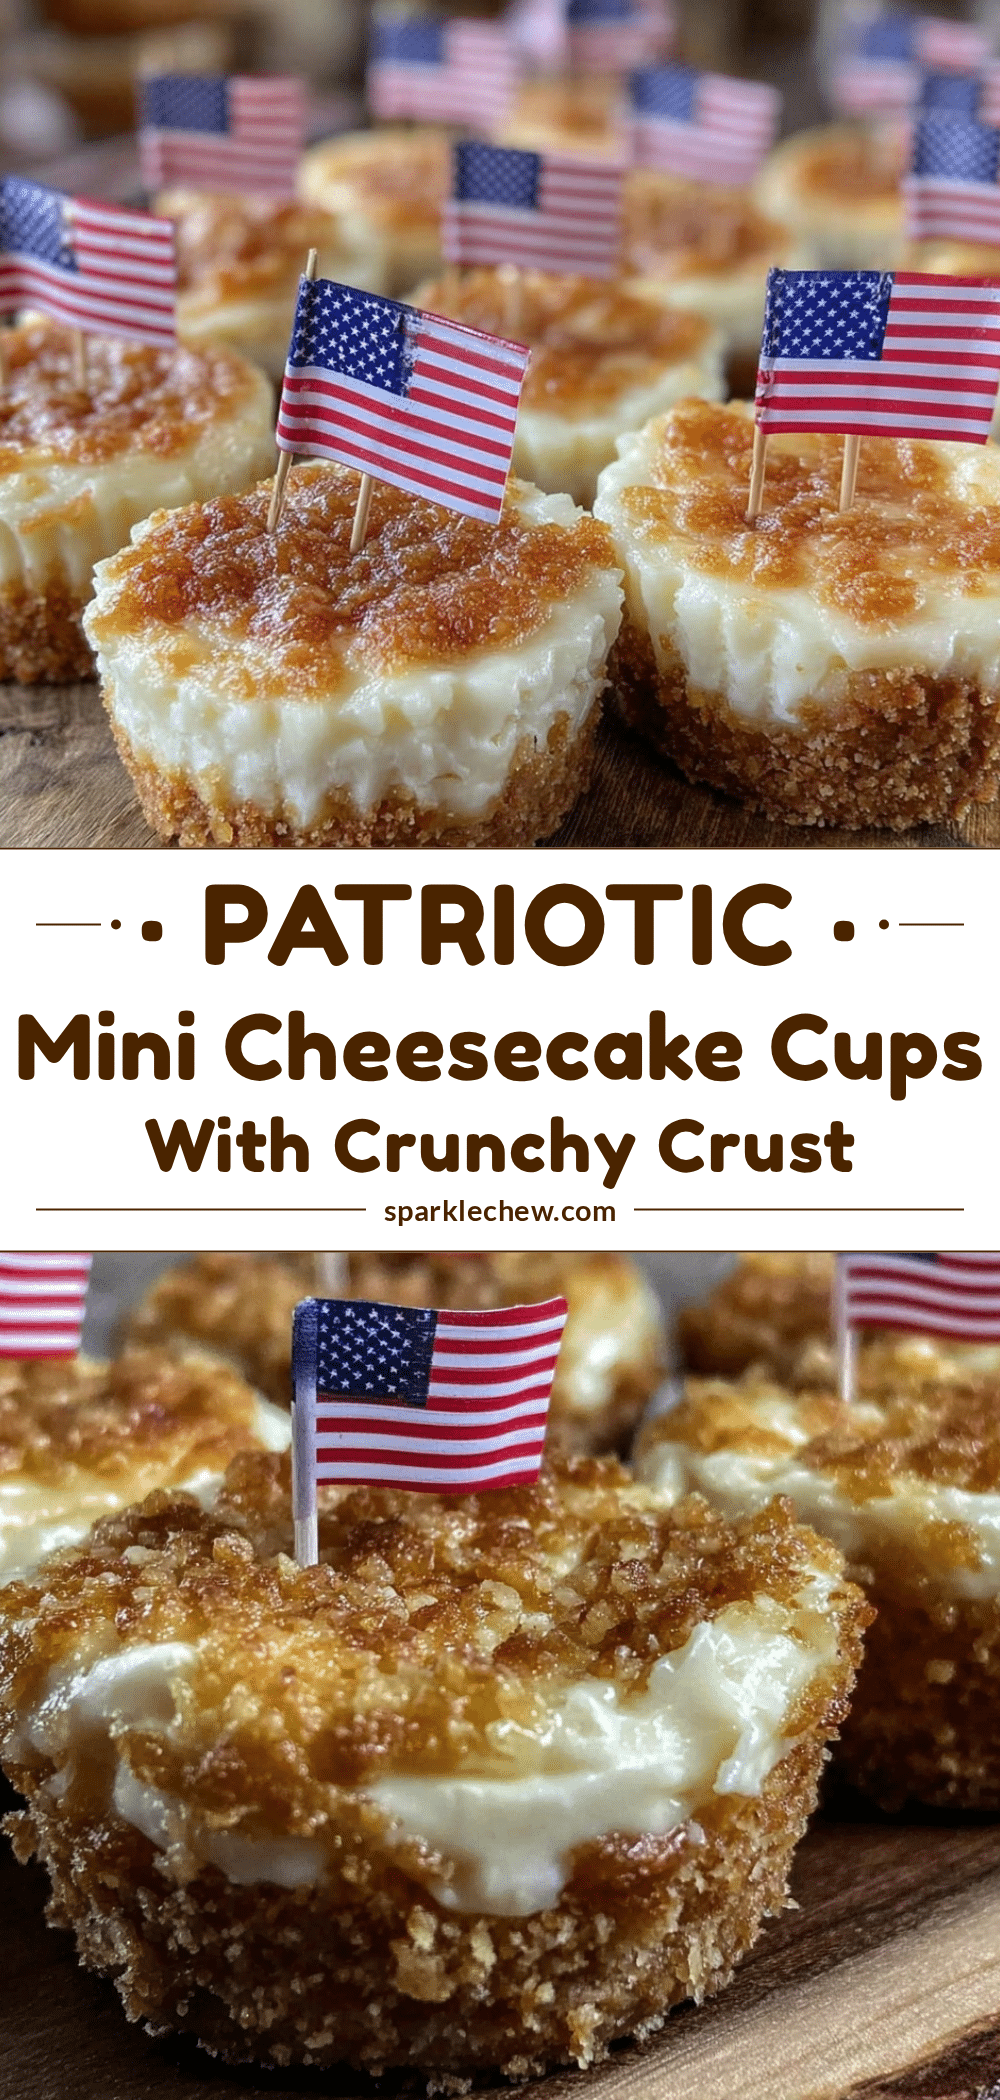
“I wasn’t even planning to make dessert that day,” I admit, laughing at how impulsive kitchen moments often lead to the best recipes. It was the Fourth of July weekend a few summers ago, and I’d stopped by my neighbor’s barbecue unannounced. As I walked in, the sound of kids playing mixed with the scent of smoky grill wafted through the air. Then, out of nowhere, my neighbor, Greg, handed me a tiny cup and said, “Try this—my daughter made it.” Honestly, I wasn’t expecting much from a mini cheesecake cup, but that first bite had me hooked. It was creamy, sweet, and the little graham cracker crust at the bottom added just the right crunch. But what really caught my eye was the patriotic flag design on top—blueberries and strawberries arranged so perfectly, it looked like a little edible American flag.
That evening, I found myself scribbling down notes, trying to figure out how to recreate these Perfect Mini Flag Cheesecake Cups with Graham Cracker Crust for my own summer gatherings. Maybe you’ve been there too—searching for a dessert that’s simple, festive, and guaranteed to impress without hours in the kitchen. Let me tell you, this recipe quickly became my go-to. It’s one of those dishes that’s as fun to make as it is to eat, and the best part? It’s perfectly portioned for little hands and big celebrations alike. So, whether you’re hosting a picnic, a potluck, or just craving a sweet treat that screams summer, these mini cheesecakes have got you covered.
Why You’ll Love This Recipe
Let me share why these Perfect Mini Flag Cheesecake Cups with Graham Cracker Crust have earned a permanent spot in my recipe box:
- Quick & Easy: Whip these up in about 30 minutes, plus chilling time—ideal for last-minute dessert cravings or busy holiday prep.
- Simple Ingredients: No need for specialty stores; you probably have most of these in your pantry already.
- Perfect for Patriotic Celebrations: Whether it’s the Fourth of July, Memorial Day, or just a summer BBQ, these cups bring festive flair effortlessly.
- Crowd-Pleaser: Kids love the colorful flag design, and adults appreciate the rich, creamy texture with a crunchy base.
- Unbelievably Delicious: The balance between the tangy cream cheese filling and the buttery graham cracker crust keeps everyone coming back for more.
What sets this recipe apart? It’s the little details that make a big impact. For instance, I blend the cream cheese until ultra-smooth for that melt-in-your-mouth feel. The crust is lightly toasted for a subtle nuttiness that adds depth you don’t always find in mini cheesecakes. Plus, the fresh berries on top? They’re arranged with care, making each cup a miniature edible flag that’s as charming as it is tasty. Honestly, this isn’t just another cheesecake cup recipe—it’s the one I trust to wow guests without fuss or stress. And if you’ve ever felt intimidated by cheesecake-making, don’t worry. This recipe is straightforward enough for beginners but impressive enough for seasoned bakers alike.
What Ingredients You Will Need
This recipe uses simple, wholesome ingredients to deliver bold flavor and satisfying texture without the fuss. Most of these are pantry staples, with fresh berries adding a seasonal, colorful touch.
- For the Graham Cracker Crust:
- 1 1/2 cups graham cracker crumbs (about 10 whole crackers, finely crushed) – I like using Honey Maid for consistent texture
- 1/4 cup granulated sugar
- 6 tablespoons unsalted butter, melted (adds richness and helps bind the crust)
- For the Cheesecake Filling:
- 16 ounces (450g) cream cheese, softened (room temperature for easier blending)
- 1/2 cup granulated sugar
- 1 teaspoon vanilla extract (pure vanilla really makes a difference here)
- 1 cup heavy whipping cream (cold, for whipping to fluffy peaks)
- 1 tablespoon lemon juice (brightens the flavor)
- For the Flag Topping:
- 1 cup fresh strawberries, sliced (in summer, I swap in fresh raspberries for extra sweetness)
- 1/2 cup fresh blueberries (look for firm, plump berries for best appearance)
Substitutions: For a dairy-free option, swap cream cheese with a plant-based cream cheese and heavy cream with coconut cream. Use gluten-free graham cracker crumbs if needed. Greek yogurt can replace some cream cheese for a lighter texture, though it changes the taste slightly.
Equipment Needed
- Mini Muffin Tin or Silicone Cupcake Mold: Essential for shaping these mini cheesecakes. I prefer silicone molds because they make removal super easy without cracking the crust.
- Mixing Bowls: One large bowl for the crust and another for the filling.
- Hand Mixer or Stand Mixer: To whip the cream and blend the cream cheese filling until smooth. A hand mixer is budget-friendly and works just fine.
- Measuring Cups and Spoons: For precise ingredient amounts.
- Spatula: For folding whipped cream into the cream cheese mixture gently without deflating it.
- Food Processor (optional): If you want perfectly fine graham cracker crumbs, though you can crush them in a plastic bag with a rolling pin.
Maintenance tip: If using a metal muffin tin, line it with paper liners or grease well to prevent sticking. Silicone molds only need a quick rinse before use and clean up easily in the dishwasher.
Preparation Method
- Prepare the Graham Cracker Crust (10 minutes): Preheat your oven to 350°F (175°C). In a mixing bowl, combine 1 1/2 cups graham cracker crumbs with 1/4 cup sugar. Pour in 6 tablespoons melted butter and stir until the mixture resembles wet sand. Press about 1 tablespoon of the crumb mixture firmly into the bottom of each mini muffin cup. Use the back of a spoon or your fingers to compact it evenly. Bake the crusts for 7-8 minutes until golden and fragrant. Let them cool completely before filling.
- Make the Cheesecake Filling (15 minutes): In a large bowl, beat 16 ounces softened cream cheese with 1/2 cup sugar and 1 teaspoon vanilla extract until smooth and creamy. Add 1 tablespoon lemon juice and mix well. In a separate chilled bowl, whip 1 cup heavy cream until it forms stiff peaks. Gently fold the whipped cream into the cream cheese mixture using a spatula—take care not to overmix so the filling stays light and fluffy.
- Assemble the Cheesecake Cups (10 minutes): Spoon or pipe the cheesecake filling evenly over the cooled crusts, filling each cup nearly to the top. Smooth the surface gently with a small spatula or the back of a spoon.
- Add the Flag Topping (10 minutes): Arrange sliced strawberries in stripes on one side of each cheesecake cup. On the opposite corner, place small clusters of blueberries to form the “star” section of the flag. Take your time with this step—it’s the charming detail that makes these cups stand out.
- Chill and Set (at least 3 hours): Refrigerate the assembled mini cheesecakes for at least three hours, ideally overnight, so they firm up and the flavors meld. Cover loosely with plastic wrap to prevent drying out.
- Serve: Once chilled, gently remove the mini cheesecakes from the tin or mold. Serve cold and enjoy!
Tip: If you notice the crust becoming soggy after refrigeration, try baking it a bit longer next time or adding a thin layer of melted chocolate to create a moisture barrier between crust and filling.
Cooking Tips & Techniques
Making mini cheesecakes can seem tricky, but here are some tips I’ve learned the hard way to keep things smooth and stress-free:
- Room Temperature Ingredients: Always start with softened cream cheese and room-temperature eggs if your recipe calls for them. This prevents lumps and gives you that silky texture.
- Don’t Overmix: When folding whipped cream into your cheesecake base, be gentle. Overmixing deflates the cream and results in a denser filling.
- Press Crust Firmly: The crust needs to be compact so it holds together when you bite into the cheesecake. Use firm pressure but don’t crush it completely flat.
- Chill Adequately: Patience is your friend. The cheesecake needs time to set up in the fridge; rushing this step leads to messy, runny cups.
- Multitasking: While your crust bakes, prep your filling and slice fruit to save time. This keeps the process efficient and enjoyable.
- Use Fresh Berries: It’s tempting to grab frozen, but fresh berries hold their shape and color better in the flag design.
I remember the first time I skipped chilling the filling fully—let’s just say, the cups looked great but collapsed after one bite! You live and learn, right?
Variations & Adaptations
These mini cheesecakes are a fantastic base for creativity. Here are a few ways I’ve mixed things up:
- Flavor Variations: Add a tablespoon of lemon zest or a teaspoon of almond extract to the filling for a subtle twist. For chocolate lovers, swirl in some melted dark chocolate before folding in the whipped cream.
- Seasonal Fruit Toppings: In fall, swap strawberries and blueberries for sliced apples and cranberries with a sprinkle of cinnamon. For spring, use kiwi and raspberries for a vibrant look.
- Crust Alternatives: Try crushed pretzels for a salty-sweet combo or use gluten-free cookies to make the recipe allergy-friendly.
- Dairy-Free Version: Use vegan cream cheese and coconut cream; the texture will be slightly different but still delicious.
- Personal Favorite: One summer, I added a thin layer of homemade blueberry jam under the filling for an extra burst of flavor—it was a hit at the neighborhood block party!
Serving & Storage Suggestions
Serve these mini cheesecakes straight from the fridge for that cool, creamy texture. They make excellent finger food for parties, and their size means no forks required—perfect for casual get-togethers.
Pair them with a fresh lemonade or a sparkling rosé for an easy summer vibe. If you want to get fancy, a dollop of whipped cream or a mint leaf on top adds a lovely touch.
To store, keep the cups covered in an airtight container in the refrigerator for up to 4 days. They also freeze well—place them on a tray to freeze solid before transferring to a freezer bag. Thaw overnight in the fridge before serving.
Flavors often deepen after a day or two, so don’t hesitate to make them ahead of time. Just be sure to add the fresh fruit topping right before serving to keep that vibrant look.
Nutritional Information & Benefits
Each mini cheesecake cup (about 2.5 ounces or 70 grams) contains roughly:
| Calories | 220 |
|---|---|
| Fat | 15g |
| Protein | 4g |
| Carbohydrates | 18g |
| Sugar | 12g |
The recipe offers a good source of calcium and protein thanks to the cream cheese and heavy cream. Using fresh berries adds antioxidants and vitamins, making it a slightly more nourishing treat than your average dessert.
If you’re watching carbs or dairy, consider the substitutions mentioned earlier. The graham cracker crust also contributes whole grain fiber if you use whole wheat or gluten-free versions.
Honestly, it’s a dessert that feels indulgent but doesn’t stray too far from wholesome ingredients, so you can enjoy it without the usual guilt.
Conclusion
These Perfect Mini Flag Cheesecake Cups with Graham Cracker Crust are more than just a festive treat—they’re a celebration of good times and simple joys. From that unexpected taste at my neighbor’s barbecue to making them for every summer gathering since, they’ve proven to be a reliable crowd-pleaser.
I encourage you to try this recipe, add your personal touch, and maybe even create your own version of the flag topping. Whether it’s for a holiday, a potluck, or just because, these mini cheesecakes bring a bit of cheer and a lot of flavor to the table.
If you make them, I’d love to hear how they turned out! Share your tweaks or favorite toppings in the comments below. Happy baking—and here’s to many sweet celebrations ahead!
FAQs
Can I make these mini cheesecakes ahead of time?
Absolutely! They taste even better after chilling overnight. Just add the fresh berries right before serving for the best presentation.
What if I don’t have a mini muffin tin?
You can use regular cupcake liners in a standard muffin tin, but the portions will be bigger and the baking time may need to be adjusted.
How do I prevent the crust from getting soggy?
Baking the crust longer or brushing it with melted chocolate before adding the filling creates a moisture barrier that helps keep it crisp.
Can I use frozen berries for the flag topping?
Fresh berries are best for appearance and texture, but if you use frozen, make sure to thaw and drain them well to avoid excess moisture.
Is there a vegan version of this recipe?
Yes! Use vegan cream cheese and coconut cream for the filling, and a dairy-free butter substitute for the crust. The texture might be slightly different but still delicious.
Pin This Recipe!
Perfect Mini Flag Cheesecake Cups
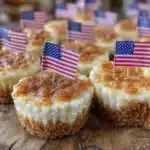
These mini cheesecakes feature a creamy cream cheese filling on a buttery graham cracker crust, topped with fresh strawberries and blueberries arranged like an American flag. Perfect for patriotic celebrations and easy to make.
- Prep Time: 25 minutes
- Cook Time: 8 minutes
- Total Time: 3 hours 33 minutes
- Yield: 24 mini cheesecakes 1x
- Category: Dessert
- Cuisine: American
Ingredients
- 1 1/2 cups graham cracker crumbs (about 10 whole crackers, finely crushed)
- 1/4 cup granulated sugar
- 6 tablespoons unsalted butter, melted
- 16 ounces cream cheese, softened
- 1/2 cup granulated sugar
- 1 teaspoon vanilla extract
- 1 cup heavy whipping cream, cold
- 1 tablespoon lemon juice
- 1 cup fresh strawberries, sliced
- 1/2 cup fresh blueberries
Instructions
- Preheat oven to 350°F (175°C). In a mixing bowl, combine graham cracker crumbs and 1/4 cup sugar. Add melted butter and stir until mixture resembles wet sand.
- Press about 1 tablespoon of the crumb mixture firmly into the bottom of each mini muffin cup. Bake for 7-8 minutes until golden and fragrant. Let cool completely.
- In a large bowl, beat softened cream cheese with 1/2 cup sugar and vanilla extract until smooth and creamy. Mix in lemon juice.
- In a separate chilled bowl, whip heavy cream until stiff peaks form. Gently fold whipped cream into cream cheese mixture without overmixing.
- Spoon or pipe cheesecake filling evenly over cooled crusts, filling each cup nearly to the top. Smooth surface gently.
- Arrange sliced strawberries in stripes on one side of each cheesecake cup. Place clusters of blueberries on the opposite corner to form the flag’s star section.
- Refrigerate assembled mini cheesecakes for at least 3 hours or overnight to set. Cover loosely with plastic wrap.
- Once chilled, gently remove mini cheesecakes from the tin or mold and serve cold.
Notes
For a dairy-free version, substitute cream cheese with plant-based cream cheese and heavy cream with coconut cream. Use gluten-free graham cracker crumbs if needed. To prevent soggy crusts, bake crust longer or brush with melted chocolate before filling. Use fresh berries for best appearance and texture. Chill cheesecakes adequately to avoid collapse.
Nutrition
- Serving Size: 1 mini cheesecake cu
- Calories: 220
- Sugar: 12
- Fat: 15
- Carbohydrates: 18
- Protein: 4
Keywords: mini cheesecake, patriotic dessert, Fourth of July dessert, graham cracker crust, berry topping, easy cheesecake cups, summer dessert