Love this? Save it for later!
Share the inspiration with your friends
My brother-in-law asked why I couldn’t just skip the fancy cheese board and dump everything on a wooden slab. Classic guy logic, right? I started to explain why that wouldnt work — the visual hierarchy, the flavor progression, the whole art-of-the-board thing. Then I stopped. Because honestly? He had a point about one thing: sometimes we overthink this stuff.
That conversation stuck with me. I mean, here I was, this person who’d spent years styling boards for brunches and holiday parties, and this guy who thinks “gourmet” is a brand of hot dogs had me questioning everything. So I tried his approach — just piling things on a board with zero strategy. It looked like a disaster. But the honeycomb? That golden, dripping honeycomb? It saved the whole thing. People went crazy for it, not because of the arrangement, but because of how the honey mixed with the nuts and cheese in this messy, beautiful way.
That’s when I realized the rustic honeycomb charcuterie board doesn’t need to be fussy. It needs to feel alive — like something you’d find at a countryside market, not a catering hall. The honeycomb is the star, sure, but the nuts, the fruit, the cheese — they’re all supporting characters that make the story work. And once I stopped trying to be perfect, the boards actually got better.
Maybe you’ve been there, staring at a cutting board wondering if the salami should be fanned or folded. Let me tell you — just put it down and add a chunk of honeycomb. You’ll be amazed at how forgiving this whole thing is. That’s the board I keep coming back to, the one that taught me less planning actually leads to more flavor.
Why You’ll Love This Recipe
This isn’t just another charcuterie board — it’s the one that makes people stop mid-conversation and ask, “Where did you get that honey?” The rustic honeycomb charcuterie board with nuts has become my go-to for everything from lazy Sundays to dinner parties where I want to look like I tried harder than I did.
- No Cooking Required : Seriously, zero heat. Just arrange and serve. Perfect for hot days when turning on the oven feels like a personal attack.
- Impressive Without Effort : The honeycomb does all the heavy lifting visually. People think you spent hours sourcing ingredients when really you grabbed everything at one store.
- Customizable for Any Crowd : Nut allergies? Swap in seeds. Vegan guests? Load up on fruit and plant-based cheeses. This board adapts to whoever shows up.
- Naturally Gluten-Free : Most components are already gluten-free, making it a safe option for guests with dietary restrictions.
- Perfect for Entertaining : Set it out 15 minutes before guests arrive and you’re done. No last-minute cooking, no stress, just a beautiful spread that invites grazing.
What makes this board different from the standard grocery store platter? It’s the texture contrast — the creamy cheese against the crunchy nuts, the chewy dried fruit, and that sticky, floral honey that drips into everything. The honeycomb isn’t just decoration; it’s the flavor bridge that ties all the components together. I’ve tested this board at least a dozen times with different groups, and the honeycomb always gets the most comments. It’s unexpected, it’s beautiful, and it makes everything taste better.
This is the kind of board that makes you close your eyes after that first bite where the honey, the gouda, and the candied pecans all hit at once. It’s comfort food reimagined — simple ingredients arranged with intention, but without the pretension.
What Ingredients You Will Need
This recipe uses simple, high-quality ingredients that work together to create a board that’s both rustic and refined. The beauty of a rustic honeycomb charcuterie board with nuts is that you can adjust quantities based on how many people you’re serving, but these are the components that make it sing.
For the Honeycomb & Sweet Elements
- Fresh honeycomb (4-6 ounces) — Look for a piece that’s intact with the honey still sealed in the wax. I prefer local honeycomb from farmers markets when possible, but Whole Foods carries a reliable option year-round. The honey will slowly seep out as the board sits, which is exactly what you want.
- Dried figs (about 8-10) — Mission figs are my favorite for their jammy texture. Slice them in half lengthwise to show off the seeds inside.
- Dried apricots (about 6-8) — Turkish apricots are sweeter and softer. Leave them whole or halve them depending on size.
- Medjool dates (4-6) — Pitted and halved. They add that caramel-like sweetness that pairs beautifully with sharp cheese.
- Honey for drizzling (optional) — If your honeycomb isn’t leaking enough, a light drizzle of wildflower honey over the nuts adds extra sheen.
For the Cheeses
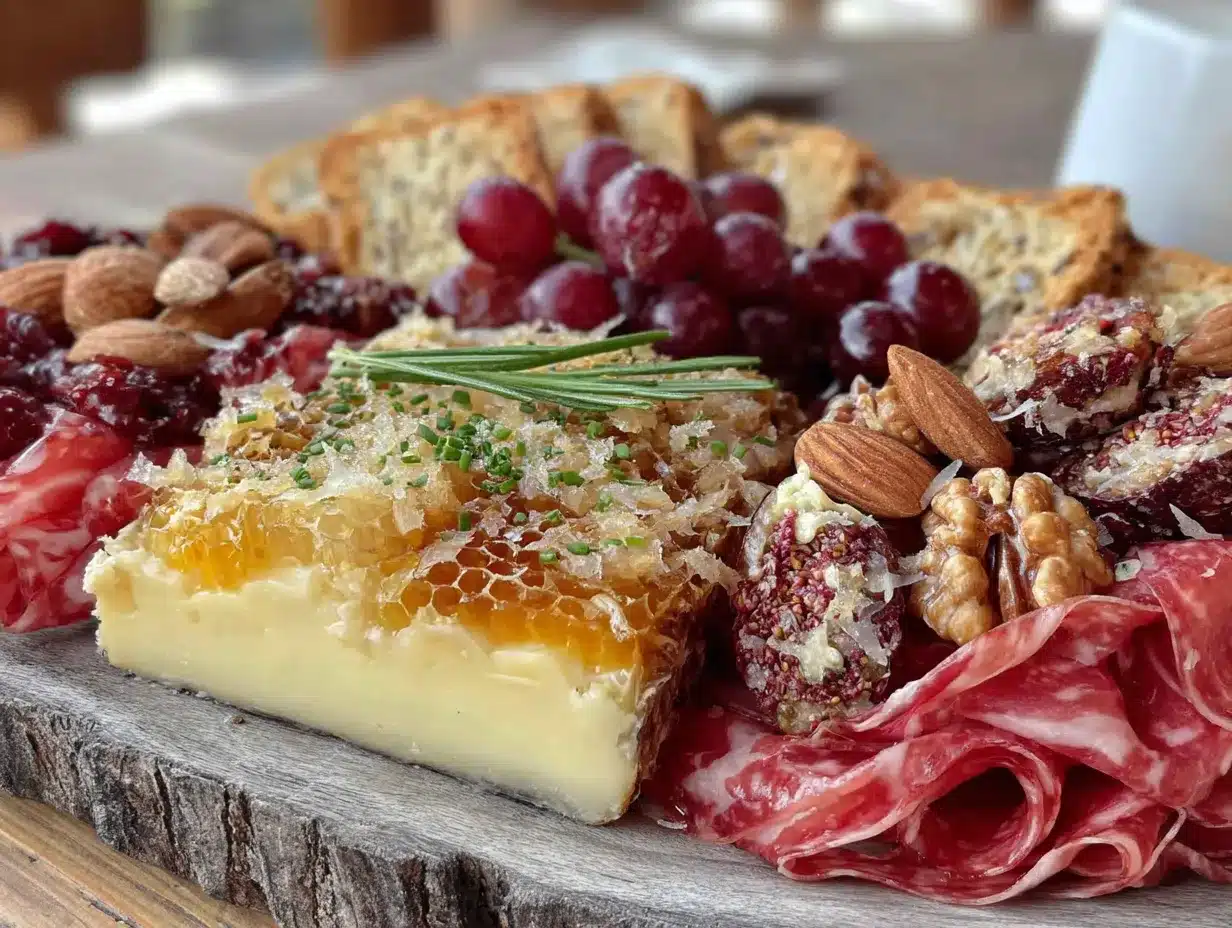
- Aged gouda (6-8 ounces) — The crystalline crunch of aged gouda is non-negotiable here. I recommend the 2-year aged gouda from Beemster for that perfect balance of nutty and sweet.
- Sharp cheddar (6-8 ounces) — Cabot’s Seriously Sharp is my go-to. The tang cuts through the honey beautifully.
- Soft goat cheese (4-6 ounces) — A log of fresh chèvre, left at room temperature so it spreads easily. The creamy tang contrasts with everything else.
- Blue cheese (4 ounces, optional) — Point Reyes Original Blue adds that funky punch if your crowd is adventurous. I sometimes skip this for milder palates.
For the Nuts
- Candied pecans (1 cup) — I use the ones from Trader Joe’s when I’m lazy, but homemade ones are easy too. The sweet-spicy coating is perfect with honey.
- Smoked almonds (1 cup) — The smokiness adds depth. Blue Diamond Smokehouse almonds work great here.
- Toasted walnuts (1 cup) — Toast them yourself in a dry pan for 3-4 minutes until fragrant. It makes a huge difference in flavor.
- Marcona almonds (1/2 cup, optional) — These Spanish almonds are already salted and fried, adding a buttery richness. A splurge, but worth it.
For the Savory Components
- Sopressata (4 ounces) — Sliced thin, then folded into loose ribbons. The fennel seeds in sopressata complement honey beautifully.
- Prosciutto (4 ounces) — Tear into rough pieces rather than laying flat. The irregular edges look more rustic.
- Cornichons (1/2 cup) — These tiny pickles cut through the richness. I tuck them in small piles around the board.
- Whole grain mustard (2 tablespoons) — A small bowl of mustard adds a tangy counterpoint. Maille brand is my standby.
- Fresh grapes (1 cup) — Red or black grapes, washed and left in small clusters. They add freshness and color.
- Crackers or crostini (about 20-24 pieces) — I like a mix of plain water crackers and rosemary-flavored flatbreads. Look for brands like Raincoast or Rustic Bakery.
Equipment Needed
- Large wooden board or slate platter (at least 12×18 inches) — A reclaimed wood board adds that rustic feel. I found mine at an antique store for $15, but any large cutting board works. Avoid plastic or glass if you want that warm, natural look.
- Small bowls or ramekins (2-3) — For the mustard, extra honey, or olives if you add them. I use mismatched ceramic ones for character.
- Cheese knives (at least 2) — One for hard cheese, one for soft. A flat cheese spreader works best for the goat cheese.
- Small honey dipper or spoon — For serving the honeycomb without making a mess. A wooden honey dipper is ideal, but a regular spoon works fine.
- Tongs or small serving forks — For the meats and pickles. I keep a pair of small tongs near the prosciutto.
- Parchment paper (optional) — For lining the board under the honeycomb to catch drips. Not necessary, but saves on cleanup.
You don’t need anything fancy here. I’ve made this board on a cutting board balanced on a cooler during a picnic, and it worked perfectly. The key is having enough surface area to spread things out so guests can reach everything without playing Jenga with the cheese.
Preparation Method
- Start with the honeycomb (5 minutes before serving) — Place the honeycomb piece toward the center or slightly off-center of your board. This is your anchor. If the honeycomb is cold from the fridge, let it sit at room temperature for 15 minutes so the honey flows more easily. Position it on a small piece of parchment if you’re worried about wax sticking to the board.
- Arrange the cheeses (3 minutes) — Place the aged gouda and sharp cheddar on opposite sides of the board, leaving space between them. Cut the gouda into thin wedges and fan them out slightly. Slice the cheddar into rectangles or cubes — I prefer cubes for easier grabbing. Put the goat cheese log on the board whole, with a small knife next to it. If you’re using blue cheese, crumble some over a corner and leave a wedge intact.
- Add the meats (2 minutes) — Tear the prosciutto into rough, bite-sized pieces and arrange them in loose piles near one edge of the board. Fold the sopressata slices into loose ribbons or simply roll them into cylinders. Don’t worry about being neat — the rustic look comes from imperfection. I usually put the meats on one side so guests who don’t eat pork can easily avoid them.
- Scatter the nuts (2 minutes) — Spoon the candied pecans, smoked almonds, and toasted walnuts into separate piles around the board. Leave some space between each nut type so flavors don’t blend too much. I like to put the candied pecans closest to the honeycomb because the sweet-savory combination is irresistible. The smoked almonds work well near the sharp cheddar.
- Fill in with fruits and pickles (3 minutes) — Tuck the halved figs, apricots, and dates in the gaps between the larger components. Place small clusters of grapes in two or three spots around the board. Spoon the cornichons into a small bowl or pile them in a corner. The pops of color from the dried fruits brighten up the whole board.
- Add the condiments and crackers (2 minutes) — Put the whole grain mustard in a small ramekin and place it near the meats. If you’re drizzling extra honey, do it lightly over the nuts and cheese — not over the honeycomb itself. Arrange the crackers and crostini in a basket or on the edges of the board. I usually put them on a separate small board or plate to keep them from getting soggy from the honey.
- Final touches (1 minute) — Step back and look at your board. Fill any empty gaps with extra grapes, a few more nuts, or small herb sprigs like rosemary or thyme for color. The board should look abundant but not crowded — you want guests to be able to reach everything without knocking things over. If it looks sparse, add more crackers or nuts. If it looks too full, remove a few elements and serve them on the side.
Here’s a tip I learned the hard way: don’t arrange everything perfectly. Leave some honeycomb pieces slightly separated from the main cluster. Let a few nuts roll loose. The rustic look is supposed to feel accidental, even though you planned it that way. The first time I made this board, I spent 20 minutes arranging everything symmetrically, and it looked like a department store display. Now I spend 10 minutes being intentionally messy, and it looks so much better.
Cooking Tips & Techniques
Let me save you from my mistakes. The first time I made a rustic honeycomb charcuterie board with nuts, I put the honeycomb in the fridge overnight. Big mistake. Cold honeycomb is rock hard and won’t release any honey. Always let it come to room temperature before serving — about 20 to 30 minutes on the counter does the trick.
Another thing I learned the hard way: don’t put the honeycomb directly next to the goat cheese. The honey will drip onto the cheese and make it slide around, and the texture gets weird. Give them a buffer zone of nuts or fruit. The candied pecans work great as a barrier because their crunch holds up against any moisture.
When it comes to the nuts, toast them yourself if you have time. I know it’s an extra step, but raw almonds or walnuts taste flat compared to toasted ones. Spread them on a baking sheet at 350°F for 5-7 minutes, and you’ll notice the difference immediately. The heat brings out the natural oils and makes them more aromatic. Just watch them closely — nuts go from toasted to burnt in about 30 seconds.
One trick I use for making the board look fuller without spending more money: use small bowls for the condiments and pickles. They take up space and add height, which makes the board look more substantial. I have a collection of mismatched ceramic ramekins from thrift stores that I use specifically for this purpose.
Timing is everything with this board. I assemble everything except the crackers and honeycomb about 30 minutes before guests arrive. Then I add the honeycomb and crackers right before people walk in. The honeycomb starts leaking immediately at room temperature, so you want it fresh. The crackers get stale if they sit out too long, especially near the moist ingredients.
If you’re making this for a party, set out small plates and napkins — people tend to pile their boards high, and they need a place to put everything. I use small wooden plates that match the rustic theme, but any appetizer plates work.
Variations & Adaptations
Seasonal Variations
Summer : Swap the dried figs for fresh black mission figs when they’re in season. Add fresh berries like raspberries and blackberries for color. Replace the candied pecans with fresh peaches or nectarines sliced thin. The honeycomb with fresh fruit is incredible.
Fall : Add roasted pumpkin seeds and apple slices. Use a sharp apple cider cheddar instead of regular sharp cheddar. Drizzle the board with a little maple syrup in addition to the honey. The combination of maple and honey is surprisingly good.
Winter : Add pomegranate seeds for color and crunch. Use dried cranberries instead of apricots. Add a spiced nut mix with cinnamon and cayenne for warmth. The deep reds and browns look beautiful against a dark wood board.
Dietary Adaptations
Vegan : Skip all the cheeses and meats. Load up on nuts, dried fruits, fresh fruits, and add a vegan cheese alternative like cashew-based chèvre. The honeycomb is technically not vegan since it’s a bee product, so substitute with agave syrup or a vegan honey alternative. Marinate some mushrooms in soy sauce and olive oil for a savory element.
Nut-Free : Replace all nuts with roasted chickpeas, pumpkin seeds, and sunflower seeds. Add extra cheese and meat to compensate for the lost volume. The texture will be different, but the flavor profile still works beautifully with the honeycomb.
Low-Carb : Focus on the cheese, meat, and nuts. Skip the dried fruits and crackers. Add cucumber slices and celery sticks for crunch. The honeycomb is higher in sugar, so use it sparingly. This version is actually my favorite for keto-friendly gatherings.
Flavor Twists
Spicy : Add a small bowl of hot honey or chili flakes. Sprinkle cayenne over the candied pecans. Use a pepper jack cheese instead of cheddar. The heat cuts through the sweetness of the honey beautifully.
Herbaceous : Add fresh rosemary sprigs and thyme around the board. Use a herbed goat cheese. Add marinated olives with oregano and garlic. The herbs make the board smell incredible and add visual interest.
I once made a version with smoked gouda instead of aged gouda, and it was a completely different experience — the smokiness paired with the honey in a way I didn’t expect. Don’t be afraid to experiment. The rustic honeycomb charcuterie board is forgiving, and even a “failed” version is still a plate of delicious food.
Serving & Storage Suggestions
Serve this board at room temperature — the cheese needs to soften, the honey needs to flow, and the meats need to release their full flavor. I usually take everything out of the fridge 30 minutes before serving. The exception is the goat cheese, which I leave out for 45 minutes because it needs more time to become spreadable.
For presentation, I like to place the board in the center of the table so everyone can reach it. If you’re serving a crowd, make two smaller boards instead of one giant one — people tend to congregate around the food, and a single board can create traffic jams. I learned this after a party where eight people were trying to reach the same honeycomb at once.
This board pairs beautifully with a crisp white wine like Sauvignon Blanc or a dry rosé. For red wine drinkers, a light Pinot Noir works well because it doesn’t overpower the honey. If you’re serving beer, go with a Belgian witbier or a wheat beer — the citrus notes complement the honey. Non-alcoholic options like sparkling water with lemon or a crisp apple cider are also great choices.
Storage : The honeycomb can be stored at room temperature in an airtight container for up to 3 months. Seriously, it doesn’t go bad. The cheeses should be wrapped in wax paper and stored in the fridge for up to a week. Nuts stay fresh in an airtight container at room temperature for about 2 weeks, but I keep them in the fridge for longer storage. Leftover meats should be wrapped tightly and eaten within 3 days.
If you have leftover assembled board, separate the components before storing. The crackers will get soft if left near the honey, and the fruits will make the cheese soggy. I usually pick through the board and put everything back in its original container. It takes 5 minutes and saves the ingredients from getting ruined.
One thing I love about this board is that the flavors actually get better after a few hours. The honey seeps into the nuts, the cheese absorbs some of the fruit flavors, and everything melds together. If you’re making this for a party, you can assemble it up to 2 hours ahead, just leave the honeycomb and crackers off until the last minute.
Nutritional Information & Benefits
This board is more of a grazing experience than a meal, so nutritional values vary widely based on what you eat. A typical serving (about 2 ounces of cheese, 1 ounce of nuts, and a few bites of honeycomb and fruit) contains approximately:
| Nutrient | Approximate Value |
|---|---|
| Calories | 350-450 |
| Protein | 15-20g |
| Fat | 25-35g |
| Carbohydrates | 20-30g |
| Fiber | 3-5g |
| Sugar | 15-20g |
The rustic honeycomb charcuterie board with nuts offers more nutritional benefits than you might expect. The honeycomb contains natural enzymes and antioxidants that support immune health. Nuts provide healthy fats, vitamin E, and magnesium. Cheese offers calcium and protein. Dried fruits deliver fiber and natural energy.
That said, this is definitely a treat, not a health food. The honey is still sugar, even if it’s natural, and the cheese is high in saturated fat. I think of this board as a special occasion food — perfect for holidays, parties, or lazy Sundays when you want to feel a little indulgent.
For guests with dietary restrictions, this board is naturally gluten-free if you skip the crackers. It’s also vegetarian-friendly if you leave off the meats. The main allergens are dairy (from the cheese), tree nuts, and honey (which some people avoid for ethical reasons). I always label the honeycomb clearly so guests can make informed choices.
Conclusion
Look, I’m not going to pretend this board changed my life. But it did change how I think about entertaining. The rustic honeycomb charcuterie board with nuts taught me that you don’t need complicated recipes or fancy techniques to impress people. You just need good ingredients arranged with a little thought and a lot of honey.
What I love most about this board is how adaptable it is. You can make it for a fancy dinner party or a casual Netflix night. You can spend $20 or $80 depending on the cheeses and meats you choose. It works for two people or twenty. And every single time, someone will ask about the honeycomb — where to find it, how to eat it, whether they can just eat it with a spoon. (The answer is yes, by the way.)
I’d love to hear how your board turns out. Did you add something unexpected? Did the honeycomb drip everywhere like it’s supposed to? Drop a comment below and share your version. And if you’re looking for more easy entertaining ideas, check out my rustic apple tart recipe — it has that same imperfect, beautiful vibe. Happy grazing!
Frequently Asked Questions
Can I eat the wax from the honeycomb?
Yes, the wax is completely edible. It has a chewy texture similar to gum and a mild honey flavor. Some people prefer to chew it and then spit out the wax, while others swallow it. It’s entirely a personal preference. The wax won’t hurt you either way.
How far in advance can I assemble the charcuterie board?
You can assemble everything except the honeycomb and crackers up to 2 hours ahead. Keep the board covered with plastic wrap in a cool place (not the fridge, unless it’s very hot). Add the honeycomb and crackers right before serving. The honeycomb will start releasing honey immediately at room temperature, so you want it fresh.
What can I substitute for honeycomb?
If you can’t find honeycomb, use a high-quality liquid honey like wildflower or orange blossom honey. Drizzle it over the nuts and cheese just before serving. You’ll lose the visual impact of the honeycomb, but the flavor will still be wonderful. Another option is to use honeycomb pieces sold in jars at specialty food stores.
How do I keep the honey from making everything sticky?
Place the honeycomb on a small piece of parchment paper or a flat stone that fits on your board. The honey will drip onto the paper instead of soaking into the wood or mixing with the cheese. You can also position the honeycomb slightly elevated on a small dish or a folded napkin to control the flow.
Can I make this board for a large crowd?
Absolutely. For a crowd of 12 or more, make two separate boards instead of one giant one. People tend to gather around the food, and a single large board can create congestion. Two smaller boards placed on opposite sides of the room or table allow guests to spread out. Double all the ingredient quantities for a crowd of 12-15 people.
Pin This Recipe!
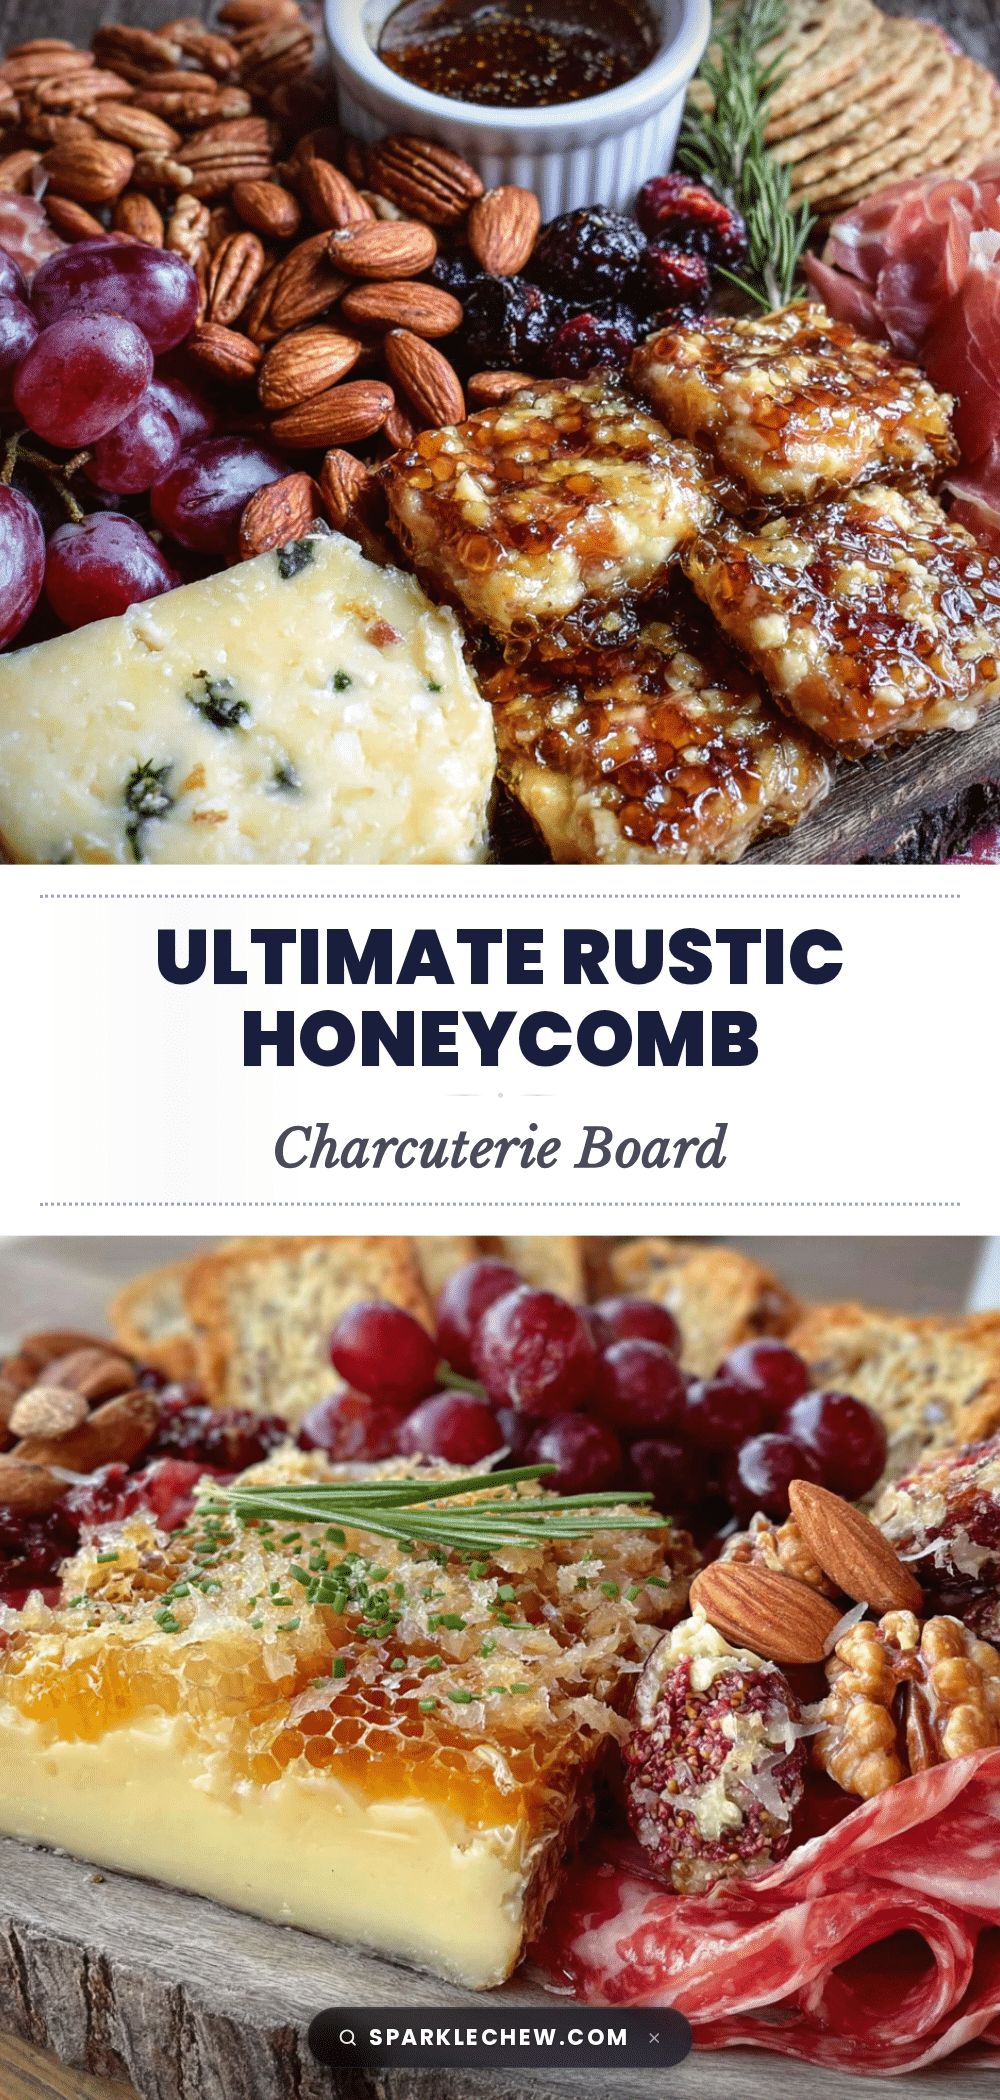
Perfect Rustic Honeycomb Charcuterie Board with Nuts
A rustic honeycomb charcuterie board with nuts, cheese, meats, and dried fruits that’s impressive yet effortless. Perfect for entertaining, this board features fresh honeycomb as the star, with creamy cheeses, crunchy nuts, and sweet dried fruits for a beautiful, crowd-pleasing spread.
- Prep Time: 15 minutes
- Cook Time: 0 minutes
- Total Time: 15 minutes
- Yield: 8 servings
- Category: Appetizer
- Cuisine: American
Ingredients
- Fresh honeycomb (4-6 ounces)
- Dried figs (8-10)
- Dried apricots (6-8)
- Medjool dates (4-6), pitted and halved
- Honey for drizzling (optional)
- Aged gouda (6-8 ounces)
- Sharp cheddar (6-8 ounces)
- Soft goat cheese (4-6 ounces)
- Blue cheese (4 ounces, optional)
- Candied pecans (1 cup)
- Smoked almonds (1 cup)
- Toasted walnuts (1 cup)
- Marcona almonds (1/2 cup, optional)
- Sopressata (4 ounces), sliced thin
- Prosciutto (4 ounces), torn into pieces
- Cornichons (1/2 cup)
- Whole grain mustard (2 tablespoons)
- Fresh grapes (1 cup), red or black
- Crackers or crostini (20-24 pieces)
Instructions
- Start with the honeycomb (5 minutes before serving): Place the honeycomb piece toward the center or slightly off-center of your board. If cold, let it sit at room temperature for 15 minutes. Position on parchment if needed.
- Arrange the cheeses (3 minutes): Place aged gouda and sharp cheddar on opposite sides. Cut gouda into thin wedges and fan out. Slice cheddar into cubes. Place goat cheese log whole with a knife. If using blue cheese, crumble some and leave a wedge intact.
- Add the meats (2 minutes): Tear prosciutto into rough pieces and arrange in loose piles. Fold sopressata into ribbons or roll into cylinders. Place meats on one side for easy avoidance.
- Scatter the nuts (2 minutes): Spoon candied pecans, smoked almonds, and toasted walnuts into separate piles. Place candied pecans near honeycomb for sweet-savory combination.
- Fill in with fruits and pickles (3 minutes): Tuck halved figs, apricots, and dates in gaps. Place grape clusters in 2-3 spots. Spoon cornichons into a small bowl or pile in a corner.
- Add the condiments and crackers (2 minutes): Put whole grain mustard in a small ramekin near meats. If drizzling extra honey, do it lightly over nuts and cheese. Arrange crackers in a basket or on edges.
- Final touches (1 minute): Fill empty gaps with extra grapes, nuts, or herb sprigs like rosemary or thyme. Board should look abundant but not crowded.
Notes
Let honeycomb come to room temperature before serving. Don’t place honeycomb directly next to goat cheese; use nuts as a buffer. Toast nuts yourself for best flavor. Assemble everything except honeycomb and crackers up to 2 hours ahead. Store leftover components separately.
Nutrition
- Serving Size: 1 serving (about 2 o
- Calories: 400
- Sugar: 18
- Sodium: 600
- Fat: 30
- Saturated Fat: 12
- Carbohydrates: 25
- Fiber: 4
- Protein: 18
Keywords: charcuterie board, honeycomb, rustic, nuts, cheese board, appetizer, entertaining, gluten-free