Love this? Save it for later!
Share the inspiration with your friends
This was supposed to be a full batch of cookies. I had the butter softening on the counter, the stand mixer ready to go, and a serious craving for that classic chocolate chip experience. But then my neighbor knocked on the door with a plate of her own freshly baked cookies—a whole army of them, enough to feed a small village. Suddenly, my plan for a mountain of cookies felt excessive, even a little silly. I mean, who really needs three dozen cookies staring at them from the counter? So I put the butter back in the fridge, feeling a bit defeated.
An hour later, the craving was back, stronger than ever. But this time, it was different. I didn’t want a lifetime supply. I wanted one perfect cookie. Maybe two. You know that feeling when you just need a little something sweet, not a whole production? I stared at the half-used stick of butter and thought, “There has to be a way to make just a couple of cookies without all the fuss.” Honestly, I was pretty sure it wouldn’t work. Small batches of cookies are notoriously tricky—they can turn out flat, greasy, or just plain sad.
I grabbed a single egg yolk, a few tablespoons of butter, and crossed my fingers. The dough came together in a single bowl in about five minutes. It looked right, it smelled right, and when I pulled those two golden-brown beauties out of the oven, I let out a little laugh. They were perfect. Not a compromise. Not a sad imitation. Just two absolutely perfect, bakery-style chocolate chip cookies. And honestly? They might be the best cookies I’ve ever made. That happy accident of a canceled plan turned into my go-to recipe, and I haven’t looked back since.
Why You’ll Love This Recipe
Let’s be real—most cookie recipes are designed for a crowd. They make three dozen cookies, which is great for a party but a disaster for a quiet Tuesday night. This recipe is different. It’s made for two people who just want a little something sweet without the leftovers calling your name for a week. Here’s why it works so well:
- Perfectly Portioned: This recipe makes exactly two generously sized cookies. No more, no less. It’s the ideal amount for a late-night craving or a small dessert for two.
- No Waste: You won’t be stuck with a half-used bag of flour or a leftover egg white. This recipe uses simple ingredients in smart, small quantities.
- Ready in 20 Minutes: From the moment you decide you want a cookie to the moment you’re eating one, it takes about 20 minutes. No chilling required.
- Bakery-Style Results: These cookies have crispy edges, soft and chewy centers, and pools of melted chocolate in every bite. They look and taste like they came from a fancy bakery.
- No Special Equipment: You don’t need a stand mixer or a food processor. Just a bowl, a spoon, and a baking sheet.
What makes this recipe different from other small-batch recipes is the technique. I’ve tested the ratios so you get that perfect texture without any complicated steps. The secret is using melted butter and a single egg yolk. The melted butter gives you a chewier cookie, and the yolk adds richness without making the dough too wet. It’s not just another version of a small-batch cookie—it’s the best version.
This is the kind of recipe that feels like a little secret. It’s comfort food in its purest form—warm, sweet, and made just for you. Perfect for a cozy night in, a small date night dessert, or a moment when you need a little pick-me-up. It’s simple, it’s fast, and it’s unbelievably delicious.
What Ingredients You Will Need
This recipe uses basic pantry staples, but with a few smart tweaks to get that perfect texture. The ingredients are simple, but each one plays a specific role. Here’s what you’ll need and why it matters:
- Unsalted Butter (2 tablespoons, melted): I always use unsalted butter so I can control the salt level. Melting the butter is the secret to a chewier cookie. It coats the flour proteins differently than creamed butter, giving you a denser, more satisfying texture. I recommend using a good quality butter like Kerrygold if you have it—the flavor really shines through.
- Light Brown Sugar (3 tablespoons, packed): Brown sugar is non-negotiable here. It has molasses in it, which adds moisture and a deep, caramel-like flavor. It also helps create that soft, chewy center. Pack it firmly into the measuring spoon for the best results.
- Granulated Sugar (1 tablespoon): A small amount of white sugar helps the cookies spread just enough and adds a touch of sweetness. It also contributes to those crispy, lacy edges.
- One Large Egg Yolk (room temperature): This is the key to a small-batch recipe. Using just the yolk gives you all the richness and moisture of an egg without the extra liquid that would make the dough too loose. Make sure your egg is at room temperature so it blends smoothly into the warm butter.
- Vanilla Extract (½ teaspoon): Pure vanilla extract is worth the splurge here. It enhances the chocolate and gives the cookies a warm, aromatic flavor. Imitation vanilla can taste a bit artificial in such a small batch.
- All-Purpose Flour (¼ cup plus 1 tablespoon, about 45 grams): Standard all-purpose flour works perfectly. For the most accurate measurement, spoon the flour into your measuring cup and level it off with a knife. Scooping directly from the bag can pack in too much flour and make your cookies dry.
- Baking Soda (⅛ teaspoon): Just a tiny bit helps the cookies spread and become golden brown. Don’t skip it—it’s essential for the right texture.
- Salt (a pinch, about ⅛ teaspoon): Salt balances the sweetness and enhances the chocolate flavor. I use fine sea salt for the dough.
- Semi-Sweet Chocolate Chips (¼ cup, about 40 grams): Semi-sweet is my go-to for a balanced flavor. You can use dark chocolate chips if you prefer a less sweet cookie, or milk chocolate for a sweeter treat. I love using a mix of chips and chopped chocolate for varied textures. Guittard or Ghirardelli are my favorite brands for consistent quality.
- Flaky Sea Salt (for finishing, optional but recommended): A sprinkle of flaky salt like Maldon on top of the warm cookies takes them to another level. It cuts through the sweetness and makes the chocolate taste even richer.
Equipment Needed
One of the best things about this recipe is how little equipment you need. You probably have everything already sitting in your kitchen drawers. Here’s the short list:
- Small Mixing Bowl: Any small bowl will do. I use a medium ceramic bowl that’s easy to hold and mix in.
- Whisk or Fork: For whisking together the wet ingredients. A fork works in a pinch, but a small whisk is easier.
- Rubber Spatula or Wooden Spoon: For folding in the flour and chocolate chips. A spatula is great for scraping the bowl clean.
- Measuring Spoons and Cups: Accurate measurements matter in a small batch. Use proper measuring spoons, not regular spoons from your silverware drawer.
- Small Baking Sheet or Cookie Sheet: A quarter-sheet pan is perfect. If you only have a large baking sheet, that works too—just make sure the cookies have a few inches of space between them.
- Parchment Paper or Silicone Baking Mat: This prevents sticking and helps the cookies bake evenly. I prefer parchment paper for easy cleanup.
- Cooling Rack: Optional but helpful for cooling the cookies quickly so they don’t continue baking on the hot pan.
If you don’t have a baking sheet, you can use a small cast-iron skillet or even a toaster oven tray. Just keep an eye on the baking time, as smaller pans can heat up faster.
Preparation Method
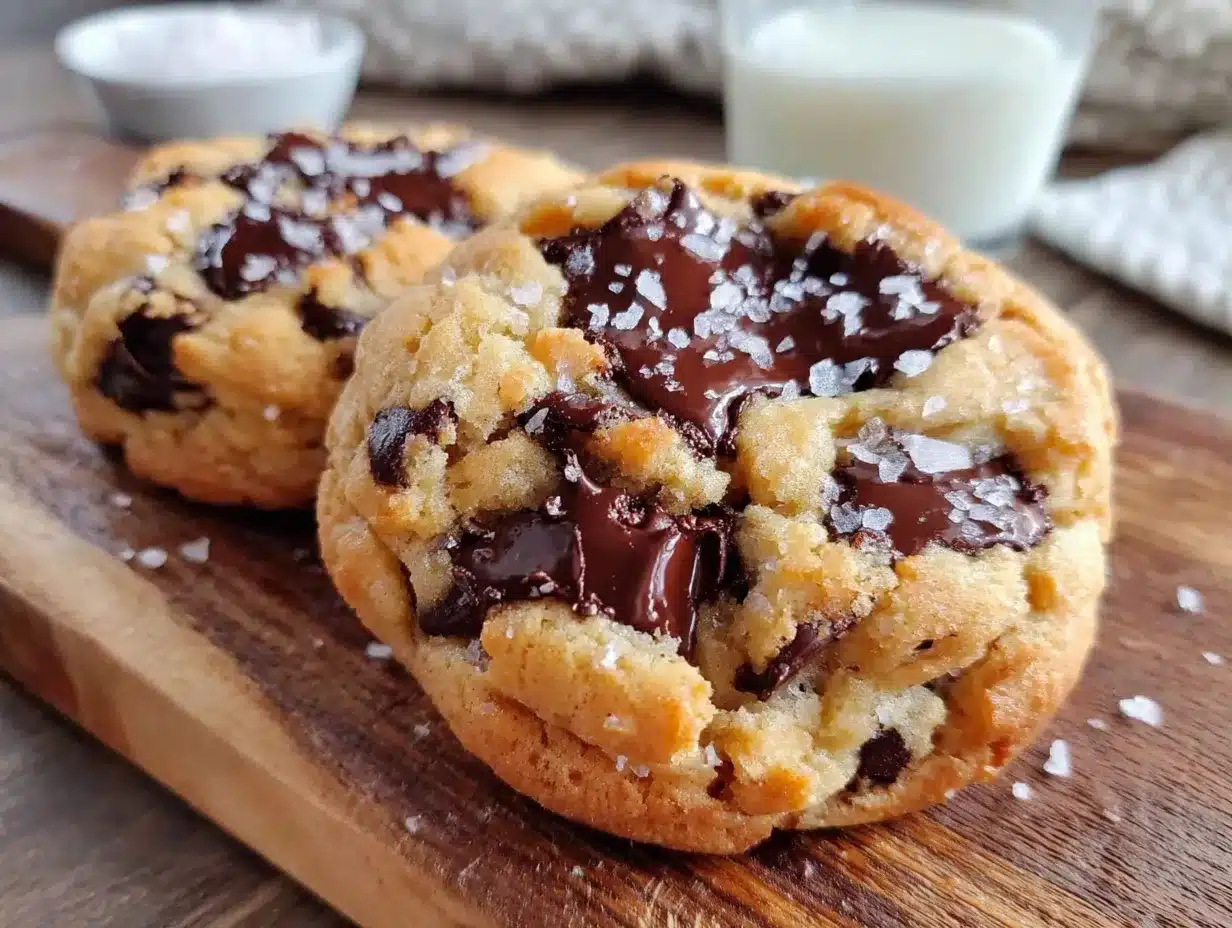
This recipe comes together in about 20 minutes from start to finish. No chilling, no complicated steps. Just pure, simple cookie joy. Follow these steps carefully, and you’ll have two perfect cookies every time.
Step 1: Preheat Your Oven
Preheat your oven to 350°F (175°C). Line a small baking sheet with parchment paper or a silicone baking mat. While the oven is heating, you can prepare the dough. This ensures the oven is at the right temperature when your cookies are ready to go in.
Step 2: Melt the Butter
Place 2 tablespoons of unsalted butter in a small microwave-safe bowl. Microwave in 15-second bursts until just melted. You want it melted but not hot—if it’s too hot, it can cook the egg yolk. Let it cool for a minute while you gather your other ingredients. Alternatively, you can melt it in a small saucepan on the stove over low heat.
Step 3: Mix the Wet Ingredients
Add 3 tablespoons of packed light brown sugar and 1 tablespoon of granulated sugar to the melted butter. Whisk vigorously for about 30 seconds until the mixture looks smooth and slightly thickened. This step is important—it helps dissolve the sugar and creates a shiny, caramel-like mixture. Add the egg yolk and ½ teaspoon of vanilla extract. Whisk again until everything is fully combined and smooth. The mixture should look like a thin caramel sauce.
Step 4: Add the Dry Ingredients
Sprinkle ¼ cup plus 1 tablespoon of all-purpose flour, ⅛ teaspoon of baking soda, and a pinch of salt over the wet mixture. Use a rubber spatula or wooden spoon to fold the dry ingredients into the wet. Mix gently until just combined. Do not overmix—overworking the dough can make the cookies tough. You should see a few streaks of flour remaining.
Step 5: Fold in the Chocolate Chips
Add ¼ cup of semi-sweet chocolate chips to the dough. Fold them in gently with your spatula until they’re evenly distributed. The dough will be thick and slightly sticky. If it feels too soft to handle, you can pop it in the fridge for 5 minutes while you clean up.
Step 6: Portion the Cookies
Divide the dough into two equal portions. I like to use a small cookie scoop or just my hands. Roll each portion into a ball. Place them on the prepared baking sheet, leaving at least 3 inches of space between them. They will spread, so give them room. For thicker cookies, gently press the tops down just slightly—don’t flatten them completely.
Step 7: Bake the Cookies
Bake for 10 to 12 minutes, or until the edges are golden brown and the centers look slightly underdone and puffy. The centers will look a little soft and shiny—that’s exactly what you want. They will continue to set as they cool on the baking sheet. If you prefer crispier cookies, bake for 12 to 13 minutes. For softer, chewier cookies, bake for 9 to 10 minutes.
Step 8: Finish and Cool
Remove the baking sheet from the oven. If you’re using flaky sea salt, sprinkle a small pinch over the tops of the warm cookies. Let them cool on the baking sheet for 5 minutes. This allows them to set properly. Then transfer them to a cooling rack or enjoy them warm. The cookies will be soft and gooey right out of the oven—pure heaven.
Cooking Tips & Techniques
After making this recipe more times than I can count (including a few spectacular failures), I’ve learned a few things that make a real difference. Here are my top tips for cookie success:
Measure Your Flour Correctly. This is the most common mistake in baking. If you scoop your measuring cup directly into the flour bag, you can pack in up to 25% more flour than you need. Instead, spoon the flour into the measuring cup and level it off with a knife. This simple step prevents dry, crumbly cookies.
Don’t Skip the Whisking Step. When you whisk the melted butter and sugars together, you’re doing more than just mixing. You’re creating air pockets and helping the sugar dissolve. This gives the cookies a better texture and flavor. Whisk for a full 30 seconds—it makes a difference.
Use Room Temperature Egg Yolk. A cold egg yolk can seize the melted butter and make the mixture lumpy. To bring it to room temperature quickly, place the whole egg in a bowl of warm water for 5 minutes before separating. It’s a small step that prevents a big headache.
Chill If Needed. If your kitchen is warm or your dough feels too soft, pop the dough balls in the fridge for 10 minutes before baking. This prevents the cookies from spreading too much and gives them a thicker, chewier texture. I do this on hot summer days.
Rotate the Pan Halfway Through. Ovens can have hot spots. About halfway through the baking time, rotate the baking sheet 180 degrees. This ensures both cookies bake evenly and get that perfect golden edge.
Underbake Slightly. I learned this the hard way after making a batch of hockey pucks. Cookies continue to bake from the residual heat of the pan even after you take them out of the oven. If the centers look set and the edges are golden, they’re done. Trust the process.
Let Them Cool on the Pan. I know it’s tempting to move them right away, but letting them rest on the hot baking sheet for 5 minutes is crucial. It allows the structure to set so they don’t fall apart when you pick them up. Patience pays off here.
Variations & Adaptations
This recipe is a great base for experimentation. Here are some of my favorite variations, plus a few I’ve tried that turned out surprisingly well:
Double Chocolate Chip: Replace 1 tablespoon of the all-purpose flour with 1 tablespoon of unsweetened cocoa powder. Use dark chocolate chips instead of semi-sweet. The result is a rich, fudgy cookie that tastes like a brownie. I made these for a friend who claims she doesn’t like chocolate chip cookies, and she ate both of them.
Gluten-Free Version: Substitute the all-purpose flour with a good quality 1-to-1 gluten-free baking flour blend. I’ve had great results with Bob’s Red Mill. The texture will be slightly more tender, but the flavor is spot on. Make sure your baking soda is gluten-free as well.
Nutty Delight: Add 2 tablespoons of chopped toasted pecans or walnuts along with the chocolate chips. Toast the nuts in a dry skillet over medium heat for 3-4 minutes until fragrant before adding them. This adds a wonderful crunch and a warm, toasty flavor.
White Chocolate & Macadamia: Swap the semi-sweet chips for white chocolate chips and add 2 tablespoons of chopped macadamia nuts. This is my go-to variation when I’m feeling a little fancy. The combination of creamy white chocolate and buttery nuts is irresistible.
Vegan Adaptation: Use melted coconut oil or vegan butter in place of the regular butter. Replace the egg yolk with 1 tablespoon of aquafaba (the liquid from a can of chickpeas) or a flax egg (1 tablespoon ground flaxseed mixed with 3 tablespoons water, left to sit for 5 minutes). The texture will be slightly different—a bit more cake-like—but still delicious.
Add a Pinch of Cinnamon: For a warm, spicy note, add ¼ teaspoon of ground cinnamon along with the dry ingredients. It pairs beautifully with the brown sugar and chocolate. I tried this on a whim one rainy afternoon, and it’s become a cozy favorite.
Serving & Storage Suggestions
These cookies are best enjoyed warm, fresh from the oven. That gooey, melty chocolate and soft center is the whole point, right? But there are a few ways to make the experience even better.
Serving Temperature: Serve them warm, but let them cool for at least 5 minutes on the baking sheet first. This allows the structure to set so they hold together when you pick them up. If you want them extra gooey, microwave them for 10 seconds before serving.
Presentation: Place the cookies on a small plate or a wooden board. Add a small glass of cold milk or a scoop of vanilla ice cream on the side. A dusting of powdered sugar or a drizzle of melted chocolate makes them look extra special for a date night dessert.
Complementary Beverages: A cold glass of milk is the classic pairing. For a more grown-up option, try them with a cup of strong coffee, a latte, or a glass of dessert wine like a late-harvest Riesling. The sweetness of the cookie balances beautifully with the bitterness of coffee.
Storage Instructions: These cookies are best eaten the same day, but you can store them in an airtight container at room temperature for up to 2 days. Place a piece of bread in the container to keep them soft—the cookies will absorb the moisture from the bread. If you want to keep them crispier, store them without the bread.
Freezing Instructions: You can freeze the unbaked dough balls for up to 3 months. Place them on a baking sheet and freeze until solid, then transfer to a freezer bag. When you’re ready to bake, simply place the frozen dough balls on a lined baking sheet and bake at 350°F for 12-14 minutes. No need to thaw! This is great for spontaneous cookie cravings.
Reheating: To revive day-old cookies, microwave them for 10-15 seconds. This softens the center and melts the chocolate chips, making them taste almost fresh-baked. You can also pop them in a 300°F oven for 3-4 minutes.
Nutritional Information & Benefits
Let’s be honest—these are cookies, not health food. But knowing what’s in them helps you enjoy them mindfully. Here’s the estimated nutritional breakdown for one cookie (based on the recipe as written):
Calories: Approximately 280-320 calories per cookie
Fat: 16-18g (mostly from butter and chocolate)
Carbohydrates: 34-38g
Sugar: 22-26g
Protein: 3-4g
Fiber: 1-2g
Key Ingredient Benefits:
- Dark Chocolate: If you use dark chocolate chips (60% cacao or higher), you’ll get a dose of antioxidants called flavonoids, which are good for heart health. Plus, dark chocolate has less sugar than milk chocolate.
- Butter: While it’s high in saturated fat, butter also provides fat-soluble vitamins like A, D, E, and K. Using a small amount in a treat like this is perfectly fine as part of a balanced diet.
- Egg Yolk: Egg yolks are packed with nutrients like choline (good for brain health), vitamin D, and B vitamins. They also add richness, which means you can use less overall fat.
Dietary Considerations:
- Contains gluten, dairy, and eggs.
- Can be made gluten-free with a 1-to-1 flour blend.
- Can be made vegan with the substitutions listed in the variations section.
- Not suitable for low-carb or keto diets due to the sugar content.
I believe in enjoying treats like this in moderation. A perfectly baked cookie shared with someone you love is more than just a dessert—it’s a small moment of joy. And that’s good for the soul, no matter what the nutrition label says.
Frequently Asked Questions
Can I double this recipe?
Absolutely! This recipe scales up perfectly. Simply double all the ingredients. You can use a whole egg instead of two yolks if you prefer. The baking time will remain about the same, but you may need to bake in batches to avoid overcrowding the pan.
Why did my cookies turn out flat?
Flat cookies usually mean the butter was too warm or the dough wasn’t chilled. Make sure your melted butter has cooled slightly before adding the egg yolk. If your kitchen is warm, chill the dough balls for 10 minutes before baking. Also, check that your baking soda is fresh—old baking soda loses its leavening power.
Can I use margarine instead of butter?
I don’t recommend it. Margarine has a higher water content than butter, which can make the cookies spread too much and turn out greasy. Butter gives a much better flavor and texture. If you need a dairy-free option, use a high-quality vegan butter stick (not the spreadable kind in a tub).
How do I get perfectly round cookies?
Right after you take the cookies out of the oven, place a round cookie cutter or a glass that’s slightly larger than the cookie over each one. Gently swirl it in a circular motion. This pushes the edges inward and creates a perfectly round shape. It’s a popular bakery trick that works like a charm.
Can I use a different type of chocolate?
Of course! You can use milk chocolate, dark chocolate, white chocolate, or even chocolate chunks instead of chips. Just keep in mind that different chocolates have different sugar and fat contents, which can slightly affect the texture. For the best results, stick with semi-sweet or dark chocolate.
Conclusion
These small-batch chocolate chip cookies are proof that you don’t need a crowd to enjoy something special. They’re quick, easy, and made with ingredients you probably already have in your pantry. Whether you’re craving a late-night treat, planning a cozy date night dessert, or just want to bake something without committing to three dozen cookies, this recipe is your answer.
What I love most about this recipe is how forgiving it is. It’s okay if your measurements aren’t perfect. It’s okay if you eat one straight off the baking sheet. It’s okay if you add a few extra chocolate chips. This recipe is designed to work for real people in real kitchens. It’s not about perfection—it’s about enjoying a warm, homemade cookie in the moment.
I’d love to hear how your cookies turn out! Did you try a variation? Did you add something unexpected? Share your experience in the comments below. And if you loved this recipe, please share it with a friend who deserves a perfect cookie moment. Happy baking, and remember—sometimes the best things come in small batches.
Pin This Recipe!
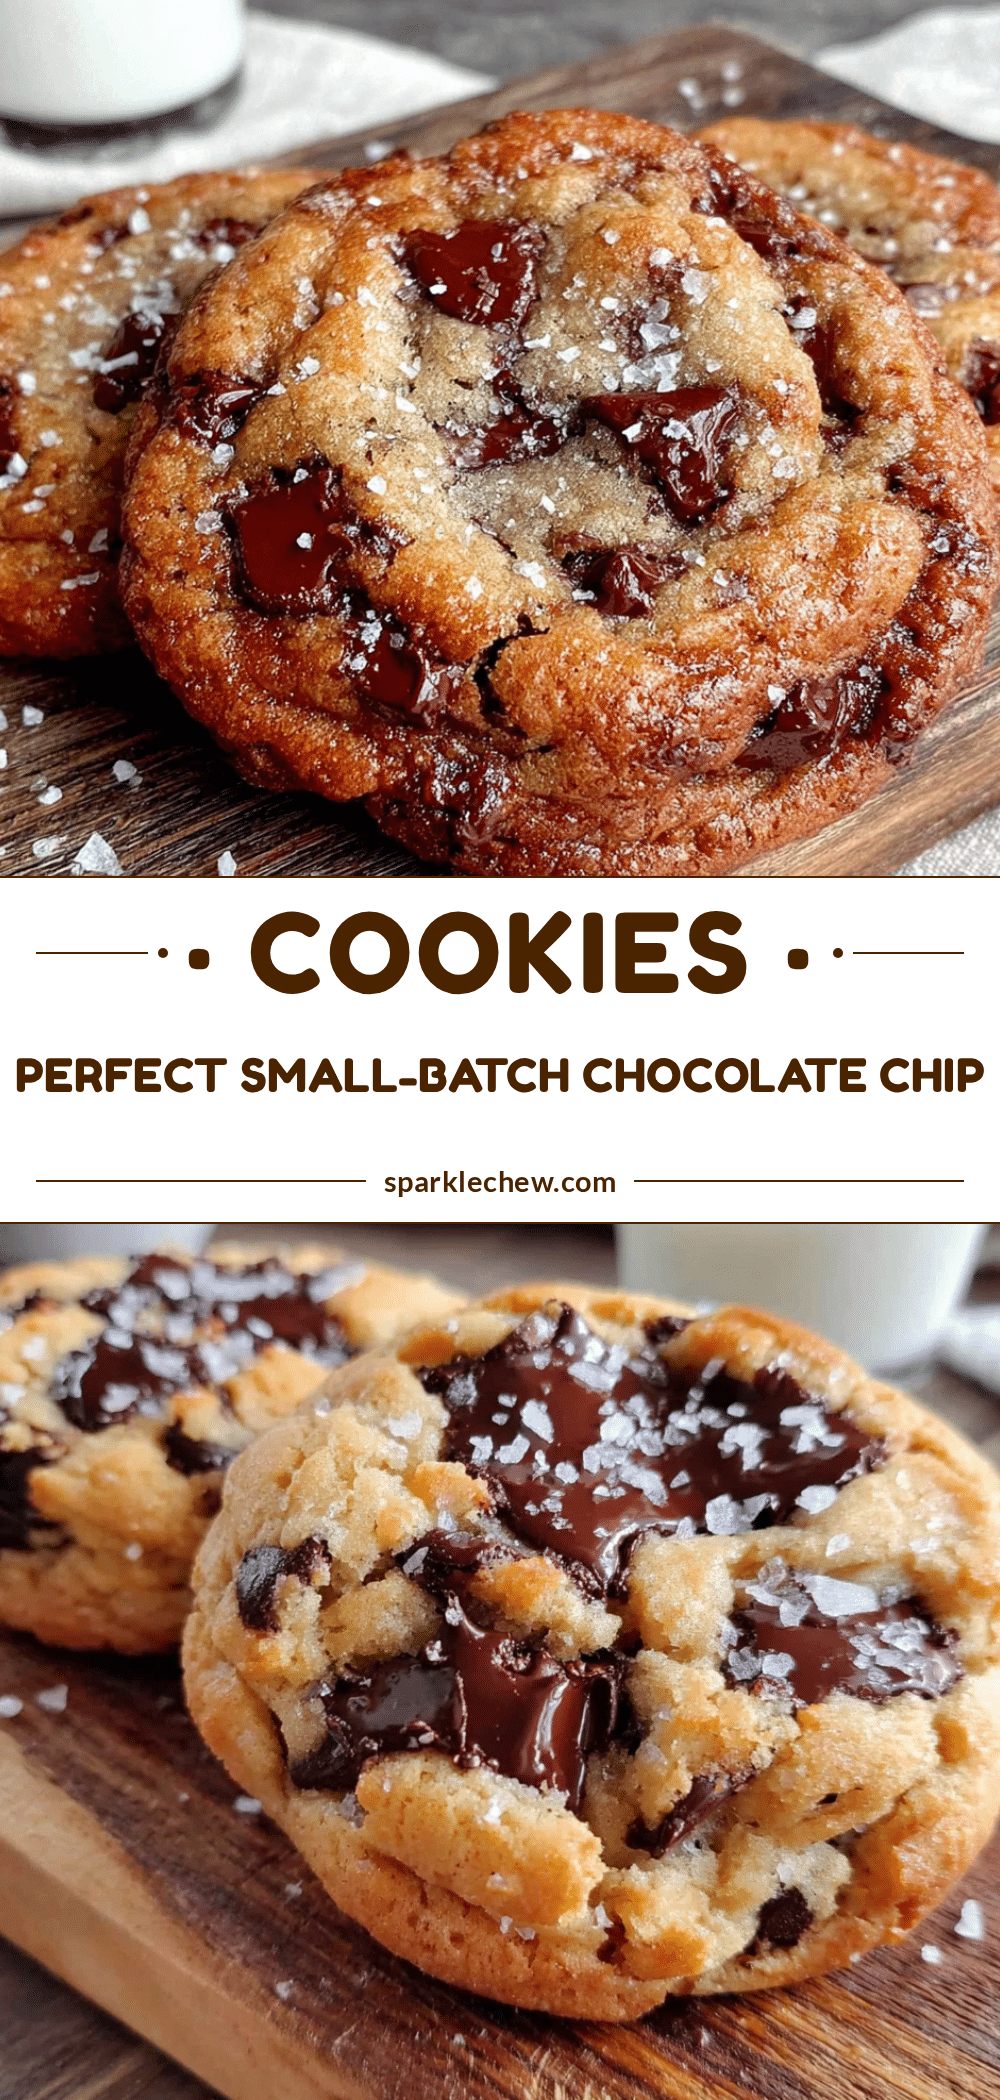
Perfect Small-Batch Chocolate Chip Cookies for Two
These small-batch chocolate chip cookies are perfectly portioned for two, ready in 20 minutes, and deliver bakery-style results with crispy edges, soft centers, and pools of melted chocolate.
- Prep Time: 10 minutes
- Cook Time: 10 minutes
- Total Time: 20 minutes
- Yield: 2 cookies 1x
- Category: Dessert
- Cuisine: American
Ingredients
- 2 tablespoons unsalted butter, melted
- 3 tablespoons light brown sugar, packed
- 1 tablespoon granulated sugar
- 1 large egg yolk, room temperature
- ½ teaspoon vanilla extract
- ¼ cup plus 1 tablespoon all-purpose flour (about 45 grams)
- ⅛ teaspoon baking soda
- ⅛ teaspoon salt (a pinch)
- ¼ cup semi-sweet chocolate chips (about 40 grams)
- Flaky sea salt for finishing (optional)
Instructions
- Preheat your oven to 350°F (175°C). Line a small baking sheet with parchment paper or a silicone baking mat.
- Place 2 tablespoons of unsalted butter in a small microwave-safe bowl. Microwave in 15-second bursts until just melted. Let cool for a minute.
- Add 3 tablespoons packed light brown sugar and 1 tablespoon granulated sugar to the melted butter. Whisk vigorously for about 30 seconds until smooth and slightly thickened.
- Add the egg yolk and ½ teaspoon vanilla extract. Whisk again until fully combined and smooth.
- Sprinkle ¼ cup plus 1 tablespoon all-purpose flour, ⅛ teaspoon baking soda, and a pinch of salt over the wet mixture. Fold gently with a rubber spatula or wooden spoon until just combined. Do not overmix.
- Fold in ¼ cup semi-sweet chocolate chips until evenly distributed. The dough will be thick and slightly sticky.
- Divide the dough into two equal portions. Roll each into a ball and place on the prepared baking sheet, leaving at least 3 inches of space between them. Gently press the tops down slightly.
- Bake for 10 to 12 minutes, until the edges are golden brown and the centers look slightly underdone and puffy.
- Remove from the oven. If using flaky sea salt, sprinkle a small pinch over the tops. Let cool on the baking sheet for 5 minutes, then transfer to a cooling rack or enjoy warm.
Notes
For best results, use room temperature egg yolk and measure flour correctly by spooning into the cup and leveling off. If dough is too soft, chill for 10 minutes before baking. Cookies continue to bake on the hot pan, so underbake slightly for chewy centers.
Nutrition
- Serving Size: 1 cookie
- Calories: 300
- Sugar: 24
- Sodium: 120
- Fat: 17
- Saturated Fat: 10
- Carbohydrates: 36
- Fiber: 1.5
- Protein: 3.5
Keywords: small batch cookies, chocolate chip cookies, cookies for two, easy cookie recipe, quick cookies