Love this? Save it for later!
Share the inspiration with your friends
“You really think they’ll eat mushrooms?” I asked, glancing at the tiny faces crowded around the kitchen island. Last Friday night, I found myself in the middle of a spontaneous pizza night experiment with my niece and her friends. The idea was simple: let the kids make their own mini pizzas — no more negotiating toppings or dealing with picky eaters. Honestly, it was a bit chaotic (flour on the floor, sauce splattered on the walls), but the smiles and laughter made it all worthwhile.
The inspiration came from a random Saturday morning at the local farmer’s market, where I overheard a mom chatting about how her kids loved making their own pizzas at home. I scribbled the idea on a napkin, and that night, while rummaging through my pantry, I decided to give it a go. The result? Personal pan pizzas that are super fun to assemble, easy to customize, and surprisingly delicious.
Maybe you’ve been there — trying to please a group of kids with wildly different tastes while keeping things stress-free for yourself. This personal pan pizzas recipe not only solves that but turns dinner prep into a creative activity everyone looks forward to. Plus, I forgot to buy mozzarella once and ended up melting cheddar with a bit of cream cheese instead — and it was a happy accident that I still do sometimes!
This recipe stuck with me because it’s more than just food; it’s a way to bring a little joy and togetherness to the table. Whether you’re hosting a casual Friday night or just need a quick, customizable dinner, these personal pan pizzas are exactly what your kitchen needs.
Why You’ll Love This Recipe
Having tested this personal pan pizzas recipe countless times with kids of all ages, I can confidently say it’s a keeper. Here’s why you’ll want to make it part of your regular rotation:
- Quick & Easy: The dough comes together fast, and each pizza bakes in about 12-15 minutes — perfect for busy weeknights or last-minute pizza cravings.
- Simple Ingredients: No complicated grocery lists here. You likely already have everything in your pantry and fridge.
- Perfect for Kids’ Pizza Night: Letting kids customize their own pizzas keeps everyone happy and entertained, turning dinner into a fun activity.
- Crowd-Pleaser: Adults love these too! The crispy edges and melty cheese combo can win over even the pickiest eaters.
- Unbelievably Delicious: The balance of tangy sauce, gooey cheese, and crispy crust makes these personal pan pizzas a total comfort food hit.
This isn’t just another pizza recipe — the secret is in the dough’s texture, which is crispy on the outside but tender inside, thanks to a simple oil mix and just the right baking time. The sauce is straightforward but flavorful, avoiding overpowering spices so every topping shines. Plus, the personal pan size means everyone gets their own perfectly sized pizza to customize just the way they like.
Honestly, it’s the kind of recipe that makes you want to close your eyes after the first bite. It’s pizza night reimagined — easier, more interactive, and with plenty of room for creativity.
What Ingredients You Will Need
This personal pan pizzas recipe uses simple, wholesome ingredients to deliver bold flavor and satisfying texture without the fuss. Here’s what you’ll gather for dough, sauce, and toppings — mostly pantry staples you probably have on hand.
For the Dough:
- 2 ¼ teaspoons active dry yeast (one packet)
- 1 ½ cups warm water (about 110°F / 43°C)
- 3 ½ cups all-purpose flour (I like King Arthur for consistent results)
- 2 tablespoons olive oil (adds richness and crispiness)
- 1 teaspoon sugar (helps yeast activate)
- 1 teaspoon salt
For the Sauce:
- 1 cup canned crushed tomatoes (San Marzano if you want to get fancy)
- 1 teaspoon olive oil
- 1 garlic clove, minced
- ½ teaspoon dried oregano
- Salt and pepper to taste
For the Toppings (customizable!):
- Shredded mozzarella cheese (whole milk for meltiness, but part-skim works too)
- Pepperoni slices
- Diced bell peppers
- Sliced mushrooms
- Black olives, sliced
- Fresh basil leaves
- Cooked sausage crumbles
- Cherry tomatoes, halved
- Grated Parmesan for finishing
Feel free to swap ingredients based on preference or dietary needs — gluten-free flour blends work well for the dough, and dairy-free cheese options are great substitutes if needed. In summer, fresh tomatoes can replace canned for the sauce, giving a bright, fresh twist.
Equipment Needed
- Mixing bowl (large enough to let the dough rise)
- Measuring cups and spoons
- Whisk or spoon for mixing dough and sauce
- Rolling pin or your hands (for shaping dough)
- Personal-sized pizza pans or small oven-safe skillets (8-inch diameter works great)
- Oven preheated to 450°F (232°C)
- Baking sheet (optional, if you prefer to bake pizzas on a stone or directly on the rack)
- Sharp knife or pizza cutter for slicing
If you don’t have personal pizza pans, small cast iron skillets or even rimmed baking sheets work well — just adjust the dough portion accordingly. I’ve used inexpensive non-stick pans from the local store without any issues, but make sure to lightly oil them to prevent sticking. Bonus tip: a pizza stone can give you a crispier crust if you’re feeling fancy.
Preparation Method
- Activate the yeast: In your large mixing bowl, combine 1 ½ cups warm water with sugar and sprinkle yeast on top. Let it sit for 5-10 minutes until foamy and bubbly — this means the yeast is alive and ready. If it doesn’t foam, your yeast might be old, so start over with fresh yeast.
- Make the dough: Add olive oil, salt, and most of the flour (about 3 cups) to the yeast mixture. Stir with a wooden spoon or dough hook until the dough starts to come together. Add the remaining flour gradually until the dough is soft but not sticky (you may not need all the flour).
- Knead: On a lightly floured surface, knead the dough for 8-10 minutes until smooth and elastic. I sometimes set a timer because it’s easy to get distracted (like when the phone rings). If the dough feels too sticky, sprinkle a bit more flour, but be careful not to add too much or it’ll get tough.
- First rise: Lightly oil the mixing bowl and place the dough inside, turning once to coat. Cover with a damp kitchen towel or plastic wrap. Let it rise in a warm spot for 1 to 1 ½ hours until doubled in size. A warm oven (turned off) with the light on works wonders here.
- Prepare the sauce: While dough rises, heat olive oil in a small pan over medium heat. Add minced garlic and sauté just until fragrant (about 30 seconds). Stir in crushed tomatoes, oregano, salt, and pepper. Simmer gently for 10 minutes, then set aside to cool.
- Preheat oven: Set your oven to 450°F (232°C) and lightly oil your personal pizza pans or skillets.
- Shape the dough: Punch down the risen dough to release air. Divide it into 4 equal pieces (about 200g / 7 oz each). Roll or press each piece into a circle about 7-8 inches (18-20 cm) in diameter, fitting your pans.
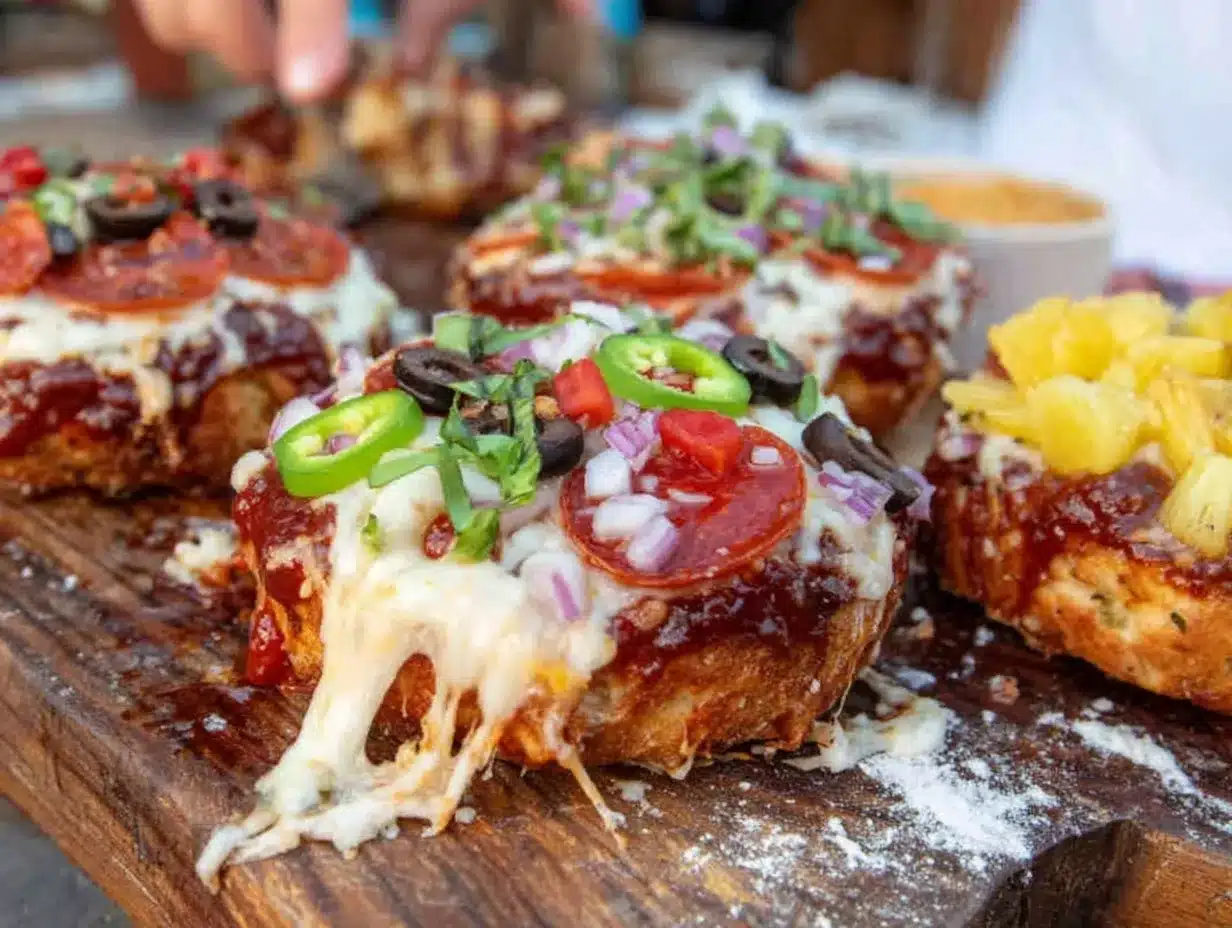
- Assemble pizzas: Spread a few tablespoons of sauce on each dough base, leaving a small border around the edges. Sprinkle shredded mozzarella generously, then add your favorite toppings. Don’t overload — too many toppings can make the crust soggy.
- Bake: Place pizzas in the oven and bake for 12-15 minutes until crust is golden and cheese is bubbly and slightly browned. Keep an eye after 10 minutes — ovens vary, and you want that perfect balance of crisp and gooey.
- Finish & serve: Remove pizzas carefully from pans. Sprinkle with fresh basil and grated Parmesan if desired. Let cool for a few minutes before slicing — kids tend to burn their tongues otherwise!
Pro tip: If you want to save time, you can prepare the sauce a day ahead — the flavors deepen nicely overnight. Also, letting the dough rest for a few minutes after shaping makes it easier to stretch and shape without springing back.
Cooking Tips & Techniques
Making personal pan pizzas is pretty forgiving, but a few tricks can make your experience smoother and your pizzas tastier.
- Don’t skip proofing the yeast: It’s tempting to mix everything at once, but proofing ensures your dough will rise properly. If your yeast doesn’t bubble, it’s dead and won’t leaven the dough.
- Use warm, not hot water: Water that’s too hot can kill your yeast, while cold water slows the process. Aim for about 110°F (43°C).
- Oil your pans well: This prevents sticking and helps get that crispy, golden crust. I usually brush olive oil generously, especially with non-stick pans.
- Don’t overload toppings: Too many toppings or too much sauce can weigh down the dough, leading to soggy pizza. Keep it balanced for a crispy crust.
- Let the cheese melt and bubble: The bubbling cheese is a visual cue that your pizza is almost ready. If it browns too quickly, lower the oven temperature slightly or move the pizza rack down.
- Multitasking tip: While pizzas bake, clean up the mess or prepare a simple side salad. Saves time and keeps the kitchen tidy!
One time, I forgot to set the timer and ended up with a slightly extra-crispy crust — the kids loved it anyway. Sometimes those little “oops” moments lead to new favorites.
Variations & Adaptations
This personal pan pizzas recipe is a great base for all kinds of twists. Here are a few ideas to make it your own:
- Gluten-Free: Swap out the all-purpose flour for a gluten-free blend (Bob’s Red Mill works well). You might need to add a little xanthan gum if your blend doesn’t have it.
- Vegan: Use dairy-free cheese alternatives and swap olive oil for a vegan-friendly version. Load up on veggies like artichokes, spinach, and roasted peppers.
- Seasonal Toppings: In the fall, try roasted butternut squash and sage. Spring calls for fresh asparagus and goat cheese. Adjust the toppings based on what’s fresh and available.
- Spicy Kick: Add crushed red pepper flakes to the sauce or top with sliced jalapeños for a little heat.
- Personal Twist: I once added a drizzle of honey after baking on a pepperoni pizza, and it created this amazing sweet-savory combo that disappeared in minutes.
You can also try baking the pizzas on a pizza stone for a crisper base or grilling the dough outdoors for a smoky flavor. The possibilities are endless!
Serving & Storage Suggestions
Serve these personal pan pizzas fresh and warm — that melty cheese and crispy crust combination is best enjoyed right out of the oven. Pair with a simple green salad or carrot sticks for a balanced meal that kids don’t mind eating.
If you have leftovers (though I doubt it!), wrap pizzas individually in foil or plastic wrap and store in the fridge for up to 2 days. To reheat, place in a preheated 375°F (190°C) oven for 8-10 minutes to crisp up again. Avoid the microwave if you want to keep the crust crispy.
For longer storage, you can freeze assembled but unbaked pizzas. Wrap tightly in plastic wrap and foil, then freeze for up to 1 month. Bake from frozen, adding a few extra minutes to the baking time.
Fun fact: letting the sauce rest overnight before making the pizzas really deepens the flavor, so if you have time, prep in advance. The flavors meld beautifully and make each bite more satisfying.
Nutritional Information & Benefits
Each personal pan pizza (serving size: one 7-8 inch pizza) contains approximately:
| Calories | 350-400 kcal |
|---|---|
| Protein | 15-18 g |
| Carbohydrates | 40-45 g |
| Fat | 12-15 g |
| Fiber | 2-3 g |
Key ingredients like olive oil provide healthy fats, while the cheese offers a good dose of calcium and protein. The tomato sauce is packed with antioxidants like lycopene, which supports heart health. By customizing toppings, you can add nutrient-rich veggies like bell peppers, mushrooms, and spinach.
If you want a lower-carb option, try using a cauliflower crust (store-bought or homemade) or swap regular flour for almond flour. Just note the texture will be different but still tasty.
Conclusion
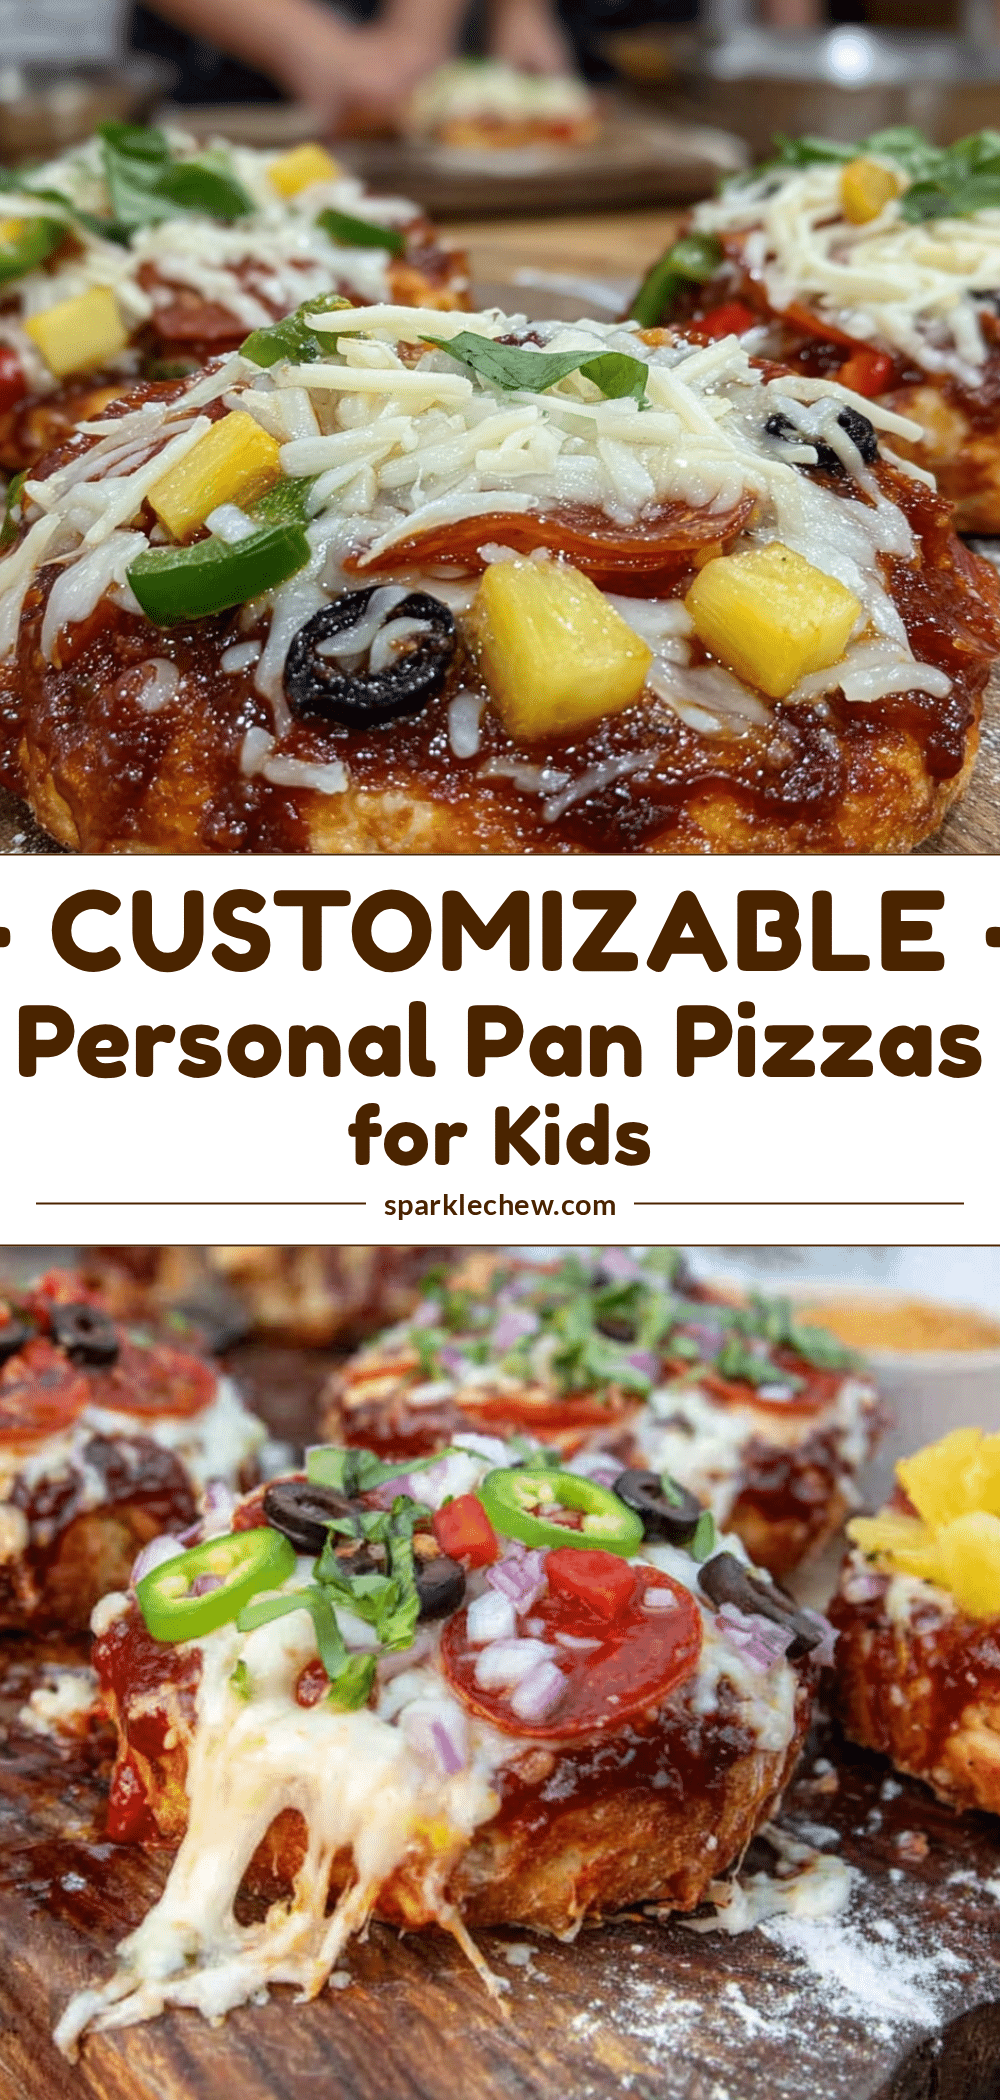
So there you have it — a fun, easy, and totally customizable personal pan pizzas recipe perfect for kids’ pizza night or any casual gathering. It’s more than just a meal; it’s a chance to get everyone involved in the kitchen and make dinner time a little more joyful.
I love this recipe because it brings out everyone’s creativity and keeps the mess manageable (mostly). Plus, it’s reliable, delicious, and endlessly adaptable — what’s not to like? Give it a try, and don’t be afraid to switch up the toppings or prep methods to suit your family’s tastes.
Let me know how your pizza night goes — drop a comment or share your favorite topping combos! Happy pizza making!
FAQs About Personal Pan Pizzas
How long does the dough need to rise?
About 1 to 1 ½ hours at room temperature until it doubles in size. A warm spot speeds this up.
Can I use store-bought pizza dough instead?
Absolutely! Store-bought dough works well and saves time, just divide it into portions for personal pans.
What if I don’t have personal pizza pans?
Use small cast iron skillets, rimmed baking sheets, or even a pizza stone with dough shaped accordingly.
Can I prepare the pizzas ahead of time?
You can assemble them and keep them refrigerated for a few hours before baking, or freeze unbaked pizzas for up to a month.
What are some good kid-friendly toppings?
Keep it simple with mozzarella, pepperoni, diced bell peppers, olives, and cherry tomatoes. Involve kids in choosing their favorites!
For more easy and family-friendly dinner ideas, check out my crispy garlic chicken recipe or the quick homemade pasta guide — both perfect for busy weeknights like pizza night!
Pin This Recipe!
Personal Pan Pizzas
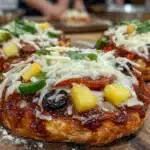
A fun, easy, and customizable personal pan pizzas recipe perfect for kids’ pizza night or any casual gathering. Quick to prepare with simple ingredients and great for involving kids in the kitchen.
- Prep Time: 20 minutes
- Cook Time: 15 minutes
- Total Time: 1 hour 35 minutes
- Yield: 4 servings 1x
- Category: Main Course
- Cuisine: Italian-American
Ingredients
- 2 ¼ teaspoons active dry yeast (one packet)
- 1 ½ cups warm water (about 110°F / 43°C)
- 3 ½ cups all-purpose flour
- 2 tablespoons olive oil
- 1 teaspoon sugar
- 1 teaspoon salt
- 1 cup canned crushed tomatoes
- 1 teaspoon olive oil
- 1 garlic clove, minced
- ½ teaspoon dried oregano
- Salt and pepper to taste
- Shredded mozzarella cheese
- Pepperoni slices
- Diced bell peppers
- Sliced mushrooms
- Black olives, sliced
- Fresh basil leaves
- Cooked sausage crumbles
- Cherry tomatoes, halved
- Grated Parmesan cheese
Instructions
- Activate the yeast: In a large mixing bowl, combine 1 ½ cups warm water with sugar and sprinkle yeast on top. Let it sit for 5-10 minutes until foamy and bubbly.
- Make the dough: Add olive oil, salt, and about 3 cups of flour to the yeast mixture. Stir until dough starts to come together. Gradually add remaining flour until dough is soft but not sticky.
- Knead the dough on a lightly floured surface for 8-10 minutes until smooth and elastic.
- First rise: Lightly oil the mixing bowl, place dough inside, cover with a damp towel or plastic wrap, and let rise in a warm spot for 1 to 1 ½ hours until doubled in size.
- Prepare the sauce: Heat olive oil in a small pan over medium heat. Add minced garlic and sauté for about 30 seconds. Stir in crushed tomatoes, oregano, salt, and pepper. Simmer gently for 10 minutes, then cool.
- Preheat oven to 450°F (232°C) and lightly oil personal pizza pans or skillets.
- Shape the dough: Punch down risen dough and divide into 4 equal pieces (~7 oz each). Roll or press each into 7-8 inch circles to fit pans.
- Assemble pizzas: Spread sauce on each dough base leaving a border. Sprinkle mozzarella cheese and add desired toppings without overloading.
- Bake pizzas for 12-15 minutes until crust is golden and cheese is bubbly and slightly browned.
- Remove pizzas from pans, sprinkle with fresh basil and grated Parmesan if desired. Let cool for a few minutes before slicing and serving.
Notes
Proof the yeast to ensure dough rises properly. Use warm water (110°F) to activate yeast. Lightly oil pans to prevent sticking and achieve crispy crust. Avoid overloading toppings to prevent soggy crust. Sauce can be prepared a day ahead for deeper flavor. Dough resting after shaping helps with easier stretching.
Nutrition
- Serving Size: One 7-8 inch persona
- Calories: 350400
- Sugar: 35
- Sodium: 600800
- Fat: 1215
- Saturated Fat: 57
- Carbohydrates: 4045
- Fiber: 23
- Protein: 1518
Keywords: personal pan pizza, kids pizza night, customizable pizza, easy pizza recipe, homemade pizza, mini pizza, pizza dough, family dinner