Love this? Save it for later!
Share the inspiration with your friends
This was supposed to be a batch of classic snickerdoodles. You know, the kind your grandma made, rolled in cinnamon sugar, soft in the middle. I had the butter softening on the counter, the cream of tartar ready to go, and a very specific vision of a cozy, non-spooky afternoon. But then I opened my pantry and found a jar of pumpkin butter I’d forgotten about from a fall market trip three weeks ago. And sitting right next to it? A skull-shaped cookie cutter my friend Lisa had shoved into my hands last October, laughing, saying, “You’ll figure out something weird to do with this.” I grabbed the pumpkin butter by accident—honestly, I was distracted by my cat knocking a spoon off the counter—and dumped a heaping scoop into the dough before I realized my mistake. My heart sank. I thought I’d ruined the whole thing. The dough looked orange. It smelled like a candle. I was this close to tossing it and starting over.
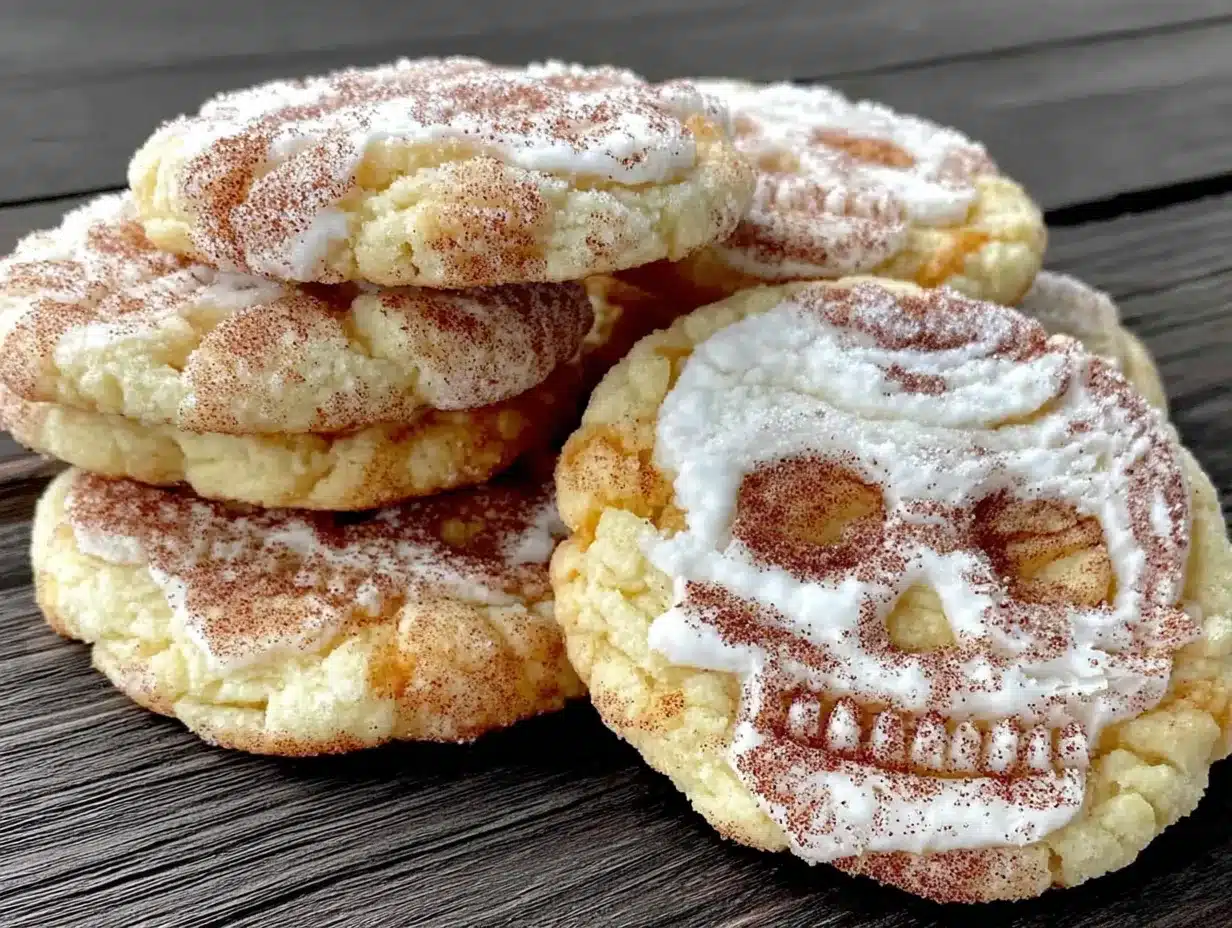
But I didn’t. I figured, what the heck, let’s see what happens. I rolled it out, pressed the skull cutter into the dough, and baked them anyway. When they came out of the oven, I almost laughed out loud. They were perfect. Not just good—perfect. The pumpkin spice and snickerdoodle flavors had melted into something completely new, like a pumpkin pie and a sugar cookie had a beautiful, slightly spooky baby. The edges were crisp, the centers were soft, and the cinnamon-sugar coating had caramelized into this crunchy, crackly top that I couldn’t stop picking at. I stood there in my messy kitchen, eating a skull-shaped cookie at 4 p.m., and realized I had stumbled onto something way better than my original plan. Maybe you’ve been there—the moment a mistake turns into a keeper. That’s this recipe.
These Pumpkin Spice Snickerdoodle Skull Cookies are now my official Halloween go-to. They’re festive without being over-the-top, delicious enough to steal the show at any party, and honestly, they’re the easiest way to look like you planned something clever when really, you just grabbed the wrong jar. I keep making them because they taste like fall in cookie form, and because every time I see that skull shape, I remember that sometimes the best recipes come from getting it wrong first.
Why You’ll Love This Recipe
Let me tell you, I’ve tested a lot of Halloween cookies over the years. Some are too fussy, some taste like straight sugar, and some just look better than they eat. These Pumpkin Spice Snickerdoodle Skull Cookies are none of those things. They’re the real deal—a cookie that actually delivers on flavor, texture, and fun, without requiring a pastry degree or a trip to a specialty baking store.
- Quick & Easy : From start to finish, these come together in about 30 minutes. No chilling the dough overnight, no complicated decorating. Mix, roll, cut, bake. Done.
- Simple Ingredients : You probably have most of this stuff in your kitchen right now. Butter, sugar, flour, eggs, cinnamon, cream of tartar. The only “special” thing is pumpkin butter, and you can find that at most grocery stores or make your own.
- Perfect for Halloween Parties : The skull shape is instantly recognizable and totally festive. Kids love them, adults love them, and they look way more impressive than the effort they require.
- Crowd-Pleaser : I brought a batch to my neighbor’s Halloween get-together last weekend, and they were gone in twenty minutes. One guy asked for the recipe before he’d even finished his first cookie.
- Unbelievably Delicious : The combo of pumpkin spice and snickerdoodle is next-level. You get the warm, cozy notes of cinnamon, nutmeg, and cloves from the pumpkin butter, plus that classic tangy-sweet snickerdoodle flavor from the cream of tartar. It’s a match made in fall heaven.
What makes this recipe different from every other pumpkin cookie out there is the texture. The pumpkin butter adds moisture without making the dough sticky or cakey. These cookies bake up with a slightly crisp edge and a soft, almost chewy center. Plus, the cinnamon-sugar coating creates this incredible crackly crust that shatters a little when you bite into it. I’ve tested this with canned pumpkin puree, and it just doesn’t work the same—the pumpkin butter is the secret. It’s not just another version of a pumpkin cookie. It’s the best version.
Honestly, this is the kind of cookie that makes you close your eyes after the first bite. It’s comfort food reimagined—seasonal, playful, but with the same soul-soothing satisfaction as a classic snickerdoodle. Perfect for impressing guests without stress, or turning a simple Tuesday afternoon into something memorable.
What Ingredients You Will Need
This recipe uses simple, wholesome ingredients that come together to create something truly special. The magic happens when the pumpkin butter meets the classic snickerdoodle base—trust the process. Here’s everything you’ll need:
For the Cookies
- 1 cup (2 sticks) unsalted butter, softened (I use Kerrygold for the rich flavor, but any good-quality butter works)
- 1 ½ cups granulated sugar (plus extra for rolling—about ¼ cup)
- 1 large egg, room temperature (cold eggs can seize the butter mixture)
- ½ cup pumpkin butter (store-bought or homemade; I like the Stonewall Kitchen brand for its balanced spice profile)
- 1 teaspoon vanilla extract (pure, not imitation, for the best flavor)
- 2 ¾ cups all-purpose flour (spooned and leveled—don’t scoop directly from the bag)
- 1 teaspoon cream of tartar (this is non-negotiable for that signature snickerdoodle tang)
- 1 teaspoon baking soda
- ½ teaspoon salt
- 1 teaspoon ground cinnamon
- ½ teaspoon ground nutmeg
- ¼ teaspoon ground cloves
- ¼ teaspoon ground ginger
For the Cinnamon-Sugar Coating
- ¼ cup granulated sugar
- 2 tablespoons ground cinnamon
Let’s talk about the pumpkin butter for a second. It’s not the same as pumpkin puree. Pumpkin butter is cooked down with sugar and spices until it’s thick, spreadable, and intensely flavored. It adds sweetness and moisture without making the dough wet. If you can’t find it, you can make a quick version by simmering 1 cup of pumpkin puree with ½ cup brown sugar, 1 teaspoon pumpkin pie spice, and a splash of apple cider until it thickens. But honestly, just buy the good stuff—it saves time and tastes better.
For the cream of tartar, don’t skip it. It’s what gives snickerdoodles their distinctive tangy flavor and that soft, puffy texture. If you don’t have it, you can substitute with 2 teaspoons of lemon juice or white vinegar, but the flavor won’t be quite the same. I’ve tried both, and cream of tartar is the winner every time.
As for the spices, feel free to adjust based on what you have. If you don’t have individual spices, you can use 2 teaspoons of pumpkin pie spice instead of the cinnamon, nutmeg, cloves, and ginger. I’ve done it that way too, and it works perfectly.
Equipment Needed
You don’t need a lot of fancy equipment for these cookies, which is part of why I love making them. Here’s what you’ll need:
- Large mixing bowl and a hand mixer or stand mixer (a wooden spoon works too, but your arm will get tired)
- Measuring cups and spoons (the metal ones are best for dry ingredients)
- Skull-shaped cookie cutter (about 3 inches wide; I found mine at a craft store for $4)
- Rolling pin (I prefer a wooden one, but a marble one works great for keeping dough cool)
- Baking sheets (light-colored metal sheets give the most even browning)
- Parchment paper or silicone baking mat (parchment is cheaper, silicone is reusable—both work)
- Cooling rack (wire racks let air circulate so cookies don’t get soggy bottoms)
- Small bowl for the cinnamon-sugar mixture
- Plastic wrap (for chilling the dough if needed)
If you don’t have a skull-shaped cutter, don’t worry. You can use any Halloween-themed shape—ghosts, bats, pumpkins—or just a round cutter. The cookies will taste exactly the same. I’ve also used a sharp knife to freehand skull shapes, and while they looked a little wonky, they were still delicious. For the rolling pin, if you don’t have one, a clean wine bottle works in a pinch. I learned that trick during a power outage last year, and honestly, it worked better than my actual rolling pin.
Preparation Method
Alright, let’s get to the fun part. These cookies come together quickly, so have everything prepped and ready before you start. Here’s the step-by-step:
- Preheat your oven to 350°F (175°C). Line two baking sheets with parchment paper or silicone mats. This ensures the cookies won’t stick and makes cleanup a breeze.
- Cream the butter and sugar together. In a large mixing bowl, beat the softened butter and 1 ½ cups of granulated sugar together until light and fluffy. This takes about 3 minutes with a hand mixer on medium speed. You’re looking for a pale yellow color and a texture that’s almost like whipped frosting. Don’t rush this step—proper creaming creates air pockets that help the cookies rise.
- Add the wet ingredients. Beat in the egg, pumpkin butter, and vanilla extract until everything is fully combined. The mixture will look a little orange and smell amazing at this point. Scrape down the sides of the bowl with a spatula to make sure everything is incorporated.
- Whisk the dry ingredients together. In a separate bowl, whisk together the flour, cream of tartar, baking soda, salt, cinnamon, nutmeg, cloves, and ginger. Whisking ensures the leavening agents and spices are evenly distributed, so you don’t end up with a pocket of baking soda in one cookie.
- Combine wet and dry ingredients. Gradually add the dry ingredients to the wet mixture, mixing on low speed until just combined. You’ll know it’s ready when no streaks of flour remain. Be careful not to overmix—this can develop the gluten and make the cookies tough. The dough should be soft but not sticky. If it feels too sticky, add an extra tablespoon of flour.
- Prepare the cinnamon-sugar coating. In a small bowl, mix together the ¼ cup of granulated sugar and 2 tablespoons of cinnamon. Set aside.
- Roll out the dough. Lightly flour your work surface and rolling pin. Place the dough on the floured surface and roll it out to about ¼-inch thickness. If the dough is too soft to handle, wrap it in plastic wrap and refrigerate for 15 minutes. I’ve learned this the hard way—warm dough sticks to everything and makes a huge mess.
- Cut out the skull shapes. Press your skull-shaped cookie cutter firmly into the dough, then lift straight up. Gently transfer the cut cookies to the prepared baking sheets, spacing them about 2 inches apart. They will spread a little, but not a ton. Gather the scraps, re-roll, and cut again until all the dough is used.
- Roll in cinnamon-sugar. Here’s where the magic happens. Sprinkle each cut-out cookie generously with the cinnamon-sugar mixture. You can use your fingers to press it in gently, or just shake it on. Don’t be shy—the coating is what gives these cookies their signature crackly top.
- Bake. Place the baking sheets in the preheated oven and bake for 10-12 minutes. The cookies are done when the edges are just set and lightly golden. The centers will look slightly underdone—that’s perfect. They’ll continue to set as they cool. For softer cookies, bake for 10 minutes. For crispier ones, go for 12.
- Cool. Let the cookies cool on the baking sheet for 5 minutes before transferring them to a wire rack to cool completely. This resting time allows them to firm up without breaking. If you try to move them too soon, they’ll fall apart. Trust me, I’ve lost many a cookie to impatience.
And that’s it! You’ve just made a batch of Pumpkin Spice Snickerdoodle Skull Cookies that look like they came from a bakery. The whole process takes about 30 minutes from start to finish, including cleanup. Not bad for a cookie that looks this impressive.
Cooking Tips & Techniques
I’ve made these cookies about a dozen times now, and I’ve picked up a few tricks along the way. Let me share what I’ve learned so you don’t have to make the same mistakes I did.
Don’t overmix the dough. This is probably the most common mistake. When you overmix, you develop gluten, which makes the cookies tough and dense. Mix just until the flour disappears, then stop. A few streaks of flour are better than a tough cookie.
Use room temperature ingredients. Cold eggs and cold butter don’t cream together properly. If you forgot to take your egg out of the fridge, place it in a bowl of warm water for 5 minutes. Same goes for the butter—if it’s too hard, microwave it in 5-second bursts until it’s soft but not melted. Melted butter will make the cookies spread too much.
Chill the dough if it gets sticky. This is a tip I learned after a particularly frustrating baking session where the dough stuck to everything. If your kitchen is warm or humid, the dough can get soft and sticky. Just wrap it in plastic wrap and pop it in the fridge for 15-20 minutes. It’ll roll out much easier.
Watch the baking time closely. Ovens vary wildly. My old oven would burn cookies at 350°F, while my current one runs cool. Start checking at the 8-minute mark. The cookies are done when the edges are set and the centers look slightly puffy and underdone. They’ll continue to bake on the hot sheet after you pull them out.
Use a light-colored baking sheet. Dark sheets absorb more heat and can cause the bottoms of your cookies to burn before the tops are done. If you only have dark sheets, reduce the oven temperature by 25°F and watch them closely.
Double the batch. These cookies disappear fast. I always make a double batch now because a single batch barely lasts a day in my house. The dough also freezes beautifully, so you can make a big batch and bake them as needed.
Variations & Adaptations
One of the best things about this recipe is how adaptable it is. I’ve tried several variations, and they’ve all been winners. Here are some of my favorites:
Gluten-Free Version: Substitute the all-purpose flour with a 1:1 gluten-free baking flour blend. I’ve used Bob’s Red Mill and King Arthur, and both work well. The texture is slightly more delicate, so handle the dough gently. You might need to chill it a bit longer before rolling.
Vegan Adaptation: Use vegan butter (I like Miyoko’s) and a flax egg (1 tablespoon ground flaxseed mixed with 3 tablespoons water, let sit for 5 minutes). The cookies won’t be quite as tender, but they’re still delicious. I’ve brought these to a vegan potluck and they were a hit.
Extra Spooky Version: Add a few drops of black or orange food coloring to the dough for a more festive look. I did this for a Halloween party last year, and the black skull cookies were a huge hit. Just be careful not to add too much liquid—gel food coloring works best.
Chocolate Drizzle: Melt some dark chocolate and drizzle it over the cooled cookies. The combination of pumpkin spice and dark chocolate is incredible. I did this on a whim one night, and now I can’t make these cookies without it.
Spice Level Adjustments: If you like things spicy, add an extra ¼ teaspoon of ground ginger or a pinch of cayenne pepper. The heat pairs surprisingly well with the sweet pumpkin flavor. My husband loves this version; I think it’s a little much, but to each their own.
Pumpkin Seed Topping: Before baking, press a few pumpkin seeds (pepitas) into the top of each cookie. It adds a nice crunch and makes them look even more Halloweeny. Plus, it’s a great way to use up leftover pumpkin seeds from carving jack-o’-lanterns.
Serving & Storage Suggestions
These cookies are best served at room temperature, but honestly, they’re delicious at any temperature. I’ve eaten them warm from the oven, cold from the fridge, and even slightly stale (don’t judge—they’re still good).
For serving: Arrange them on a platter with other Halloween treats like candy corn, caramel apples, or ghost-shaped marshmallows. They also look amazing on a cake stand with a few fake spider webs draped around. For a party, I like to pile them high on a black plate—the contrast makes the skull shapes pop.
Storage: Store the cookies in an airtight container at room temperature for up to 5 days. Place a slice of bread in the container to keep them soft—the bread absorbs excess moisture and releases it back into the cookies. Replace the bread slice every couple of days. I’ve been doing this for years, and it works like magic.
Freezing: These cookies freeze beautifully. Place them in a single layer in a freezer-safe container or bag, separating layers with parchment paper. They’ll keep for up to 3 months. To thaw, just leave them at room temperature for about 30 minutes. You can also freeze the unbaked dough—roll it out, cut the shapes, and freeze them on a baking sheet. Once frozen, transfer to a bag. Bake directly from frozen, adding 2-3 minutes to the baking time.
Reheating: If you want that fresh-from-the-oven experience, pop a cookie in the microwave for 10 seconds. It’ll be soft and warm, like it just came out of the oven. For a crispier texture, reheat in a 300°F oven for 5 minutes.
Flavor development: Interestingly, these cookies taste even better the next day. The spices have time to meld together, and the texture becomes perfectly soft and chewy. So don’t be afraid to make them a day ahead—they’ll be even better for your party.
Nutritional Information & Benefits
Let’s be real—these are cookies, not health food. But they do have a few redeeming qualities, especially if you compare them to store-bought Halloween treats.
| Nutrient | Per Cookie (approx.) |
|---|---|
| Calories | 180 |
| Total Fat | 8g |
| Saturated Fat | 5g |
| Cholesterol | 30mg |
| Sodium | 120mg |
| Total Carbohydrates | 26g |
| Dietary Fiber | 1g |
| Sugars | 15g |
| Protein | 2g |
The pumpkin butter provides a small amount of vitamin A and fiber, which is more than you’d get from a regular sugar cookie. The cinnamon in the coating has anti-inflammatory properties and can help regulate blood sugar. Plus, making cookies from scratch means you control the ingredients—no preservatives, artificial flavors, or high-fructose corn syrup here.
For dietary considerations, these cookies contain gluten, dairy, and eggs. If you have allergies, check the variations section above for substitutions. I’ve had friends with celiac disease and dairy allergies enjoy these with the appropriate swaps, and they said they couldn’t tell the difference.
My personal perspective? Everything in moderation. I believe in enjoying treats like these as part of a balanced diet. They’re for special occasions, for sharing with loved ones, for making memories. One cookie isn’t going to derail your health goals, but it might just make your day a little brighter.
Conclusion
These Pumpkin Spice Snickerdoodle Skull Cookies are everything I want in a Halloween treat—festive, delicious, and surprisingly easy to make. They started as a mistake, but now they’re a tradition. Every October, I pull out that skull-shaped cutter and remember that sometimes the best things in life come from happy accidents.
I hope you give these a try, whether you’re making them for a Halloween party, a cozy night in, or just because you want something seasonal and sweet. Don’t be afraid to customize them—add more spice, change the shape, drizzle with chocolate. Make them your own. That’s the beauty of baking.
I’d love to hear how they turn out for you! Leave a comment below and let me know if you tried any variations, or tag me in your photos on social media. Your feedback and creativity are what make this community so special. Happy Halloween, and happy baking!
Frequently Asked Questions
Can I use canned pumpkin puree instead of pumpkin butter?
I wouldn’t recommend it. Pumpkin puree has a much higher water content than pumpkin butter, which will make the dough too wet and sticky. The cookies will spread too much and won’t have that concentrated pumpkin spice flavor. Stick with pumpkin butter for the best results.
Why didn’t my cookies have that crackly top?
The crackly top comes from rolling the cut-out cookies in the cinnamon-sugar mixture before baking. Make sure you’re generous with the coating and that you’re pressing it into the dough slightly. Also, baking at the right temperature is key—too low and the sugar won’t caramelize properly.
Can I make the dough ahead of time?
Absolutely! You can make the dough up to 3 days in advance and keep it wrapped in plastic wrap in the refrigerator. When you’re ready to bake, let it sit at room temperature for about 10 minutes to soften slightly before rolling it out. You can also freeze the dough for up to 3 months.
My cookies came out too hard. What went wrong?
Overbaking is the most common culprit. These cookies should be pulled from the oven when the edges are just set and the centers still look slightly underdone. They’ll continue to firm up as they cool. Also, make sure you’re measuring your flour correctly—too much flour can make cookies dry and hard.
Can I use a different cookie cutter shape?
Of course! Any Halloween-themed shape will work—ghosts, bats, pumpkins, cats. You can even use a round cutter for a more traditional look. The cookies will taste the same no matter what shape they are. Just adjust the baking time slightly if the shapes are much larger or smaller than the skull cutter.
Pin This Recipe!
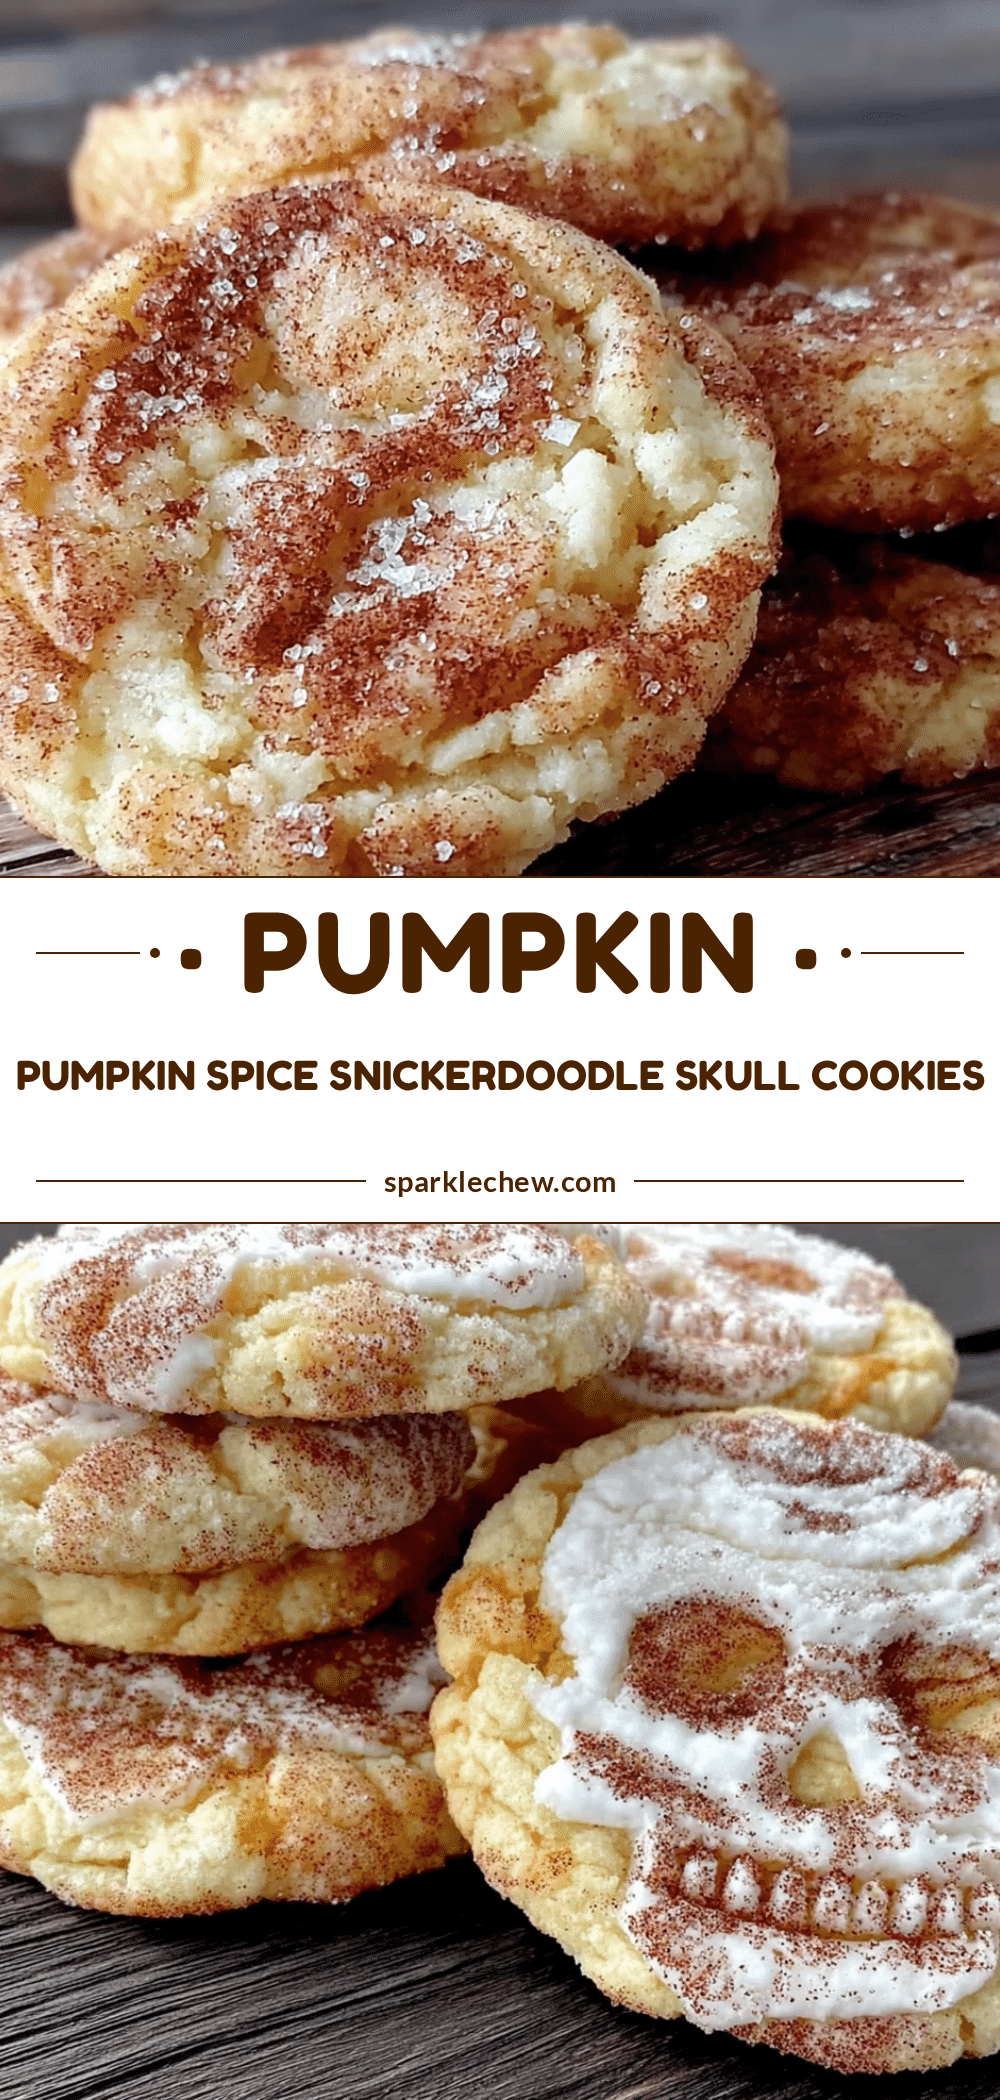
Pumpkin Spice Snickerdoodle Skull Cookies – Easy Halloween Treat

These Pumpkin Spice Snickerdoodle Skull Cookies are a festive and delicious Halloween treat that combines the warm flavors of pumpkin spice with the classic tangy-sweet snickerdoodle. They’re quick, easy, and perfect for parties or a cozy fall afternoon.
- Prep Time: 15 minutes
- Cook Time: 12 minutes
- Total Time: 27 minutes
- Yield: 24 servings 1x
- Category: Dessert
- Cuisine: American
Ingredients
- 1 cup (2 sticks) unsalted butter, softened
- 1 ½ cups granulated sugar (plus ¼ cup for rolling)
- 1 large egg, room temperature
- ½ cup pumpkin butter
- 1 teaspoon vanilla extract
- 2 ¾ cups all-purpose flour
- 1 teaspoon cream of tartar
- 1 teaspoon baking soda
- ½ teaspoon salt
- 1 teaspoon ground cinnamon
- ½ teaspoon ground nutmeg
- ¼ teaspoon ground cloves
- ¼ teaspoon ground ginger
- ¼ cup granulated sugar (for coating)
- 2 tablespoons ground cinnamon (for coating)
Instructions
- Preheat your oven to 350°F (175°C). Line two baking sheets with parchment paper or silicone mats.
- In a large mixing bowl, beat the softened butter and 1 ½ cups of granulated sugar together until light and fluffy, about 3 minutes.
- Beat in the egg, pumpkin butter, and vanilla extract until fully combined. Scrape down the sides of the bowl.
- In a separate bowl, whisk together the flour, cream of tartar, baking soda, salt, cinnamon, nutmeg, cloves, and ginger.
- Gradually add the dry ingredients to the wet mixture, mixing on low speed until just combined. Do not overmix.
- In a small bowl, mix together the ¼ cup of granulated sugar and 2 tablespoons of cinnamon for the coating.
- Lightly flour your work surface and rolling pin. Roll the dough out to about ¼-inch thickness. If too soft, refrigerate for 15 minutes.
- Press a skull-shaped cookie cutter into the dough and transfer cut cookies to the prepared baking sheets, spacing them about 2 inches apart. Re-roll scraps and repeat.
- Sprinkle each cut-out cookie generously with the cinnamon-sugar mixture, pressing it in gently.
- Bake for 10-12 minutes, until edges are set and lightly golden. Centers will look slightly underdone.
- Let cookies cool on the baking sheet for 5 minutes, then transfer to a wire rack to cool completely.
Notes
Don’t overmix the dough to avoid tough cookies. Use room temperature ingredients for best results. Chill the dough if it gets sticky. Watch baking time closely as ovens vary. Use a light-colored baking sheet to prevent burning. Double the batch if desired.
Nutrition
- Serving Size: 1 cookie
- Calories: 180
- Sugar: 15
- Sodium: 120
- Fat: 8
- Saturated Fat: 5
- Carbohydrates: 26
- Fiber: 1
- Protein: 2
Keywords: pumpkin spice, snickerdoodle, skull cookies, Halloween, fall, easy, festive


