Love this? Save it for later!
Share the inspiration with your friends
I was standing in the checkout line at the grocery store last October, clutching a bag of pretzel rods and a block of white almond bark, when the smell hit me. It was that specific, waxy-sweet scent of cheap white chocolate melting in a plastic bag—and suddenly I was eight years old, standing on a step stool in my Aunt Josie’s cramped kitchen while she piped “blood” onto a batch of graveyard cupcakes. She’d been gone five years by then, and I hadn’t thought about those afternoons in forever. But there I was, a grown woman in a Halloween-crazed checkout line, feeling the exact same flutter of anticipation I felt as a kid waiting for her to hand me a spoon to lick.
I almost put the pretzels back. I mean, what was I thinking? I had a dinner party in two days and I was standing there with ingredients for something I hadn’t made since I was eight. But honestly, that’s exactly why I kept them. I wanted to see if I could recreate that feeling—not just the treat, but the moment. The way she’d laugh when I’d stick the sliced almond “fingernails” on crooked. The way she’d pretend to scream when I held up a finished finger. The way the whole kitchen smelled like sugar and mischief.
So I went home, cleared off my counter, and got to work. And let me tell you—maybe you’ve been there—the first batch came out a little lopsided. One of the almonds fell off and I accidentally pressed too hard and cracked a pretzel rod clean in half. But when I bit into that first one, salty and sweet and crunchy all at once, I closed my eyes and there she was. That’s the thing about these Spooky White Chocolate Pretzel Fingers. They’re not just a Halloween treat. They’re a time machine made of sugar and salt, and they’re about to become the thing your guests fight over at your next Halloween gathering.
Why You’ll Love This Recipe
Look, I’ve tested a lot of Halloween treats over the years. Some are cute but take three hours. Others are quick but look like a toddler made them. These Spooky White Chocolate Pretzel Fingers hit that sweet spot where impressive meets effortless—and honestly, that’s a rare combination when you’re hosting.
- Incredibly Easy : This whole recipe comes together in about 20 minutes of active time. No baking, no complicated techniques, no specialty tools. If you can melt chocolate and press on an almond, you’ve got this.
- Simple Ingredients : You need exactly four main ingredients—pretzel rods, white chocolate or almond bark, sliced almonds, and a little red food coloring. That’s it. You probably already have half of them in your pantry.
- Perfect for Halloween Parties : These are made for gatherings. They’re finger food (pun absolutely intended), they don’t require plates or forks, and they’re the kind of treat that gets people talking. I’ve watched grown adults pretend to scream when they see a platter of these.
- Crowd-Pleaser : Kids love them because they’re spooky. Adults love them because they’re delicious. And everyone loves that salty-sweet combo that’s basically impossible to resist.
- Unbelievably Customizable : You can dress these up or down. Drizzle with dark chocolate for a witchy vibe. Add sprinkles for a kid-friendly version. Make them extra bloody with more red gel. They’re a blank canvas for your Halloween creativity.
What makes these different from every other Halloween treat out there? It’s the texture, honestly. You get that satisfying snap when you bite into the white chocolate coating, then the crunch of the pretzel, then the little pop of the almond “fingernail.” It’s a textural experience that most Halloween sweets just don’t deliver. Plus, they actually look like fingers—not cartoon fingers, but real, slightly-creepy, I’d-rather-not-touch-that fingers. That’s the whole point, right?
And here’s the emotional part. This recipe isn’t just good—it’s the kind that makes you close your eyes after the first bite. It’s Halloween nostalgia reimagined. It’s the treat you bring to a party and everyone asks for the recipe before the night’s over. It’s comfort food with a spooky twist, and honestly, that’s the best kind of Halloween food there is.
What Ingredients You Will Need
This recipe uses simple, everyday ingredients to create something that looks way more complicated than it is. Most of these are pantry staples or easy to find at any grocery store, especially around Halloween when the seasonal candy aisle is fully stocked.
- Pretzel rods (1 bag, about 12 ounces) : These are the backbone of the recipe. Look for sturdy, straight pretzel rods—not the thin, fragile ones that snap at the slightest pressure. I personally prefer the Snyder’s of Hanover brand because they’re thick and hold up well to the chocolate coating. If you can only find the thinner ones, just handle them gently.
- White chocolate melting wafers or almond bark (12 ounces) : This is your “skin” coating. I recommend Ghirardelli white chocolate melting wafers for the best flavor and smoothest melt. Almond bark works perfectly too and is usually cheaper—just check the ingredients to make sure it’s not waxy. Avoid white chocolate chips if you can; they often contain stabilizers that prevent smooth melting and can seize up on you.
- Sliced almonds (about 1/2 cup) : These become the fingernails. Look for sliced almonds that are relatively uniform in size and shape—you want them to look like actual fingernails when pressed into the chocolate. I’ve tried whole almonds and they’re too bulky. Slivered almonds are too thin. Sliced is the sweet spot. You’ll need about one almond slice per pretzel finger.
- Red gel food coloring (1 small tube) : This creates the “blood” effect at the tips. Gel food coloring is crucial here—liquid food coloring will thin out your white chocolate and make it seize. I use Wilton brand red gel, which you can find at any craft store or in the baking aisle. A little goes a long way.
- Optional: Coconut oil or shortening (1 teaspoon) : If your white chocolate seems thick when melted, a tiny bit of coconut oil or vegetable shortening will thin it out and make dipping easier. Don’t use butter—it contains water and can cause the chocolate to seize.
- Optional: Dark chocolate or chocolate chips (for drizzling) : If you want to add a “dirt” effect or make the fingers look more realistic, a drizzle of dark chocolate adds depth. Totally optional, but I love the contrast.
Substitution Guidance : If you need a dairy-free option, use dairy-free white chocolate chips (like Enjoy Life brand) and add a teaspoon of coconut oil to help them melt smoothly. For a nut-free version, skip the almonds entirely and use a small dot of red gel at the tip to look like a bloody nail bed—it’s actually creepier that way. If you can’t find pretzel rods, you can use thick, straight breadsticks, but the flavor will be different.
Equipment Needed
You don’t need a fancy kitchen to pull these off. Here’s what you’ll need, along with some alternatives and tips I’ve learned the hard way.
- Microwave-safe bowl or double boiler : I use a glass Pyrex measuring cup for melting chocolate because the spout makes dipping easier. A double boiler works if you’re nervous about burning the chocolate, but honestly, the microwave is faster and perfectly fine if you go in 30-second bursts.
- Baking sheet lined with parchment paper or wax paper : This is where your finished fingers will set. Parchment paper is best because it’s non-stick and reusable. Wax paper works too, but it can get a little greasy. I’ve used foil in a pinch and regretted it—the chocolate stuck like crazy.
- Small piping bag or zip-top bag : For piping the “blood” at the tips. A zip-top bag with a tiny corner snipped off works perfectly. I’ve also used a toothpick for more precise application, but the bag is faster when you’re making a big batch for a party.
- Toothpicks or small offset spatula : For spreading the chocolate evenly on the pretzels and for positioning the almond “nails.” A toothpick is actually better than a spatula here because it gives you more control.
- Cooling rack (optional but helpful) : If you have one, placing the dipped pretzels on a cooling rack over the baking sheet allows excess chocolate to drip off and prevents pooling. Not essential, but it makes for a cleaner look.
Budget-friendly tip : Don’t run out and buy a double boiler. A glass bowl set over a pot of simmering water works exactly the same way. And if you don’t have a piping bag, a sandwich bag with the corner snipped off is free and works like a charm.
Preparation Method

Alright, let’s make some fingers. I’ve broken this down step-by-step so you don’t end up with a chocolatey mess and a broken pretzel—both of which have happened to me, by the way.
- Set up your workspace. Line a baking sheet with parchment paper and set it aside. Have your pretzel rods, sliced almonds, and red gel food coloring ready to go. Trust me, once you start dipping, you don’t want to be hunting for the almonds. I learned this the hard way when my chocolate started setting up while I was still opening the almond bag.
- Melt the white chocolate. Place your white chocolate melting wafers or chopped almond bark in a microwave-safe bowl. Microwave in 30-second intervals at 50% power, stirring well after each interval. It usually takes about 2 to 3 minutes total. Stop when the chocolate is mostly melted with a few small lumps—stirring will finish the job. If it looks too thick, stir in 1 teaspoon of coconut oil or shortening. Do not overheat, or the chocolate will seize and turn into a grainy, unusable mess. I speak from experience.
- Dip the pretzels. Hold a pretzel rod by one end and dip the other end into the melted white chocolate, covering about two-thirds of the pretzel. Lift it out and let the excess chocolate drip back into the bowl for a few seconds. You want a nice, even coating—not too thick, not too thin. If you’re using a cooling rack, place the dipped pretzel on the rack. Otherwise, lay it directly on the parchment paper.
- Add the fingernail. While the chocolate is still wet, take one sliced almond and gently press it onto the tip of the pretzel, pointy end facing outward, so it looks like a fingernail. Press just enough to make it stick—don’t push so hard that the almond breaks or the pretzel cracks. The almond should be about 1/4 inch from the very tip of the pretzel, leaving a small “nail bed” of white chocolate visible.
- Create the knuckle lines. Use a toothpick to gently drag two or three horizontal lines across the chocolate coating, about 1/2 inch apart, to create the appearance of knuckles. Don’t drag too deep—you just want to create a subtle indentation in the chocolate. If you accidentally drag too deep and expose the pretzel, just dab a tiny bit of melted chocolate over it with your finger.
- Repeat for all fingers. Continue dipping and decorating the remaining pretzel rods. Work in batches of about 6 to 8 at a time so the chocolate doesn’t set before you can add the details. If the chocolate in your bowl starts to thicken, pop it back in the microwave for 10 seconds and stir.
- Let them set. Allow the chocolate to set completely at room temperature. This takes about 20 to 30 minutes, depending on your kitchen temperature. Don’t put them in the refrigerator—condensation can form and make the chocolate look blotchy. I know it’s tempting to speed things up, but trust me on this one.
- Add the “blood.” Once the chocolate is fully set, squeeze a small amount of red gel food coloring into a tiny piping bag or zip-top bag. Snip off the tiniest corner you can manage—like, really tiny, you can always cut more. Pipe a small dot of red gel at the base of each almond “nail,” letting a tiny bit drip down the side of the pretzel. This creates the “bloody” effect. Don’t go overboard—a little looks realistic, a lot looks like a crime scene. Unless that’s the vibe you’re going for, in which case, go nuts.
- Final set. Let the red gel dry for about 10 minutes. The gel will firm up slightly but won’t become hard. Your Spooky White Chocolate Pretzel Fingers are now ready to serve or store.
Sensory cues to look for : When you dip the pretzel, you should hear a faint sizzle if the chocolate is the right temperature—warm enough to coat but not so hot it’s steaming. When you press the almond, it should feel secure but not sink into the chocolate. The finished fingers should look matte, not shiny, when fully set.
Cooking Tips & Techniques
I’ve made these Spooky White Chocolate Pretzel Fingers at least a dozen times now, and I’ve made every mistake in the book so you don’t have to. Here’s what I’ve learned.
Don’t overheat the chocolate. This is the number one mistake. White chocolate is delicate. If you overheat it, it seizes into a grainy, clumpy mess that’s impossible to dip. Always use 50% power and stir frequently. If it does seize, you can try adding a teaspoon of vegetable oil and stirring vigorously, but honestly, it’s usually better to just start over. I’ve thrown away two batches of seized chocolate and it hurts every time.
Work in small batches. Don’t dip all 20 pretzels at once. The chocolate will start to set while you’re still decorating the first ones, and your knuckle lines won’t look clean. Dip 5 or 6 at a time, add the almonds and knuckle lines, then move on to the next batch. It takes a little longer, but the results are worth it.
Use the right pretzels. Thick, sturdy pretzel rods are non-negotiable. I once bought a store brand that was thin and brittle, and I snapped three in a row just trying to dip them. If you can only find thin ones, handle them like they’re made of glass and dip gently.
Keep your hands clean. White chocolate shows every fingerprint. If you’re handling the dipped pretzels, try to touch only the uncoated end. If you do get chocolate on your fingers, wipe them off immediately before it transfers to the next pretzel. I keep a damp paper towel nearby for exactly this reason.
Plan your timing. These are best made the day before your party. They need at least 30 minutes to set, and the flavors actually meld together overnight. Plus, it’s one less thing to stress about on the day of your gathering. You can make them up to 3 days in advance and store them in an airtight container at room temperature.
Multitasking strategy : While the first batch of chocolate is melting, line your baking sheet and count out your pretzels and almonds. While the first batch of dipped fingers is setting, clean up your workspace. This recipe is forgiving enough that you can work at your own pace.
Variations & Adaptations
One of the best things about this recipe is how easy it is to customize. Here are some variations I’ve tried and loved.
Dark Chocolate Witch Fingers : Swap the white chocolate for dark or milk chocolate. The dark chocolate gives a more “earthy” look that’s actually pretty creepy. Use white chocolate for the “blood” effect instead. I did this for a Halloween party last year and they looked like something out of a witch’s kitchen.
Gluten-Free Version : Use gluten-free pretzel rods. They’re available at most health food stores and online. The texture is slightly different—a little more crumbly—but the taste is still fantastic. Just be extra gentle when dipping.
Nut-Free Version : Skip the almonds and use a small dot of red gel at the tip of each finger to look like a bloody nail bed. Honestly, this version is actually creepier because the red stands out more against the white chocolate. I’ve had guests actually recoil when they saw these.
Kid-Friendly “Friendly Fingers” : Skip the red gel entirely and use colored sprinkles or edible glitter on the tips instead. Kids love the sparkly version, and you don’t have to explain why there’s “blood” on their snack. I make these for my nephew’s Halloween party every year and they’re always the first thing to disappear.
Spider Web Drizzle : After the white chocolate sets, melt a small amount of dark chocolate and drizzle it in a spider web pattern over the fingers. Use a toothpick to drag the lines from the center outward. It adds a whole new level of spooky detail that looks like you spent hours on it.
Seasonal Twist : For Christmas, use white chocolate and red and green sprinkles. For Valentine’s Day, use pink chocolate and heart-shaped sprinkles. The basic technique works for any holiday—just change the colors and decorations.
Serving & Storage Suggestions
These Spooky White Chocolate Pretzel Fingers are designed to be the star of your Halloween snack table. Here’s how to serve and store them like a pro.
Serving Temperature : Serve at room temperature. If they’ve been stored in a cool place, let them sit out for about 10 minutes before serving. The white chocolate should be firm but not hard, and the pretzel should snap easily when bitten.
Presentation Ideas : Arrange them on a black or dark purple platter to make the white fingers pop. Stand them upright in a small vase or jar filled with black jelly beans or crushed chocolate cookies to look like they’re growing out of the “dirt.” I’ve also seen them arranged in a circle on a platter with a small bowl of “blood” (raspberry sauce) in the center for dipping. For extra spookiness, add a few fake spider webs around the platter.
What to Serve Alongside : These pair beautifully with other Halloween treats like pumpkin-shaped cookies, caramel apples, or a bowl of candy corn. For a savory balance, serve them alongside a cheese board with orange cheddar and dark crackers. A warm mug of apple cider or a pumpkin spice latte is the perfect drink pairing.
Storage Instructions : Store in an airtight container at room temperature for up to 5 days. Do not refrigerate—the condensation will make the white chocolate sticky and blotchy. If you need to store them longer, you can freeze them for up to 2 months. Place them in a single layer in a freezer-safe container with parchment paper between layers. Thaw at room temperature for about 30 minutes before serving.
How Flavors Develop : Honestly, these are better the next day. The white chocolate sets fully, the pretzel stays crunchy, and the salt-and-sweet balance becomes more pronounced. I always make mine the day before a party for this exact reason.
Nutritional Information & Benefits
Let’s be real—these are a treat, not a health food. But here’s the breakdown so you know what you’re working with.
Per serving (1 finger) : Approximately 150 calories, 8g fat, 18g carbohydrates, 2g protein, 12g sugar. These values will vary based on the specific brands you use and the thickness of your chocolate coating.
Health Highlights : White chocolate contains calcium from the milk solids, and almonds provide vitamin E and healthy fats. The pretzels offer a small amount of iron and B vitamins. Is it a superfood? No. But it’s a Halloween treat, and that’s okay.
Dietary Considerations : This recipe contains dairy (white chocolate), gluten (pretzels), and tree nuts (almonds). For a dairy-free version, use dairy-free white chocolate chips. For a gluten-free version, use gluten-free pretzel rods. For a nut-free version, skip the almonds. Always check labels if you’re serving guests with allergies.
My Wellness Perspective : I believe in balance. These are the kind of treat you make for a special occasion, not for everyday snacking. They’re meant to be enjoyed, shared, and remembered. One or two with a cup of coffee is plenty. And honestly, the joy they bring to a Halloween party is worth every calorie.
Conclusion
These Spooky White Chocolate Pretzel Fingers are more than just a Halloween treat—they’re a conversation starter, a memory maker, and honestly, the easiest way to look like a Halloween hero without spending hours in the kitchen. They’re the recipe I keep coming back to year after year, the one that makes people smile and pretend to scream and ask for the recipe before the party’s even over.
I want you to make these your own. Add extra “blood” if you’re feeling dramatic. Use dark chocolate if that’s your thing. Skip the almonds and go full creepy. The beauty of this recipe is that it’s forgiving, flexible, and foolproof. You really can’t mess it up—and even if you do, it’ll still taste amazing.
So here’s my challenge to you. Make a batch for your next Halloween gathering. Watch people’s faces when they see them. And then come back and tell me how it went. Seriously—leave a comment, share a photo, tag me in your post. I want to see your spooky creations. Because honestly, the best part of sharing a recipe is seeing it come to life in someone else’s kitchen.
Now go make some fingers. And maybe don’t eat all of them before your guests arrive. I speak from experience.
Frequently Asked Questions
Can I make these ahead of time for a party?
Absolutely. These are actually better when made a day in advance. Store them in an airtight container at room temperature for up to 5 days. Just don’t refrigerate them, or the chocolate will get sticky.
My white chocolate seized and turned grainy. What did I do wrong?
You likely overheated the chocolate or got a drop of water in it. Always melt at 50% power in 30-second bursts, and make sure your bowl is completely dry. If it seizes, add a teaspoon of vegetable oil and stir vigorously, but sometimes it’s easier to just start over.
Can I use white chocolate chips instead of melting wafers?
You can, but they’re not ideal. White chocolate chips contain stabilizers that make them thicker and harder to dip. If you use chips, add a teaspoon of coconut oil to thin them out. Melting wafers or almond bark are much easier to work with.
How do I get the red “blood” to look realistic?
Use gel food coloring, not liquid. Pipe a tiny dot at the base of the almond and let it drip naturally. Less is more—a small amount looks like a realistic nail bed injury, while too much looks like a cartoon. Practice on a piece of parchment first if you’re nervous.
My pretzel rods keep breaking when I dip them. What am I doing wrong?
You might be using thin or brittle pretzels. Look for thick, sturdy pretzel rods. Also, dip gently—don’t push the pretzel into the chocolate with force. Let the chocolate coating do the work. If they’re still breaking, try dipping at a slight angle rather than straight down.
Pin This Recipe!
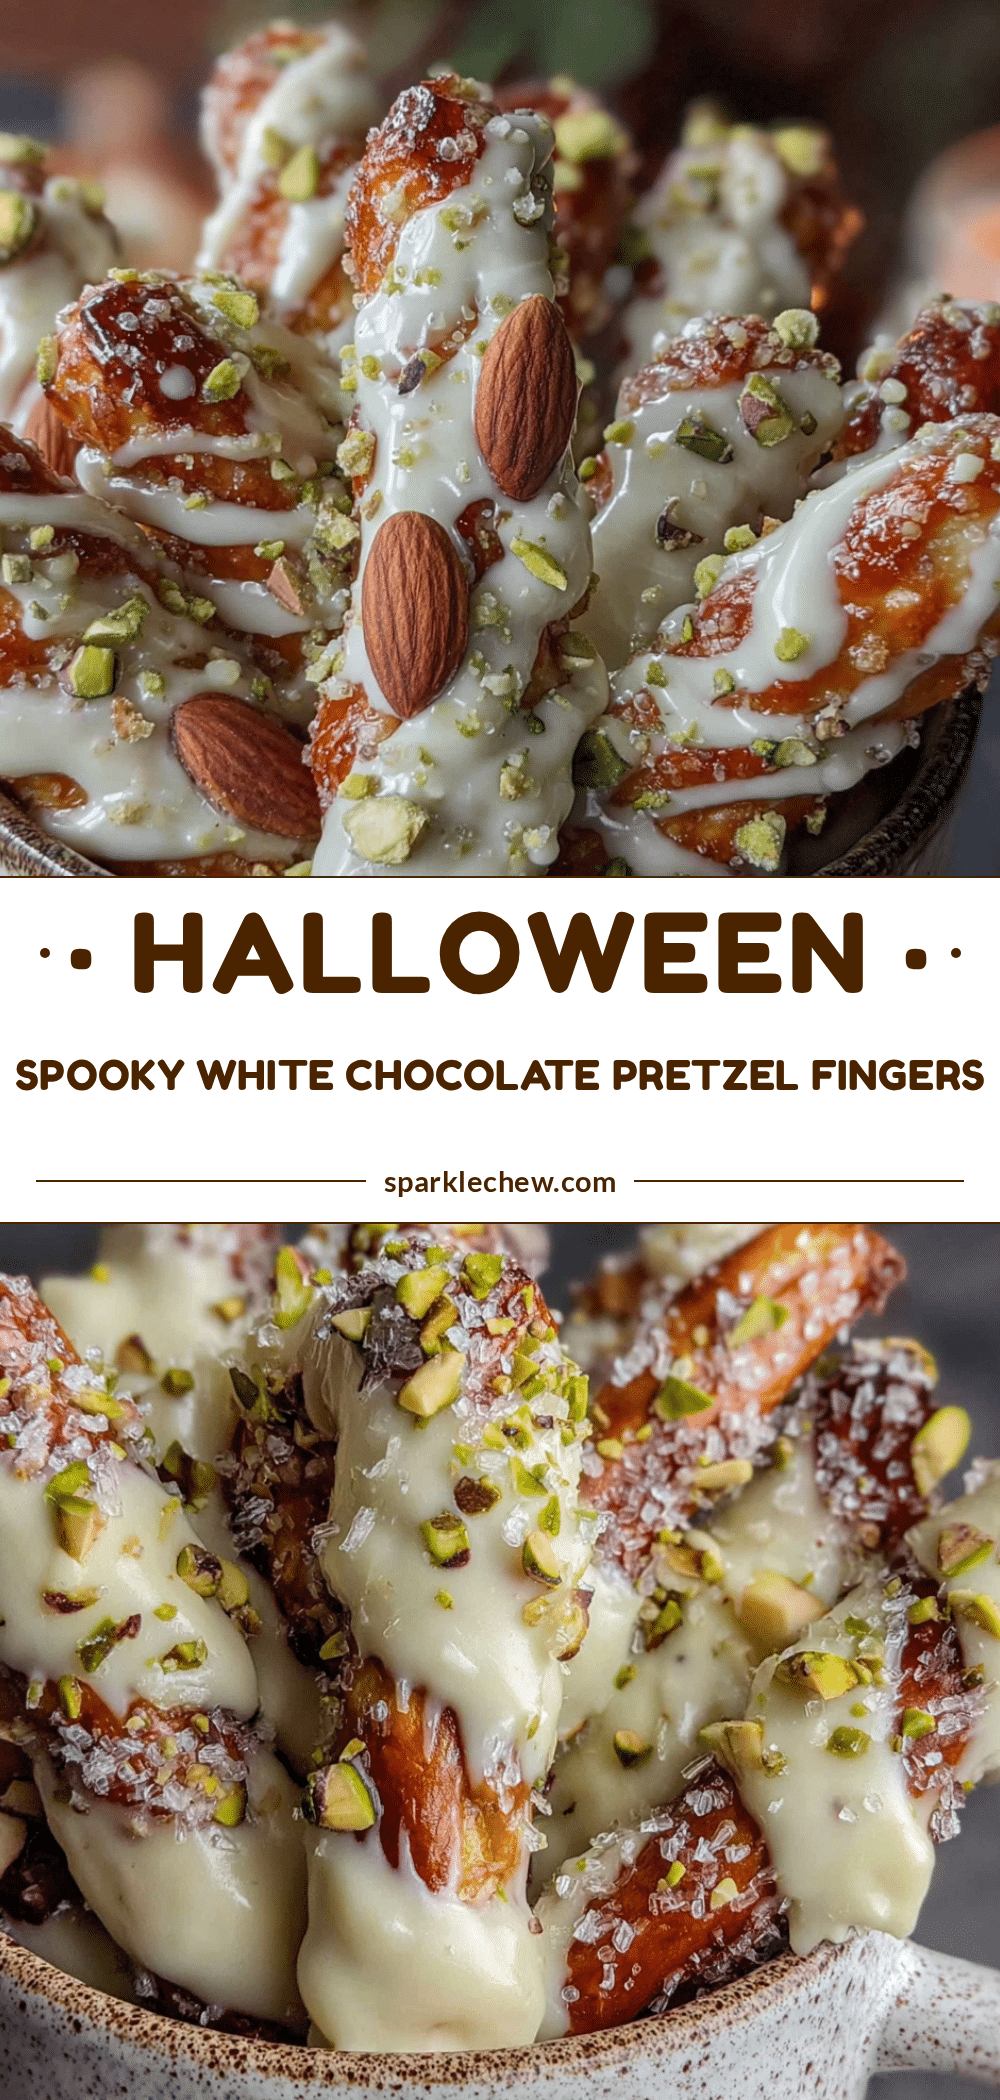
Spooky White Chocolate Pretzel Fingers

These spooky white chocolate pretzel fingers are the perfect easy Halloween treat. Made with just four main ingredients, they come together in about 20 minutes and are sure to be a hit at any Halloween party.
- Prep Time: 20 minutes
- Cook Time: 0 minutes
- Total Time: 50 minutes
- Yield: 12 servings 1x
- Category: Dessert
- Cuisine: American
Ingredients
- 1 bag (about 12 ounces) pretzel rods
- 12 ounces white chocolate melting wafers or almond bark
- 1/2 cup sliced almonds
- 1 small tube red gel food coloring
- 1 teaspoon coconut oil or shortening (optional, to thin chocolate)
- Dark chocolate or chocolate chips (optional, for drizzling)
Instructions
- Set up your workspace. Line a baking sheet with parchment paper and set aside. Have pretzel rods, sliced almonds, and red gel food coloring ready.
- Melt the white chocolate. Place white chocolate melting wafers or chopped almond bark in a microwave-safe bowl. Microwave in 30-second intervals at 50% power, stirring well after each interval, until mostly melted (about 2 to 3 minutes). Stir until smooth. If too thick, stir in 1 teaspoon coconut oil or shortening.
- Dip the pretzels. Hold a pretzel rod by one end and dip the other end into the melted white chocolate, covering about two-thirds of the pretzel. Let excess drip back into the bowl. Place on the prepared baking sheet.
- Add the fingernail. While chocolate is still wet, press one sliced almond onto the tip of the pretzel, pointy end outward, about 1/4 inch from the tip.
- Create the knuckle lines. Use a toothpick to gently drag two or three horizontal lines across the chocolate coating, about 1/2 inch apart, to create knuckles.
- Repeat for all fingers. Work in batches of 6 to 8 at a time so chocolate doesn’t set before adding details. If chocolate thickens, microwave for 10 seconds and stir.
- Let them set. Allow chocolate to set completely at room temperature, about 20 to 30 minutes. Do not refrigerate.
- Add the ‘blood.’ Once chocolate is fully set, pipe a small dot of red gel food coloring at the base of each almond ‘nail,’ letting a tiny bit drip down the side of the pretzel.
- Final set. Let the red gel dry for about 10 minutes. Serve or store.
Notes
Don’t overheat the white chocolate; melt at 50% power in 30-second bursts. Work in small batches to prevent chocolate from setting before decorating. Use thick, sturdy pretzel rods for best results. These are best made a day in advance and stored in an airtight container at room temperature for up to 5 days. Do not refrigerate.
Nutrition
- Serving Size: 1 finger
- Calories: 150
- Sugar: 12
- Sodium: 150
- Fat: 8
- Saturated Fat: 4
- Carbohydrates: 18
- Fiber: 1
- Protein: 2
Keywords: Halloween treats, white chocolate pretzels, spooky snacks, easy Halloween recipe, pretzel fingers


