Love this? Save it for later!
Share the inspiration with your friends
This was supposed to be a proper layered chocolate cake. I had the butter softening, the eggs sitting out, and a whole plan for a from-scratch chocolate layer cake with marshmallow frosting for my neighbor’s end-of-summer block party. Then my oven decided it was done for the day. Three beeps, a flashing error code, and the smell of something electrical—just like that, no bake. I stood there staring at the hot, dead oven with a stick of butter melting in my hand and a bag of chocolate graham crackers on the counter that I’d bought for something else entirely.
I grabbed the wrong chocolate, too. I meant to get dark cocoa powder, but somehow ended up with a bag of chocolate wafers. The whipped cream was already in the fridge, and someone had left a bag of jumbo marshmallows from a camping trip that never happened. I was already running late, and the thought of showing up empty-handed made me cringe. So I just started layering. Crackers, cream, marshmallows. Another layer. Another. I shoved the whole thing in the fridge, crossed my fingers, and hoped for the best.
What came out was nothing like the plan—and better. That first slice was a mess, honestly. The layers slid a little, the cream squished out the sides, and I thought I’d ruined it. But the taste? Oh man. The graham crackers had softened into something almost cake-like, the cream had set up perfectly, and the marshmallows had this chewy, slightly gooey thing going on. My neighbor asked for the recipe before I even got a full bite. I just laughed and said, “I have no idea what I did.”
Maybe you’ve been there—staring at a kitchen fail that somehow turns into your most requested dish. That’s this cake. It’s not fancy, it’s not complicated, and it definitely wasn’t planned. But I’ve made it for every gathering since, and it never lasts long. There’s something about the way it comes together, the way people’s eyes light up when they see those layers, that makes me keep coming back to it.
Why You’ll Love This Recipe
Let me tell you why this no-bake s’mores icebox cake has become my go-to for feeding a crowd. I’ve tested this thing at least a dozen times—sometimes with different crackers, different creams, even different pan sizes—and it holds up every single time. It’s one of those recipes that feels almost too easy, but then you taste it and wonder why you ever bothered turning on the oven.
- Quick & Easy: Comes together in about 20 minutes of active work. No baking, no fuss, no complicated techniques. Just layer and chill.
- Simple Ingredients: You probably already have most of this stuff in your kitchen. Chocolate graham crackers, heavy cream, marshmallows, and a few pantry staples.
- Perfect for Crowds: This recipe makes a generous 9×13 pan that serves 12-16 people easily. Block parties, potlucks, birthday parties, holiday gatherings—it’s perfect.
- Crowd-Pleaser: Kids love it, adults love it, even the picky eaters at my gatherings go back for seconds. I’ve never brought home leftovers.
- Unbelievably Delicious: The texture is what gets people. The graham crackers soften into a tender, almost cake-like layer, while the marshmallows stay chewy and the cream stays light and fluffy. It’s comfort food without the heat.
What makes this recipe different from the other icebox cakes out there is the layering technique. Most recipes just pile everything in and hope for the best, but I’ve learned that letting it rest overnight is non-negotiable. That extra time lets the crackers fully soften and the flavors meld together. It’s not just another version—it’s the best version.
This cake is the kind that makes people close their eyes after the first bite. I’ve seen it happen at least five times. It’s nostalgic without being childish, indulgent without being heavy, and impressive without any stress. Perfect for impressing guests without breaking a sweat, or turning a simple summer evening into something memorable.
What Ingredients You Will Need
This recipe uses simple, wholesome ingredients to deliver that classic s’mores flavor with a creamy, dreamy texture. Most of these are pantry staples or easy to find at any grocery store.
- Chocolate graham crackers – 2 full boxes (about 24-30 full sheets). These form the base layers. I recommend the brand Honey Maid for consistent texture. Regular honey graham crackers work too, but the chocolate version adds that deeper cocoa flavor that makes this taste like a real s’more.
- Heavy whipping cream – 4 cups (960 ml). This is the heart of the filling. Don’t substitute with Cool Whip or stabilized whipped cream from a tub. Real heavy cream whips up lighter and fluffier, and it sets better overnight. Look for cream with at least 36% milk fat for best results.
- Powdered sugar – ½ cup (60 g). Just enough to sweeten the cream without making it heavy. Sift it if you want to avoid lumps, though I’ve been lazy and skipped that step plenty of times.
- Vanilla extract – 2 teaspoons (10 ml). Pure vanilla is better, but imitation works fine. I use the real stuff because it adds a warmth that complements the chocolate and marshmallow.
- Marshmallows – 2 cups (about 200 g) of mini marshmallows, plus extra for topping. The mini ones distribute more evenly between layers. Jumbo marshmallows cut into quarters work too, but they’re harder to spread.
- Chocolate syrup – ½ cup (120 ml) for drizzling between layers. Store-bought is fine, but if you have homemade chocolate syrup, even better. I use Hershey’s when I’m in a hurry.
- Marshmallow fluff – 1 cup (about 240 ml) optional but recommended. This gives an extra marshmallow-y boost to the cream layers. I fold it into the whipped cream for a double marshmallow effect.
- Semi-sweet chocolate chips – ½ cup (90 g) for garnish. These add a nice crunch and visual appeal on top. Dark chocolate chips work too if you want a less sweet finish.
Substitution Tips: If you can’t find chocolate graham crackers, use regular honey grahams and add a layer of chocolate pudding or ganache between each cracker layer. For a dairy-free version, use coconut cream (chilled and whipped) instead of heavy cream. Just make sure it’s full-fat coconut cream, not the light stuff. I tried it once with light coconut milk and it was a watery disaster.
Equipment Needed
You don’t need much for this recipe, which is part of the beauty. Here’s what you’ll need:
- 9×13 inch baking dish – Glass or ceramic works best. Metal pans can sometimes react with the cream and leave a metallic taste. I use a Pyrex dish and it’s perfect.
- Electric mixer – Hand mixer or stand mixer with whisk attachment. You can whip cream by hand with a whisk, but your arm will hate you by the end. Trust me, I’ve done it.
- Large mixing bowl – Make sure it’s chilled for best whipped cream results. Pop it in the freezer for 10 minutes before you start.
- Spatula – A rubber or silicone spatula for spreading the cream evenly. Offset spatulas work great too.
- Measuring cups and spoons – Standard set for accuracy.
- Sharp knife – For cutting the finished cake. A serrated knife works best to get clean slices through the layers.
Budget-Friendly Options: No electric mixer? A whisk and some elbow grease will do the job—just give yourself an extra 5-7 minutes. No 9×13 dish? Use a deep 8×8 pan and make a taller cake, or even a loaf pan for a smaller version. I’ve made this in a disposable aluminum pan for camping trips and it worked fine.
Preparation Method
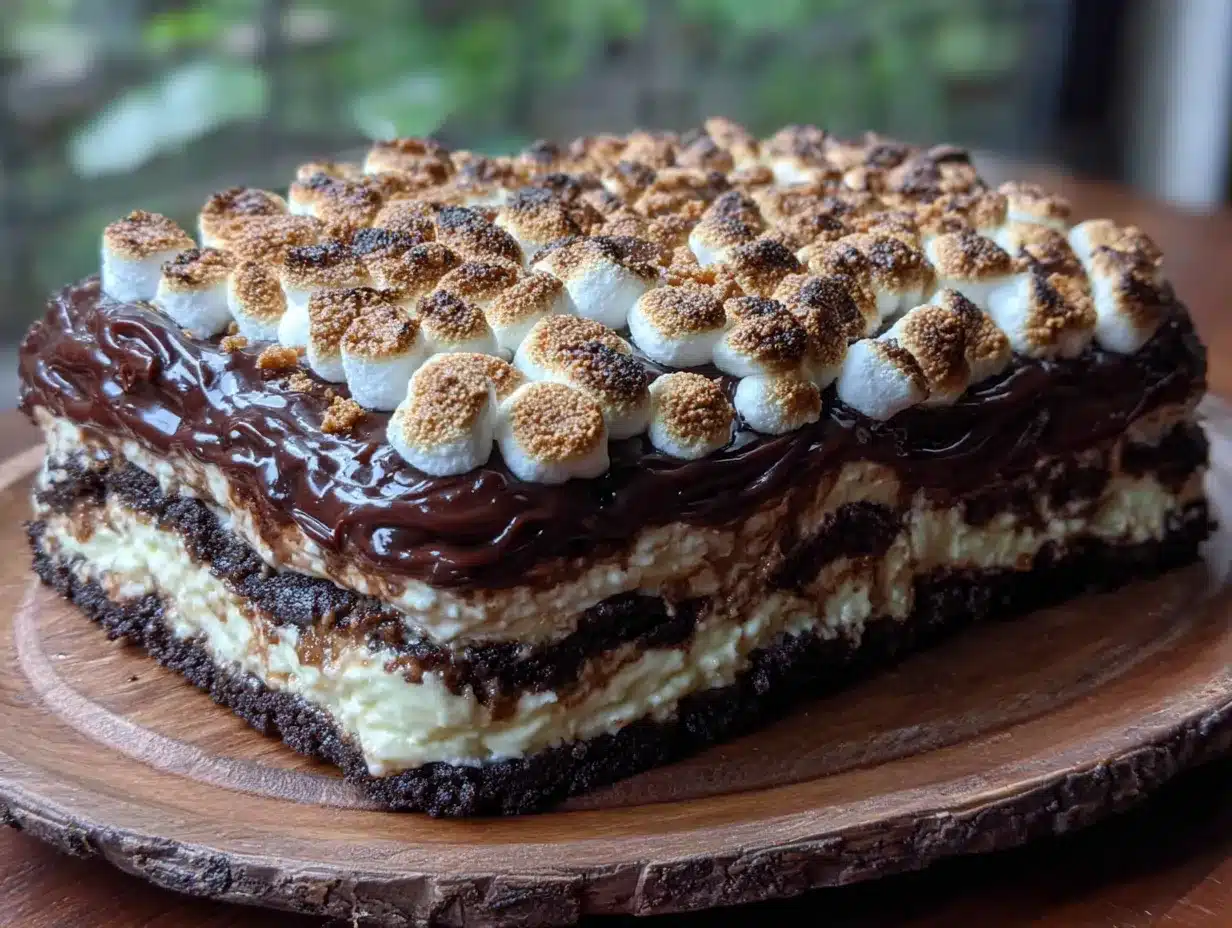
This is where the magic happens. Follow these steps carefully, and you’ll have a dessert that looks like you spent hours on it.
- Chill your bowl and cream (5 minutes). Place your large mixing bowl and the beaters from your mixer in the freezer for at least 10 minutes. Cold cream whips faster and holds its shape better. I learned this the hard way after making flat, sad whipped cream at a party.
- Whip the cream (5 minutes). Pour the cold heavy cream, powdered sugar, and vanilla extract into the chilled bowl. Beat on medium-high speed until soft peaks form—meaning when you lift the beaters, the cream forms gentle peaks that flop over slightly. Be careful not to over-whip, or you’ll end up with butter. If you’re using marshmallow fluff, fold it in gently after whipping.
- Prepare your pan (1 minute). Spread a thin layer of the whipped cream (about ¼ cup) on the bottom of your 9×13 dish. This helps the first layer of graham crackers stick and keeps them from sliding around.
- Layer the graham crackers (3 minutes). Arrange a single layer of chocolate graham crackers over the cream, breaking them as needed to fill gaps. Don’t overlap them, but don’t leave huge spaces either. I usually fit about 8-9 full sheets per layer.
- Add the marshmallows and syrup (2 minutes). Sprinkle about ⅓ cup of mini marshmallows over the crackers, then drizzle with about 2 tablespoons of chocolate syrup. Don’t go overboard on the syrup—it can make the cake soggy if you use too much.
- Spread a cream layer (3 minutes). Spoon about 1 cup of whipped cream over the marshmallows and spread it evenly with a spatula. Make sure it reaches the edges so every bite has cream.
- Repeat layers (10 minutes). Continue layering: graham crackers, marshmallows, chocolate syrup, whipped cream. You should get 4-5 full layers depending on your pan depth. End with a final layer of whipped cream on top. Smooth it out nicely.
- Top with garnishes (2 minutes). Sprinkle the remaining mini marshmallows and chocolate chips over the top. Drizzle with a little extra chocolate syrup for visual appeal. I like to press a few marshmallows into the cream so they stay put.
- Chill overnight (8-12 hours). This is the most important step. Cover the dish with plastic wrap or foil and refrigerate for at least 8 hours, preferably overnight. The graham crackers need time to soften into that cake-like texture. Don’t rush this—I tried a 4-hour chill once and the crackers were still crunchy in the middle.
- Serve cold (5 minutes). Use a sharp knife to cut clean slices. Wipe the knife between cuts for neat edges. Serve straight from the fridge.
Sensory Cues: When you spread the cream, it should feel light and airy, almost like cloud. The graham crackers should resist slightly when you press them into the cream but not break. After chilling, the top should be firm to the touch, and when you cut into it, the layers should hold together without sliding apart.
Cooking Tips & Techniques
After making this cake more times than I can count, I’ve picked up a few tricks that make a real difference.
Whip cream like a pro: Start on low speed to avoid splashing, then gradually increase to medium-high. Stop as soon as you see soft peaks. Over-whipped cream turns grainy and eventually separates into butter. I’ve ruined three batches learning this lesson. If you accidentally over-whip, add a tablespoon of cold cream and fold it in gently—sometimes it saves it.
The overnight rest is non-negotiable: I know it’s tempting to dig in after a few hours, but the texture just isn’t the same. The graham crackers need a full 8 hours to absorb moisture from the cream and soften completely. I once served this after 6 hours and the center layer was still crunchy. My friend politely said it was “interesting texture contrast.” Never again.
Layer evenness matters: Take the time to spread each cream layer all the way to the edges. Uneven layers lead to lopsided slices and some bites having too much cream while others are dry. Use an offset spatula if you have one—it makes spreading so much easier.
Temperature control: Keep everything cold. If your kitchen is warm, the cream will start to soften and the layers will slide. Work quickly and pop the bowl of cream back in the fridge between layers if needed. I’ve done this on a 90-degree summer day and it was a race against time.
Cutting clean slices: Run your knife under hot water, wipe it dry, then cut. Repeat for each slice. This gives you those beautiful, clean edges that make people think you’re a professional. Also, let the cake sit at room temperature for about 5 minutes before cutting—it cuts cleaner than straight from the fridge.
Variations & Adaptations
This recipe is incredibly versatile. Here are some variations I’ve tried and loved:
Peanut Butter S’mores Cake: Add a layer of peanut butter between the graham crackers and cream. Melt ½ cup peanut butter with 2 tablespoons butter and drizzle it over the crackers before adding marshmallows. The salty-sweet combo is incredible. I made this for a Super Bowl party and it disappeared in 20 minutes.
Berry S’mores Cake: Layer fresh strawberries, raspberries, or sliced bananas between the cream and crackers. The tartness of the berries cuts through the sweetness beautifully. I did this with strawberries and balsamic glaze once and it was restaurant-quality.
Vegan Version: Use coconut cream (chilled overnight, whipped) instead of heavy cream. Use vegan graham crackers and vegan marshmallows. Drizzle with dairy-free chocolate syrup. I tested this for a friend with dietary restrictions and honestly, it was almost indistinguishable from the original.
Gluten-Free Option: Use gluten-free graham crackers. Most major brands now make gluten-free versions that work perfectly. Just check the package because some are smaller—you might need an extra box.
Individual Servings: Make these in small mason jars or dessert cups for a portable version. Layer the ingredients in the cups, chill overnight, and serve with a spoon. Perfect for picnics or parties where people are standing.
Serving & Storage Suggestions
This cake is best served cold, straight from the fridge. The texture is perfect when the cream is firm and the graham crackers have fully softened. I like to let it sit at room temperature for about 5-10 minutes before serving—it takes the chill off and makes the flavors more pronounced.
Presentation Ideas: Garnish with extra chocolate shavings, a sprinkle of sea salt (trust me on this one), or a few whole marshmallows toasted with a kitchen torch. For a fun touch, serve each slice with a small skewer of toasted marshmallows on the side.
Complementary Dishes: This cake pairs beautifully with fresh fruit salad, a scoop of vanilla ice cream, or a drizzle of warm caramel sauce. For drinks, try it with cold milk, iced coffee, or a rich hot chocolate.
Storage Instructions: Cover the dish tightly with plastic wrap or foil and store in the refrigerator for up to 5 days. The texture actually improves after day one as the flavors meld together. After day three, the graham crackers start to get a bit too soft, so it’s best eaten within 2-3 days.
Freezing: You can freeze this cake for up to 2 months. Wrap the entire dish in plastic wrap, then foil, and freeze. Thaw overnight in the refrigerator before serving. The texture might be slightly softer after freezing, but it’s still delicious. I’ve done this for holiday prep and it works great.
Reheating: This is a cold dessert, so no reheating needed. But if you want that toasted marshmallow flavor, use a kitchen torch to lightly toast the marshmallows on top just before serving. It adds a smoky, campfire vibe that takes this to another level.
Nutritional Information & Benefits
Per serving (based on 16 servings): Calories: 320, Fat: 22g, Saturated Fat: 14g, Carbohydrates: 30g, Fiber: 1g, Sugar: 20g, Protein: 3g, Sodium: 180mg.
Health Benefits: While this is definitely a treat, there are some redeeming qualities. The heavy cream provides calcium and vitamin A. Dark chocolate contains antioxidants. Graham crackers offer some whole grains if you choose a whole wheat variety. And honestly, sometimes you just need a dessert that makes you happy—that counts for something too.
Dietary Considerations: This recipe contains dairy and gluten. For a dairy-free version, use coconut cream. For gluten-free, use gluten-free graham crackers. It’s naturally nut-free if you skip the peanut butter variation. Always check labels for cross-contamination if serving to someone with allergies.
I’m not one to pretend desserts are health food, but I do believe in balance. This cake is for celebrations, gatherings, and those days when you need something comforting. Enjoy it without guilt and share it with people you love.
Conclusion
This no-bake s’mores icebox cake has become my signature dessert, and it all started with a broken oven and a moment of panic. Funny how the best things in life often come from mistakes, isn’t it? I’ve made this cake for birthdays, block parties, holiday dinners, and quiet summer evenings, and it never fails to bring smiles.
I hope you give this recipe a try, and I hope you make it your own. Maybe you’ll add peanut butter like I did that one time, or maybe you’ll layer in fresh berries for a summer twist. The beauty of this cake is that it’s forgiving—it wants you to experiment and play. Don’t be afraid to mess it up. I mean, my first version was a complete accident and it turned out amazing.
If you make this, I’d love to hear about it. Drop a comment below and tell me how it went, what variations you tried, or if your oven broke too. Share a photo on Pinterest and tag me so I can see your beautiful creation. And remember—sometimes the best recipes are the ones you never planned to make.
Frequently Asked Questions
Can I use Cool Whip instead of heavy cream?
You can, but the texture won’t be as light and fluffy. Cool Whip is stabilized with additives that give it a different mouthfeel. Real whipped cream sets up better overnight and tastes fresher. If you’re in a pinch, use Cool Whip, but expect a denser, less creamy result.
How long does this cake need to chill?
At least 8 hours, but overnight is best. The graham crackers need time to absorb moisture from the cream and soften into that cake-like texture. I’ve tried 4 hours and the crackers were still crunchy in the middle. Don’t rush it—your patience will be rewarded.
Can I make this in advance for a party?
Absolutely! This is actually the perfect make-ahead dessert. You can assemble it up to 2 days in advance and keep it covered in the fridge. The flavors meld together beautifully over time. Just add the garnishes (extra marshmallows and chocolate chips) right before serving for the best presentation.
What if I don’t have a 9×13 pan?
No problem! Use an 8×8 pan for a taller cake, or a loaf pan for a smaller version. You can even make individual servings in mason jars or dessert cups. Just adjust the layering to fit your container and keep the same ratios. The number of layers will change, but the taste will be the same.
Can I toast the marshmallows on top?
Definitely! Use a kitchen torch to lightly toast the marshmallows on top just before serving. It adds that smoky campfire flavor that takes this cake to another level. If you don’t have a torch, you can broil it for 30-60 seconds, but watch it closely—marshmallows burn fast.
Pin This Recipe!
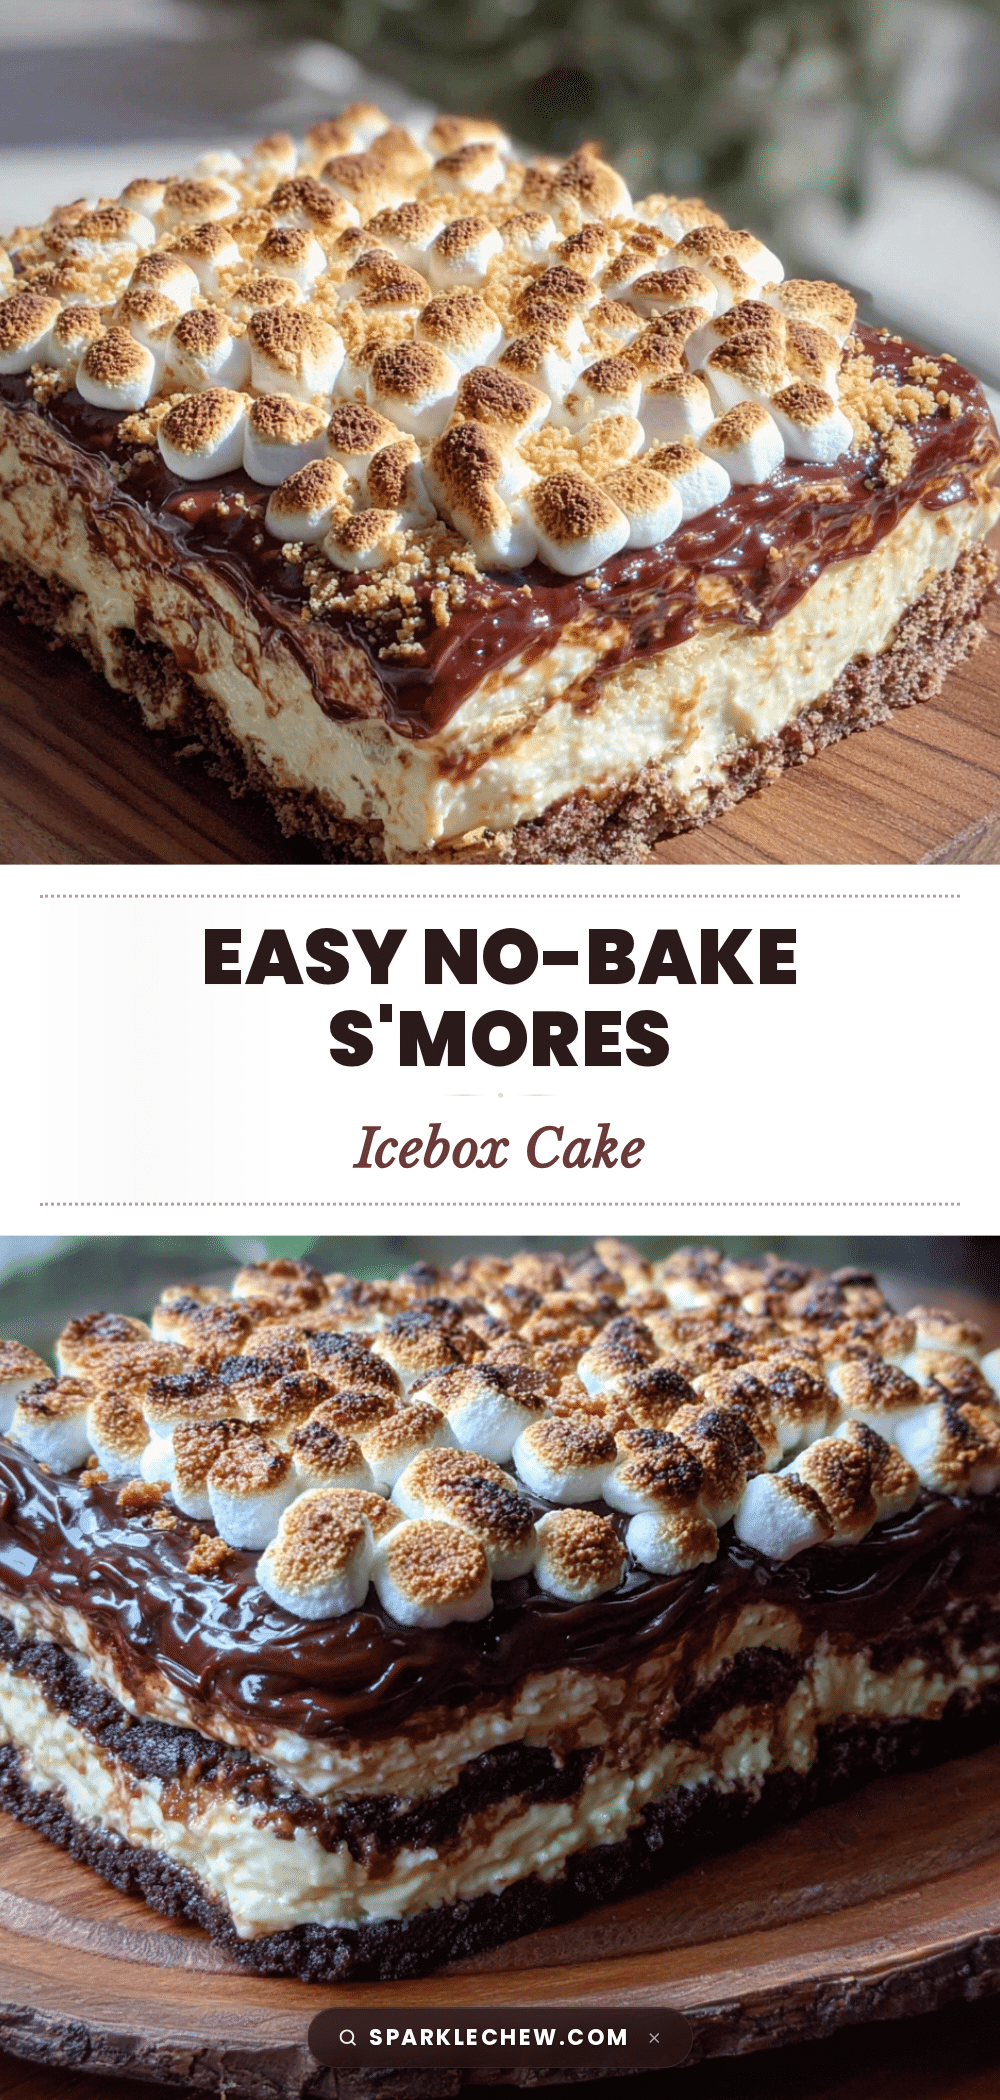
The Best Easy No-Bake Smores Icebox Cake for a Crowd
A no-bake s’mores icebox cake that layers chocolate graham crackers, whipped cream, marshmallows, and chocolate syrup for a crowd-pleasing dessert. Perfect for block parties, potlucks, and summer gatherings.
- Prep Time: 20 minutes
- Cook Time: 0 minutes
- Total Time: 8 hours 20 minutes (includes chilling)
- Yield: 12-16 servings 1x
- Category: Dessert
- Cuisine: American
Ingredients
- 2 boxes (about 24–30 full sheets) chocolate graham crackers
- 4 cups (960 ml) heavy whipping cream
- ½ cup (60 g) powdered sugar
- 2 teaspoons (10 ml) vanilla extract
- 2 cups (about 200 g) mini marshmallows, plus extra for topping
- ½ cup (120 ml) chocolate syrup
- 1 cup (about 240 ml) marshmallow fluff (optional)
- ½ cup (90 g) semi-sweet chocolate chips
Instructions
- Chill your bowl and cream: Place your large mixing bowl and the beaters from your mixer in the freezer for at least 10 minutes.
- Whip the cream: Pour the cold heavy cream, powdered sugar, and vanilla extract into the chilled bowl. Beat on medium-high speed until soft peaks form. If using marshmallow fluff, fold it in gently after whipping.
- Prepare your pan: Spread a thin layer of the whipped cream (about ¼ cup) on the bottom of your 9×13 dish.
- Layer the graham crackers: Arrange a single layer of chocolate graham crackers over the cream, breaking them as needed to fill gaps.
- Add the marshmallows and syrup: Sprinkle about ⅓ cup of mini marshmallows over the crackers, then drizzle with about 2 tablespoons of chocolate syrup.
- Spread a cream layer: Spoon about 1 cup of whipped cream over the marshmallows and spread it evenly with a spatula.
- Repeat layers: Continue layering: graham crackers, marshmallows, chocolate syrup, whipped cream. You should get 4-5 full layers depending on your pan depth. End with a final layer of whipped cream on top.
- Top with garnishes: Sprinkle the remaining mini marshmallows and chocolate chips over the top. Drizzle with a little extra chocolate syrup.
- Chill overnight: Cover the dish with plastic wrap or foil and refrigerate for at least 8 hours, preferably overnight.
- Serve cold: Use a sharp knife to cut clean slices. Wipe the knife between cuts for neat edges. Serve straight from the fridge.
Notes
The overnight rest is non-negotiable for the graham crackers to soften into a cake-like texture. Keep everything cold while assembling. For clean slices, run your knife under hot water, wipe dry, then cut. Let the cake sit at room temperature for about 5 minutes before cutting.
Nutrition
- Serving Size: 1 slice (based on 16
- Calories: 320
- Sugar: 20
- Sodium: 180
- Fat: 22
- Saturated Fat: 14
- Carbohydrates: 30
- Fiber: 1
- Protein: 3
Keywords: no-bake dessert, icebox cake, s'mores, chocolate, marshmallow, graham cracker, crowd-pleaser, summer dessert, potluck


