Love this? Save it for later!
Share the inspiration with your friends
I was standing in the frozen food aisle last Saturday, staring at a box of pre-made nacho chips with that weird powdered cheese packet, when the smell hit me. It wasn’t the chips — it was the air from the freezer section mixing with someone’s chili-scented breath behind me. And just like that, I was twenty-two, shivering in my friend Marco’s driveway, holding a foil pan full of chips that were already getting soggy from the humidity.
That was the year I learned that nachos, when done wrong, are a tragedy. When done right? They’re the thing people remember long after the game is over. I’ve spent ten years perfecting what I call the Ultimate Loaded Nacho Bar Tailgate Platter, and honestly, it started because I got tired of sad, cold nachos that tasted more like regret than celebration.
The first time I attempted a build-your-own nacho station, I forgot the cheese sauce entirely. I mean, who does that? We had chips, we had jalapeños, we had ground beef — but no cheese. My buddy Dave still brings it up every football season. “Remember the year you gave us dry nachos?” Yeah, Dave. I remember.
But that failure taught me something important: a nacho bar isn’t just about throwing ingredients on a table. It’s about timing, temperature, and texture. You need the right vessels, the right layering strategy, and honestly, the right attitude. This Ultimate Loaded Nacho Bar Tailgate Platter is the result of all those trial-and-error years. It’s the one I bring to every party now, and the one people specifically ask for when they invite me over. Maybe you’ve been there — that moment when you realize your party snack is the real MVP of the gathering.
Let me show you how to build something that’ll make your game day unforgettable.
Why You’ll Love This Recipe
I’ve tested this Ultimate Loaded Nacho Bar Tailgate Platter at least twenty times across different gatherings — backyard barbecues, Super Bowl parties, even a tailgate in a rainstorm where we had to hold a tarp over the food. Every single time, it delivered. Here’s why this version stands out from every other nacho recipe you’ve seen:
- Quick & Easy: Full assembly takes under 30 minutes, and most of that is just warming things up. Perfect for when guests show up early or you’re running late (which, let’s be real, is most game days).
- Simple Ingredients: Everything comes from a regular grocery store. No specialty shops, no obscure spices, no ingredients you’ll use once and forget about.
- Perfect for Tailgating: This platter travels surprisingly well if you pack components separately, and it feeds a crowd without needing plates or forks for every single person.
- Crowd-Pleaser: I’ve watched picky eaters, vegetarians, and even my aunt who “doesn’t eat finger food” go back for seconds. The build-your-own format means everyone gets exactly what they want.
- Unbelievably Delicious: The secret is in the layering strategy and the homemade cheese sauce that stays smooth instead of turning into that weird clumpy mess you get from canned stuff.
What makes this different from every other nacho bar recipe? It’s the temperature control system I’ve developed — keeping the cheese warm, the chips crispy, and the cold toppings actually cold. No more soggy bottom layer or lukewarm sour cream. This is nacho engineering at its finest, and I’m not even sorry for how nerdy that sounds.
This recipe isn’t just good — it’s the kind that makes people close their eyes after the first bite. It’s comfort food reimagined for sharing, with the same soul-soothing satisfaction but built for a crowd. Perfect for impressing your tailgate crew without spending the whole game in the kitchen.
What Ingredients You Will Need
This Ultimate Loaded Nacho Bar Tailgate Platter uses simple, mostly pantry-friendly ingredients to deliver bold flavor and satisfying texture without the fuss. I’ve organized everything by category so you can shop and prep efficiently.
For the Base
- Restaurant-style tortilla chips (2 large bags, about 18 ounces each) — Look for sturdy chips that can hold up to toppings. I prefer Tostitos Scoops or a similar scoop-shaped chip for maximum topping retention. Thin chips will break under the weight of the cheese.
- Ground beef (1.5 pounds, 80/20 blend) — The fat content keeps the meat moist. I’ve tried leaner blends and they turn out dry and crumbly.
- Taco seasoning (1 packet or 3 tablespoons homemade) — I use McCormick’s original, but feel free to make your own with cumin, chili powder, garlic powder, and smoked paprika.
- Refried beans (1 can, 16 ounces) — Traditional or vegetarian both work great. This adds staying power and helps anchor the toppings.
For the Cheese Sauce
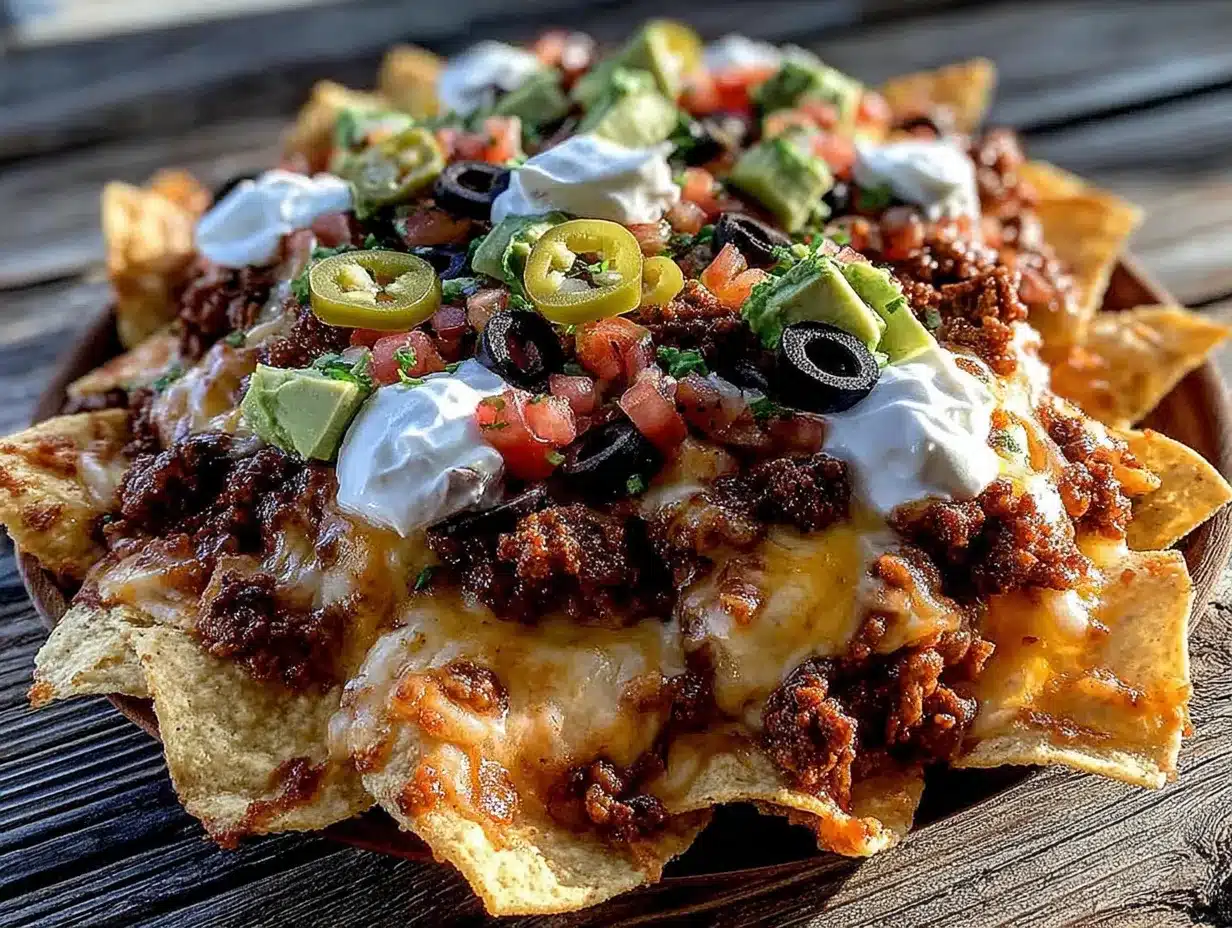
- Sharp cheddar cheese (8 ounces, freshly grated) — Pre-shredded cheese has anti-caking agents that make sauce grainy. Grate it yourself for that silky texture.
- Monterey Jack cheese (4 ounces, freshly grated) — Adds creaminess without overpowering the cheddar.
- Whole milk (1 cup) — Don’t use skim or low-fat; the sauce won’t emulsify properly.
- Unsalted butter (2 tablespoons)
- All-purpose flour (2 tablespoons) — For the roux that thickens the sauce.
- Jalapeño brine (1 tablespoon, from the jar) — This is my secret ingredient. It adds tang and a subtle heat that makes the cheese sauce unforgettable.
For the Toppings Bar
- Roma tomatoes (4 medium, diced) — Seed them first to prevent sogginess. I learned this the hard way after serving swimming nachos.
- Red onion (1 medium, finely diced)
- Jalapeños (1 jar, pickled sliced) — Both the peppers and a splash of the brine go onto the bar.
- Black olives (1 can, sliced and drained)
- Fresh cilantro (1 bunch, roughly chopped)
- Sour cream (1 cup, full-fat for best texture)
- Guacamole (1.5 cups, store-bought or homemade) — If making your own, add extra lime juice to prevent browning.
- Shredded lettuce (2 cups, iceberg or romaine) — Adds crunch but add it right before serving so it doesn’t wilt.
Equipment Needed
You don’t need fancy gear for this Ultimate Loaded Nacho Bar Tailgate Platter, but having the right tools makes everything smoother. Here’s what I use:
- Large rimmed baking sheet (half-sheet size, 18×13 inches) — The rim is crucial for keeping everything contained. I’ve tried rimless cookie sheets and regretted it every time.
- Medium saucepan (2-quart) — For the cheese sauce. Non-stick makes cleanup easier.
- Large skillet (12-inch) — For browning the beef. Cast iron gives the best browning, but any heavy-bottomed pan works.
- Small slow cooker or fondue pot — Optional but amazing for keeping cheese sauce warm during serving. A 1.5-quart slow cooker is perfect.
- Small bowls and ramekins (6-8) — For organizing the toppings bar. I use a mix of ceramic and disposable if I’m tailgating.
- Cutting board and sharp knife — A dull knife will crush your tomatoes and make you cry over onions. Trust me.
- Cheese grater — Box grater or food processor with grating disc. Please don’t buy pre-shredded for the sauce.
Budget-friendly tip: Thrift stores always have random small bowls and baking sheets for a few bucks. My entire nacho bar setup cost under $15 from Goodwill.
Preparation Method
Let me walk you through building this Ultimate Loaded Nacho Bar Tailgate Platter step by step. I’ve included all the little details that make the difference between good nachos and unforgettable ones.
- Preheat your oven to 375°F. While it’s heating, line your baking sheet with parchment paper or aluminum foil for easier cleanup. Trust me on this one — congealed cheese is a nightmare to scrub off.
- Start the beef. Heat your large skillet over medium-high heat. Add the ground beef and break it apart with a wooden spoon. Cook for 6-8 minutes, stirring occasionally, until no pink remains. Drain off excess fat (leave about 1 tablespoon for flavor). Reduce heat to low, add taco seasoning and 1/3 cup water. Simmer for 3-4 minutes until the liquid thickens slightly. The meat should look glossy, not watery. Set aside and keep warm.
- Warm the refried beans. In a small saucepan over medium-low heat, warm the refried beans with 2 tablespoons of water. Stir frequently until smooth and spreadable, about 3-4 minutes. If they seem too thick, add another tablespoon of water. Cover and keep warm.
- Make the cheese sauce. This is where the magic happens. In a medium saucepan over medium heat, melt the butter. Whisk in the flour and cook for 1 minute, stirring constantly — this gets rid of the raw flour taste. Slowly pour in the milk while whisking continuously. Keep whisking until the mixture thickens enough to coat the back of a spoon, about 3-4 minutes. Reduce heat to low. Add the shredded cheddar and Monterey Jack cheese by handfuls, stirring until completely melted before adding more. Stir in the jalapeño brine. Taste and add salt if needed (the cheese is usually salty enough). The sauce should be smooth and pourable, not thick like paste. If it’s too thick, whisk in a splash of milk.
- Assemble the base layer. Spread half the tortilla chips evenly on your prepared baking sheet. Spoon the refried beans in small dollops across the chips — don’t spread them, just drop them. Sprinkle half the seasoned beef over everything. This first layer gets the most toppings because it’s the base that everything else sits on.
- Add the second layer. Pile the remaining chips on top. Add the rest of the beef. Pour about half the cheese sauce over everything, reserving the rest for serving. Don’t drown the chips — you want them to stay crispy underneath.
- Bake for 8-10 minutes. Just until the cheese sauce is bubbly and the chips on top are lightly toasted around the edges. Watch carefully — chips go from golden to burnt faster than you’d think. Your kitchen should smell incredible right about now.
- Set up the toppings bar. While the nachos bake, arrange your small bowls with tomatoes, red onion, jalapeños, black olives, cilantro, sour cream, guacamole, and shredded lettuce. Put the remaining cheese sauce in your slow cooker or a heatproof bowl.
- Finish and serve. Remove the baking sheet from the oven. Let it rest for 2 minutes — this prevents the toppings from sliding off immediately. Place the sheet on a heatproof surface (or a cutting board if you’re tailgating). Let everyone pile on their own toppings from the bar. The warm nachos with cold toppings create that perfect temperature contrast that makes this dish so addictive.
One more thing: if you’re serving this at an actual tailgate, assemble the nachos at the last possible minute. Pack the chips separately, warm the beef and beans in a thermos or portable burner, and do the cheese sauce in a slow cooker. Layer everything on a disposable foil pan right before serving. You’ll thank me later.
Cooking Tips & Techniques
After more failed nacho attempts than I care to count, I’ve gathered some hard-won wisdom. Here are the tips that’ll take your Ultimate Loaded Nacho Bar Tailgate Platter from good to legendary.
Don’t skip the double layering. I know it seems fussy, but single-layer nachos are a tragedy waiting to happen. The top chips get all the toppings while the bottom chips remain bare and sad. Two layers ensure every chip gets some love. It’s basic nacho math.
Temperature management is everything. The biggest mistake I see is people putting cold ingredients on hot nachos and wondering why everything turns into a lukewarm mess. Keep your cheese sauce in a slow cooker on warm. Let your beef and beans stay hot until the last minute. And please, for the love of game day, keep your sour cream and guacamole cold until they hit the chips. The contrast is what makes each bite exciting.
Grate your own cheese. I know, I know — pre-shredded cheese is convenient. But it’s coated in potato starch or cellulose to prevent clumping, and that same coating prevents smooth melting. Your cheese sauce will turn out grainy and weird. Take the extra three minutes to grate a block of cheddar. Your taste buds will notice the difference even if you don’t think they will.
Watch the chip quality. I once bought the generic store brand chips to save two dollars, and they disintegrated under the toppings like they were made of wet cardboard. Spend the extra money on sturdy restaurant-style chips. Your nacho structure depends on it.
Timing is critical. The assembled nachos should go into the oven for exactly 8-10 minutes — no longer. Any more time and the chips underneath start steaming instead of staying crispy. If you’re making a huge batch for a crowd, work in batches rather than piling everything onto one massive sheet. I learned this lesson when I tried to feed thirty people at once and ended up with a tray of nacho mush.
Variations & Adaptations
One of the best things about this Ultimate Loaded Nacho Bar Tailgate Platter is how easily it adapts. Here are some variations I’ve tried and loved:
Vegetarian Version
Swap the ground beef for a plant-based crumble or black beans. I use two cans of black beans, drained and rinsed, then sautéed with the same taco seasoning. The texture is different but equally satisfying. My vegetarian friends actually prefer this version now.
Spicy Upgrade
If you like heat, add 2 finely chopped chipotle peppers in adobo sauce to the cheese sauce. Stir in 1 teaspoon of the adobo sauce too. I tried this on a dare and it became my personal favorite version. Just warn your guests — this one sneaks up on you.
Breakfast Nachos
This is my secret Sunday morning indulgence. Replace the beef with crumbled breakfast sausage, add scrambled eggs, and use a white cheddar cheese sauce. Top with avocado and a drizzle of hot sauce. It’s ridiculous and wonderful and I’m not sorry.
Healthier Option
Use baked tortilla chips, ground turkey instead of beef, and low-fat cheese for the sauce. Add extra vegetables like bell peppers and corn. It’s still delicious, just slightly less decadent. I make this version when I’m pretending to be healthy but still want nachos.
Pulled Pork Nachos
Leftover pulled pork from your barbecue? Shred it, warm it with some barbecue sauce, and use it instead of the ground beef. The smoky sweetness pairs amazingly with the sharp cheese sauce. This is my go-to for using up leftovers.
Serving & Storage Suggestions
This Ultimate Loaded Nacho Bar Tailgate Platter is designed for sharing, but here’s how to make the experience even better.
Serving temperature: Serve the nacho base hot from the oven, with the toppings bar at room temperature (except sour cream and guacamole, which should stay chilled). The contrast between hot chips and cool toppings is what makes every bite exciting. If you’re serving outdoors, keep the cheese sauce in a slow cooker on warm and replenish the chips as needed.
What to serve alongside: This platter is a meal on its own, but if you want to round things out, add a simple side of Mexican street corn salad or a bowl of fresh fruit. For drinks, cold beer or margaritas are the obvious choices. I also like having a pitcher of agua fresca for non-drinkers.
Storage: Here’s the honest truth — assembled nachos don’t store well. The chips get soft and sad within an hour. If you have leftovers, store the components separately. Keep the beef in an airtight container in the fridge for up to 3 days. The cheese sauce will keep for 4 days and reheats beautifully in the microwave or on the stovetop with a splash of milk. Store toppings individually in small containers.
Reheating: For the beef, reheat in a skillet over medium heat with a tablespoon of water to restore moisture. For the cheese sauce, microwave in 30-second bursts, stirring between each, or warm on the stovetop over low heat. Add a splash of milk if it seems thick. Do not reheat assembled nachos — just make fresh chips and use the leftover components.
Make-ahead tips: You can prep almost everything the day before. Dice the tomatoes and onions, grate the cheese, make the beef, and prepare the cheese sauce. Store everything separately in the fridge. On game day, just warm everything up and assemble. This saves about 20 minutes and reduces stress significantly.
Nutritional Information & Benefits
Let’s be real — this is indulgent food. But here’s the breakdown so you can plan accordingly. Per serving (about 1/8 of the platter with all toppings):
- Calories: 520
- Protein: 24g
- Carbohydrates: 38g
- Fat: 32g
- Fiber: 6g
- Sodium: 890mg
The beef provides a solid protein punch, which helps keep you full during a long game. The beans add fiber and plant-based protein. Tomatoes and cilantro contribute vitamins A and C, plus antioxidants. The cheese sauce delivers calcium, though it’s also where most of the saturated fat lives.
If you’re watching sodium, use low-sodium taco seasoning and skip the added salt in the cheese sauce. The pickled jalapeños and olives add enough saltiness on their own. For a lighter version, swap in ground turkey and baked chips — you’ll save about 150 calories and 8 grams of fat per serving.
This recipe contains dairy (cheese, sour cream, milk) and gluten (flour in the cheese sauce). For a gluten-free version, use cornstarch instead of flour to thicken the cheese sauce — 1 tablespoon cornstarch mixed with 2 tablespoons cold milk, stirred in at the end.
Frequently Asked Questions
Can I make this nacho bar completely dairy-free?
Yes! Use a plant-based cheese sauce made with cashews or store-bought vegan cheddar. Swap the sour cream with a coconut-based version, and use dairy-free milk in the sauce. The beef and beans are already dairy-free. I’ve tested this with a cashew cheese sauce and it worked surprisingly well, though the texture is slightly different.
How do I keep the chips from getting soggy?
Three things: use sturdy chips, don’t overdress the base layer, and serve immediately after baking. The double-layer method also helps because the top chips stay crispier. If you’re serving over a long period, set up a “chip station” where people can grab fresh chips and add warm toppings from the slow cooker.
Can I prepare the cheese sauce ahead of time?
Absolutely. Make it up to 3 days in advance and store it in the fridge. Reheat gently on the stovetop or in the microwave, adding a splash of milk to restore the consistency. I actually think the flavor improves after a day in the fridge as the spices meld together.
What’s the best way to transport this for a tailgate?
Pack everything separately. Carry the chips in their original bags. Transport the beef and beans in a thermos or insulated container. Put the cheese sauce in a slow cooker and plug it in when you arrive. Assemble the nachos on a disposable foil pan right before serving. This method keeps everything at the right temperature and texture.
How many people does this platter feed?
This recipe comfortably serves 8-10 people as a main dish, or 12-15 as an appetizer. If you’re feeding a crowd of hungry football fans, I’d double the recipe and set up two platters. People always eat more nachos than you expect — especially when there’s a toppings bar involved.
Conclusion
This Ultimate Loaded Nacho Bar Tailgate Platter is more than just a recipe — it’s a whole experience. It’s the kind of dish that brings people together around a table, reaching over each other for that last dollop of guacamole, arguing over who gets the chip with the most cheese. It’s messy and loud and absolutely perfect for game day.
I’ve made this for Super Bowl parties, birthday celebrations, and random Tuesday nights when I just needed something fun to eat. Every single time, it delivers. The best part? You can customize it based on what your crowd loves. Add more heat, swap in different proteins, load up on extra toppings — make it yours.
I’d love to hear how your nacho bar turns out. Did you try a wild variation? Did your guests fight over the last crispy chip? Drop a comment below and let me know. And if you’re looking for more crowd-pleasing game day recipes, check out my slow cooker meatballs and buffalo chicken dip — they’re perfect companions for this platter.
Now go make some nachos. Your game day crew will thank you.
Pin This Recipe!
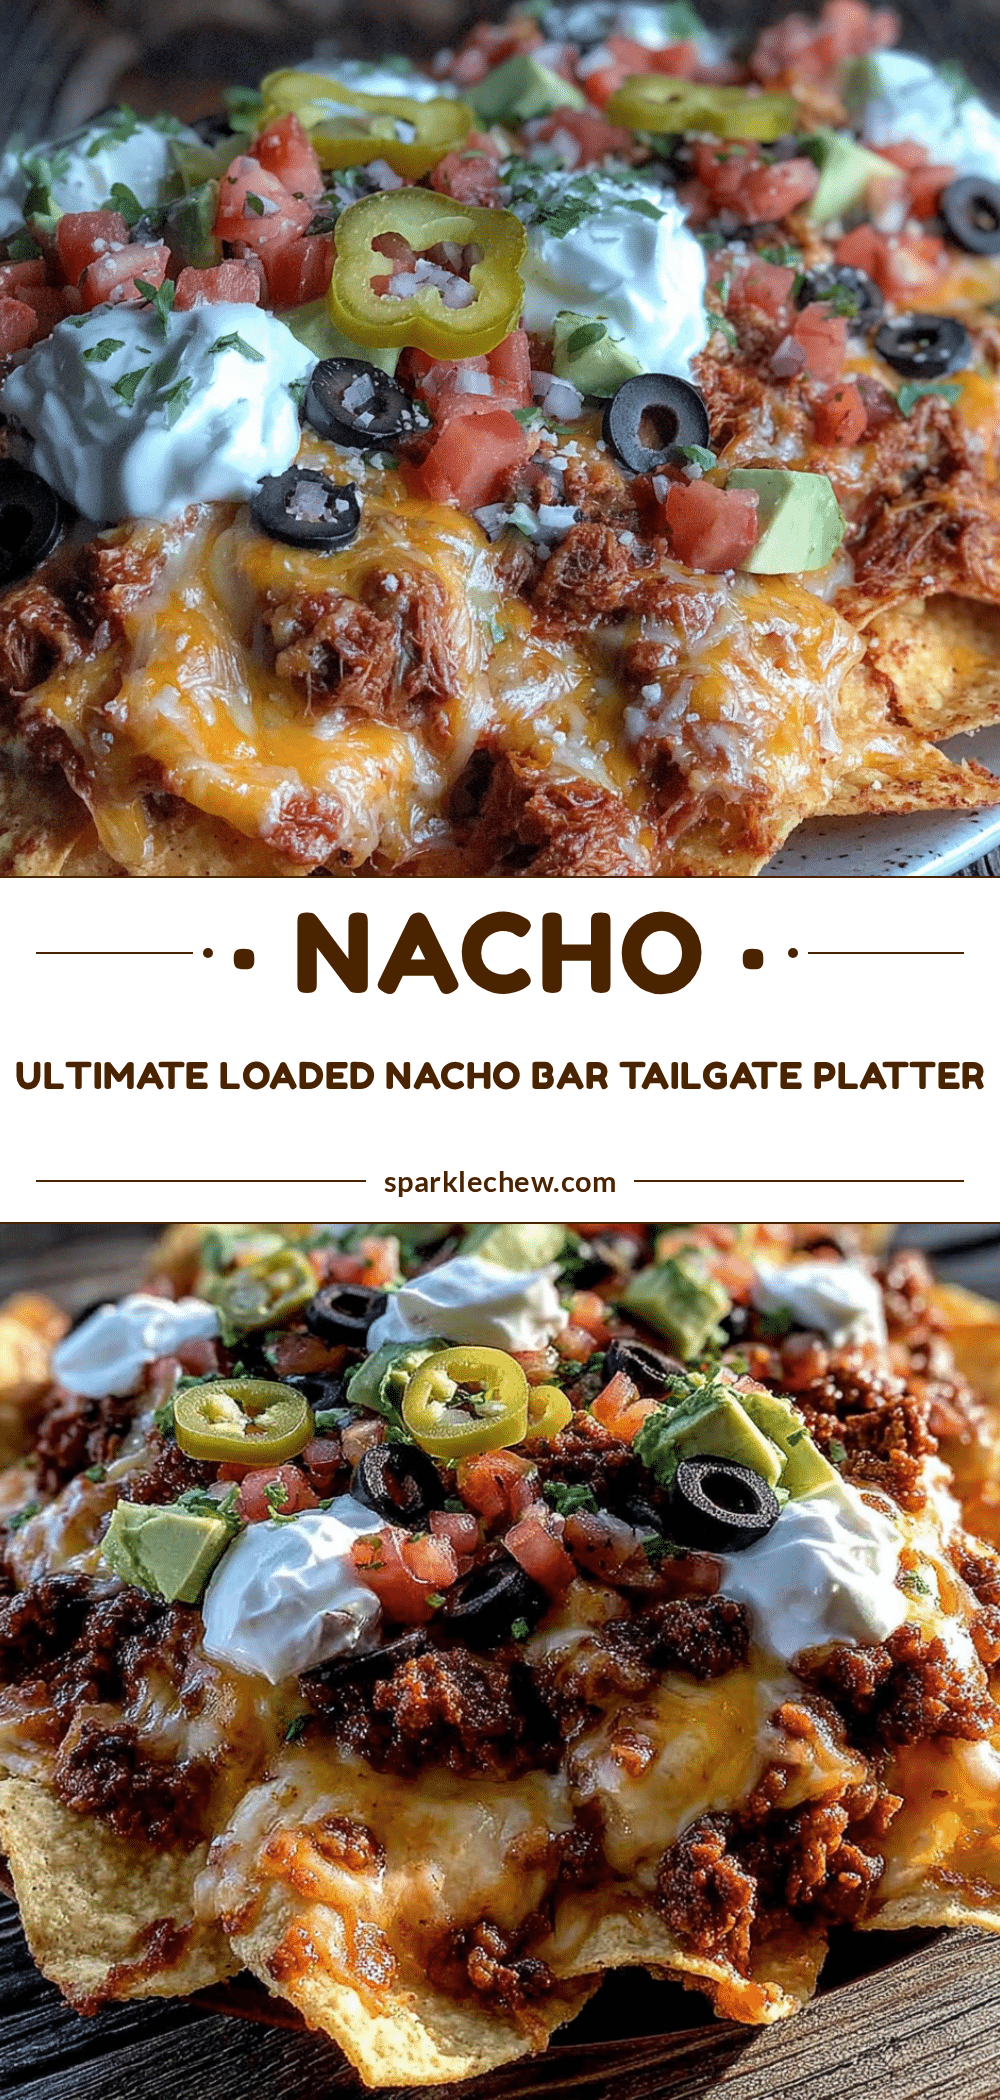
Ultimate Loaded Nacho Bar Tailgate Platter – Easy Game Day Recipe
This Ultimate Loaded Nacho Bar Tailgate Platter is the perfect game day recipe, featuring a build-your-own nacho station with crispy chips, seasoned beef, homemade cheese sauce, and a variety of fresh toppings. It’s quick, easy, and guaranteed to be a crowd-pleaser.
- Prep Time: 15 minutes
- Cook Time: 20 minutes
- Total Time: 35 minutes
- Yield: 8-10 servings 1x
- Category: Main Course
- Cuisine: Mexican-American
Ingredients
- 2 large bags (about 18 ounces each) restaurant-style tortilla chips
- 1.5 pounds ground beef (80/20 blend)
- 1 packet (or 3 tablespoons) taco seasoning
- 1 can (16 ounces) refried beans
- 8 ounces sharp cheddar cheese, freshly grated
- 4 ounces Monterey Jack cheese, freshly grated
- 1 cup whole milk
- 2 tablespoons unsalted butter
- 2 tablespoons all-purpose flour
- 1 tablespoon jalapeño brine (from the jar)
- 4 medium Roma tomatoes, seeded and diced
- 1 medium red onion, finely diced
- 1 jar pickled sliced jalapeños
- 1 can sliced black olives, drained
- 1 bunch fresh cilantro, roughly chopped
- 1 cup full-fat sour cream
- 1.5 cups guacamole (store-bought or homemade)
- 2 cups shredded lettuce (iceberg or romaine)
Instructions
- Preheat your oven to 375°F. Line a large rimmed baking sheet (half-sheet size, 18×13 inches) with parchment paper or aluminum foil.
- Heat a large skillet over medium-high heat. Add the ground beef and break it apart with a wooden spoon. Cook for 6-8 minutes, stirring occasionally, until no pink remains. Drain off excess fat, leaving about 1 tablespoon. Reduce heat to low, add taco seasoning and 1/3 cup water. Simmer for 3-4 minutes until the liquid thickens slightly. Set aside and keep warm.
- In a small saucepan over medium-low heat, warm the refried beans with 2 tablespoons of water. Stir frequently until smooth and spreadable, about 3-4 minutes. Add another tablespoon of water if too thick. Cover and keep warm.
- Make the cheese sauce: In a medium saucepan over medium heat, melt the butter. Whisk in the flour and cook for 1 minute, stirring constantly. Slowly pour in the milk while whisking continuously. Keep whisking until the mixture thickens enough to coat the back of a spoon, about 3-4 minutes. Reduce heat to low. Add the shredded cheddar and Monterey Jack cheese by handfuls, stirring until completely melted before adding more. Stir in the jalapeño brine. Taste and add salt if needed. The sauce shoul…
- Assemble the base layer: Spread half the tortilla chips evenly on the prepared baking sheet. Spoon the refried beans in small dollops across the chips. Sprinkle half the seasoned beef over everything.
- Add the second layer: Pile the remaining chips on top. Add the rest of the beef. Pour about half the cheese sauce over everything, reserving the rest for serving.
- Bake for 8-10 minutes, until the cheese sauce is bubbly and the chips on top are lightly toasted around the edges.
- While the nachos bake, set up the toppings bar: Arrange small bowls with tomatoes, red onion, jalapeños, black olives, cilantro, sour cream, guacamole, and shredded lettuce. Put the remaining cheese sauce in a slow cooker or heatproof bowl.
- Remove the baking sheet from the oven. Let it rest for 2 minutes. Place the sheet on a heatproof surface. Let everyone pile on their own toppings from the bar.
Notes
For tailgating, pack components separately and assemble at the last minute. Use a disposable foil pan for easy transport. The cheese sauce can be made up to 3 days ahead and reheated with a splash of milk. For gluten-free, use cornstarch instead of flour to thicken the cheese sauce (1 tablespoon cornstarch mixed with 2 tablespoons cold milk).
Nutrition
- Serving Size: 1/8 of platter with
- Calories: 520
- Sugar: 4
- Sodium: 890
- Fat: 32
- Saturated Fat: 12
- Carbohydrates: 38
- Fiber: 6
- Protein: 24
Keywords: nachos, loaded nachos, nacho bar, tailgate food, game day recipe, easy appetizer, crowd-pleaser, build-your-own nachos


