Love this? Save it for later!
Share the inspiration with your friends
A friend asked why I couldn’t just skip the searing step and dump everything in the baking dish at once. I started to explain why that wouldn’t work—then stopped. Honestly, I had no good reason except that’s how I’d always done it. I mean, searing is practically sacred in the cooking world, right? You brown the meat first, build that fond on the bottom of the pan, then build your sauce around it. That’s the rule.
But she was standing there with her honey mustard mixture already whisked together, looking at me like I was making things harder than they needed to be. And let’s face it—I was. So I shrugged, poured the sauce over the raw chicken thighs, and slid the dish into the oven. I fully expected to pull out a pale, sad tray of chicken with a sauce that never quite came together.
What came out of the oven was the most beautifully glazed, sticky, golden chicken I’d made in months. The sauce had concentrated into this thick, glossy coating that clung to every piece of meat. The chicken was somehow juicier than my seared versions. I stood there holding the spatula, feeling equal parts delighted and ridiculous. The whole thing took about five minutes of prep and the oven did the rest.
That was three summers ago, and I haven’t seared a chicken thigh for this recipe since. There’s something humbling about being taught a lesson by a friend who just wanted dinner on the table without the fuss. Maybe you’ve been there—stubbornly clinging to a method that adds work without adding much to the final dish. This recipe is proof that sometimes the simplest path really is the best one.
Why You’ll Love This Recipe
This honey mustard chicken thighs recipe has become my go-to for so many reasons, but let me tell you what really keeps me coming back to it. First, it solves the weeknight dinner problem in the most delicious way possible. You’re looking at about ten minutes of hands-on work, and then your oven does everything else. That’s not a typo—ten minutes.
- Quick & Easy: From fridge to table in under 40 minutes with almost no active cooking time. Perfect for those evenings when you walk through the door hungry and tired.
- Simple Ingredients: You probably have most of these in your pantry right now. Honey, mustard, a few spices—nothing fancy, nothing hard to find.
- Perfect for Busy Weeknights: This is the kind of dinner that makes you look like you tried hard when you really didn’t. Great for feeding the family or just yourself with leftovers for tomorrow.
- Crowd-Pleaser: I’ve served this to picky eaters, health-conscious friends, and people who usually don’t like chicken thighs. Every single time, the dish comes back empty.
- Unbelievably Delicious: The sauce transforms in the oven into something almost caramel-like—sticky, tangy, slightly sweet, and deeply savory. The chicken stays incredibly tender because you’re not drying it out on the stovetop first.
What makes this version different from the dozens of honey mustard chicken recipes out there is the technique—or rather, the lack of it. By skipping the sear and letting the sauce cook down with the chicken, you get a glaze that’s concentrated and complex without any extra effort. The honey caramelizes slowly in the oven, the mustard mellows into something warm and rounded, and the chicken thighs render just enough fat to keep everything moist and flavorful. It’s comfort food that feels a little lighter, a little brighter, but still deeply satisfying.
This recipe isn’t just good—it’s the kind that makes you close your eyes after the first bite. It’s the dinner you make when you need something reliable, something that delivers every single time without stress or fuss.
What Ingredients You Will Need
This recipe relies on a handful of pantry staples that come together to create something surprisingly complex. Each ingredient plays a specific role in building that sticky, tangy, golden glaze you’re after.
- Chicken Thighs (6-8 pieces, bone-in or boneless, skin-on or skinless): Chicken thighs are the star here because they stay juicy during the longer oven cooking time. I prefer bone-in, skin-on thighs for maximum flavor and that crispy edge where the skin peeks out of the sauce. But boneless skinless works beautifully too—just reduce the cooking time by about 10 minutes.
- Honey (⅓ cup): This provides the sweetness and that sticky texture we’re after. Use a runny, mild honey like clover or orange blossom. Avoid strong-flavored honeys like buckwheat, which can overpower the mustard. I like using local honey when I can find it—it’s usually milder and supports local beekeepers.
- Dijon Mustard (¼ cup): Dijon gives you that sharp, tangy kick without being too vinegary. It emulsifies beautifully with the honey and olive oil. Grey Poupon is my go-to brand, but any good-quality Dijon works. Avoid yellow mustard here—it’s too sharp and doesn’t blend as smoothly.
- Whole Grain Mustard (2 tablespoons): This is my secret ingredient. Those little mustard seeds add texture and little bursts of flavor throughout the dish. If you don’t have it, just use all Dijon and add a pinch of mustard powder for depth.
- Olive Oil (2 tablespoons): Helps the sauce coat the chicken and keeps everything from drying out. A good extra virgin olive oil adds a subtle fruitiness, but regular olive oil works fine too.
- Garlic (3-4 cloves, minced): Fresh garlic is non-negotiable here. The pre-minced stuff in jars has a different flavor that doesn’t mellow as nicely during cooking. Trust me on this one.
- Apple Cider Vinegar (1 tablespoon): Just a splash to brighten everything up. It cuts through the richness of the honey and chicken fat, keeping the dish from feeling heavy. You can substitute white wine vinegar or even lemon juice in a pinch.
- Salt (1 teaspoon, plus more for seasoning): Use kosher salt if you have it—it dissolves more evenly and is harder to over-season with.
- Black Pepper (½ teaspoon, freshly ground): Freshly ground pepper makes a noticeable difference here. The pre-ground stuff just doesn’t have the same aromatic quality.
- Paprika (1 teaspoon): Adds a subtle smokiness and helps with browning. Smoked paprika is lovely here if you have it, but regular sweet paprika works great too.
- Dried Thyme (½ teaspoon): Earthy and slightly floral, thyme complements both the honey and mustard beautifully. You can use fresh thyme—just double the amount and strip the leaves off the stems.
- Optional Garnish: Fresh parsley or chives, chopped. A sprinkle of flaky sea salt right before serving adds a nice finishing touch too.
Equipment Needed
You don’t need much for this recipe, which is part of its charm. Here’s what you’ll need to have on hand:
- Baking Dish (9×13-inch or similar): A ceramic or glass dish works best because it heats evenly and doesn’t react with the acidic mustard and vinegar. I use a Pyrex baking dish that I’ve had for years, and it’s never let me down. A metal baking pan works too, but you might need to watch the cooking time more closely since metal conducts heat differently.
- Mixing Bowl (medium-sized): For whisking together the sauce. Any bowl will do, but a glass or stainless steel bowl is easier to clean afterward since honey can be stubborn.
- Whisk: Helps emulsify the honey and mustard into a smooth sauce. A fork works in a pinch, but a whisk is faster and gives you a more uniform mixture.
- Measuring Cups and Spoons: Honey is sticky, so I recommend spraying your measuring cup with a little non-stick spray before measuring. The honey slides right out—no waste, no mess.
- Tongs: For turning the chicken halfway through cooking. They give you better control than forks, which can pierce the meat and let juices escape.
- Instant-Read Thermometer (optional but recommended): Takes the guesswork out of doneness. Chicken thighs are done at 165°F, but I usually pull them at 170°F for bone-in pieces since the dark meat stays juicier at a slightly higher temperature.
If you don’t have a baking dish, a cast-iron skillet works beautifully. The sides are high enough to hold the sauce, and the even heat distribution is excellent. Just be aware that dark cast iron can cause the honey to darken faster, so check your chicken a few minutes early.
Preparation Method
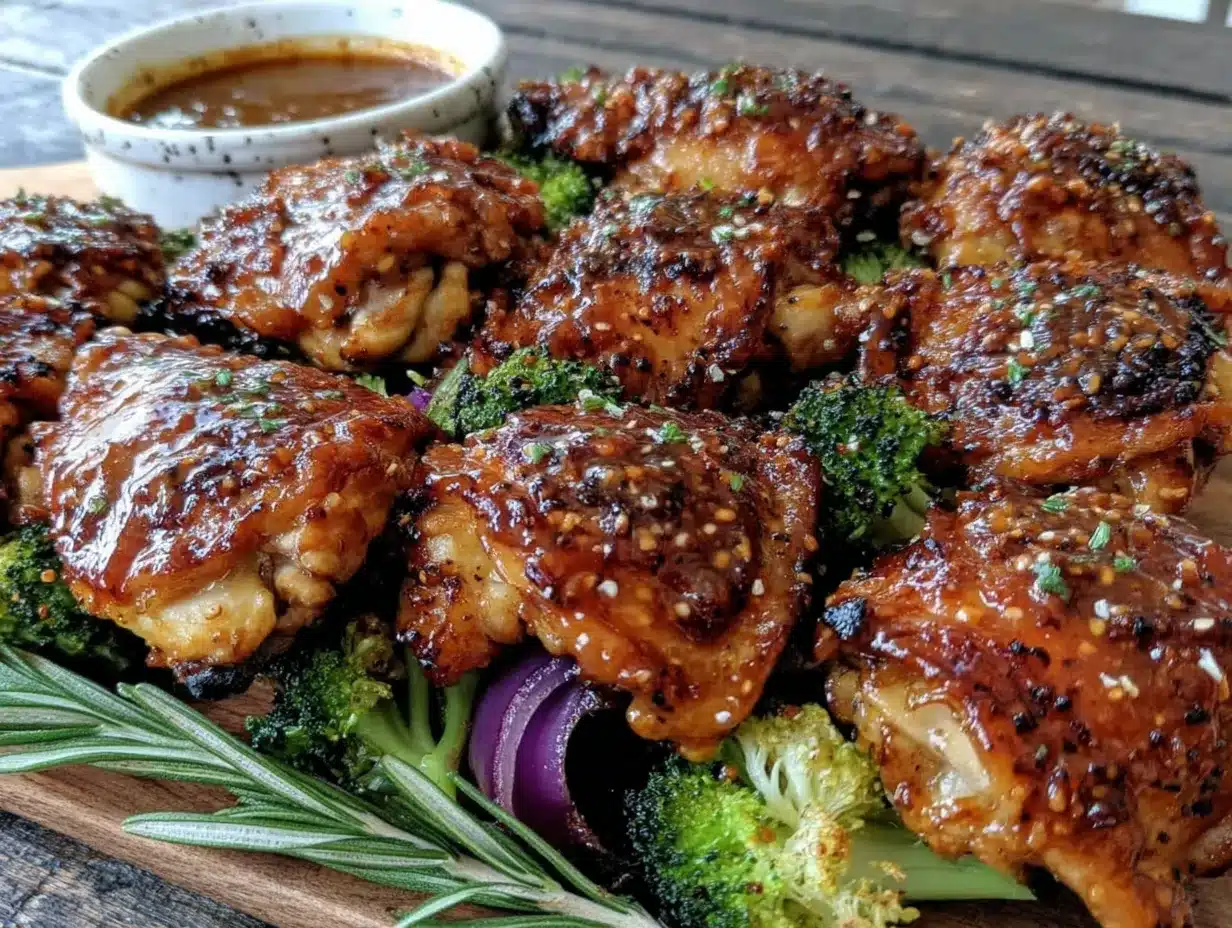
- Preheat your oven to 400°F (200°C). Getting the oven hot before the chicken goes in is important—that initial blast of heat helps the sauce start reducing right away. While the oven heats, pat your chicken thighs dry with paper towels. This step isn’t about searing anymore, but dry chicken still absorbs the sauce better than wet chicken.
- Make the honey mustard sauce. In your mixing bowl, combine ⅓ cup honey, ¼ cup Dijon mustard, 2 tablespoons whole grain mustard, 2 tablespoons olive oil, 3-4 minced garlic cloves, 1 tablespoon apple cider vinegar, 1 teaspoon salt, ½ teaspoon black pepper, 1 teaspoon paprika, and ½ teaspoon dried thyme. Whisk everything together until smooth. Taste it—it should be sweet, tangy, and a little punchy from the mustard. If it tastes too sharp, add another teaspoon of honey. If it’s too sweet, add a splash more vinegar.
- Arrange the chicken in your baking dish. Place the thighs in a single layer, skin-side up if you’re using skin-on pieces. Don’t crowd them too much—leave a little space between each piece so the sauce can circulate and reduce properly. If your dish is too small, use two smaller dishes or a larger rimmed baking sheet.
- Pour the sauce over the chicken. Use a spatula to scrape every last bit of that honey mustard goodness out of the bowl. Then use the back of a spoon or a pastry brush to spread the sauce evenly over each piece of chicken. Make sure every thigh is well-coated, especially any exposed skin or meat.
- Bake for 25 minutes. Place the dish on the middle rack of your oven. After 25 minutes, pull it out and use your tongs to carefully flip each piece of chicken. The sauce will have started to reduce and thicken, and the chicken should be beginning to brown. Spoon any sauce that’s settled at the bottom back over the chicken.
- Bake for another 15-20 minutes. Return the dish to the oven and continue baking until the chicken is deeply golden and the sauce is thick, sticky, and bubbling around the edges. The chicken should be cooked through—165°F at the thickest part if you’re using a thermometer. For bone-in thighs, I usually aim for 170°F because the dark meat stays juicier at that temperature.
- Broil for 2-3 minutes (optional but recommended). If you want that gorgeous caramelized top, switch your oven to broil for the last few minutes. Watch it carefully—honey burns fast. You’re looking for dark golden spots, not black. This step is worth the extra attention because it gives you those little crispy bits that are absolutely irresistible.
- Let the chicken rest for 5 minutes. Pull the dish out of the oven and let it sit on the counter. The sauce will continue to thicken as it cools slightly. Spoon some of the pan sauce over the chicken before serving. Sprinkle with fresh parsley or chives if you’re feeling fancy.
A note on timing: If you’re using boneless, skinless thighs, check them at the 25-minute mark. They cook faster than bone-in pieces and can dry out if left too long. You’re looking for an internal temperature of 165°F and a sticky, reduced sauce.
Cooking Tips & Techniques
I’ve made this recipe more times than I can count, and I’ve learned a few things along the way. Let me save you from making the same mistakes I did.
Don’t overcrowd the dish. The first time I made this, I crammed eight thighs into a dish that was clearly too small. The sauce pooled around them instead of coating them, and the chicken steamed rather than roasted. Give each piece a little breathing room. If you need to, use two dishes or a larger rimmed baking sheet. The sauce will reduce better and the chicken will brown more evenly.
Use room temperature chicken. I know we’re all guilty of pulling cold chicken straight from the fridge and throwing it in the oven. But letting the thighs sit on the counter for 15-20 minutes before they go into the dish helps them cook more evenly. Cold chicken can lower the temperature of the sauce, which means it takes longer to start reducing properly.
Watch the broiler like a hawk. I cannot stress this enough. Honey has a low burning point, and that beautiful golden glaze can turn into a bitter, blackened mess in about 30 seconds. If you’re broiling, stay by the oven and keep the door cracked so you can see what’s happening. Pull it out the moment you see those dark golden spots forming.
Make extra sauce. The sauce reduces quite a bit during cooking, and you’ll want extra for spooning over rice or dipping bread into. I usually make one and a half times the sauce recipe and reserve about a quarter cup to drizzle over the finished dish. Just don’t add the reserved sauce until after the chicken is done cooking—it’s best added fresh.
Let it rest. I know it’s tempting to dig in right away, but those five minutes of resting time are crucial. The sauce continues to thicken, the juices redistribute through the meat, and everything settles into something more cohesive. Plus, you won’t burn your mouth on molten honey—I’ve done that, and it’s not fun.
Variations & Adaptations
This recipe is surprisingly flexible, and I’ve tried quite a few variations over the years. Here are some of my favorites:
Spicy Honey Mustard Chicken: Add 1-2 teaspoons of sriracha or a pinch of cayenne pepper to the sauce. The heat cuts through the sweetness beautifully and gives the dish a nice kick. I make this version when I’m cooking for myself and want something with a little more punch.
Herb-Infused Version: Swap the dried thyme for fresh rosemary and add a couple of sprigs to the baking dish. Rosemary and honey are a classic combination, and the woody herb notes balance the sweetness perfectly. I’ve also tried it with fresh sage, which adds an earthy, almost peppery flavor that’s lovely in fall.
Lighter Version: Use boneless, skinless chicken breasts instead of thighs and reduce the honey to ¼ cup. Chicken breasts cook faster—check them at 20 minutes—and the lower fat content means a lighter dish overall. Just be careful not to overcook them, or they’ll dry out. An instant-read thermometer is your best friend here.
Maple Mustard Chicken: Substitute the honey with pure maple syrup for a deeper, more complex sweetness. The maple flavor pairs wonderfully with the mustard and gives the dish a slightly different character. This version is especially good in the colder months when you’re craving something cozy and warming.
One-Pan Meal: Add vegetables to the baking dish during the last 20 minutes of cooking. I’ve used broccoli florets, halved Brussels sprouts, and cubed sweet potatoes with great success. The vegetables soak up the honey mustard sauce and become tender and caramelized. Just make sure to cut them into similar-sized pieces so they cook evenly.
Dairy-Free Adaptation: This recipe is naturally dairy-free, so no changes needed there. But if you’re serving it with a side of mashed potatoes or a creamy grain, use plant-based milk and butter to keep the whole meal dairy-free.
Serving & Storage Suggestions
This honey mustard chicken is incredibly versatile when it comes to serving. Here’s how I like to enjoy it:
Serving temperature: Serve the chicken hot, straight from the oven, with plenty of pan sauce spooned over the top. The sauce will be thick and glossy at this point, coating each piece beautifully. If it’s cooled down too much, just pop the dish back in a 350°F oven for 5 minutes to warm through.
What to serve with it: The sticky, tangy sauce pairs wonderfully with simple sides that soak it up. I love serving this over steamed rice, quinoa, or couscous. Mashed potatoes are another favorite—the creamy texture balances the bold sauce perfectly. For vegetables, roasted asparagus, green beans, or a simple side salad with a light vinaigrette work beautifully. The sauce is also amazing drizzled over roasted vegetables if you want to go all-in on one-pan cooking.
Storage: Leftover chicken keeps beautifully in the refrigerator for up to 4 days. Store it in an airtight container with the sauce spooned over the top. The flavors actually deepen and meld together overnight, so leftovers might taste even better the next day.
Reheating: The best way to reheat this chicken is in the oven at 350°F for about 10 minutes, or until warmed through. The microwave works in a pinch, but it can make the sauce separate and the chicken rubbery. If you’re using the microwave, cover the dish with a damp paper towel to add a little moisture and heat in 30-second bursts.
Freezing: This recipe freezes surprisingly well. Let the chicken cool completely, then transfer it to a freezer-safe container with the sauce. It will keep for up to 3 months. Thaw overnight in the refrigerator and reheat in the oven as described above. The sauce might be a little thinner after freezing, but the flavor will still be excellent.
Flavor development: If you can plan ahead, this is one of those dishes that actually benefits from sitting. The chicken marinates in the sauce as it sits, and the flavors become more integrated. I’ve made this a day ahead and reheated it for dinner, and honestly, it was even better than the fresh version.
Nutritional Information & Benefits
While I’m not a nutritionist, I can share some general information about what’s in this dish. Per serving (based on 4 servings with bone-in, skin-on thighs), you’re looking at approximately:
- Calories: 380-420
- Protein: 28-32g
- Fat: 18-22g
- Carbohydrates: 22-26g
- Fiber: 0-1g
- Sugar: 18-22g (mostly from honey)
Chicken thighs are an excellent source of protein, iron, and B vitamins, which support energy metabolism and red blood cell production. The honey provides natural sweetness with some antioxidant properties, while mustard seeds contain selenium and magnesium. Garlic is known for its immune-supporting compounds, and olive oil adds healthy monounsaturated fats.
This recipe is naturally gluten-free and dairy-free, making it suitable for many dietary needs. If you’re watching your sugar intake, you can reduce the honey to ¼ cup without sacrificing too much of the sticky texture. The mustard and vinegar will still provide plenty of flavor.
What I love about this dish from a wellness perspective is that it feels indulgent without being heavy. You get that satisfying, comfort-food experience from real ingredients—no weird additives or processed sauces. It’s the kind of meal that makes you feel good about what you’re eating while still delivering on flavor.
Conclusion
This honey mustard chicken thighs recipe has earned a permanent spot in my weekly rotation, and I think it will in yours too. It’s the rare dish that delivers restaurant-quality flavor with minimal effort, using ingredients you probably already have in your kitchen. The sauce transforms into something almost magical in the oven—sticky, tangy, sweet, and savory all at once—while the chicken stays tender and juicy every single time.
What I love most about this recipe is that it taught me something important about cooking: sometimes the simplest approach really is the best. You don’t always need complicated techniques or extra steps to create something memorable. Sometimes you just need good ingredients, a little patience, and the willingness to try something different.
I’d love to hear how this turns out for you. Did you try any of the variations? Did you add your own twist? Drop a comment below and let me know—I read every single one, and your feedback helps me create better recipes for all of us. And if you loved this as much as I do, share it with a friend who needs a reliable weeknight dinner in their life. Happy cooking!
Frequently Asked Questions
Can I use chicken breasts instead of thighs?
Absolutely! Boneless, skinless chicken breasts work well here. Just reduce the cooking time to about 25-30 minutes total, and check for doneness at 165°F. Chicken breasts can dry out faster than thighs, so keep an eye on them.
Can I make this recipe ahead of time?
Yes, and it actually gets better! You can assemble the dish up to 24 hours in advance, cover it, and refrigerate. When you’re ready to cook, add about 10 minutes to the baking time since you’re starting from cold. The flavors meld together beautifully overnight.
Is this recipe gluten-free?
Yes, as written this recipe is naturally gluten-free. Just double-check your Dijon mustard and whole grain mustard labels to make sure no gluten-containing ingredients have been added. Most brands are gluten-free, but it’s always worth verifying.
Can I use chicken with the bone in?
Definitely—and I actually prefer it that way. Bone-in thighs have more flavor and stay juicier during cooking. Just add about 10 minutes to the baking time and use an instant-read thermometer to check for doneness at 170°F for the best texture.
What if my sauce is too thin at the end of cooking?
If your sauce hasn’t reduced enough, remove the chicken to a plate and transfer the baking dish to the stovetop. Simmer the sauce over medium heat for 3-5 minutes, stirring constantly, until it thickens to your liking. You can also add a cornstarch slurry (1 teaspoon cornstarch mixed with 1 tablespoon cold water) if you need a quick fix.
Pin This Recipe!
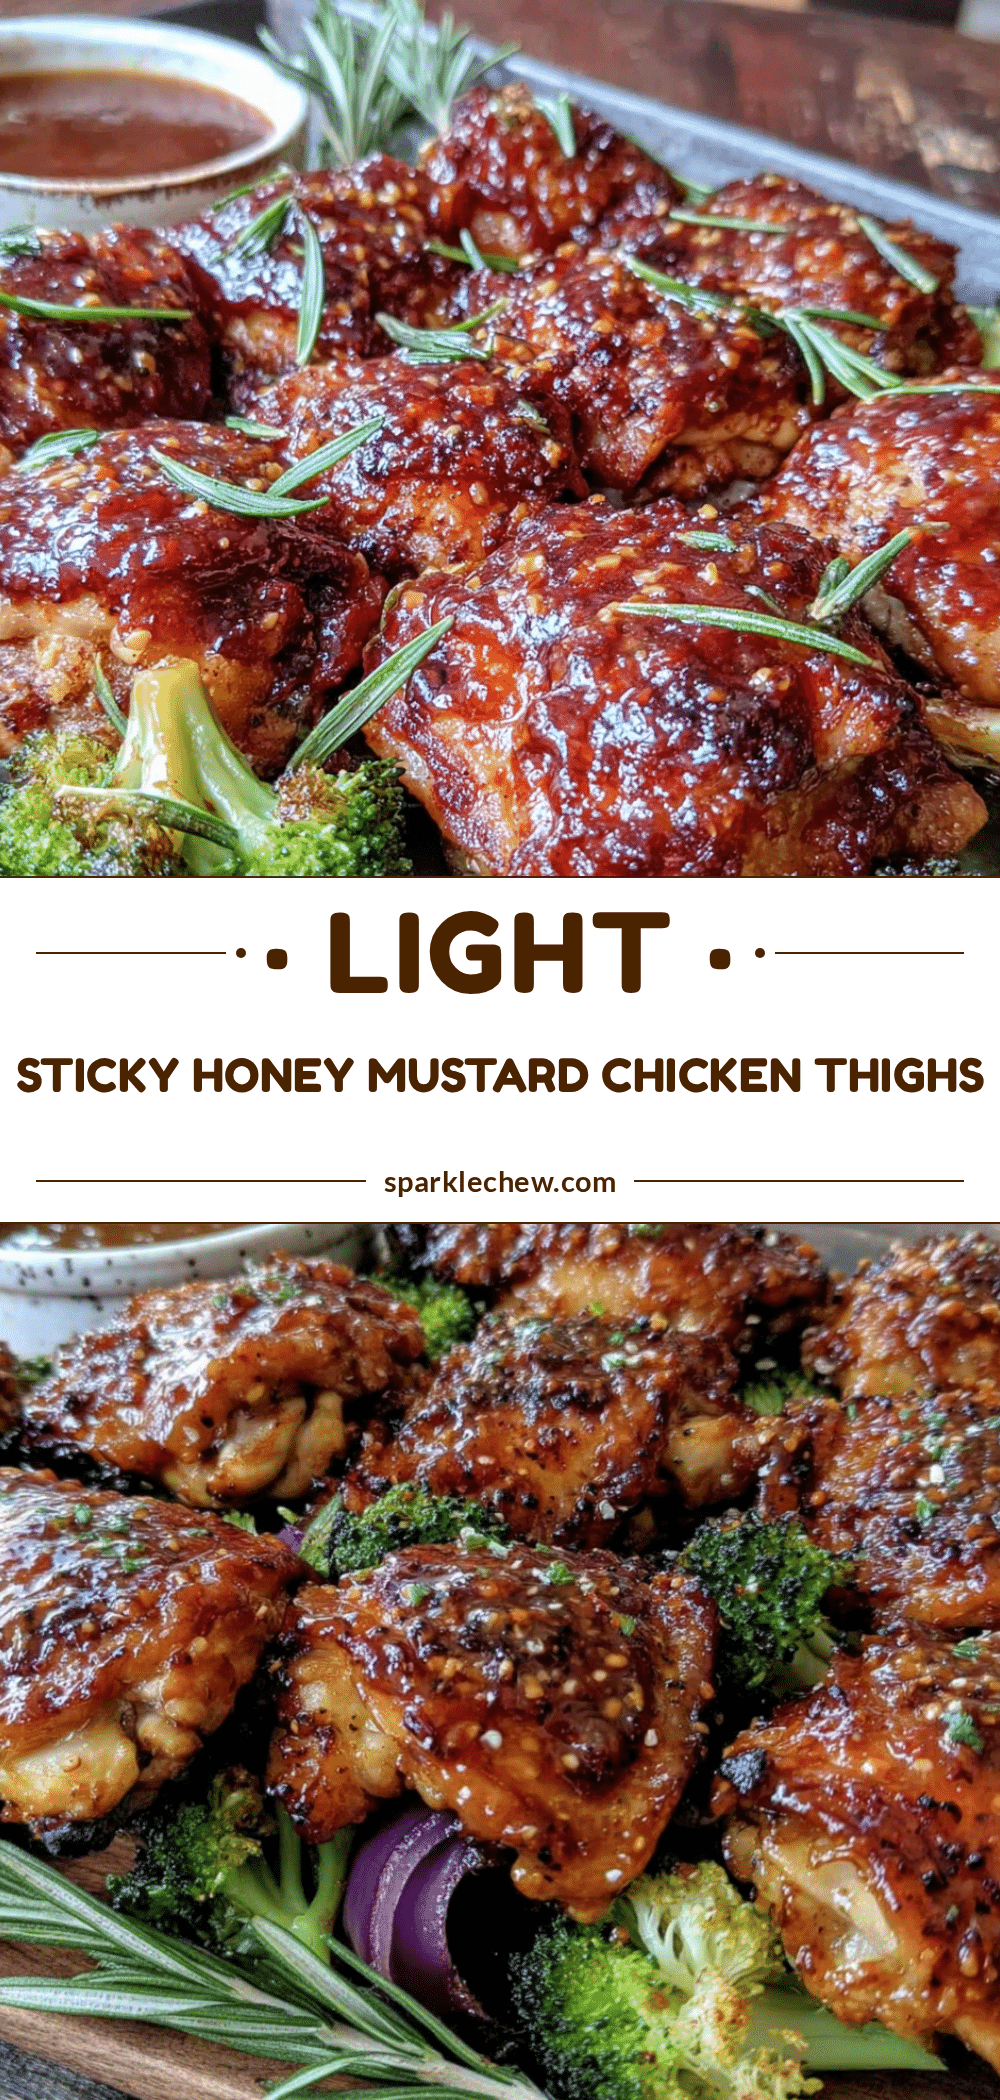
Best Easy Honey Mustard Chicken Thighs Recipe
This honey mustard chicken thighs recipe is a quick and easy weeknight dinner that requires only 10 minutes of prep and delivers sticky, golden, and tender chicken every time. Skip the sear and let the oven do the work for a beautifully glazed dish that’s perfect for busy evenings.
- Prep Time: 10 minutes
- Cook Time: 40 minutes
- Total Time: 50 minutes
- Yield: 4 servings 1x
- Category: Main Course
- Cuisine: American
Ingredients
- 6–8 chicken thighs (bone-in or boneless, skin-on or skinless)
- ⅓ cup honey
- ¼ cup Dijon mustard
- 2 tablespoons whole grain mustard
- 2 tablespoons olive oil
- 3–4 cloves garlic, minced
- 1 tablespoon apple cider vinegar
- 1 teaspoon salt
- ½ teaspoon black pepper, freshly ground
- 1 teaspoon paprika (smoked or sweet)
- ½ teaspoon dried thyme
- Fresh parsley or chives, chopped (optional garnish)
Instructions
- Preheat your oven to 400°F (200°C). Pat chicken thighs dry with paper towels.
- In a mixing bowl, whisk together honey, Dijon mustard, whole grain mustard, olive oil, minced garlic, apple cider vinegar, salt, black pepper, paprika, and dried thyme until smooth. Taste and adjust sweetness or tanginess as desired.
- Arrange chicken thighs in a single layer in a 9×13-inch baking dish, skin-side up if using skin-on pieces. Leave space between each piece.
- Pour the honey mustard sauce over the chicken, using a spatula to scrape the bowl clean. Spread the sauce evenly over each piece with the back of a spoon or pastry brush.
- Bake for 25 minutes. Remove from oven and carefully flip each piece of chicken using tongs. Spoon any sauce from the bottom back over the chicken.
- Return to oven and bake for another 15-20 minutes, until chicken is deeply golden and sauce is thick and sticky. Internal temperature should reach 165°F (or 170°F for bone-in thighs).
- Optional: Broil for 2-3 minutes for a caramelized top, watching carefully to prevent burning.
- Let chicken rest for 5 minutes. Spoon pan sauce over chicken before serving. Garnish with fresh parsley or chives if desired.
Notes
For boneless, skinless thighs, check at 25 minutes total cooking time. For bone-in thighs, aim for 170°F internal temperature. Make extra sauce by increasing ingredients by 1.5 times and reserve ¼ cup to drizzle after cooking. Let chicken rest 5 minutes before serving. Leftovers keep in the refrigerator for up to 4 days or freeze for up to 3 months.
Nutrition
- Serving Size: 1 serving (2 chicken
- Calories: 400
- Sugar: 20
- Sodium: 800
- Fat: 20
- Saturated Fat: 5
- Carbohydrates: 24
- Protein: 30
Keywords: honey mustard chicken, chicken thighs, easy weeknight dinner, baked chicken, gluten-free, dairy-free