Love this? Save it for later!
Share the inspiration with your friends
I was standing in the checkout line at the hardware store—of all places—when the cashier, a woman named Dottie with silver hair and glasses on a beaded chain, started telling me about her holiday candy-making operation. I wasn’t expecting cooking advice from a hardware store cashier, but there I was, holding a new paintbrush and a bag of replacement screws, listening to her describe exactly how to make three-ingredient peppermint bark fudge. She told me she makes twelve batches every December, gives them away to the mail carrier, the librarian, and her entire book club. I almost laughed, honestly. Three ingredients? From a hardware store cashier? But Dottie was serious, and she even wrote the measurements on the back of my receipt with a pen she pulled from her apron pocket.
The thing is, I went home and made it that same afternoon. And let me tell you—it worked. It worked so well that I texted a photo to my sister, who immediately demanded the recipe. That was three years ago, and this easy peppermint bark fudge has become my official holiday secret weapon. I make it for cookie swaps, teacher gifts, and those last-minute “oh no, I need a hostess gift” moments. The best part? It takes about ten minutes of actual work, and people lose their minds over it. Maybe you’ve been there—staring down a long holiday to-do list, wondering how you’re going to get everything done. This recipe is the answer you didn’t know you needed.
There’s something magical about a recipe that requires almost no effort but looks like you spent hours in the kitchen. That’s this peppermint bark fudge. It’s smooth, it’s crunchy, it’s perfectly festive, and it’s impossible to mess up. I mean, I once made it while simultaneously wrapping presents and talking on the phone, and it still turned out perfect. Dottie from the hardware store knew what she was talking about.
Why You’ll Love This Recipe
Let me be real with you—I’ve tested a lot of holiday candy recipes over the years. Some are finicky. Some require a candy thermometer and nerves of steel. This peppermint bark fudge is none of those things. It’s the recipe I turn to when I want to look impressive without breaking a sweat.
- Quick & Easy: This comes together in about 10 minutes of active time. After that, it’s just a couple of hours in the fridge to set. Perfect for busy holiday weeks or those “I completely forgot” moments.
- Simple Ingredients: You only need three things—white chocolate chips, sweetened condensed milk, and crushed peppermint candies. No fancy baking aisle hunting required.
- Perfect for Gifting: This fudge slices cleanly, stacks beautifully in tins, and stays fresh for weeks. It’s my go-to for holiday gift bags and cookie plates.
- Crowd-Pleaser: I’ve yet to meet someone who doesn’t love this. Kids go for the peppermint crunch, adults appreciate the creamy texture, and everyone asks for the recipe.
- Unbelievably Delicious: The combination of creamy white chocolate fudge with crunchy peppermint pieces is honestly next-level. It’s like a candy cane and a truffle had a perfect holiday baby.
What makes this recipe different from other bark or fudge recipes? It’s the texture. Most peppermint bark uses dark or milk chocolate, which can be overpowering. This white chocolate base lets the peppermint shine without competing. Plus, the sweetened condensed milk creates an incredibly smooth, melt-in-your-mouth consistency that you just don’t get with traditional chocolate bark. It’s comfort food reimagined—faster, simpler, but with the same soul-soothing satisfaction that makes holiday baking so special.
What Ingredients You Will Need
This recipe uses three simple, wholesome ingredients to deliver bold flavor and satisfying texture without the fuss. You likely already have two of them in your pantry right now.
- White chocolate chips (12 ounces or 340 grams): I recommend Ghirardelli or Guittard for the best melt and flavor. Avoid white morsels labeled “white baking chips”—they often lack cocoa butter and don’t melt as smoothly. Look for real white chocolate with cocoa butter listed in the ingredients. (adds richness and creamy texture)
- Sweetened condensed milk (14 ounces or 396 grams, one can): This is the secret to the fudge texture. Don’t substitute evaporated milk—they’re not the same. Sweetened condensed milk adds sweetness and creates that dense, creamy fudge consistency. (use dairy-free sweetened condensed coconut milk if needed)
- Crushed peppermint candies (1/2 cup or about 60 grams): You can use candy canes, starlight mints, or pre-crushed peppermint pieces. I prefer candy canes because they crush into a mix of fine powder and small chunks, which gives the best texture. (adds crunch and minty flavor)
For the topping, you’ll want an extra 2 tablespoons of crushed peppermint for sprinkling on top. This is purely decorative but makes the fudge look professionally made.
One quick tip: if you’re using full-sized candy canes, place them in a zip-top bag and crush them with a rolling pin or the bottom of a heavy skillet. You want a mix of fine pieces and slightly larger chunks. Too powdery and you lose the crunch; too chunky and it’s hard to cut through.
For a dairy-free version, use dairy-free white chocolate chips and sweetened condensed coconut milk. The texture will be slightly softer but still delicious. I’ve tested this with both, and honestly, my dairy-free friends couldn’t tell the difference.
Equipment Needed
You don’t need a fancy kitchen setup for this one. Here’s what you’ll need:
- 8×8-inch baking pan: This is the perfect size for fudge that’s about 3/4 inch thick. If you only have a 9×9, your fudge will be slightly thinner—still works, just keep an eye on chilling time.
- Parchment paper: Absolutely essential for easy removal. Leave overhang on two sides so you can lift the fudge out like a little edible blanket.
- Medium saucepan: For melting the chocolate and condensed milk together. A heavy-bottomed pan works best to prevent scorching.
- Silicone spatula: For stirring. Metal spoons can scratch your pan, and you want to be gentle while the chocolate melts.
- Rolling pin or heavy skillet: For crushing the peppermint candies. A meat mallet works too—just wrap the candies in a kitchen towel first to contain the flying pieces.
- Measuring cups and spoons: Because precision matters, even with just three ingredients.
I’ve made this fudge in a rental cabin kitchen with a warped saucepan and a butter knife for a spatula. It still worked. You really don’t need anything fancy.
Preparation Method
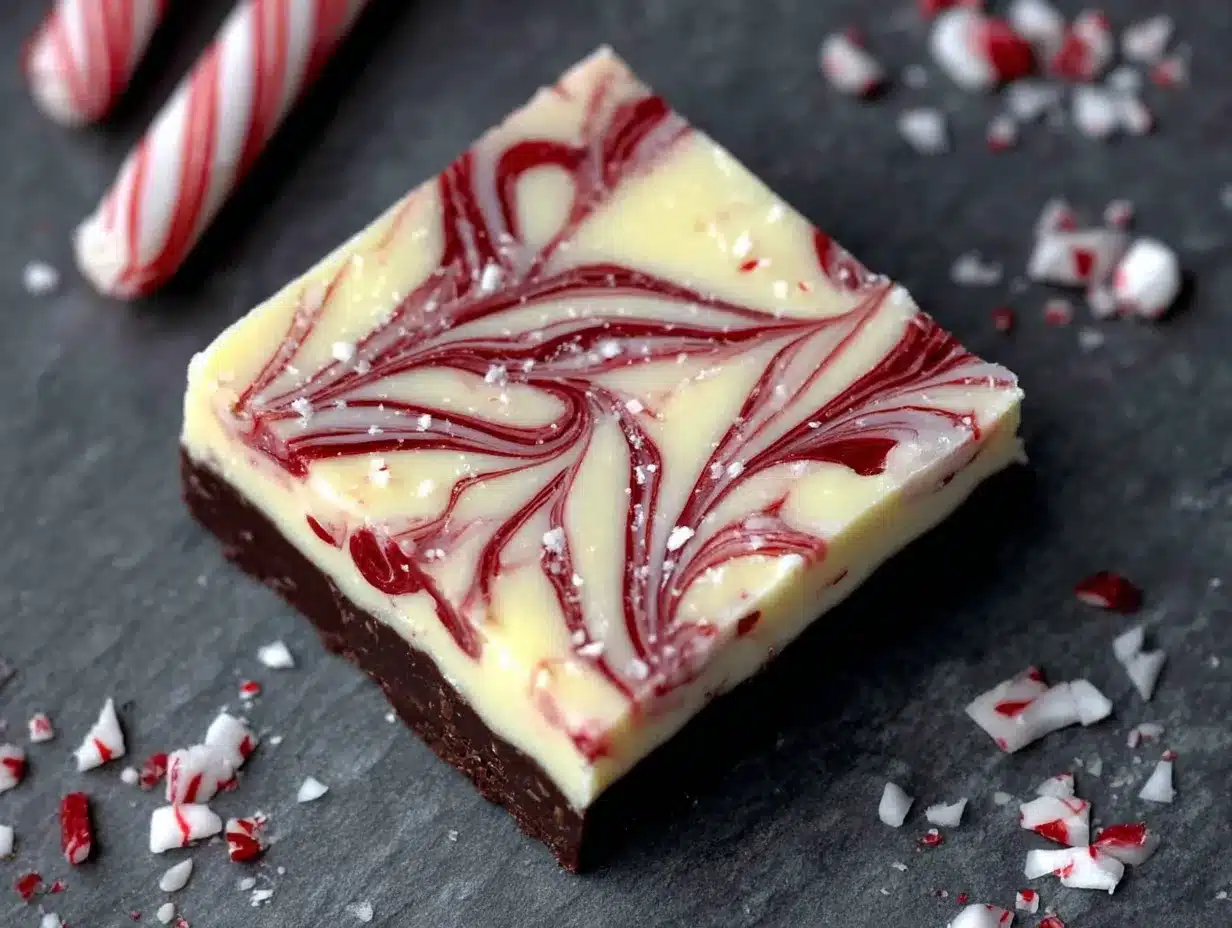
Let’s get to the good part. This recipe moves fast, so I recommend having everything measured and ready before you turn on the stove.
- Prep your pan: Line your 8×8 baking pan with parchment paper, leaving about 2 inches of overhang on two opposite sides. This creates handles for lifting the fudge out later. Lightly spray the paper with nonstick cooking spray if you’re nervous about sticking—though I’ve never had an issue.
- Crush the peppermint: Unwrap about 12-15 candy canes (or enough to get 1/2 cup crushed, plus 2 tablespoons for topping). Place them in a sturdy zip-top bag. Seal it, then go to town with your rolling pin. You want a mix of fine powder and small pea-sized chunks. Set aside 2 tablespoons for the top.
- Melt the base: In a medium saucepan over low heat, combine the white chocolate chips and the entire can of sweetened condensed milk. Stir constantly with your silicone spatula. This is not the time to walk away—white chocolate can scorch in seconds. Keep stirring until the chips are mostly melted and the mixture is smooth and glossy. This takes about 5-7 minutes.
- Add the crunch: Remove the pan from heat. Immediately stir in 1/2 cup of the crushed peppermint. Work quickly—the mixture will start to thicken as it cools. Stir until the peppermint is evenly distributed throughout the fudge.
- Spread and top: Pour the fudge mixture into your prepared pan. Use the spatula to spread it evenly into all corners. It will be thick and slightly sticky—that’s normal. Immediately sprinkle the reserved 2 tablespoons of crushed peppermint over the top. Gently press them in with your fingers or the spatula so they stick.
- Chill: Place the pan in the refrigerator, uncovered, for at least 2 hours. I’ve left it overnight with no issues. The fudge should be firm to the touch and pull away slightly from the parchment paper when it’s ready.
- Slice and serve: Lift the fudge out of the pan using the parchment overhang. Place it on a cutting board. Use a sharp chef’s knife to cut it into squares—I go for 1-inch pieces, which makes about 64 bite-sized treats. For clean cuts, wipe the knife between slices with a damp paper towel.
Here’s a sensory cue: when you’re melting the chocolate, you’ll know it’s ready when the mixture looks like thick, glossy frosting and you can drag your spatula through it and see the bottom of the pan for a second before it flows back together. That’s the sweet spot.
One warning: don’t be tempted to speed things up by melting the chocolate in the microwave. I tried it once and ended up with grainy, separated fudge. Low and slow on the stove is the way to go.
Cooking Tips & Techniques
After making this peppermint bark fudge at least thirty times (I’m not exaggerating), I’ve learned a few things the hard way. Here’s what I wish someone had told me.
Don’t rush the melting process. White chocolate is temperamental. If you crank the heat to high, it will seize up into a grainy, clumpy mess. Keep the flame on low and stir constantly. If you see any spots starting to brown, remove the pan from heat immediately and keep stirring—the residual heat will finish the job.
Room temperature ingredients matter. I know, I know—this is supposed to be easy. But if your sweetened condensed milk is straight from the fridge, it can cause the white chocolate to seize. Let both ingredients sit on the counter for 15 minutes before you start. Trust me on this one.
Crush peppermint strategically. I used to crush candy canes into a fine dust, thinking more even distribution was better. Wrong. The fudge needs texture contrast. Aim for a mix of powder (which melts into the fudge and flavors it throughout) and small chunks (which give you that satisfying crunch). Think of it like chocolate chip cookie dough—you want pockets of texture, not uniform distribution.
Patience with chilling. I once tried to cut the fudge after only an hour in the fridge. It was a sticky, messy disaster. Two hours is the minimum. If you’re in a hurry, pop it in the freezer for 45 minutes, but watch it carefully—frozen fudge is hard to cut cleanly.
Storage matters. This fudge stays perfect in an airtight container in the fridge for up to three weeks. But here’s the trick: let it sit at room temperature for 5 minutes before serving. Cold fudge is firm and less flavorful. Slightly warmed fudge is creamy, aromatic, and absolutely irresistible.
Variations & Adaptations
One of the best things about this recipe is how easy it is to customize. Here are some variations I’ve tried and loved.
Dark chocolate version: Swap the white chocolate chips for dark or semi-sweet chocolate chips. The bitterness of the dark chocolate balances the sweetness of the condensed milk beautifully. I’d recommend using 60% cacao chips for the best balance. This version pairs wonderfully with orange zest—add a teaspoon of orange zest along with the peppermint for a chocolate-orange-mint combo that’s absolutely divine.
Mint chocolate chip version: Add 1/2 cup of mini chocolate chips to the fudge along with the crushed peppermint. The tiny chocolate flecks melt slightly into the white fudge, creating a mint chocolate chip ice cream effect in solid form. My niece requests this version every single year.
Vegan adaptation: Use dairy-free white chocolate chips (I like the Enjoy Life brand) and a can of sweetened condensed coconut milk. The texture will be slightly softer, so you’ll want to keep it refrigerated until just before serving. The flavor is still fantastic—I’ve brought this to holiday parties and no one guessed it was vegan.
Peppermint bark fudge cookies: Here’s a fun twist I stumbled upon by accident. After slicing the fudge, chop it into tiny pieces and fold them into sugar cookie dough before baking. The fudge pieces melt slightly, creating pockets of peppermint flavor throughout the cookie. Dangerous. So dangerous.
Spiced version: Add 1/4 teaspoon of cinnamon and a pinch of nutmeg along with the peppermint. It gives the fudge a subtle chai-like warmth that’s perfect for winter gatherings. I made this for a holiday open house and it disappeared faster than the traditional version.
Serving & Storage Suggestions
This peppermint bark fudge is incredibly versatile when it comes to serving. Here’s how I handle it.
Serving temperature: I prefer serving this fudge slightly chilled—straight from the fridge, let it sit at room temperature for about 5 minutes. The texture is firm but creamy, and the peppermint crunch is at its peak. If you leave it out too long, the fudge softens and the peppermint pieces can get sticky.
Presentation ideas: For a simple but stunning presentation, arrange the fudge squares on a white platter and dust with a little powdered sugar. For gift-giving, layer the squares in a decorative tin with parchment paper between each layer. I like to add a few extra crushed candy canes on top for visual appeal. If you’re making a cookie plate, these fudge squares pair beautifully with classic sugar cookies or gingerbread—the creamy mint flavor contrasts perfectly with spiced cookies.
Storage instructions: Store the fudge in an airtight container in the refrigerator for up to 3 weeks. Yes, three weeks! The flavor actually improves after a day or two as the peppermint mellows and melds with the white chocolate. For longer storage, you can freeze the fudge for up to 3 months. Wrap each layer in parchment paper, then place the entire block in a freezer-safe bag. Thaw overnight in the refrigerator before slicing or serving.
Reheating note: You really shouldn’t need to reheat this fudge. If it’s too firm straight from the fridge, just let it sit at room temperature for 10 minutes. If you want a warm treat (which I sometimes do on cold evenings), microwave a single piece for 5-7 seconds. It will become soft and almost truffle-like. Be careful not to overheat—melted fudge is just a puddle of sadness.
Flavor development: Here’s a little secret: this fudge is actually better on day two or three. The peppermint flavor infuses more deeply into the white chocolate, and the texture becomes even creamier. So don’t stress about making it the day before—it’s actually ideal.
Nutritional Information & Benefits
Let’s be honest—this is a treat, not a health food. But if you’re going to indulge, here’s what you’re working with.
Estimated nutritional values (per 1-inch square, based on 64 pieces):
- Calories: 85
- Total Fat: 4g
- Saturated Fat: 2.5g
- Cholesterol: 5mg
- Sodium: 20mg
- Total Carbohydrates: 12g
- Sugars: 11g
- Protein: 1g
Dietary considerations: This recipe contains dairy and may contain trace amounts of soy (depending on your chocolate brand). It’s gluten-free as written, making it a safe option for those with celiac disease or gluten sensitivity. For vegan and dairy-free options, see the variations section above.
Health benefits of key ingredients: Peppermint has been used for centuries to aid digestion and soothe upset stomachs—perfect after a heavy holiday meal. White chocolate contains calcium from milk solids, though in small amounts. And honestly? The biggest benefit here is the joy it brings. There’s something to be said for a treat that makes people smile, brings back childhood memories, and creates new holiday traditions. That counts for something.
My personal perspective: I don’t believe in demonizing dessert. This fudge is part of my holiday tradition, and I enjoy it without guilt. A single square is perfectly satisfying—rich enough to feel like a real treat, small enough that you don’t need a second. Portion control is built right in.
Conclusion
So there you have it—the easiest, most impressive holiday candy you’ll ever make. Three ingredients, ten minutes of work, and a result that looks like you spent hours in a professional kitchen. Dottie from the hardware store would be proud.
What I love most about this peppermint bark fudge is how it brings people together. I’ve made it for stressed-out coworkers, for my kid’s teachers, for neighbors I barely know. Every single time, the response is the same: a surprised smile, a quick bite, and then “Wait, you made this? Can I have the recipe?” It’s a little gift of joy wrapped in parchment paper.
I hope you’ll make this recipe your own. Add your favorite mix-ins, tweak the chocolate ratio, crush your peppermint as fine or as chunky as you like. That’s the beauty of simple recipes—they leave room for your personality to shine through.
If you make this fudge, I’d love to hear about it. Drop a comment below and tell me how it turned out, what variations you tried, or who you gifted it to. And if you’re feeling generous, share a photo—there’s nothing I love more than seeing these little squares of happiness in kitchens around the world. Happy holidays, friend. You’ve got this.
Frequently Asked Questions
Can I use milk chocolate instead of white chocolate?
Absolutely. Milk chocolate will create a richer, sweeter fudge with a different flavor profile. Just keep in mind that milk chocolate is more sensitive to heat, so stir constantly and remove from heat as soon as it’s smooth. The texture will be slightly softer than the white chocolate version.
Why did my fudge turn out grainy?
Grainy fudge usually means the white chocolate got too hot or seized. Always melt on low heat and stir constantly. If you see any spots starting to brown or the mixture looking separated, remove from heat immediately and whisk vigorously. Sometimes you can save it by adding a tablespoon of warm sweetened condensed milk and stirring like crazy.
Can I make this without a stove?
Yes! You can melt the white chocolate and sweetened condensed milk in a microwave-safe bowl. Microwave in 30-second bursts, stirring thoroughly between each, until smooth. Be careful—white chocolate can burn easily in the microwave. I recommend using 50% power if your microwave has that setting.
How do I get clean, sharp cuts?
Use a sharp chef’s knife and wipe it clean with a damp paper towel between each cut. For the cleanest edges, chill the fudge for at least 3 hours or overnight. If your fudge is still sticky, pop it in the freezer for 15 minutes before cutting.
Can I add other toppings?
Definitely. Try sprinkling crushed pretzels for a salty-sweet twist, drizzle melted dark chocolate over the top before chilling, or add a sprinkle of sea salt flakes right after the peppermint. Just don’t overload the top—too many toppings can make the fudge difficult to cut cleanly.
Pin This Recipe!
Easy 3-Ingredient Peppermint Bark Fudge Recipe

This easy peppermint bark fudge requires only three ingredients and ten minutes of active time, making it the perfect holiday treat for gifting or last-minute hostess gifts. Creamy white chocolate fudge with crunchy peppermint pieces is a crowd-pleaser that looks impressive with minimal effort.
- Prep Time: 10 minutes
- Cook Time: 7 minutes
- Total Time: 2 hours 17 minutes (includes chilling)
- Yield: 64 servings 1x
- Category: Dessert
- Cuisine: American
Ingredients
- 12 ounces (340 grams) white chocolate chips (preferably Ghirardelli or Guittard)
- 14 ounces (396 grams) sweetened condensed milk (one can)
- 1/2 cup (about 60 grams) crushed peppermint candies (plus 2 tablespoons for topping)
Instructions
- Line an 8×8-inch baking pan with parchment paper, leaving about 2 inches of overhang on two opposite sides. Lightly spray with nonstick cooking spray if desired.
- Unwrap about 12-15 candy canes (or enough to get 1/2 cup crushed, plus 2 tablespoons for topping). Place them in a sturdy zip-top bag and crush with a rolling pin or heavy skillet until you have a mix of fine powder and small pea-sized chunks. Set aside 2 tablespoons for topping.
- In a medium saucepan over low heat, combine the white chocolate chips and the entire can of sweetened condensed milk. Stir constantly with a silicone spatula until the chips are mostly melted and the mixture is smooth and glossy, about 5-7 minutes.
- Remove the pan from heat. Immediately stir in 1/2 cup of the crushed peppermint. Work quickly as the mixture will start to thicken.
- Pour the fudge mixture into the prepared pan and spread evenly. Immediately sprinkle the reserved 2 tablespoons of crushed peppermint over the top and gently press them in.
- Place the pan in the refrigerator, uncovered, for at least 2 hours (or overnight) until firm.
- Lift the fudge out of the pan using the parchment overhang. Place on a cutting board and cut into 1-inch squares (about 64 pieces). Wipe the knife clean between cuts for neat edges.
Notes
For best results, let sweetened condensed milk and white chocolate chips sit at room temperature for 15 minutes before starting. Do not microwave the chocolate mixture as it can cause graininess. The fudge is actually better on day two or three as the peppermint flavor infuses more deeply. Store in an airtight container in the refrigerator for up to 3 weeks, or freeze for up to 3 months. Let sit at room temperature for 5 minutes before serving for optimal texture.
Nutrition
- Serving Size: 1 square (1-inch pie
- Calories: 85
- Sugar: 11
- Sodium: 20
- Fat: 4
- Saturated Fat: 2.5
- Carbohydrates: 12
- Protein: 1
Keywords: peppermint bark fudge, easy fudge, 3-ingredient fudge, holiday candy, white chocolate fudge, peppermint candy, no-bake dessert


