Love this? Save it for later!
Share the inspiration with your friends
The kindergarten Halloween party was in six hours and I had completely forgotten. I mean, I’d signed up for the treat table weeks ago, but between work deadlines and a sick kid, it had slipped my mind entirely. Every other parent would be bringing those perfectly decorated cookies or those elaborate cake pops that look like they belong in a bakery window. I had a package of chocolate pudding mix, some crushed-up chocolate sandwich cookies, and a bag of gummy worms that my son had talked me into buying at the grocery store checkout.
I stood in my kitchen, staring at these random ingredients, feeling that familiar knot of panic in my stomach. You know that feeling when you’ve got nothing and you need something? I grabbed a few clear plastic cups from the back of the cabinet and just started layering. Crushed cookies, a dollop of pudding, more cookies, a couple of worms poking out. Honestly, I wasn’t trying to be clever — I was just trying not to show up empty-handed.
Well, let me tell you, those Easy Spooky Gummy Worm Dirt Cups were the first thing to disappear at that party. The kids went absolutely wild for them. They kept pulling the worms out and pretending to scream, and the parents were asking me for the recipe like I’d spent hours on them. I just smiled and shrugged, too embarrassed to admit I’d thrown them together in about ten minutes while my coffee was brewing. But that’s the thing about this recipe — it looks like you tried so hard when you barely tried at all. And that, right there, is why I keep coming back to it.
Why You’ll Love This Recipe
These Easy Spooky Gummy Worm Dirt Cups are the kind of recipe that makes you look like a Halloween hero without actually having to be one. I’ve tested this in every possible scenario — for my own kids, for classroom parties, for neighborhood get-togethers — and it works every single time. Here’s why this one is different:
- Quick & Easy: You can have these ready in under 15 minutes. No baking, no complicated steps, no waiting for things to cool. Just layer and serve.
- Simple Ingredients: You probably have most of this stuff in your pantry right now. Chocolate pudding mix, milk, chocolate sandwich cookies, and gummy worms. That’s it.
- Perfect for Halloween: Whether it’s a classroom party, a trunk-or-treat event, or just a spooky movie night at home, these fit right in.
- Crowd-Pleaser: I’ve never met a kid who didn’t love these. Grown-ups too, honestly. There’s something about digging into a cup of “dirt” that brings out the kid in everyone.
- Unbelievably Delicious: The combination of creamy chocolate pudding and crunchy cookie crumble is just perfect. And the gummy worms? They add that chewy, fruity surprise that makes every bite fun.
What really sets this recipe apart is how customizable it is. I’ve made these with dairy-free pudding for kids with allergies, and they turned out just as good. I’ve used different flavors of pudding — chocolate is the classic, but I’ve done vanilla with crushed graham crackers for a “sand” version that was a hit at a beach-themed party. The basic idea is so simple that you can adapt it to whatever you have on hand.
This isn’t just another Halloween dessert. It’s the one that makes you close your eyes after the first bite — not because it’s fancy, but because it’s exactly what you wanted. Comfort food with a spooky twist, made in minutes, and guaranteed to make everyone smile.
What Ingredients You Will Need
This recipe uses simple, everyday ingredients to create something that feels special. Most of these are pantry staples, which is exactly what you want when you’re in a pinch. Let me walk you through each one.
- 1 (3.9 oz) package instant chocolate pudding mix — I prefer Jell-O brand for its consistent texture, but any brand works. The instant kind is key here — you don’t want the cook-and-serve version, because it needs time to set and won’t firm up properly for this recipe.
- 2 cups cold milk — Whole milk gives the richest, creamiest pudding, but I’ve used 2% and even oat milk with great results. Just avoid skim milk — the pudding needs some fat to set up properly. If you’re using a dairy-free milk, go for one that’s barista-style or has a little thickness to it.
- 20 chocolate sandwich cookies — Oreos are the obvious choice, but store-brand versions work just fine. You’ll be crushing these up, so it doesn’t matter if they’re a little broken in the package. I’ve also used gluten-free chocolate sandwich cookies for a GF version, and they crushed up beautifully.
- 1 (4.25 oz) bag gummy worms — This is where you can have some fun. I like the classic sour worms for that extra tangy kick against the sweet pudding, but regular gummy worms work great too. Look for bright, colorful worms — the contrast against the dark “dirt” is what makes these so visually striking.
- Optional: Green or orange sprinkles — Not necessary, but they add a fun pop of color on top. I sometimes use Halloween-themed sprinkles with little pumpkins or ghosts for extra spooky points.
- Optional: Small plastic spiders or Halloween rings — These are great for decoration on top. Kids love finding a little toy in their dessert. Just make sure to warn them it’s there so nobody accidentally eats plastic!
One thing I’ve learned from making these dozens of times is that the quality of your gummy worms matters more than you’d think. Cheap gummy worms can be tough and rubbery, while better-quality ones are soft and chewy. I’ve found that Albanese or Black Forest brands have the best texture. They stay soft even after sitting in the pudding for a while, which is important if you’re making these ahead of time.
For the crushed cookies, you want a mix of fine crumbs and slightly bigger pieces. The fine crumbs look like real dirt, while the bigger pieces give you that nice crunchy texture. I’ll show you exactly how to get that perfect consistency in the preparation method.
Equipment Needed
You don’t need anything fancy for these Easy Spooky Gummy Worm Dirt Cups. That’s part of the beauty of this recipe. Here’s what you’ll need:
- 6 (6-8 oz) clear plastic cups or glass cups — Clear cups are the way to go for these. You want people to see the layers of “dirt” and the worms poking out. I buy the plastic cups at the dollar store in packs of 20. They’re cheap, disposable, and perfect for parties. If you’re making these at home, small mason jars or even clear tumblers work beautifully.
- Medium mixing bowl — For making the pudding. Any bowl works, but a glass or ceramic bowl is easier to clean than plastic.
- Whisk — You need this to mix the pudding. A wire whisk works best to get out all the lumps.
- Food processor or zip-top bag and rolling pin — For crushing the cookies. I’ve done it both ways. The food processor is faster and gives you a more even crumb. But if you don’t have one, just put the cookies in a zip-top bag and go at them with a rolling pin. It’s oddly satisfying, honestly.
- Measuring cups and spoons — For the milk and any optional ingredients.
- Small spatula or spoon — For layering the pudding and crumbs.
That’s it. No mixer, no oven, no special tools. If you have these six things, you’re ready to go. I’ve made these in hotel rooms for last-minute Halloween parties, using a coffee mug and a butter knife. The recipe is that forgiving.
Preparation Method
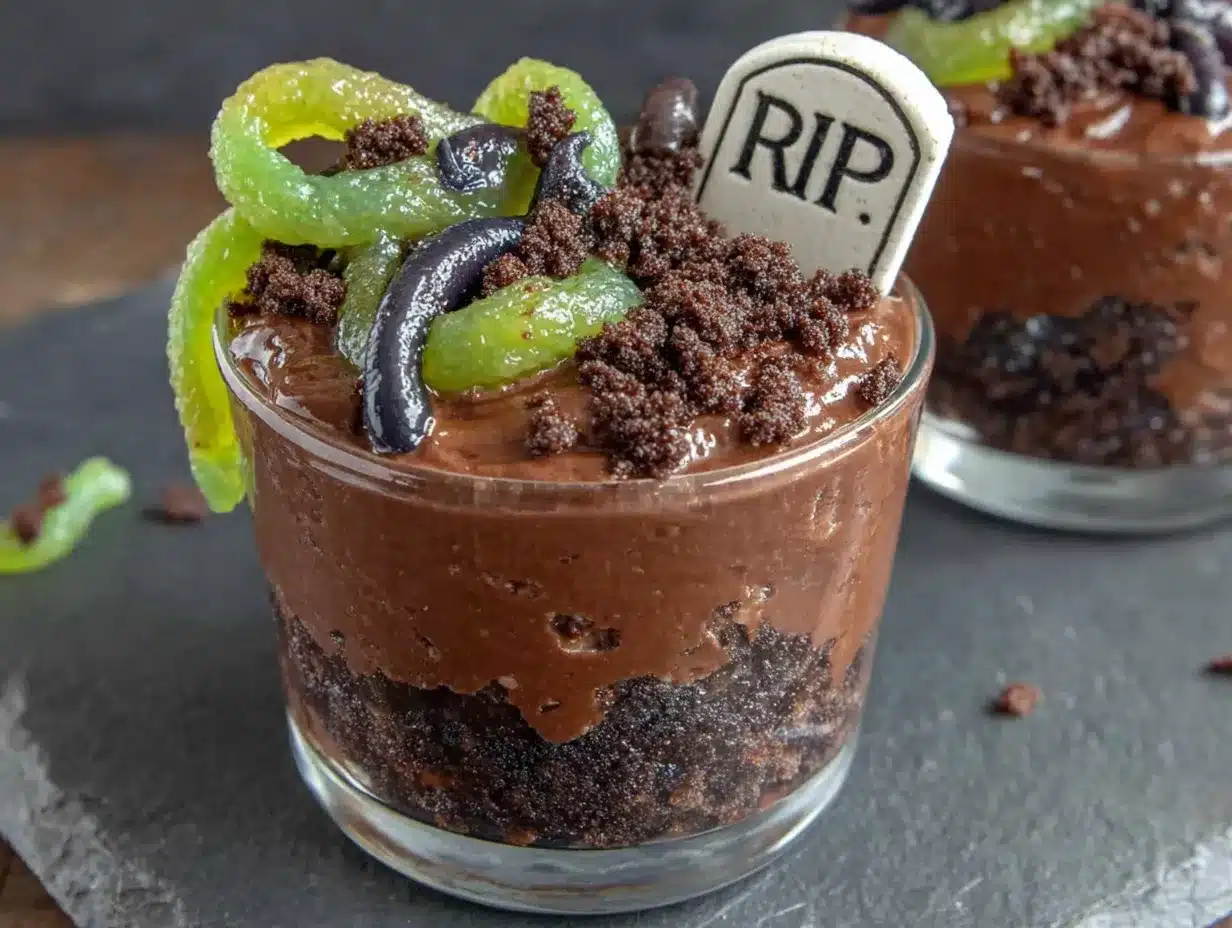
Let me walk you through this step by step. Trust me, it’s easier than you think. And if something goes wrong along the way — and I’ve had plenty of things go wrong — I’ll tell you how to fix it.
- Make the pudding. In your medium mixing bowl, combine the instant chocolate pudding mix with 2 cups of cold milk. Whisk vigorously for about 2 minutes, until the mixture starts to thicken. You’ll feel it getting heavier as you whisk. It should be thick but still pourable. If it’s too thin, let it sit for another minute — instant pudding needs a few minutes to fully set. If it’s too thick, you might have whisked it too long. Don’t worry, just add a tablespoon of milk and stir gently to loosen it up.
- Crush the cookies. While the pudding is setting, crush your chocolate sandwich cookies. If you’re using a food processor, pulse them about 10-15 times. You want a mix of fine crumbs and small chunks. If you’re using the bag method, put the cookies in a zip-top bag, seal it, and roll over them with a rolling pin. Don’t go crazy — you want some texture. I’ve made the mistake of turning them into dust before, and it just doesn’t look as good. The little bits of white filling in the crumbs actually make it look more like real dirt, so don’t try to separate the filling from the cookie.
- Layer the cups. Now the fun part. Take your clear cups and start layering. Start with about 2 tablespoons of crushed cookies at the bottom of each cup. This creates the “underground” layer. Then add about 3 tablespoons of pudding on top. You want to spread it gently so you don’t disturb the cookie layer too much. Then add another tablespoon of crushed cookies on top of the pudding. This is your “surface” dirt.
- Add the worms. Here’s where you get creative. Take 2-3 gummy worms and gently push them into the pudding layer from the top. Let some of the worm stick out of the “dirt” — like they’re trying to escape. I like to curl one worm around the edge of the cup so it looks like it’s crawling out. This is the part that makes kids (and adults) squeal with delight. If you’re making these ahead of time, don’t add the worms until just before serving. They can get a little soggy if they sit in the pudding too long.
- Chill (optional but recommended). If you have time, pop the cups in the fridge for about 30 minutes before serving. This helps the pudding set completely and makes the layers more distinct. If you’re in a hurry — and let’s face it, with this recipe you probably are — you can serve them right away. The pudding will be a little softer, but they’ll still taste amazing.
- Decorate and serve. Right before serving, add any optional decorations. A few green or orange sprinkles on top of the “dirt” looks great. You can also add a small plastic spider or Halloween ring on top for an extra spooky touch. Serve immediately and watch them disappear.
One thing I learned the hard way — don’t overfill the cups. Leave about half an inch of space at the top. Otherwise, when you push the worms in, the pudding and crumbs will spill over the sides. Trust me, I’ve cleaned up that mess more than once.
Cooking Tips & Techniques
After making these Easy Spooky Gummy Worm Dirt Cups more times than I can count, I’ve picked up a few tricks that make a real difference. Let me share them with you.
Use cold milk straight from the fridge. This is the single most important tip for perfect pudding. If your milk is even slightly warm, the pudding won’t set properly. I’ve made this mistake on a hot summer day when I left the milk out while crushing the cookies. The pudding turned out runny and never really firmed up. Now I always keep the milk in the fridge until the last second.
Crush cookies in batches. If you’re making a big batch — say, for a classroom party of 20 kids — crush your cookies in two or three batches. A food processor can get overloaded, and you’ll end up with uneven crumbs. Plus, working in smaller batches gives you more control over the texture. You want a consistent crumb, not a mix of dust and whole cookies.
Don’t skip the bottom layer. I know it’s tempting to just dump everything in and call it a day, but that bottom layer of crushed cookies is important. It creates a barrier that prevents the pudding from making the top layer of “dirt” too wet. Without it, your top layer will turn into a muddy mess within an hour. And nobody wants muddy dirt cups.
Make the pudding a little thicker than you think. Instant pudding continues to set as it sits, but if you’re serving these right away, you want it to be on the thicker side. Whisk it for an extra 30 seconds if you’re in a hurry. The pudding should be thick enough that it doesn’t run when you tilt the bowl. If it’s still liquidy after 2 minutes, let it sit for 5 minutes and whisk again.
Use a piping bag for the pudding. This is a pro tip I picked up from a baker friend. If you’re making these for a party and want them to look really polished, put the pudding in a piping bag or a zip-top bag with the corner snipped off. This lets you pipe the pudding into the cups cleanly without getting it on the sides. It’s totally optional, but it makes a difference if presentation matters to you.
I once forgot to buy gummy worms and tried using gummy bears instead. Don’t do that. They’re too short and just sink into the pudding. You need the long, wormy shape to get that creepy effect. If you’re in a real pinch, you can use fruit leather cut into strips, but it’s not quite the same.
Variations & Adaptations
One of the best things about this recipe is how easy it is to change up. I’ve tried quite a few variations over the years, and here are my favorites.
Dairy-Free Version: This is probably the most requested variation I get from readers. Use a dairy-free instant pudding mix (many brands make them now) and swap the milk for oat milk or coconut milk. I’ve found that oat milk gives the creamiest texture. For the cookies, there are several brands of dairy-free chocolate sandwich cookies available. The rest of the ingredients are already dairy-free. The flavor is just as rich and the texture is almost identical.
Gluten-Free Version: This one is even simpler. Just use gluten-free chocolate sandwich cookies. The pudding mix is naturally gluten-free, and gummy worms are typically gluten-free too (always check the label, though). I’ve made this version for a friend with celiac disease, and she said it was the first Halloween dessert she’d been able to enjoy in years. That alone made it worth the extra effort of finding the right cookies.
Different Pudding Flavors: While chocolate is the classic “dirt” flavor, I’ve experimented with others. Vanilla pudding with crushed graham crackers makes a great “sand” version for a beach-themed party. Butterscotch pudding with crushed shortbread cookies is surprisingly good — it tastes like a butterscotch sundae. And for a truly spooky twist, try lime or green apple pudding with green food coloring. It looks like slime, which kids absolutely love.
Halloween Candy Addition: Want to make these even more indulgent? Add a layer of mini candy pieces in the middle. I’ve used crushed candy corn, mini chocolate chips, and even broken-up pieces of chocolate bar. Just sprinkle them on top of the first pudding layer before adding the second layer of crumbs. It adds a nice surprise when someone digs into their cup.
Individual vs. Large Format: If you’re serving these at a party and don’t want to deal with individual cups, you can make one large “dirt cup” in a 9×13 baking dish. Just layer everything the same way — crumbs, pudding, crumbs — and stick the worms in so they’re poking out. Serve it with a big spoon and let people scoop their own. It’s less portable but makes a great centerpiece for a Halloween buffet table.
Serving & Storage Suggestions
These Easy Spooky Gummy Worm Dirt Cups are best served cold, right out of the fridge. The contrast between the cool, creamy pudding and the crunchy cookie crumbs is what makes them so satisfying. If you’re serving them at a party, keep them refrigerated until the last minute. They can sit out at room temperature for about an hour without any issues, but any longer and the crumbs will start to get soggy.
For presentation, I like to arrange the cups on a large tray or platter. If you’re feeling extra creative, you can put a few plastic spiders or fake cobwebs around the base of the cups. I’ve also seen people write little signs that say “Worm Farm” or “Dirt for Sale” — it’s a cute touch that gets people smiling before they even take a bite.
These pair beautifully with other Halloween treats. I’ve served them alongside easy Halloween popcorn balls and a bowl of candy corn for a full spooky spread. For drinks, apple cider or a simple punch works great. If you’re serving adults, a cup of hot coffee is a nice contrast to the cold, sweet dessert.
Storage: If you have leftovers (which, honestly, rarely happens in my house), you can store the cups in the refrigerator for up to 3 days. Cover them with plastic wrap or put the lids on if your cups came with them. The worms will get a little softer over time, but they’ll still taste good. I don’t recommend freezing these — the pudding gets icy and the texture is off when it thaws.
Make Ahead: This is the perfect make-ahead dessert for busy Halloween schedules. You can assemble the cups (without the worms) up to 24 hours in advance. Keep them covered in the fridge, and add the worms and any decorations just before serving. The worms stay firmer this way, and the presentation is much better. I’ve done this for multiple classroom parties, and it’s a lifesaver.
Nutritional Information & Benefits
Let’s be honest — these are a treat, not a health food. But that doesn’t mean they can’t fit into a balanced diet. Here’s the estimated nutritional breakdown for one serving (one cup made with whole milk and regular cookies):
| Nutrient | Amount Per Serving |
|---|---|
| Calories | 280-320 |
| Total Fat | 10-12g |
| Saturated Fat | 4-5g |
| Carbohydrates | 45-50g |
| Sugar | 30-35g |
| Protein | 5-7g |
| Calcium | 15% DV |
The milk in the pudding provides calcium and vitamin D, which are important for bone health. The chocolate pudding also contains a small amount of iron. The cookies, well, they’re mostly for fun. But hey, Halloween comes once a year, and a little indulgence is part of the celebration.
If you’re looking for a slightly healthier version, you can use reduced-fat milk and sugar-free pudding mix. This cuts the calories and sugar by about 30%. The taste is still good, though the texture is a little less creamy. For a protein boost, I’ve also tried mixing a scoop of chocolate protein powder into the pudding. It works surprisingly well and makes these a bit more filling for an after-school snack.
As for allergens, these contain dairy (milk) and gluten (cookies). The gummy worms may contain gelatin, which is not suitable for vegetarians or vegans. Always check labels if you’re serving someone with dietary restrictions. The dairy-free and gluten-free variations I mentioned earlier are great alternatives that still capture the spirit of the original.
Conclusion
These Easy Spooky Gummy Worm Dirt Cups have become a Halloween tradition in my house, and I have a feeling they’ll become one in yours too. They’re the kind of recipe that proves you don’t need fancy ingredients or hours in the kitchen to create something truly memorable. Sometimes the simplest ideas are the ones that bring the most joy — and watching a room full of kids (and adults) giggle as they pull gummy worms out of their “dirt” cups is pure magic.
I love how forgiving this recipe is. You can make it your own — add extra worms, use different pudding flavors, or go wild with the decorations. The basic idea is so solid that it’s hard to mess up. And honestly, even if you do mess up, it’ll still taste delicious. That’s the kind of recipe I want in my back pocket, especially during the chaos of Halloween season.
So go ahead and give these a try. Whether you’re making them for a classroom party, a neighborhood gathering, or just a fun family movie night, I promise they’ll be a hit. And when someone asks you how you made something so cute and fun, you can just smile and say, “Oh, it’s nothing.” Because honestly, it kind of is. But they don’t need to know that.
If you make these Easy Spooky Gummy Worm Dirt Cups, I’d love to hear about it! Drop a comment below and let me know how they turned out. Did your kids love them? Did you try any fun variations? Share your photos and tag me — I always love seeing your creations. Happy Halloween, and happy snacking!
Frequently Asked Questions
Can I use homemade pudding instead of instant?
You can, but it’s not ideal. Homemade pudding is thinner and takes longer to set. If you want to use it, make it a day ahead and let it chill thoroughly before assembling the cups. Even then, the texture won’t be quite the same. Instant pudding is really the way to go for this recipe — it’s designed to set quickly and hold its shape.
How far in advance can I make these?
You can assemble the cups (without the worms) up to 24 hours ahead of time. Keep them covered in the refrigerator. Add the gummy worms and any decorations just before serving. If you add the worms too early, they’ll absorb moisture from the pudding and get soft and mushy. They’re still edible, but they lose that satisfying chewy texture.
Can I use sugar-free pudding mix?
Absolutely! Sugar-free instant pudding works just as well as the regular version. The texture is slightly different — a little less creamy — but the taste is still great. I’ve made these with sugar-free pudding for friends who are watching their sugar intake, and nobody noticed the difference. Just follow the package directions for the amount of milk.
What’s the best way to crush the cookies without a food processor?
The zip-top bag and rolling pin method is my go-to when I don’t want to clean the food processor. Put the cookies in a sturdy zip-top bag, squeeze out the air, and seal it. Then roll over them with a rolling pin, or even a heavy can or bottle. You can also use a meat mallet if you have one. Just be careful not to tear the bag — I’ve had cookie crumbs explode across my kitchen more than once.
Can I make these in a different size container?
Yes, you can use any size cup or container you like. Small shot glasses make fun mini versions for parties. Larger mason jars work great for bigger portions. Just adjust the layering accordingly. For mini cups, use about half the amount of each layer. For larger containers, you might want to add an extra layer of pudding and crumbs in the middle. The key is keeping that ratio of about 2 parts pudding to 1 part crumbs.
Pin This Recipe!
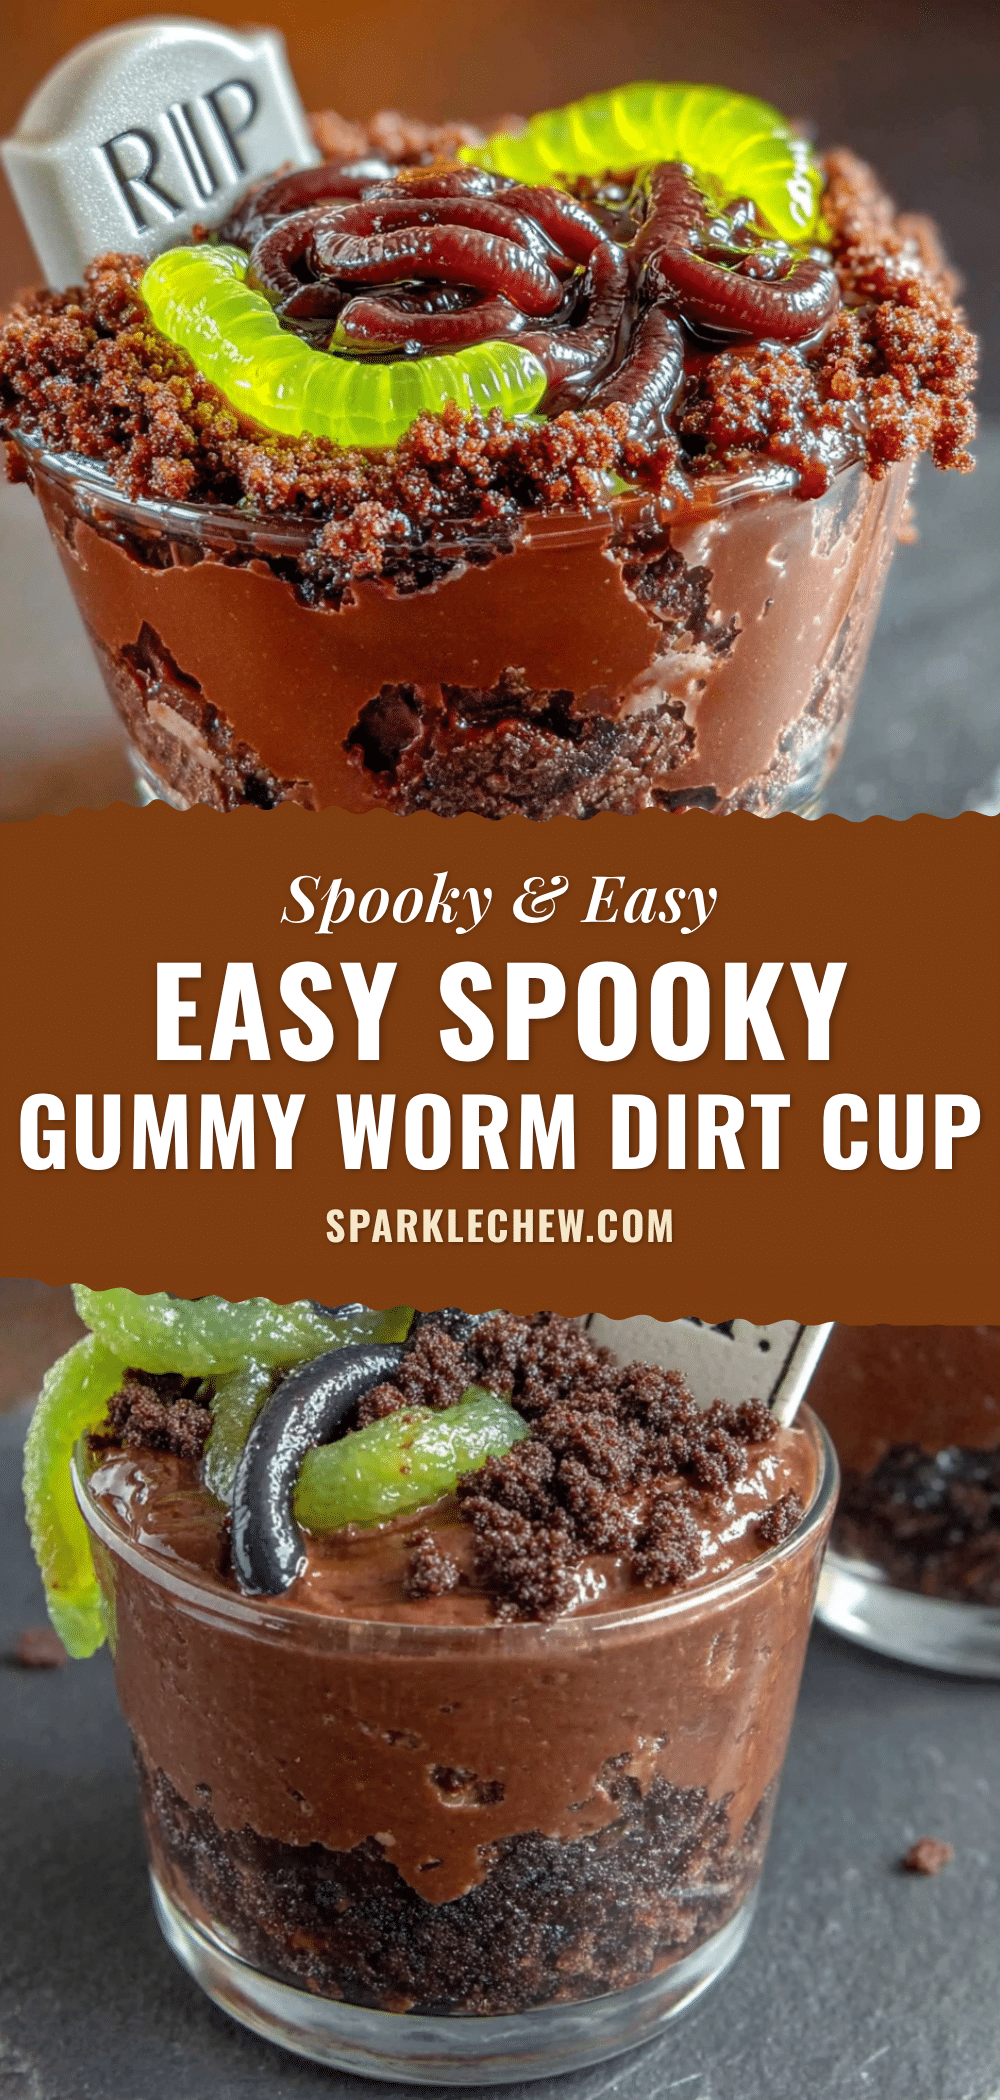
Easy Spooky Gummy Worm Dirt Cups
These Easy Spooky Gummy Worm Dirt Cups are a quick and fun Halloween dessert made with chocolate pudding, crushed chocolate sandwich cookies, and gummy worms. Ready in under 15 minutes, they’re a crowd-pleaser that looks impressive with minimal effort.
- Prep Time: 10 minutes
- Cook Time: 0 minutes
- Total Time: 15 minutes
- Yield: 6 servings 1x
- Category: Dessert
- Cuisine: American
Ingredients
- 1 (3.9 oz) package instant chocolate pudding mix
- 2 cups cold milk
- 20 chocolate sandwich cookies (e.g., Oreos)
- 1 (4.25 oz) bag gummy worms
- Optional: Green or orange sprinkles
- Optional: Small plastic spiders or Halloween rings
Instructions
- In a medium mixing bowl, combine the instant chocolate pudding mix with 2 cups of cold milk. Whisk vigorously for about 2 minutes until the mixture starts to thicken. Let it sit for a few minutes to fully set.
- While the pudding is setting, crush the chocolate sandwich cookies. Use a food processor (pulse 10-15 times) or place them in a zip-top bag and crush with a rolling pin. Aim for a mix of fine crumbs and small chunks.
- Take 6 clear cups (6-8 oz each). Start with about 2 tablespoons of crushed cookies at the bottom of each cup.
- Add about 3 tablespoons of pudding on top of the cookie layer, spreading gently.
- Add another tablespoon of crushed cookies on top of the pudding for the ‘surface’ dirt.
- Take 2-3 gummy worms and gently push them into the pudding layer from the top, letting some stick out. Optionally curl one worm around the edge of the cup.
- If time allows, refrigerate the cups for about 30 minutes before serving to help the pudding set completely.
- Just before serving, add optional decorations like green or orange sprinkles or small plastic spiders. Serve immediately.
Notes
Use cold milk straight from the fridge for best pudding texture. Don’t skip the bottom cookie layer to prevent sogginess. For make-ahead, assemble cups without worms up to 24 hours in advance; add worms just before serving. For dairy-free, use dairy-free pudding mix and oat milk. For gluten-free, use gluten-free chocolate sandwich cookies.
Nutrition
- Serving Size: 1 cup
- Calories: 300
- Sugar: 32
- Sodium: 380
- Fat: 11
- Saturated Fat: 4.5
- Carbohydrates: 47
- Fiber: 1
- Protein: 6
Keywords: Halloween dessert, dirt cups, gummy worms, chocolate pudding, no-bake, easy dessert, spooky treats, kids party


