Love this? Save it for later!
Share the inspiration with your friends
“You really don’t need a fancy kitchen gadget for a good snack,” my friend Lisa said last Saturday as we stood in her tiny apartment kitchen, surrounded by half-empty grocery bags and a small mountain of oats scattered across the counter. Honestly, I wasn’t expecting much from her homemade granola bars—after all, I was used to those neat little wrappers from the store that promised “healthy” but tasted like cardboard. But then she handed me a piece of her latest batch, still warm from the oven, the edges golden and crunchy with a hint of honey sweetness. That first bite was a surprise: wholesome, crunchy, and just the right balance of chewy and crisp. She confessed this recipe started as a quick fix when her usual snack bars ran out, but it soon became her go-to for busy mornings and afternoon pick-me-ups.
Maybe you’ve been there, staring into your pantry, wishing for a snack that’s both satisfying and guilt-free. I know I have. What’s cool about this recipe is that it’s straightforward—just five ingredients, most of which are pantry staples—and it doesn’t skimp on flavor or texture. Lisa’s little kitchen mishap turned into a delicious discovery worth sharing. Plus, making your own granola bars means you skip all the sneaky preservatives and get to control exactly what goes inside.
So, if you’re tired of the usual snack rut and want something crunchy, wholesome, and genuinely easy to pull together, these healthy homemade granola bars might just become your new obsession. Stick with me—I’ll walk you through every step, from picking ingredients to storing your bars for maximum freshness. You’ll be amazed at how simple it is to make a snack that’s both good for you and tastes incredible.
Why You’ll Love This Recipe
This Healthy Homemade Granola Bars recipe has been tested and loved by friends, family, and yes, even picky snackers. It’s one of those recipes that honestly keeps on giving. Here’s why you’ll want to keep these bars in your snack arsenal:
- Quick & Easy: Ready in under 30 minutes, perfect for those hectic mornings or last-minute snacks.
- Simple Ingredients: Only five basic ingredients needed—no weird additives, just real food you probably already have.
- Perfect for On-The-Go: These bars are sturdy enough to toss in your bag without falling apart, making them ideal for work, school, or outdoor adventures.
- Crowd-Pleaser: The balanced crunch and subtle honey sweetness get thumbs up from kids and adults alike.
- Unbelievably Delicious: The blend of toasted oats, nuts, and a touch of natural sweetener hits that crave-worthy spot between chewy and crispy.
What sets this granola bar recipe apart is the perfect balance of texture and flavor. I like to think it’s the way the bars toast just right in the oven, giving them a golden edge without drying them out. Plus, the modest ingredient list means you can tweak it easily—swap nuts for seeds or add in dried fruit if you want. It’s not just another granola bar recipe; it’s the one you’ll come back to when you want a snack that feels homemade, wholesome, and truly satisfying.
Honestly, it’s the kind of snack that makes you pause mid-bite and think, “Yeah, this is good.” Whether you’re packing lunches or need a quick energy boost, these bars are a solid choice without the fuss.
What Ingredients You Will Need
This recipe celebrates simplicity with a handful of wholesome ingredients that come together to create a crunchy, flavorful snack. Most are pantry staples, and you can easily find them in any grocery store. Here’s what you’ll need:
- Old-fashioned rolled oats (2 cups / 180 g): The base of the bars, providing that hearty, chewy texture. I always recommend using rolled oats over instant for better structure—Bob’s Red Mill is a brand I trust for consistency.
- Raw nuts (1 cup / 120 g): Such as almonds, walnuts, or pecans, roughly chopped. They add crunch and healthy fats. Feel free to swap for seeds like pumpkin or sunflower to keep things nut-free.
- Natural honey (1/3 cup / 113 g): This binds everything together and adds gentle sweetness. If you prefer, maple syrup works too—just watch the bars as they bake to prevent burning.
- Peanut butter or almond butter (1/2 cup / 128 g): Adds richness and helps hold the bars together. Make sure it’s creamy for easy mixing; I’ve had great results with natural, no-sugar-added varieties.
- Vanilla extract (1 tsp / 5 ml): Just a splash to round out the flavors and add warmth.
Optional add-ins:
- Dried cranberries, raisins, or chopped dark chocolate (1/2 cup / 75 g) — toss these in after mixing the wet and dry ingredients for bursts of flavor.
- Chia seeds or flaxseeds (2 tbsp / 20 g) — if you want a nutritional boost without changing the texture much.
All these ingredients are easy to source and flexible enough to fit your taste or dietary needs. Whether you keep it simple or jazz it up with extras, these granola bars are a wholesome win.
Equipment Needed
Making these Healthy Homemade Granola Bars doesn’t require fancy kitchen tools. Here’s what you’ll use:
- Mixing bowl: A large one to combine all ingredients comfortably.
- Wooden spoon or silicone spatula: For mixing. I prefer silicone spatulas because they scrape the bowl clean and handle sticky mixtures well.
- 8×8-inch (20×20 cm) baking pan: Lined with parchment paper to make removing the bars easier.
- Measuring cups and spoons: For accuracy. If you want to be precise, a kitchen scale is helpful.
- Oven: For baking the bars to that perfect crunch.
If you don’t have an 8×8-inch pan, a similar-sized dish will do. I once used a loaf pan, and while the bars were thicker and took a bit longer to bake, the result was still great. For cleaning, parchment paper is a lifesaver—it cuts down on scrubbing and keeps those bars intact.
Preparation Method
- Preheat your oven to 350°F (175°C). This ensures the bars bake evenly. Line your 8×8-inch baking pan with parchment paper, letting some overhang for easy removal later. (5 minutes)
- Toast the oats and nuts: Spread oats and chopped nuts on a baking sheet and toast in the oven for about 8-10 minutes until lightly golden and fragrant. This step amps up the flavor and crunch. Watch carefully to avoid burning. (10 minutes)
- Mix the wet ingredients: In a large bowl, combine honey, peanut butter, and vanilla extract. Warm the mixture slightly in the microwave for 20-30 seconds if needed to make stirring easier. Stir until smooth and well blended. (5 minutes)
- Add the toasted oats and nuts to the wet mix: Stir well until everything is evenly coated. If you’re adding dried fruit or seeds, fold them in now. The mixture will be sticky but manageable. (5 minutes)
- Transfer the mixture to your lined pan: Use a spatula or your hands (lightly wet to prevent sticking) to press the granola mixture firmly and evenly into the pan. Pressing firmly helps the bars hold together once baked. (5 minutes)
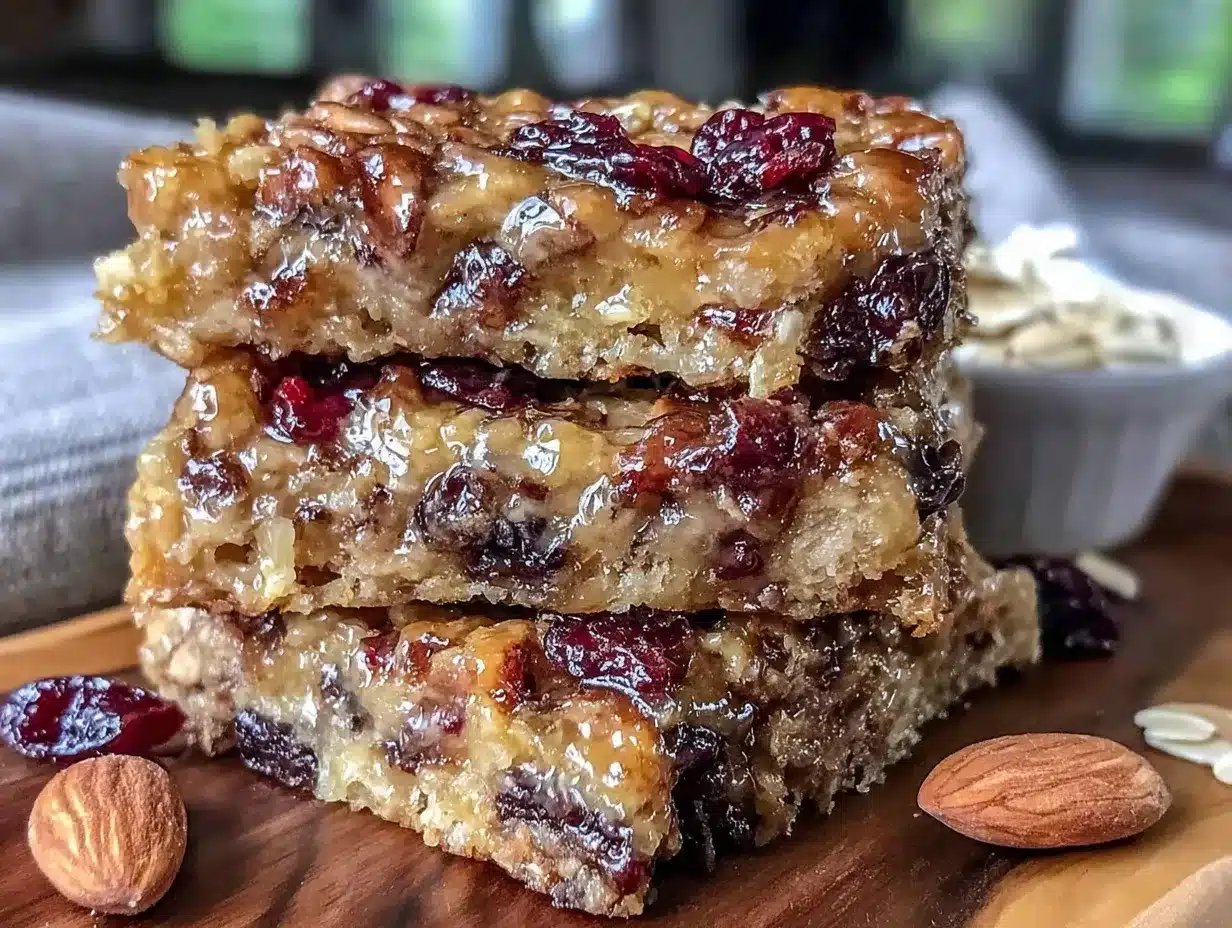
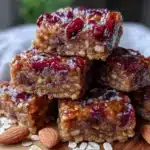
- Bake for 15-18 minutes: Keep an eye on the edges—they should turn a beautiful golden brown while the center remains slightly soft. Overbaking can make bars too dry and crumbly. (15-18 minutes)
- Cool completely: Let the bars cool in the pan on a wire rack for at least 30 minutes. This is key because cutting them too early causes crumbling. Use the parchment overhang to lift the slab from the pan. (30 minutes)
- Cut into bars: Use a sharp knife to slice into 10-12 bars, depending on your preferred size. Store in an airtight container. (5 minutes)
Pro tip: If your bars are still crumbly after cooling, try pressing them down a little more next time before baking or adding a tablespoon of melted butter for extra binding.
Cooking Tips & Techniques
Let me share some tips I’ve picked up over the years making granola bars like these:
- Toast the oats and nuts separately: This step adds a toasty depth you just can’t get from raw oats. It also helps keep your bars crunchy instead of soggy.
- Warm the honey and nut butter: Slightly warming these ingredients makes mixing easier and ensures the bars bind properly.
- Press firmly before baking: I learned this the hard way—if the mixture isn’t compacted enough, the bars fall apart when you cut them.
- Don’t skip the cooling step: Patience here pays off. It helps the bars set and slice cleanly.
- Watch your baking time: Ovens vary, so keep an eye on the bars after 15 minutes. They should be golden but not burnt.
- Multitask smartly: While your oats and nuts toast, mix your wet ingredients to save time.
One time, I forgot to line the pan with parchment, and it was a sticky mess to get the bars out—lesson learned! Also, if you find your bars are too dry or crumbly, try adding a splash of milk or an extra tablespoon of nut butter next time. These small tweaks make a big difference.
Variations & Adaptations
This recipe is a great canvas for creativity. Here are some ways to change things up:
- Gluten-Free: Use certified gluten-free oats and swap nuts with seeds to keep it allergy-friendly.
- Vegan Version: Replace honey with maple syrup or agave nectar and choose a nut butter without added honey.
- Flavor Boost: Add spices like cinnamon or nutmeg for warmth, or stir in shredded coconut for extra texture.
- Chocolate Lover’s Twist: Mix in mini dark chocolate chips after baking or swirl in cocoa powder with the wet ingredients.
- Seasonal Fruit: Swap dried cranberries for chopped dried apricots or cherries to freshen things up.
Personally, I once tried a batch with pumpkin seeds and a dash of pumpkin pie spice—talk about a fall vibe! It was a hit with friends and surprisingly easy to make. Feel free to experiment; these bars are forgiving and adapt well.
Serving & Storage Suggestions
These granola bars are best enjoyed at room temperature, straight out of the container or lunchbox. They make a fantastic quick breakfast paired with a glass of milk or your favorite hot tea. For a little extra treat, serve alongside some fresh fruit or a dollop of yogurt.
Store bars in an airtight container at room temperature for up to a week. For longer storage, keep them in the refrigerator—just bring to room temperature before eating to soften slightly. You can also freeze the bars for up to three months; thaw overnight in the fridge or on the counter.
Pro tip: The flavor and texture improve a bit after a day as the bars sit, allowing the ingredients to meld. So if you can wait, they get even better overnight!
Nutritional Information & Benefits
Each granola bar (based on 12 bars per batch) roughly contains:
| Calories | ~180 kcal |
|---|---|
| Protein | 5 g |
| Fiber | 3 g |
| Fat | 8 g (mostly healthy fats from nuts) |
| Sugar | 8 g (natural from honey) |
This snack packs a good balance of carbohydrates, protein, and healthy fats, making it a sustaining choice for energy without the crash. The oats provide fiber, supporting digestion, and nuts contribute heart-healthy fats. Using natural sweeteners keeps added sugars low compared to commercial bars.
For those mindful of allergens, swapping nuts for seeds makes this recipe nut-free. It’s also easy to adapt to gluten-free diets by choosing the right oats.
Conclusion
These Healthy Homemade Granola Bars are a simple, tasty way to snack smarter. With just five ingredients and no fuss, you get a crunchy, chewy bar that satisfies hunger and tastes great. I love how easy they are to customize—whether you like them nutty, fruity, or with a hint of spice, they come together quickly and hold up well for on-the-go snacking.
Give this recipe a try, and don’t be shy about making it your own. Maybe you’ll find a new favorite combo or discover how fun it is to make snacks from scratch. I’d love to hear your tweaks and how these bars fit into your day. Drop a comment or share your version—let’s keep the homemade snack conversation going!
Here’s to crunchy, wholesome bites that make life a little tastier, one bar at a time.
FAQs
Can I use quick oats instead of rolled oats?
Quick oats aren’t ideal because they tend to make the bars too crumbly. Rolled oats hold their shape better and provide that perfect chewy texture.
How long do homemade granola bars last?
Stored in an airtight container at room temperature, they last about a week. Refrigerating extends shelf life to two weeks, and freezing keeps them fresh up to three months.
Can I make these granola bars without nuts?
Absolutely! You can swap nuts for seeds like sunflower or pumpkin seeds to keep the crunch without allergens.
Is it possible to make these bars vegan?
Yes, simply replace honey with maple syrup or agave nectar and use a nut butter without honey added.
How do I prevent the bars from falling apart?
Press the mixture firmly into the pan before baking and let the bars cool completely before slicing. Using a bit of nut butter also helps bind everything together.
Pin This Recipe!
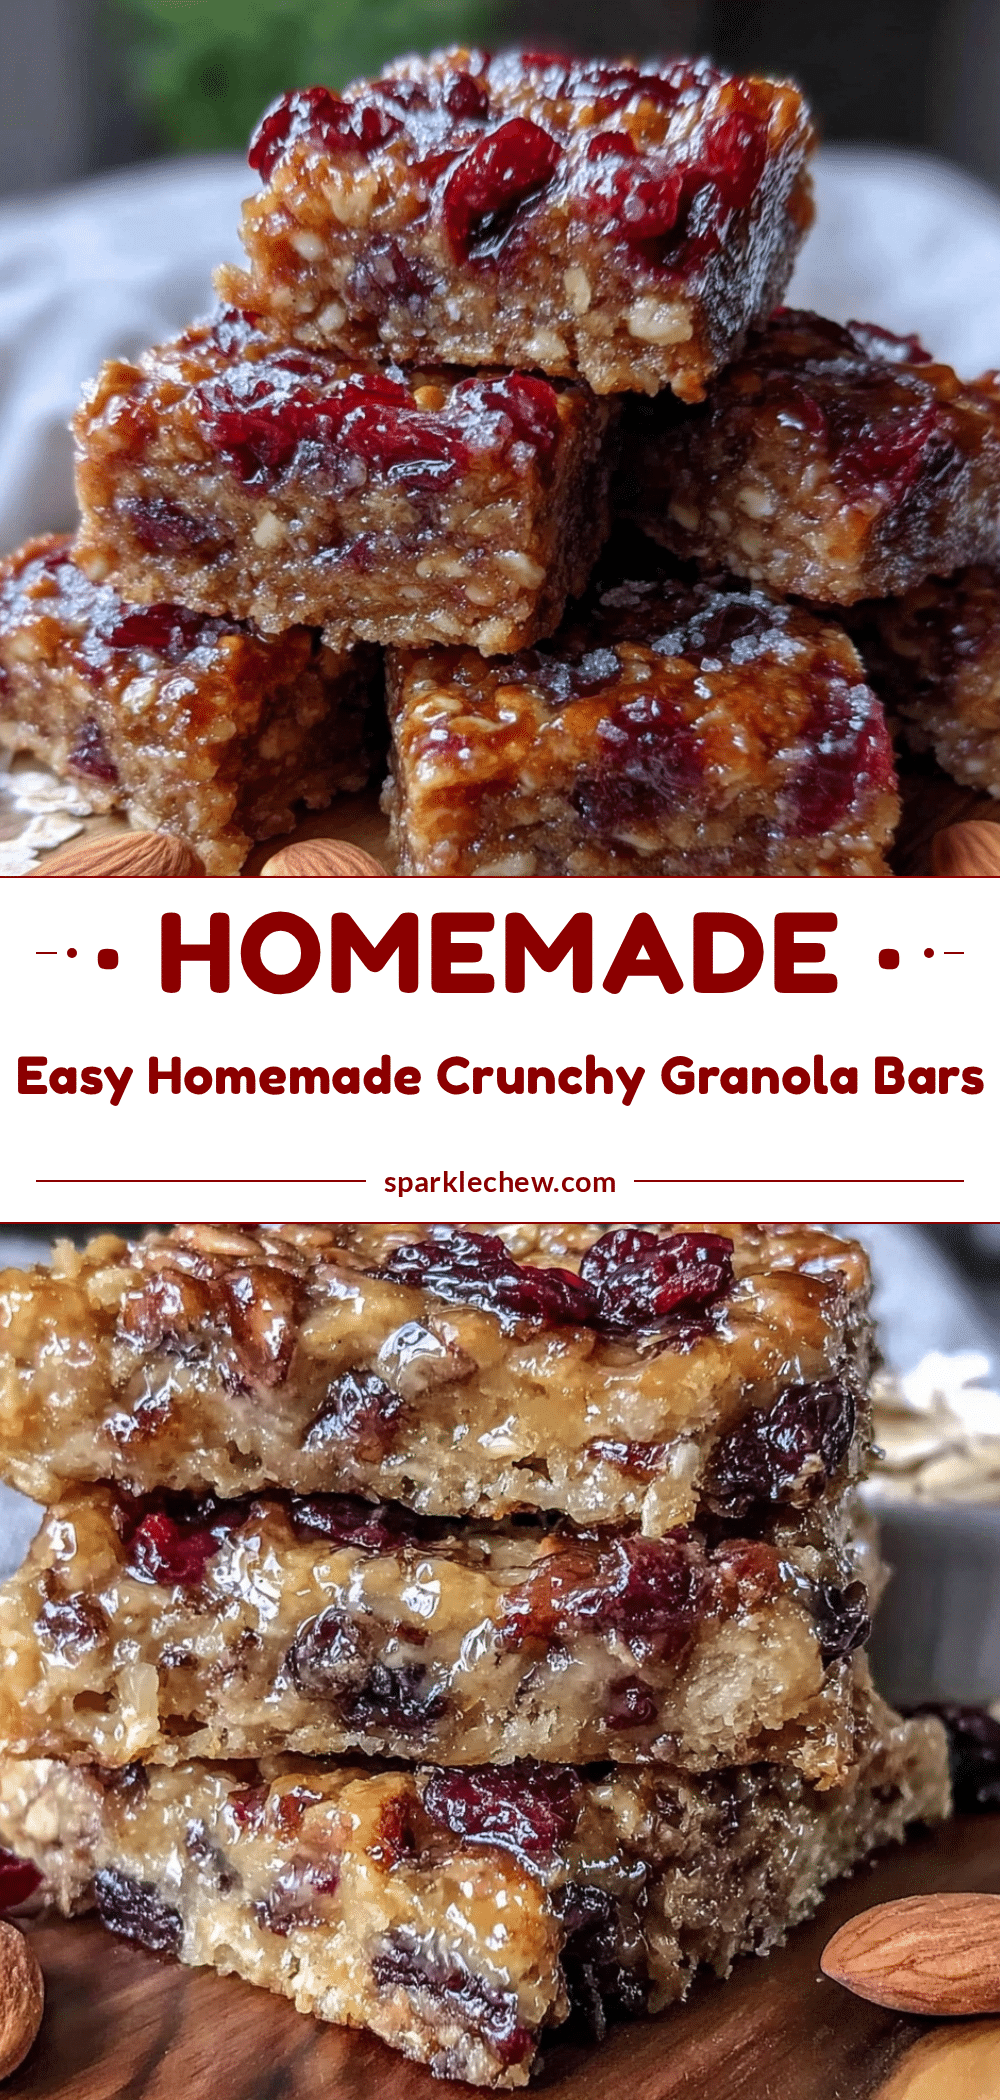
Healthy Homemade Granola Bars
A quick and easy 5-ingredient recipe for wholesome, crunchy granola bars perfect for on-the-go snacking. These bars balance chewy and crispy textures with natural sweetness and healthy fats.
- Prep Time: 15 minutes
- Cook Time: 25 minutes
- Total Time: 40 minutes
- Yield: 10-12 bars 1x
- Category: Snack
- Cuisine: American
Ingredients
- 2 cups old-fashioned rolled oats (180 g)
- 1 cup raw nuts (almonds, walnuts, or pecans), roughly chopped (120 g)
- 1/3 cup natural honey (113 g)
- 1/2 cup peanut butter or almond butter, creamy (128 g)
- 1 tsp vanilla extract (5 ml)
- Optional: 1/2 cup dried cranberries, raisins, or chopped dark chocolate (75 g)
- Optional: 2 tbsp chia seeds or flaxseeds (20 g)
Instructions
- Preheat your oven to 350°F (175°C). Line an 8×8-inch baking pan with parchment paper, leaving some overhang for easy removal. (5 minutes)
- Toast the oats and chopped nuts on a baking sheet in the oven for 8-10 minutes until lightly golden and fragrant. Watch carefully to avoid burning. (10 minutes)
- In a large bowl, combine honey, peanut butter, and vanilla extract. Warm slightly in the microwave for 20-30 seconds if needed and stir until smooth. (5 minutes)
- Add the toasted oats and nuts to the wet mixture and stir well until evenly coated. Fold in any optional dried fruit or seeds now. (5 minutes)
- Transfer the mixture to the lined pan and press firmly and evenly using a spatula or lightly wet hands. (5 minutes)
- Bake for 15-18 minutes until edges are golden brown and the center is slightly soft. Avoid overbaking to prevent dryness. (15-18 minutes)
- Cool completely in the pan on a wire rack for at least 30 minutes to set. Use the parchment overhang to lift the slab from the pan. (30 minutes)
- Cut into 10-12 bars with a sharp knife and store in an airtight container. (5 minutes)
Notes
Toast oats and nuts separately to enhance flavor and crunch. Warm honey and nut butter slightly for easier mixing and better binding. Press mixture firmly before baking to prevent crumbling. Cool bars completely before cutting to ensure clean slices. If bars are crumbly, try adding a tablespoon of melted butter or pressing more firmly next time. Store in airtight container at room temperature for up to one week, refrigerate for two weeks, or freeze for up to three months.
Nutrition
- Serving Size: 1 bar (if cut into 1
- Calories: 180
- Sugar: 8
- Fat: 8
- Fiber: 3
- Protein: 5
Keywords: granola bars, healthy snack, homemade granola bars, easy granola bars, 5-ingredient snack, wholesome snack, crunchy granola bars