Love this? Save it for later!
Share the inspiration with your friends
The winter market was in three hours and I’d completely forgotten I’d signed up for the “wellness table” at our neighborhood’s first-ever Cold Weather Festival. Everyone else would be bringing elaborate things — homemade kombucha with exotic fruits, turmeric lattes with oat milk foam art, handcrafted herbal tea blends in mason jars with custom labels. I had a bag of dried elderberries from last fall’s foraging trip, a jar of honey from my aunt’s bees, and honestly, a growing sense of panic.
Let me tell you, there’s nothing quite like the pressure of a community event to make you question every life choice that led you to that moment. I stood in my kitchen at 7 AM on a Saturday, staring at those shriveled purple berries like they held the secrets to the universe. My neighbor Carol had already texted the group chat asking if anyone needed help setting up — which was code for “I’m bringing something amazing and I want everyone to know.” I had elderberries, honey, some cloves I’d bought for mulled wine last Christmas, and absolutely zero confidence.
But here’s the thing about homemade elderberry syrup — it doesn’t need to be fancy. It just needs to be made with care. I threw those berries in a pot with water, tossed in the cloves because they smelled good together, and let it simmer while I frantically cleaned the kitchen. The smell that filled my apartment was something else — warm, spicy, deeply comforting. By the time I strained it and stirred in the honey, I had this gorgeous deep purple syrup that looked like liquid amethyst. I poured it into a repurposed wine bottle, tied a piece of twine around the neck, and showed up late and flustered.
That syrup sold out in forty-five minutes. People kept coming back to the table asking if I had more. Carol’s elaborate setup got plenty of attention, but my little bottle of homemade goodness was the thing people were actually talking about. Maybe you’ve been there — when the simplest thing you make ends up being the thing everyone wants. That’s how this recipe became my cold-weather staple, and honestly, I haven’t stopped making it since.
Why You’ll Love This Recipe
This homemade elderberry syrup with honey and cloves isn’t just another immunity booster you’ll make once and forget about. It’s the kind of recipe that becomes a seasonal ritual — something you look forward to making as the weather turns cold and the sniffles start creeping in.
- Simple Ingredients: No fancy supplements or hard-to-find extracts. You need dried elderberries, raw honey, whole cloves, and water. That’s it. Most of these are probably already in your pantry if you do any kind of seasonal cooking.
- Quick & Easy: The active prep time is about 10 minutes. The rest is just simmering and waiting — which means you can do laundry, answer emails, or honestly just sit and enjoy the amazing smell filling your kitchen.
- Perfect for Cold Season: Whether you’re trying to ward off whatever your kid brought home from school or just want something warm and comforting on a chilly evening, this syrup delivers. A tablespoon a day keeps the winter blues at bay.
- Crowd-Pleaser: Even people who swear they hate “health stuff” love this syrup. The honey and cloves make it taste like a treat, not a medicine. I’ve had friends ask for refills — which is saying something.
- Unbelievably Delicious: The flavor combo is honestly next-level. The elderberries give this deep, almost berry-wine taste, the honey adds floral sweetness, and the cloves bring that warm, spicy kick that makes you feel cozy from the inside out.
What makes this recipe different from the dozens of other elderberry syrup recipes out there? It’s the balance. Most recipes either go heavy on the ginger (which can be harsh) or skimp on the honey (which makes it taste like medicine). I’ve tested this ratio more times than I care to admit — too many cloves and it’s like eating potpourri, too few and you lose that magic. This version hits the sweet spot where every ingredient supports the others without overpowering anything. It’s comfort food for your immune system — healthier, faster, and with the same soul-soothing satisfaction as a warm cup of tea on a rainy day.
What Ingredients You Will Need
This recipe uses simple, wholesome ingredients to deliver bold flavor and immune-supporting benefits without the fuss. Each component plays a specific role, and the beauty is that you can find most of these at your local grocery store or online.
- Dried Elderberries (1 cup / about 140g): These are the star of the show. Look for organic dried elderberries from a trusted source — I personally like Starwest Botanicals or Mountain Rose Herbs for consistent quality. The berries should be dark purple to almost black, with a slightly tart, earthy smell. Avoid any that look dusty or have an off odor.
- Raw Honey (1 cup / 340g): This is where the magic happens. Raw, unfiltered honey is ideal because it retains natural enzymes and beneficial compounds that processed honey lacks. If you can get local honey, even better — it may help with seasonal allergies too. I use honey from my aunt’s hives, but any high-quality raw honey works. Do not substitute with regular supermarket honey; the flavor and benefits just aren’t the same.
- Whole Cloves (1 tablespoon / about 6g): These little spice powerhouses add warmth and depth. Whole cloves are better than ground because they infuse gently without making the syrup gritty. I buy mine from the bulk section at my local co-op — they’re usually fresher and cheaper that way.
- Water (4 cups / 960ml): Filtered water is best. Tap water with chlorine or strong mineral flavors can affect the final taste, and since you’re simmering it down, those flavors concentrate.
Optional but Recommended:
- Cinnamon Stick (1 small stick): Adds another layer of warmth. I sometimes add this when I want a chai-like vibe.
- Fresh Ginger (a 1-inch piece, sliced): For an extra immune boost and a little zing. I add this when I feel something coming on.
- Star Anise (1 pod): If you love licorice notes, this is a lovely addition. Not traditional, but delicious.
Substitution Guidance: If you’re out of raw honey, you can use maple syrup for a different flavor profile — it will be thinner and less sweet, but still tasty. For a vegan version, use maple syrup or agave nectar. If you don’t have whole cloves, use 1/2 teaspoon of ground cloves, but strain the syrup through a fine-mesh sieve or cheesecloth to avoid grittiness.
Equipment Needed
You don’t need a fancy kitchen setup for this recipe — which is honestly one of the best things about it. Here’s what you’ll need:
- Medium Saucepan (2-3 quart capacity): A heavy-bottomed saucepan works best for even heating. I use my trusty stainless steel one that’s seen better days but still gets the job done.
- Fine-Mesh Strainer (or cheesecloth): Essential for straining out the berries and spices. A regular colander won’t cut it — the berries are small and you’ll end up with bits floating in your syrup. Cheesecloth gives you the clearest result, but a fine-mesh strainer works fine.
- Glass Jar or Bottle (16-20 ounce capacity): For storing your finished syrup. A swing-top bottle is ideal, but any clean glass jar with a tight-fitting lid works. I’ve repurposed old hot sauce bottles — just make sure they’re thoroughly washed and sterilized.
- Wooden Spoon (for stirring): Metal can react with the honey and berries, so wooden or silicone is better.
- Measuring Cups and Spoons: For accuracy. I’ve eyeballed this recipe before and regretted it — the ratio matters for both taste and preservation.
Budget-Friendly Alternatives: If you don’t have a fine-mesh strainer, a clean, thin kitchen towel or even a coffee filter works. Just be patient — it will take longer to strain. For the jar, any glass container with a lid works. I’ve used old pickle jars (washed thoroughly, of course) and they work perfectly.
Preparation Method
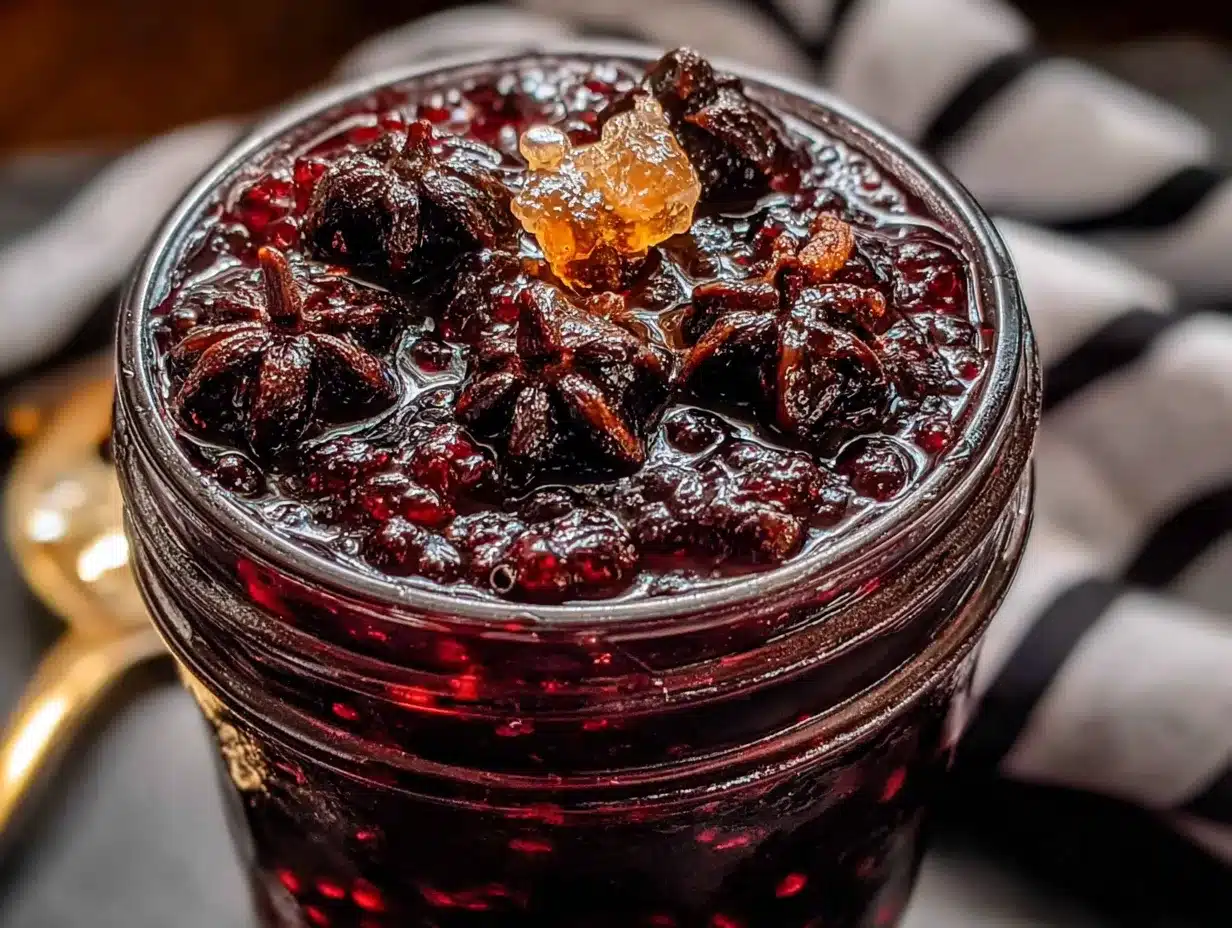
Making homemade elderberry syrup is almost embarrassingly easy. The hardest part is waiting for it to cool so you can add the honey — and honestly, that’s not hard at all.
- Combine berries, water, and spices. Add the dried elderberries, water, and whole cloves to your medium saucepan. If you’re using the optional cinnamon stick, ginger, or star anise, add them now. Give everything a gentle stir with your wooden spoon. The water will turn a deep purple almost immediately — that’s normal and beautiful.
- Bring to a boil, then simmer. Place the saucepan over medium-high heat and bring the mixture to a boil. This should take about 5-7 minutes. Once it’s boiling, reduce the heat to low and let it simmer gently. You want small bubbles, not a vigorous boil. Let it simmer for 30-40 minutes. The liquid will reduce by about half, and the kitchen will smell like a cozy winter cabin. I like to set a timer so I don’t forget — nothing worse than boiled-down berries stuck to the bottom of your pan.
- Check for doneness. After 30 minutes, the liquid should be significantly reduced and deeply concentrated. The berries will look plump and slightly wrinkled, and the liquid should coat the back of a spoon. If it’s still watery, let it simmer another 10 minutes. Pro tip: don’t over-reduce it, or the syrup will be too thick and won’t mix well with the honey.
- Strain the mixture. Place your fine-mesh strainer over a large bowl or heatproof measuring cup. Carefully pour the hot mixture through the strainer. Use the back of your wooden spoon to gently press on the berries to extract as much liquid as possible. Don’t press too hard, or you’ll push bitter compounds from the berries into your syrup. Let it drain naturally for a few minutes. Discard the berries and spices — they’ve given everything they have.
- Cool the liquid. Let the strained liquid cool until it’s warm but not hot — about 110°F (43°C) is ideal. If you add honey to boiling hot liquid, you’ll destroy the beneficial enzymes in the raw honey. I usually let it sit for 15-20 minutes, stirring occasionally. Test it by dipping your finger in — it should feel comfortably warm, not hot.
- Stir in the honey. Add the raw honey to the warm elderberry liquid and stir gently until fully dissolved. The honey will thicken the syrup beautifully. If your honey is crystallized, warm the jar in a bowl of hot water before adding it — it’ll mix in much easier. The final syrup should be the consistency of thin maple syrup.
- Bottle and store. Pour the finished syrup into your clean glass jar or bottle. Let it cool completely before sealing the lid. This prevents condensation from forming inside the jar, which can lead to mold. I usually let it sit on the counter for an hour before moving it to the refrigerator.
Sensory Cues: At each stage, pay attention. The simmering liquid should smell fruity and spicy — if it smells bitter or burnt, you’ve cooked it too long. The final syrup should be a deep, jewel-toned purple with a glossy sheen. It should taste sweet first, then warm and slightly tart, with the cloves lingering at the back of your throat.
Cooking Tips & Techniques
I’ve made this recipe more times than I can count, and I’ve learned a few things the hard way. Here’s what I wish someone had told me the first time.
Don’t boil the honey. This is the biggest mistake people make. Raw honey is packed with beneficial enzymes and antioxidants, but heat destroys them. Always let the elderberry liquid cool before adding honey. I once got impatient and added honey to hot liquid — the syrup was still tasty, but I felt like I’d wasted all that good raw honey.
Watch your simmer. A gentle simmer is key. If you boil the berries aggressively, you’ll extract bitter tannins from the seeds, and your syrup will taste like regret. Keep the heat low and the bubbles small. Think of it as a gentle conversation, not a shouting match.
Strain twice for clarity. If you want a crystal-clear syrup (which looks gorgeous in a glass bottle), strain the liquid once through a fine-mesh strainer and then again through cheesecloth or a coffee filter. I don’t always bother with this step, but when I’m gifting the syrup, it makes a difference.
Timing and multitasking. The simmering time is perfect for other kitchen tasks. I usually prep dinner while the syrup simmers, or I sit down with a cup of tea and a book. The aroma alone is worth the wait — it makes the whole house smell like a holiday market.
A note on consistency. Your syrup will thicken slightly as it cools. If it’s too thick after refrigeration, simply stir in a tablespoon of warm water. If it’s too thin, simmer it a bit longer next time. Every batch is slightly different depending on the berries and honey, so don’t stress about perfection.
Variations & Adaptations
One of the best things about this recipe is how flexible it is. Here are some variations I’ve tried and loved.
- Spiced Chai Version: Add 2 cardamom pods, a small cinnamon stick, and 3 slices of fresh ginger along with the cloves. This version tastes like a warm hug and is amazing stirred into black tea.
- Citrus Boost: Add the zest of one orange and one lemon during the simmering stage. The citrus brightens everything up and adds extra vitamin C. I make this version in January when everyone’s feeling blah.
- Low-Sugar Option: If you’re watching your sugar intake, reduce the honey to 1/2 cup and add a few drops of stevia or monk fruit sweetener. The texture will be thinner, but the flavor is still lovely.
- Adult Version: Once the syrup is finished and cooled, stir in 2 tablespoons of bourbon or whiskey. It’s not traditional, but it makes a fantastic cocktail base or a cozy nightcap. My neighbor Tom loves this version.
- Vegan Adaptation: Replace the honey with maple syrup or agave nectar. The flavor changes slightly — maple syrup adds a woodsy note that pairs surprisingly well with the cloves — but it’s equally delicious.
Personal Variation: My favorite version involves adding a vanilla bean (split and scraped) during the simmer. The vanilla softens the tartness of the elderberries and makes the syrup taste almost dessert-like. I drizzle it over pancakes or yogurt when I’m feeling indulgent.
Serving & Storage Suggestions
This syrup is wonderfully versatile. Here’s how to make the most of it.
Daily Immune Boost: Take 1 tablespoon daily during cold season. Adults can take up to 2 tablespoons, and children (over age 1) can take 1 teaspoon. I keep a small shot glass on my counter as a reminder.
In Warm Beverages: Stir a tablespoon into hot water for an instant tea, or add it to herbal tea for extra flavor and immune support. It’s also amazing in warm apple cider or even stirred into oatmeal.
As a Topping: Drizzle over pancakes, waffles, yogurt, or ice cream. The flavor is sophisticated enough for a dinner party dessert but simple enough for a Tuesday morning breakfast.
In Cocktails: Mix with sparkling water for a mocktail, or add to bourbon or gin for a winter cocktail. The syrup’s depth of flavor makes it a fantastic cocktail ingredient.
Storage: Store the syrup in a sealed glass jar in the refrigerator. It will keep for 2-3 months. Do not store at room temperature — the honey can ferment over time, and you’ll end up with elderberry wine (which is not what we’re going for here).
Freezing: Pour the syrup into ice cube trays and freeze. Once solid, pop the cubes into a freezer bag. They’ll keep for up to 6 months. Thaw a cube or two as needed — perfect for single servings.
Reheating: If the syrup thickens too much in the fridge, let it sit at room temperature for 15 minutes or microwave for 10 seconds. Stir well before using.
Flavor Development: The flavors actually deepen and meld after a few days in the fridge. I always think the syrup tastes better on day three than day one. The cloves become more pronounced, and the honey sweetness balances beautifully.
Nutritional Information & Benefits
While I’m not a doctor or nutritionist, I can share what’s known about these ingredients based on research and traditional use.
Estimated Nutritional Values (per 1 tablespoon serving):
| Nutrient | Amount |
|---|---|
| Calories | 45-50 |
| Total Carbohydrates | 12g |
| Sugars | 11g |
| Vitamin C | 2% DV |
| Antioxidants | High (from elderberries and cloves) |
Health Benefits: Elderberries are packed with antioxidants called anthocyanins, which give them their deep purple color and support immune function. Raw honey contains natural enzymes and has antimicrobial properties. Cloves are rich in eugenol, a compound known for its anti-inflammatory effects. Together, these ingredients create a synergistic blend that supports overall wellness during cold season.
Dietary Considerations: This recipe is naturally gluten-free, dairy-free, and vegetarian. For vegans, substitute honey with maple syrup. For low-sugar diets, reduce the honey and add stevia. Note that raw honey is not recommended for infants under 1 year due to the risk of botulism.
Potential Allergens: Honey can cause allergic reactions in people with severe pollen allergies. Cloves are generally safe but should be used in moderation. Elderberries are safe for most people, but raw elderberries (not dried) can cause digestive upset — which is why we cook them.
Conclusion
Honestly, this homemade elderberry syrup with honey and cloves has become one of those recipes I can’t imagine winter without. It’s simple enough for a frantic Saturday morning when you’ve forgotten about a community event, yet special enough to gift to friends and family during the holidays. The process itself is almost meditative — the simmering, the straining, the moment when the honey melts into the warm purple liquid and everything comes together.
I hope you’ll make this recipe your own. Adjust the spices to your taste, experiment with different honeys, find the version that makes you close your eyes and smile after that first spoonful. That’s the beauty of simple recipes — they leave room for you to leave your mark.
If you try this recipe, I’d love to hear how it turned out. Drop a comment below and let me know what variations you tried, or share a photo of your finished syrup. And if you’re looking for more cozy winter recipes, don’t miss our cozy winter tea blends or this honey ginger sore throat soother — they pair beautifully with this syrup for a complete cold-season wellness routine.
Stay warm, stay healthy, and keep cooking with love.
Frequently Asked Questions
Can I use fresh elderberries instead of dried?
Fresh elderberries work, but they need to be fully ripe and cooked thoroughly — raw elderberries can cause digestive upset. Use 2 cups of fresh berries in place of 1 cup dried, and increase the simmering time by about 15 minutes to account for the extra water content.
How long does homemade elderberry syrup last?
Stored in a sealed glass jar in the refrigerator, this syrup keeps for 2-3 months. Always use clean utensils when scooping out syrup to prevent contamination. If you see mold, fizzing, or smell anything off, discard it immediately.
Can I give this syrup to children?
Yes, but with precautions. Children over age 1 can take 1 teaspoon daily. Do not give raw honey to infants under 1 year due to botulism risk. For younger children, substitute honey with maple syrup or agave. Always consult your pediatrician before starting any new supplement routine.
Why did my syrup turn out too thick or too thin?
Thick syrup usually means you simmered it too long or added too much honey. Thin syrup means you didn’t simmer long enough or added too much water. Adjust next time by watching the reduction carefully — you want the liquid to reduce by about half before adding honey.
Can I make this recipe in a slow cooker?
Absolutely! Combine the elderberries, water, and spices in a slow cooker and cook on low for 4-6 hours. Strain, cool, and add honey as directed. The slow cooker method gives a deeper flavor infusion, though the kitchen won’t smell as strongly as with stovetop simmering.
Pin This Recipe!
Homemade Elderberry Syrup: Best Immune-Boosting Recipe
This homemade elderberry syrup with honey and cloves is a simple, immune-boosting recipe that becomes a seasonal ritual. Made with dried elderberries, raw honey, and whole cloves, it’s quick to prepare and perfect for cold season.
- Prep Time: 10 minutes
- Cook Time: 40 minutes
- Total Time: 50 minutes
- Yield: 4 servings 1x
- Category: Condiment
- Cuisine: American
Ingredients
- 1 cup (about 140g) dried elderberries
- 1 cup (340g) raw honey
- 1 tablespoon (about 6g) whole cloves
- 4 cups (960ml) filtered water
- 1 small cinnamon stick (optional)
- 1-inch piece fresh ginger, sliced (optional)
- 1 pod star anise (optional)
Instructions
- Combine dried elderberries, water, and whole cloves (plus optional cinnamon, ginger, or star anise) in a medium saucepan. Stir gently.
- Bring to a boil over medium-high heat (about 5-7 minutes), then reduce heat to low and simmer gently for 30-40 minutes until liquid is reduced by about half and coats the back of a spoon.
- Check for doneness: liquid should be deeply concentrated and berries plump. Do not over-reduce.
- Strain the mixture through a fine-mesh strainer or cheesecloth into a large bowl or heatproof measuring cup. Gently press berries with a wooden spoon to extract liquid, but do not press too hard.
- Let the strained liquid cool until warm but not hot (about 110°F / 43°C), approximately 15-20 minutes.
- Stir in raw honey until fully dissolved. If honey is crystallized, warm the jar in hot water first.
- Pour finished syrup into a clean glass jar or bottle. Let cool completely before sealing. Store in the refrigerator.
Notes
Do not add honey to boiling liquid; let cool to 110°F to preserve beneficial enzymes. For a vegan version, substitute honey with maple syrup or agave nectar. Store in refrigerator for 2-3 months. Can be frozen in ice cube trays for up to 6 months.
Nutrition
- Serving Size: 1 tablespoon
- Calories: 4550
- Sugar: 11
- Carbohydrates: 12
Keywords: elderberry syrup, homemade elderberry syrup, immune booster, honey and cloves, cold season recipe, wellness syrup, natural remedy


