Love this? Save it for later!
Share the inspiration with your friends
I swore I hated candy corn. For years. Every October, I’d side-eye those little triangles of sugar with the same suspicion I reserve for fruitcake and those decorative gourds nobody actually eats. Then my sister Rachel showed up at our family potluck last September with a tray of these jello cups, and I caught myself—mid-conversation, holding a plastic spoon, absolutely demolishing my third one before I even realized what I was doing.
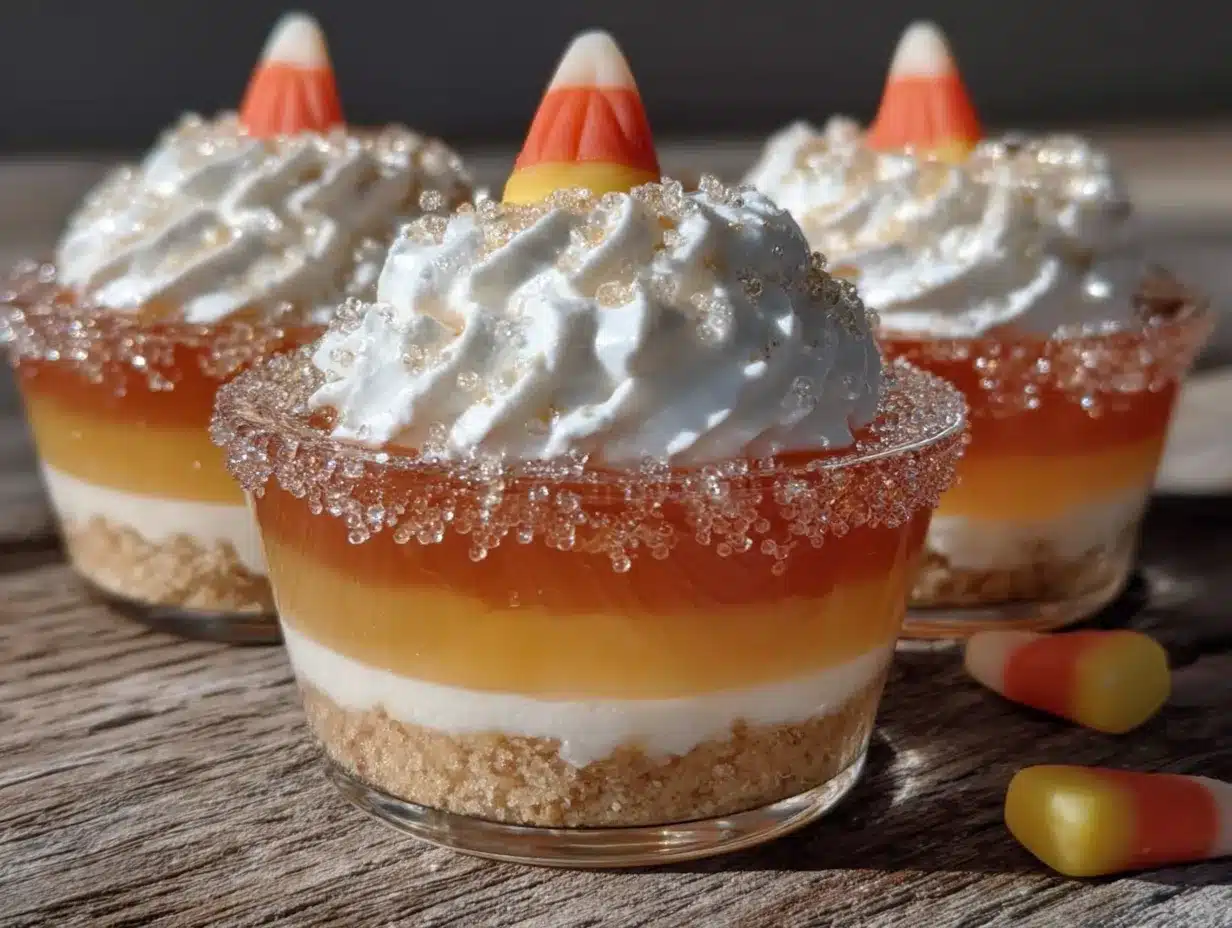
The thing is, I’d been so busy being a snob about the candy itself that I never stopped to think about what candy corn actually represents in the dessert world. That perfect gradient. That nostalgic fall feeling. The way those three layers stack up like a little edible sunset in a cup. Rachel didn’t even say anything when she caught me scraping the last bit of orange jello from the bottom of my cup. She just raised an eyebrow and handed me the recipe card, which she’d written on the back of a receipt from Target. Honestly, that’s how you know a recipe is legit—when it comes scribbled on random paper, not printed on fancy cardstock.
I’ve been making these Lighter Candy Corn Layered Jello Cups ever since, tweaking them until they felt like mine. And the best part? They’re actually lighter than the original version I grew up with. No heavy cream, no sweetened condensed milk, no guilt after the third one. Maybe you’ve been there too, rolling your eyes at candy corn while secretly loving the idea of it. I get it. This version changed my mind, and I have a feeling it might change yours too.
Why You’ll Love This Recipe
Let’s be real for a second. Most layered jello desserts are beautiful but packed with so much sugar and cream that you can barely eat one without a sugar crash. These Lighter Candy Corn Layered Jello Cups solve that problem without sacrificing the fun factor. I’ve tested this recipe four times to get the texture just right, and my neighbor Karen—who is brutally honest about desserts—said they taste “like fall in a cup but without the food coma.” That’s the kind of feedback you can trust.
Here’s what makes these little cups special:
- Quick & Easy: The active prep time is about 15 minutes. The rest is just waiting for layers to set. You can make these while watching an episode of your favorite show.
- Simple Ingredients: You probably already have jello packets in your pantry from the last time you made a salad for a barbecue. No fancy grocery trips required.
- Perfect for Fall Gatherings: These are a hit at Halloween parties, Thanksgiving dinners, or just a random Tuesday when you want something festive but not heavy.
- Crowd-Pleaser: Kids love the colors, adults love the nostalgia, and nobody has to know they’re lighter until after they’ve already complimented you.
- Unbelievably Delicious: The combination of light whipped topping with the fruity jello layers creates this airy, creamy texture that melts in your mouth. It’s comfort food that doesn’t weigh you down.
What makes this recipe different from all those other layered jello desserts out there? It’s the ratio. I spent a whole afternoon figuring out the perfect balance between the jello layers and the light cream layer so that every spoonful gives you a bit of everything. Not too sweet, not too heavy, just right. This isn’t just another version—it’s the version that makes you close your eyes after the first bite and go, “Oh, that’s good.”
What Ingredients You Will Need
This recipe uses simple, wholesome ingredients to create those iconic candy corn colors and that light, creamy texture. Most of these are pantry staples or easy to find at any grocery store. Here’s what you’ll need:
For the Jello Layers
- 1 box (3 oz) lemon jello (for the yellow bottom layer—I prefer Jell-O brand for consistent setting)
- 1 box (3 oz) orange jello (for the orange middle layer)
- 1 cup boiling water (for each jello flavor, so 2 cups total)
- 1 cup cold water (for each jello flavor, so 2 cups total)
For the Cream Layer
- 1 container (8 oz) light whipped topping, thawed (like Cool Whip Lite or store brand—just make sure it’s thawed in the fridge overnight, not on the counter)
- 1/2 cup plain nonfat Greek yogurt (this is my secret trick—adds creaminess and protein without the heaviness of cream cheese)
- 1 tablespoon honey (adds just a touch of sweetness without refined sugar)
- 1/2 teaspoon vanilla extract (for warmth and depth)
For Assembly
- 6 to 8 clear plastic cups (4 oz size works perfectly—I use the ones from the party supply aisle)
- Optional: yellow and orange sprinkles for garnish (because why not?)
A few notes on ingredients: For the jello, you can use sugar-free versions if you want to cut even more sugar. I’ve tested this with both regular and sugar-free, and honestly, I prefer the texture of regular jello for this recipe—it sets up firmer and gives you cleaner lines between layers. But if you’re watching your sugar intake, sugar-free works fine; just let it set an extra 15 minutes.
The Greek yogurt is my little hack. I tried this recipe first with just whipped topping, and it was fine, but it lacked that slight tanginess that makes candy corn desserts interesting. Adding the yogurt gives it a subtle complexity that balances the sweetness of the jello. My sister Rachel was skeptical when I told her, but after tasting it, she said, “Okay, you were right.” Which, let’s be honest, is the best thing a sibling can say.
Equipment Needed
You don’t need any fancy equipment for these Lighter Candy Corn Layered Jello Cups. Here’s what you’ll need:
- Two small mixing bowls (one for each jello flavor—glass or ceramic works best)
- One medium mixing bowl (for the cream layer)
- Measuring cups (1 cup for hot and cold water)
- Measuring spoons (for the honey and vanilla)
- Whisk (a fork works in a pinch, but a whisk makes the jello dissolve faster)
- 6 to 8 clear plastic cups (4 oz size—I got a pack of 50 at the dollar store for like three bucks)
- Small ladle or measuring cup with a spout (for pouring the jello into cups without spilling)
- Refrigerator space (you’ll need room for the cups to sit undisturbed for at least 4 hours)
If you don’t have clear cups, you can use small glass cups or even shot glasses for a party appetizer version. The key is being able to see the layers, so clear is best. I once used opaque plastic cups in a pinch, and while they tasted fine, nobody could see the beautiful candy corn effect. That’s half the fun, honestly.
Preparation Method
Making these Lighter Candy Corn Layered Jello Cups is a process of patience, but I promise it’s worth it. Here’s how to do it step by step:
- Start with the yellow (bottom) layer. In a small mixing bowl, empty the lemon jello packet. Add 1 cup of boiling water and whisk for about 2 minutes until the powder is completely dissolved. Then add 1 cup of cold water and stir. Set aside to cool slightly—about 5 minutes. You don’t want it hot when you pour it into the cups, or it might fog up the plastic.
- Pour the yellow layer. Divide the yellow jello evenly among your 6 to 8 clear cups. You want each cup to be about one-third full. Place the cups in the refrigerator and let them set for at least 1 hour, or until the jello is firm to the touch. I usually check by gently tilting a cup—if the jello doesn’t move, it’s ready.
- While that sets, make the cream layer. In your medium mixing bowl, combine the thawed light whipped topping, Greek yogurt, honey, and vanilla extract. Whisk gently until smooth and well combined. Don’t overmix, or the whipped topping will deflate. You want it light and fluffy, like a cloud that tastes like dessert. Cover and refrigerate until you need it.
- Prepare the orange (middle) layer. Once the yellow layer is set, make the orange jello the same way: empty the packet into a bowl, add 1 cup boiling water, whisk for 2 minutes, then add 1 cup cold water. Let it cool for 5 minutes.
- Add the cream layer. Remove the cups from the fridge. Spoon about 2 tablespoons of the cream mixture onto each yellow layer. Spread it gently with the back of the spoon so it covers the surface evenly. Don’t press down—you want a distinct layer, not a mixed-up mess. Return the cups to the fridge for 15 minutes to let the cream layer firm up slightly.
- Pour the orange layer. Once the cream layer has set for 15 minutes, carefully pour the orange jello over the cream layer in each cup. I use a small ladle or a measuring cup with a spout to control the pour. Fill each cup until it’s about two-thirds full. You want some room at the top for the final layer.
- Let the orange layer set. Return the cups to the fridge for another 1 to 1.5 hours, until the orange jello is firm. This is the part where you need patience—I know, it’s hard. I once tried to rush this step and ended up with orange jello seeping into the cream layer. Still tasted fine, but it looked like a moody abstract painting instead of candy corn.
- Add the final cream layer. Once the orange jello is set, spoon the remaining cream mixture on top of each cup. Smooth it gently. You want it to look like the white tip of a candy corn. If you’re feeling fancy, add a few yellow and orange sprinkles on top.
- Chill until ready to serve. Refrigerate the cups for at least 1 more hour before serving. This allows all the flavors to meld together. These are best served cold, straight from the fridge.
A quick sensory note: when you pour the hot water over the jello powder, you should smell that bright, fruity aroma that reminds you of childhood birthday parties. The yellow jello smells like lemon candy, and the orange smells like—well, orange. The cream layer should be thick but pourable, like a thick milkshake. When you take that first bite, the layers should be distinct but complementary: the tangy cream against the sweet jello, all light and airy on your tongue.
Cooking Tips & Techniques
After making these Lighter Candy Corn Layered Jello Cups about a dozen times, I’ve learned a few things the hard way. Here are my best tips:
Patience is not optional. I know I said this already, but let me say it again: each layer needs to be fully set before you add the next one. If you rush, the layers will bleed into each other, and you’ll end up with a muddy mess. I ruined my first batch because I was impatient and poured the orange layer while the yellow was still slightly jiggly. The result was a weird orange-yellow swirl that looked more like a science experiment than candy corn.
Cool the jello before pouring. Let the jello mixture sit for 5 minutes after adding the cold water. If you pour it while it’s still hot, it can melt the layer underneath or fog up your clear cups. I learned this the hard way when my first batch of cups looked like they’d been through a steam room.
Use a gentle hand with the cream layer. When you’re spooning the cream mixture onto the jello, be gentle. Don’t plop it in the center and expect it to spread evenly. Instead, spoon it around the edges first, then fill in the center. This prevents the cream from sinking into the jello and creating a messy layer.
Temperature matters. Make sure your whipped topping is thawed but still cold. If it’s too warm, it won’t hold its shape when you mix in the yogurt. If it’s still partially frozen, you’ll get lumps. Thaw it in the fridge overnight for best results.
Double the recipe for a crowd. These cups disappear fast. If you’re bringing them to a party, I’d recommend doubling the recipe. Trust me, you don’t want to be the person who brings 6 cups to a party of 12 people. I speak from experience—and from the memory of watching people fight over the last one.
Variations & Adaptations
One of the best things about this recipe is how flexible it is. Here are some variations I’ve tried:
Dairy-Free Version: Swap the Greek yogurt for a dairy-free yogurt alternative (I like coconut-based yogurt for the creaminess) and use a dairy-free whipped topping. The texture will be slightly different, but it’s still delicious. My friend Jenna, who’s dairy-free, said this version was “dangerously good” and asked for the recipe immediately.
Different Flavor Combinations: You’re not limited to lemon and orange. Try strawberry for the bottom layer and orange for the middle for a different color gradient. Or go tropical with pineapple and mango. Just make sure the colors create that candy corn gradient—light on bottom, darker in the middle, white on top.
Adult Version: Add a splash of vodka or rum to the jello mixture before pouring. About 2 tablespoons per batch works well. Just keep in mind that alcohol can affect how the jello sets, so you might need to let it chill a bit longer. I made these for a Halloween party once with a splash of vanilla vodka in the cream layer, and they were a huge hit.
Lower Sugar Version: Use sugar-free jello and skip the honey in the cream layer. The cream layer will be less sweet, but the jello still provides plenty of sweetness. I’ve tested this version, and it works well—just be prepared for a slightly less firm jello texture.
Pumpkin Spice Twist: Add 1/2 teaspoon of pumpkin pie spice to the cream layer for a fall-themed variation. The warm spices complement the fruity jello beautifully. This is my current favorite version, and I’ve been making it nonstop since September started.
Serving & Storage Suggestions
These Lighter Candy Corn Layered Jello Cups are best served cold, straight from the fridge. The contrast between the cool, creamy top and the firm, fruity jello layers is part of the experience. I like to serve them on a tray with a few fall leaves scattered around for presentation—it’s simple but looks festive.
For a party, arrange the cups on a platter and let guests grab their own. They’re the perfect finger food dessert—no plates or forks required if you use plastic cups with spoons. I’ve served these at Halloween parties, Thanksgiving dinners, and even a fall-themed baby shower, and they always get compliments.
Storage: These cups will keep in the refrigerator for up to 5 days. Cover them with plastic wrap or pop a lid on each cup to prevent them from absorbing fridge odors. I don’t recommend freezing them—the texture of the jello and cream layer will be ruined.
Flavor Development: Interestingly, these taste even better on day two. The flavors meld together overnight, and the cream layer firms up slightly, making the texture even more satisfying. So feel free to make these a day ahead—your future self will thank you.
Reheating: Don’t. These are meant to be served cold. If you want a warm dessert, make something else. These are the refreshing, cool treat that balances out all the heavy comfort food of fall.
Nutritional Information & Benefits
Here’s the thing about these Lighter Candy Corn Layered Jello Cups: they’re a dessert, so I’m not going to pretend they’re a health food. But compared to traditional layered jello desserts that use heavy cream, cream cheese, and sweetened condensed milk, these are significantly lighter. Each cup (based on 8 servings) has approximately:
- Calories: 120-140
- Protein: 3-4 grams (thanks to the Greek yogurt)
- Fat: 3-4 grams (mostly from the whipped topping)
- Sugar: 18-22 grams (depending on whether you use regular or sugar-free jello)
- Carbohydrates: 25-30 grams
The Greek yogurt adds protein and probiotics, which is a nice bonus. And because these are portion-controlled in individual cups, it’s easier to enjoy a treat without overdoing it. I appreciate that I can have one of these after dinner without feeling like I need to go for a run the next morning.
For those with dietary concerns: these contain dairy (from the whipped topping and yogurt) and gelatin (from the jello). They’re not suitable for vegans or vegetarians who avoid gelatin. You can find vegan jello alternatives, but I haven’t tested this recipe with them, so I can’t vouch for the results.
Conclusion
These Lighter Candy Corn Layered Jello Cups are proof that you don’t need to sacrifice flavor for a lighter dessert. They’re fun, festive, and surprisingly satisfying—the kind of treat that makes you feel like a kid again but without the sugar crash. I love that I can make them ahead of time, that they look impressive with minimal effort, and that they actually taste as good as they look.
I’d love to hear how yours turn out! Did you try any variations? Did your family fight over the last one like mine did? Drop a comment below and let me know. And if you’re looking for more fall-inspired lighter desserts, check out my healthy pumpkin bars or my light apple crisp—they follow the same philosophy of delicious food that doesn’t weigh you down.
Go ahead, give these a try. I promise you won’t miss the heavy stuff. And hey, if someone tells you they hate candy corn? Just hand them one of these cups and watch what happens.
Frequently Asked Questions
Can I use sugar-free jello for this recipe?
Yes, you can! Sugar-free jello works fine, but it tends to set a bit softer than regular jello. Let it chill for an extra 15-20 minutes per layer to make sure it’s fully set before adding the next layer.
How far ahead can I make these?
You can make these up to 2 days in advance. In fact, they taste even better on day two because the flavors have time to meld. Just keep them covered in the fridge.
Can I use a different type of yogurt?
Absolutely. Regular plain yogurt works, though it might make the cream layer slightly thinner. You can also use vanilla yogurt for extra sweetness—just reduce or skip the honey.
Why did my layers bleed into each other?
This usually happens when you pour the next layer before the previous one is fully set. Make sure each jello layer is completely firm (not just slightly jiggly) before adding the cream or the next jello layer. Patience is key here!
Can I make these in a large dish instead of individual cups?
You can, but it’s harder to get clean layers in a large dish. If you try it, use a clear glass dish so you can still see the layers. You’ll need to let each layer set completely before adding the next, and plan on cutting it into squares for serving.
Pin This Recipe!
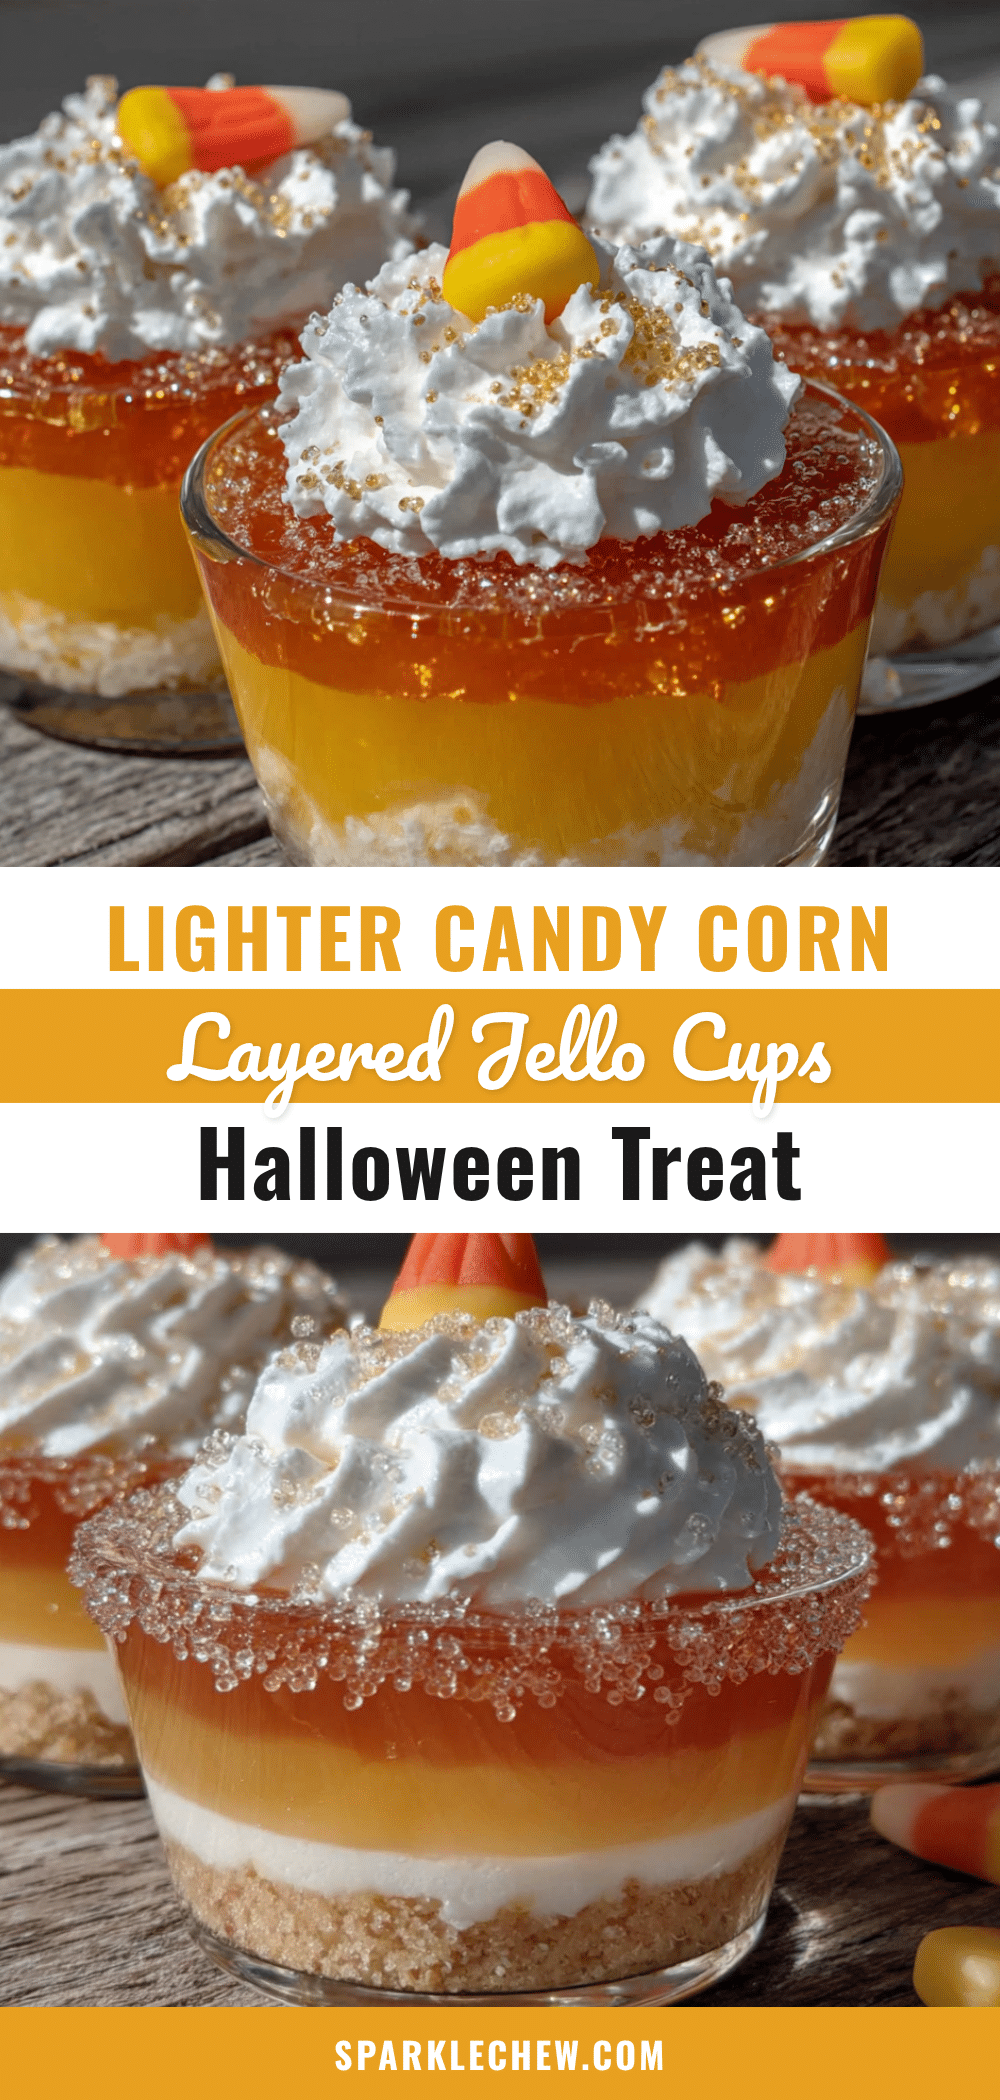
Lighter Candy Corn Layered Jello Cups (Easy 3-Layer Dessert)
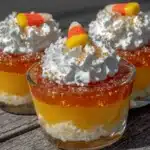
These Lighter Candy Corn Layered Jello Cups are a fun, festive fall dessert with a perfect gradient of yellow, orange, and cream layers. Made with light whipped topping and Greek yogurt, they’re a guilt-free twist on a nostalgic treat that’s quick to assemble and perfect for Halloween or Thanksgiving gatherings.
- Prep Time: 15 minutes
- Cook Time: 0 minutes
- Total Time: 4 hours 15 minutes (includes chilling time)
- Yield: 8 servings 1x
- Category: Dessert
- Cuisine: American
Ingredients
- 1 box (3 oz) lemon jello
- 1 box (3 oz) orange jello
- 1 cup boiling water (for each jello flavor, 2 cups total)
- 1 cup cold water (for each jello flavor, 2 cups total)
- 1 container (8 oz) light whipped topping, thawed
- 1/2 cup plain nonfat Greek yogurt
- 1 tablespoon honey
- 1/2 teaspoon vanilla extract
- Optional: yellow and orange sprinkles for garnish
Instructions
- Start with the yellow (bottom) layer. In a small mixing bowl, empty the lemon jello packet. Add 1 cup of boiling water and whisk for about 2 minutes until the powder is completely dissolved. Then add 1 cup of cold water and stir. Set aside to cool slightly—about 5 minutes.
- Pour the yellow layer. Divide the yellow jello evenly among 6 to 8 clear cups (4 oz size). Each cup should be about one-third full. Refrigerate for at least 1 hour, or until the jello is firm to the touch.
- While that sets, make the cream layer. In a medium mixing bowl, combine the thawed light whipped topping, Greek yogurt, honey, and vanilla extract. Whisk gently until smooth and well combined. Cover and refrigerate until needed.
- Prepare the orange (middle) layer. Once the yellow layer is set, make the orange jello the same way: empty the packet into a bowl, add 1 cup boiling water, whisk for 2 minutes, then add 1 cup cold water. Let it cool for 5 minutes.
- Add the cream layer. Remove the cups from the fridge. Spoon about 2 tablespoons of the cream mixture onto each yellow layer. Spread it gently with the back of the spoon to cover evenly. Return the cups to the fridge for 15 minutes to let the cream layer firm up slightly.
- Pour the orange layer. Once the cream layer has set for 15 minutes, carefully pour the orange jello over the cream layer in each cup. Fill each cup until it’s about two-thirds full.
- Let the orange layer set. Return the cups to the fridge for another 1 to 1.5 hours, until the orange jello is firm.
- Add the final cream layer. Once the orange jello is set, spoon the remaining cream mixture on top of each cup. Smooth gently. If desired, add a few yellow and orange sprinkles on top.
- Chill until ready to serve. Refrigerate the cups for at least 1 more hour before serving. Serve cold.
Notes
Patience is key—each layer must be fully set before adding the next to prevent bleeding. Cool the jello mixture for 5 minutes before pouring to avoid fogging cups or melting the layer underneath. Use a gentle hand when adding the cream layer to keep layers distinct. These taste even better on day two. For a dairy-free version, use dairy-free yogurt and whipped topping. For an adult version, add a splash of vodka or rum to the jello mixture (may require longer chilling).
Nutrition
- Serving Size: 1 cup (4 oz)
- Calories: 130
- Sugar: 20
- Sodium: 85
- Fat: 3.5
- Saturated Fat: 3
- Carbohydrates: 27
- Protein: 3.5
Keywords: candy corn, jello cups, layered dessert, fall dessert, Halloween dessert, light dessert, easy dessert, no-bake dessert