Love this? Save it for later!
Share the inspiration with your friends
I was standing in my kitchen last Tuesday morning, staring into the freezer with one eye barely open, when the smell of burnt coffee and the sound of my own grumbling stomach hit me — and suddenly I was twenty-four again, living in that tiny apartment with the cracked linoleum floor, watching my neighbor Rosa pull a stack of foil-wrapped bundles from her freezer like she was performing magic. She’d hand me one, still slightly frosty, and say, “Two minutes in the microwave, mija. Breakfast is the only meal you should not have to think about.” I didn’t know it then, but that moment was the beginning of my love affair with make-ahead freezer breakfast burritos. Honestly, I think about Rosa every single time I wrap one up. She had this way of making the most practical thing feel like a gift.
Let me tell you, I have messed up more freezer breakfast burritos than I care to admit. The first batch I made on my own turned into a soggy, sad mess that tasted more like freezer burn than breakfast. But over the years — and after a lot of trial and error — I’ve figured out the secrets to making them actually, genuinely good. Not just “good for a frozen breakfast,” but the kind of good that makes you look forward to your alarm going off. The kind where you take a bite and think, “Wait, this is from my freezer?”
Maybe you’ve been there — standing in your own kitchen at 7 AM on a Tuesday, trying to get everyone out the door while also somehow producing a hot breakfast. It’s a lot. But here’s the thing: with a little planning on a Sunday afternoon, you can set yourself up for weeks of effortless, delicious mornings. These make-ahead freezer breakfast burritos are my go-to, and I think they’re about to become yours too.
Why You’ll Love This Recipe
These aren’t just any breakfast burritos. They’re the result of years of testing, a few kitchen disasters, and one very specific breakthrough: the secret to keeping them from turning into a freezer-burned, soggy disappointment. Here’s what makes them special:
- Quick & Easy: Comes together in under an hour on a Sunday, and you’ll have breakfast ready for weeks. Seriously, one batch makes 12 burritos.
- Simple Ingredients: No fancy grocery trips needed. Eggs, cheese, tortillas, your choice of protein, and a few veggies — that’s it. You probably have most of this in your kitchen right now.
- Perfect for Busy Mornings: Whether you’re rushing to work, getting kids to school, or just want to hit snooze one more time, these burritos are your morning superhero.
- Crowd-Pleaser: My picky-eater nephew actually asked for seconds the first time I made these. I almost dropped my spatula.
- Unbelievably Delicious: The texture is spot-on — fluffy eggs, melty cheese, crispy potatoes, all wrapped in a warm tortilla. No sad, soggy bites here.
What makes this recipe different from the rest? It’s the technique. Most recipes tell you to just throw everything in a tortilla and freeze it. But that’s a recipe for disaster. I’ve learned that the key is to slightly undercook the eggs, drain any excess moisture from your ingredients, and let everything cool completely before wrapping. It’s those little details that make all the difference between a burrito that tastes like it was made fresh and one that tastes like a freezer brick.
This recipe isn’t just good — it’s the kind that makes you close your eyes after the first bite. It’s comfort food reimagined: faster, more practical, but with the same soul-soothing satisfaction. Perfect for impressing your future self on a hectic morning, or turning a simple breakfast into something you actually look forward to.
What Ingredients You Will Need
This recipe uses simple, wholesome ingredients to deliver bold flavor and satisfying texture without the fuss. Most of these are pantry staples, and the ones that aren’t are easy to find at any grocery store.
For the Filling
- 12 large eggs — the foundation of any good breakfast burrito. I use organic when I can, but any large eggs work fine.
- 1 pound breakfast sausage or bacon — I prefer Jimmy Dean sausage for its consistent flavor, but feel free to use turkey sausage, chorizo, or even diced ham. (For a vegetarian option, see variations below.)
- 2 cups frozen shredded hash browns — the crispy potato element is non-negotiable in my book. I like Ore-Ida for their consistent texture.
- 1 cup shredded cheddar cheese — sharp cheddar gives the most flavor, but a Mexican blend or pepper jack works beautifully too.
- 1/2 cup milk — helps keep the eggs fluffy. Any milk works, including non-dairy options like oat milk.
- 1/2 cup diced onion — yellow or white, adds a savory backbone. (Adds depth of flavor.)
- 1/2 cup diced bell pepper — any color works. I like red for sweetness, but green is classic. (Use fresh or frozen, thawed and drained.)
- Salt and black pepper to taste — don’t be shy with the seasoning.
- Optional: 1/4 cup chopped green onions or fresh cilantro — for a fresh pop at the end.
For the Wraps
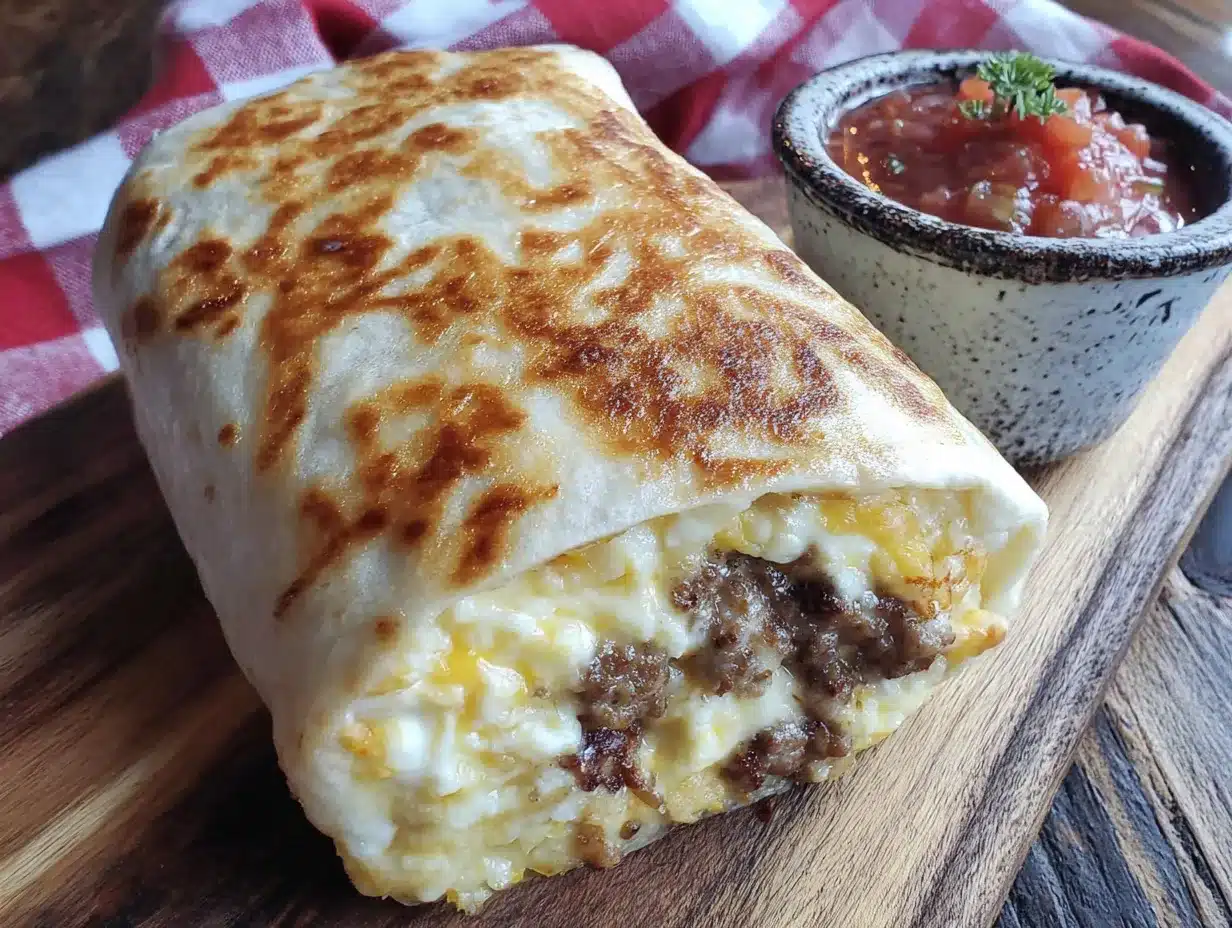
- 12 large flour tortillas — look for burrito-sized (10-inch) tortillas. I recommend Mission or Ole Xtreme Wellness for a lower-carb option. (Use gluten-free tortillas if needed.)
For Freezing & Reheating
- Parchment paper or aluminum foil — for wrapping each burrito individually.
- Freezer-safe zip-top bags — to store the wrapped burritos.
Substitution Guidance: Use turkey sausage or plant-based crumbles for a lighter option. Swap the cheese with dairy-free shreds if needed. For a low-carb version, use low-carb tortillas and skip the hash browns. The beauty of this recipe is its flexibility — you can really make it your own.
Equipment Needed
You don’t need a lot of fancy tools for this recipe, which is part of why I love it. Here’s what you’ll need:
- Large skillet or frying pan — for cooking the sausage and eggs. A non-stick pan makes cleanup a breeze.
- Mixing bowl — to whisk the eggs.
- Whisk or fork — for beating the eggs until smooth.
- Spatula — for scrambling and stirring.
- Cutting board and knife — for dicing the onion and bell pepper.
- Measuring cups and spoons — accuracy helps, but honestly, I eyeball most of it now.
- Baking sheet — optional but helpful for laying out the filled burritos before wrapping.
- Parchment paper or aluminum foil — for wrapping.
- Freezer-safe zip-top bags — for storage.
Budget-Friendly Tip: If you don’t have a non-stick skillet, a well-seasoned cast iron pan works great. Just make sure to use a little extra butter or oil to prevent sticking. And if you don’t have a baking sheet, a large cutting board works fine for assembly.
Preparation Method
Alright, let’s get to it. I’m going to walk you through every step, including all the little tricks I’ve learned the hard way. Trust me, following these steps exactly will save you from a soggy burrito disaster.
- Cook the sausage (or bacon): Heat your large skillet over medium-high heat. Add the sausage and cook, breaking it up with a spatula, until it’s browned and cooked through — about 6-8 minutes. If using bacon, cook until crispy, then crumble. Use a slotted spoon to transfer the cooked meat to a paper towel-lined plate to drain. Pro tip: Don’t skip the draining step. Excess grease is one of the main culprits of soggy burritos.
- Cook the hash browns: In the same skillet (with about 1 tablespoon of the rendered fat or a little oil), add the frozen hash browns in an even layer. Let them cook undisturbed for 3-4 minutes until golden brown on the bottom, then flip and cook another 3-4 minutes. Season with a pinch of salt and pepper. Transfer to a bowl and set aside to cool. You want them crispy but not overly done — they’ll continue to cook slightly when you reheat the burrito.
- Sauté the vegetables: Reduce the heat to medium. Add the diced onion and bell pepper to the skillet and cook for 3-4 minutes until softened and just starting to brown. Remove from the pan and set aside with the hash browns. This step adds so much flavor, don’t skip it.
- Scramble the eggs: In a mixing bowl, whisk the eggs with the milk, a pinch of salt, and a few grinds of black pepper until well combined. Reduce the skillet heat to medium-low and add a pat of butter. Pour in the eggs and let them set for about 30 seconds before gently stirring with a spatula. Continue cooking, stirring occasionally, until the eggs are just set but still slightly soft — about 3-4 minutes. Here’s the key: slightly undercook the eggs. They’ll finish cooking when you reheat the burrito, and this prevents them from becoming rubbery in the freezer.
- Combine the filling: In a large bowl, gently mix the cooked sausage, hash browns, sautéed vegetables, scrambled eggs, and shredded cheese. Stir until everything is evenly distributed. Let the mixture cool completely — this is crucial. If you wrap hot filling, the steam will make the tortillas soggy and create ice crystals in the freezer.
- Assemble the burritos: Lay a tortilla on a clean work surface. Spoon about 3/4 cup of the filling into the center, spreading it into a log shape. Fold in the sides, then fold the bottom flap over the filling, tucking it tightly. Roll the burrito away from you, keeping it snug but not too tight — you don’t want the tortilla to tear. Repeat with the remaining tortillas and filling.
- Wrap for freezing: Place each burrito seam-side down on a piece of parchment paper or aluminum foil. Wrap tightly, folding in the ends like a present. I prefer parchment paper because it’s easier to microwave, but foil works great if you plan to reheat in the oven or air fryer.
- Freeze: Place the wrapped burritos in a single layer on a baking sheet and freeze for 1-2 hours, or until solid. Then transfer them to a freezer-safe zip-top bag, squeeze out as much air as possible, and seal. Label with the date and contents. This initial freeze prevents them from sticking together in the bag.
Cooking Tips & Techniques
Over the years, I’ve made every mistake in the book with freezer breakfast burritos. Here’s what I’ve learned so you don’t have to repeat my failures.
The Moisture Problem: This is the number one issue with freezer burritos. Watery fillings turn into icy, soggy disasters. To combat this, make sure to drain any cooked meat well, pat vegetables dry if using frozen, and don’t overfill the tortillas. I also recommend letting the filling cool completely — this allows any residual moisture to evaporate.
The Tortilla Tear: Tortillas can crack or tear when you roll them, especially if they’re cold. Warm them briefly in the microwave (about 10-15 seconds per tortilla) to make them pliable. This small step makes a huge difference.
Batch Cooking Strategy: I like to do all my prep work first — dice the vegetables, shred the cheese, cook the meat — before I start cooking anything else. This way, the assembly line moves smoothly and I’m not scrambling (pun intended) to keep up.
Freezer Burn Prevention: The key to preventing freezer burn is removing as much air as possible from the storage bag. I use the “water displacement method”: seal the bag almost all the way, then slowly lower it into a bowl of water (keeping the seal above water) to push the air out, then seal completely. Or just use a straw to suck the air out — whatever works.
Reheating Perfection: For the best texture, unwrap the burrito and microwave it for 1 minute, then flip and microwave another 30-45 seconds. For a crispy exterior, finish it in a dry skillet over medium heat for 1-2 minutes per side, or pop it in the air fryer at 350°F for 3-4 minutes. Trust me, that extra step is worth it.
Variations & Adaptations
One of the best things about this recipe is how customizable it is. Here are some of my favorite variations:
Vegetarian Version
Skip the meat and add a can of drained and rinsed black beans or pinto beans. You can also add sautéed mushrooms for an earthy, savory flavor. I’ve made this version for my vegetarian sister-in-law, and she says it’s even better than the original.
Spicy Southwest Style
Add 1/2 teaspoon of cumin and 1/4 teaspoon of smoked paprika to the eggs. Use pepper jack cheese instead of cheddar, and add a diced jalapeño (seeds removed for less heat) to the vegetable sauté. Top with a spoonful of salsa before wrapping — just make sure to drain any excess liquid.
Low-Carb/Keto Friendly
Use low-carb tortillas (I like Ole Xtreme Wellness). Skip the hash browns and add extra sautéed vegetables like spinach, mushrooms, or zucchini. Use full-fat cheese and add a dollop of cream cheese to the egg mixture for extra richness.
Breakfast Burrito Bowl (No Tortilla)
If you’re watching carbs or just want a lighter option, serve the filling in a bowl with a side of avocado, salsa, and a sprinkle of cilantro. It’s equally delicious and even faster to reheat.
Serving & Storage Suggestions
These burritos are designed to be a grab-and-go breakfast, but they can be dressed up for a more leisurely meal too.
Serving Temperature & Presentation: Serve hot, straight from the microwave or skillet. If you’re feeling fancy, slice the burrito in half diagonally and serve with a side of fresh salsa, sour cream, or sliced avocado. A sprinkle of fresh cilantro on top makes it look restaurant-worthy.
Complementary Dishes & Beverages: These burritos pair beautifully with a simple fruit salad or a side of fresh orange slices. For drinks, a hot cup of coffee, a cold glass of orange juice, or even a spicy Bloody Mary for a weekend brunch vibe.
Storage Instructions: Store the wrapped burritos in a freezer-safe bag for up to 3 months. Be sure to label the bag with the date so you know how long they’ve been in there. I usually make a batch every month or so.
Reheating Methods: The microwave is the fastest option (1.5-2 minutes total, flipping halfway). For a crispier tortilla, use an air fryer at 350°F for 3-4 minutes, or a dry skillet over medium heat for 2-3 minutes per side. If reheating from frozen, there’s no need to thaw — just add an extra 30 seconds to the microwave time.
Flavor Development: Here’s a fun fact: the flavors actually meld and deepen after a day or two in the freezer. The first burrito you eat might taste slightly different from one you eat a week later — in a good way. The spices have time to marry, and everything just tastes more cohesive.
Nutritional Information & Benefits
Here’s an approximate nutritional breakdown per burrito (based on using pork sausage, cheddar cheese, and standard flour tortillas):
- Calories: 380-420
- Protein: 22-25g
- Fat: 18-22g
- Carbohydrates: 28-32g
- Fiber: 2-3g
Health Benefits: These burritos are a fantastic source of protein, which keeps you full and energized throughout the morning. The eggs provide choline, which is great for brain health, and the vegetables add important vitamins and antioxidants. Using turkey sausage or plant-based crumbles can reduce the saturated fat content significantly.
Dietary Considerations: This recipe can be easily adapted to be gluten-free (use gluten-free tortillas), low-carb (use low-carb tortillas and skip the hash browns), or vegetarian (skip the meat and add beans). It’s naturally nut-free and can be made dairy-free with appropriate cheese and milk substitutes.
Potential Allergens: Eggs, dairy (cheese, milk), and gluten (tortillas) are the main allergens in this recipe. Adjust ingredients as needed for your dietary needs.
Conclusion
Look, I know it takes a little effort to make these burritos. But honestly, the payoff is enormous. You’re investing maybe an hour of your time on a Sunday to save yourself 15 minutes of stress every single morning for the next month. That’s a trade I’ll make every time.
These make-ahead freezer breakfast burritos have saved my sanity on more mornings than I can count. They’ve turned chaotic, rushed mornings into something almost peaceful. And they’ve reminded me that taking care of your future self is one of the kindest things you can do.
I’d love to hear how they turn out for you. Did you try a variation I didn’t mention? Did your kids actually eat them without complaining? (Mine did, and it felt like a miracle.) Drop a comment below and let me know your favorite filling combination. And if you’re feeling generous, share this recipe with a friend who also deserves an easier morning.
Go ahead — make a batch this weekend. Your future self will thank you.
Frequently Asked Questions
Can I make these breakfast burritos without eggs?
Absolutely! You can use a tofu scramble as a substitute. Crumble extra-firm tofu and cook it with a little turmeric (for color), nutritional yeast (for cheesy flavor), and your favorite seasonings. It works surprisingly well in these burritos.
How long do freezer breakfast burritos last?
Properly wrapped and stored in a freezer-safe bag, these burritos will stay fresh for up to 3 months. After that, they’re still safe to eat, but the texture and flavor may start to decline. I recommend labeling the bag with the date so you can keep track.
Can I reheat these burritos in an air fryer?
Yes! The air fryer is actually my preferred method for reheating. Unwrap the burrito, place it in the air fryer basket, and cook at 350°F for 3-4 minutes, flipping halfway through. The tortilla gets wonderfully crispy on the outside while the filling stays hot and melty.
What’s the best way to prevent soggy burritos?
The most important step is to let the filling cool completely before wrapping. Hot filling creates steam, which leads to soggy tortillas and ice crystals in the freezer. Also, make sure to drain any excess moisture from cooked meat and vegetables. Slightly undercooking the eggs also helps, as they’ll finish cooking when reheated.
Can I use corn tortillas instead of flour?
You can, but corn tortillas are smaller and more prone to cracking when rolled. If you want to use corn tortillas, I recommend warming them thoroughly and using a double layer to prevent breakage. They’ll also have a different flavor profile — more earthy and slightly sweet — which can be delicious with the right fillings.
Pin This Recipe!
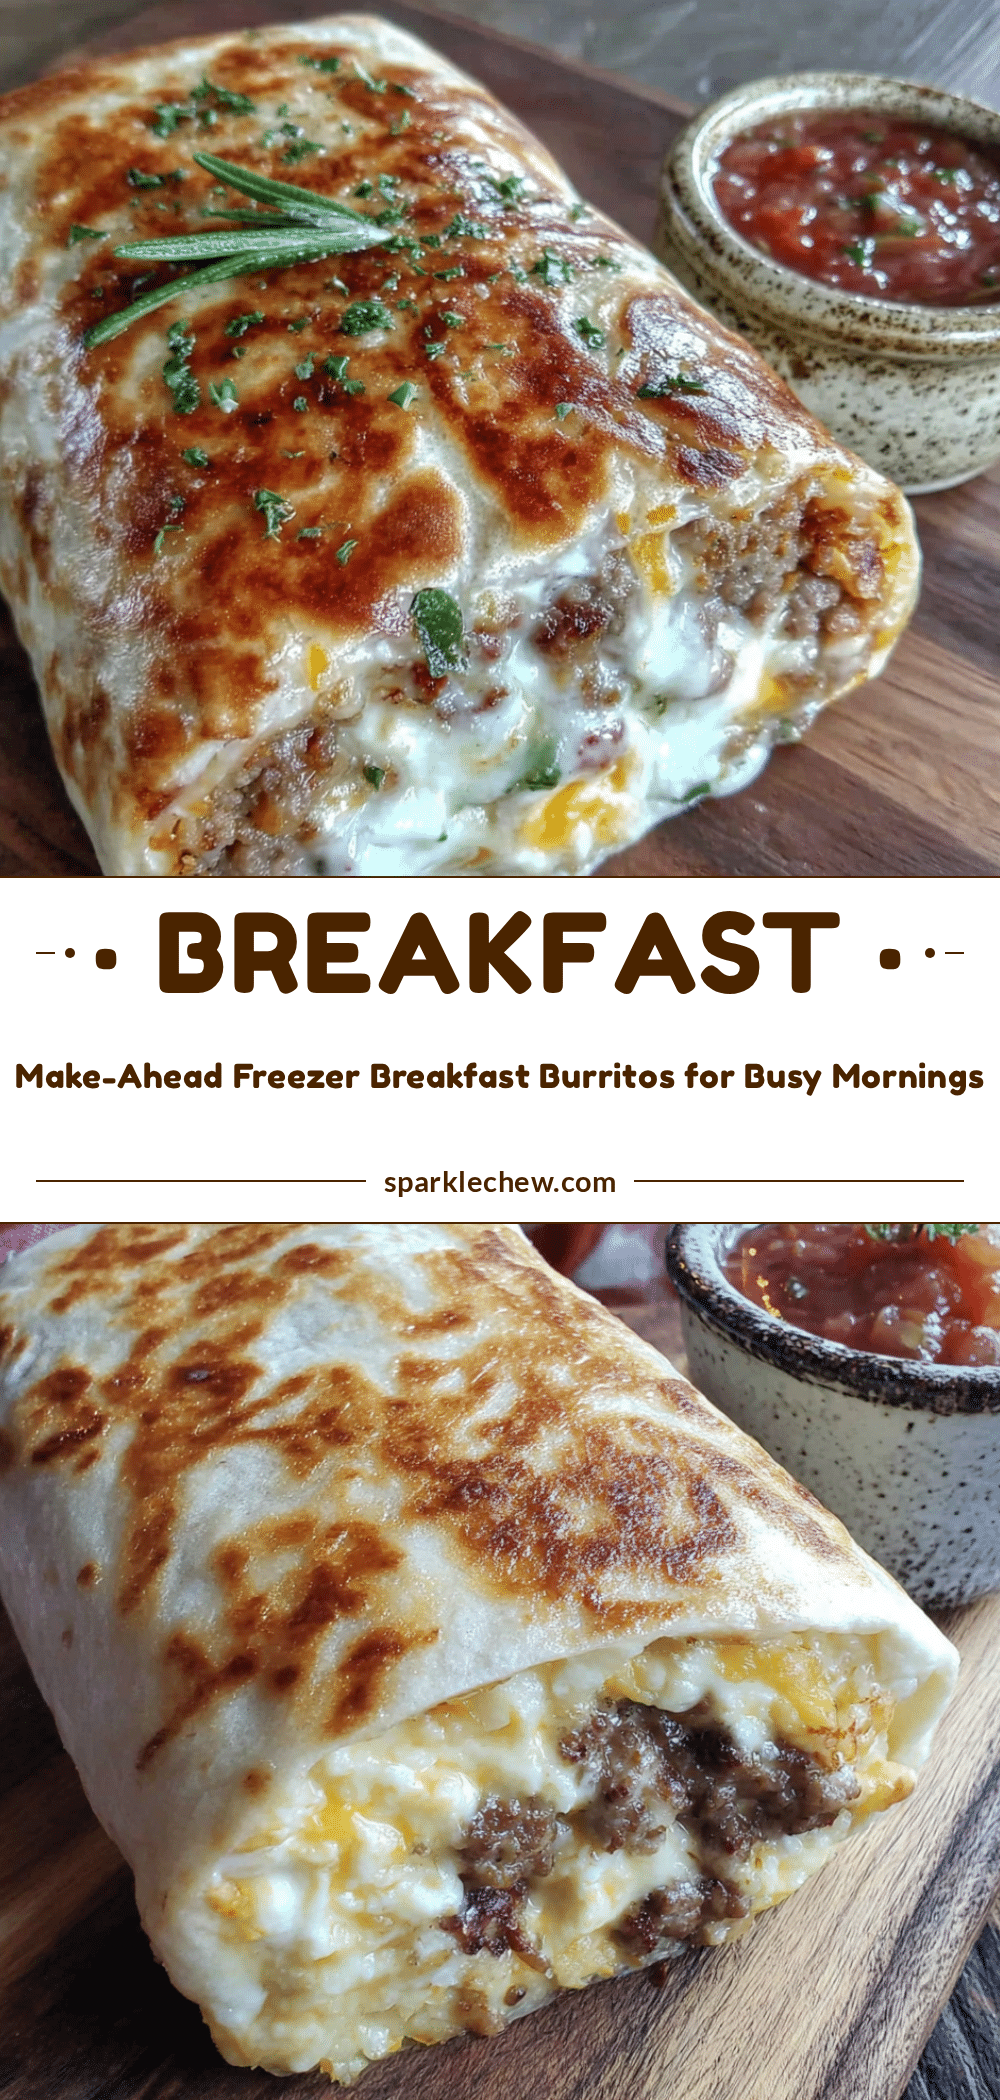
Make-Ahead Freezer Breakfast Burritos: Easy Busy Morning Meal

These make-ahead freezer breakfast burritos are the ultimate solution for busy mornings. With fluffy eggs, crispy potatoes, melty cheese, and your choice of protein, they’re easy to prep in bulk and reheat perfectly for a delicious, stress-free breakfast.
- Prep Time: 20 minutes
- Cook Time: 25 minutes
- Total Time: 45 minutes
- Yield: 12 servings 1x
- Category: Breakfast
- Cuisine: American
Ingredients
- 12 large eggs
- 1 pound breakfast sausage or bacon
- 2 cups frozen shredded hash browns
- 1 cup shredded cheddar cheese
- 1/2 cup milk
- 1/2 cup diced onion
- 1/2 cup diced bell pepper
- Salt and black pepper to taste
- 1/4 cup chopped green onions or fresh cilantro (optional)
- 12 large flour tortillas (10-inch)
- Parchment paper or aluminum foil
- Freezer-safe zip-top bags
Instructions
- Cook the sausage (or bacon): Heat your large skillet over medium-high heat. Add the sausage and cook, breaking it up with a spatula, until browned and cooked through — about 6-8 minutes. If using bacon, cook until crispy, then crumble. Use a slotted spoon to transfer the cooked meat to a paper towel-lined plate to drain.
- Cook the hash browns: In the same skillet (with about 1 tablespoon of the rendered fat or a little oil), add the frozen hash browns in an even layer. Let them cook undisturbed for 3-4 minutes until golden brown on the bottom, then flip and cook another 3-4 minutes. Season with a pinch of salt and pepper. Transfer to a bowl and set aside to cool.
- Sauté the vegetables: Reduce the heat to medium. Add the diced onion and bell pepper to the skillet and cook for 3-4 minutes until softened and just starting to brown. Remove from the pan and set aside with the hash browns.
- Scramble the eggs: In a mixing bowl, whisk the eggs with the milk, a pinch of salt, and a few grinds of black pepper until well combined. Reduce the skillet heat to medium-low and add a pat of butter. Pour in the eggs and let them set for about 30 seconds before gently stirring with a spatula. Continue cooking, stirring occasionally, until the eggs are just set but still slightly soft — about 3-4 minutes.
- Combine the filling: In a large bowl, gently mix the cooked sausage, hash browns, sautéed vegetables, scrambled eggs, and shredded cheese. Stir until everything is evenly distributed. Let the mixture cool completely.
- Assemble the burritos: Lay a tortilla on a clean work surface. Spoon about 3/4 cup of the filling into the center, spreading it into a log shape. Fold in the sides, then fold the bottom flap over the filling, tucking it tightly. Roll the burrito away from you, keeping it snug but not too tight. Repeat with the remaining tortillas and filling.
- Wrap for freezing: Place each burrito seam-side down on a piece of parchment paper or aluminum foil. Wrap tightly, folding in the ends like a present.
- Freeze: Place the wrapped burritos in a single layer on a baking sheet and freeze for 1-2 hours, or until solid. Then transfer them to a freezer-safe zip-top bag, squeeze out as much air as possible, and seal. Label with the date and contents.
Notes
Slightly undercook the eggs to prevent them from becoming rubbery in the freezer. Let the filling cool completely before wrapping to avoid soggy tortillas and ice crystals. For best results, reheat in an air fryer at 350°F for 3-4 minutes or in a dry skillet for a crispy exterior.
Nutrition
- Serving Size: 1 burrito
- Calories: 400
- Sugar: 3
- Sodium: 650
- Fat: 20
- Saturated Fat: 8
- Carbohydrates: 30
- Fiber: 2.5
- Protein: 23
Keywords: freezer breakfast burritos, make-ahead breakfast, breakfast burritos, freezer meals, easy breakfast, meal prep breakfast