Love this? Save it for later!
Share the inspiration with your friends
The neighborhood Halloween block party was in six hours and I’d completely forgotten. Everyone else would be bringing elaborate themed desserts—I’d seen the neighbor across the street hauling in a cake shaped like a graveyard, complete with little tombstone cookies. I had a box of orange Jell-O, a box of yellow Jell-O, some unflavored gelatin, and a can of evaporated milk in my pantry. Honestly, I almost just grabbed a bag of chips and called it a day.
But then I remembered this trick my aunt used to do with layered Jell-O—you know, where you let each layer set before adding the next one. And it hit me: if I could do it in candy corn colors, I’d have something that looked like I spent hours on it. The thing is, I’m not exactly patient. Waiting for gelatin to set is basically my version of watching paint dry. But I had no choice. So I poured my first orange layer, set a timer, and paced around my kitchen like a nervous parent.
By the time the fourth layer was done, the sun was starting to go down. I popped those little cups onto a tray, threw on a witch hat, and walked over. And let me tell you—those Easy Candy Corn Layered Jello Cups were the first thing to disappear. People kept asking where I bought them. I just smiled and said I whipped them up that afternoon. Maybe you’ve been there—showing up with something simple while everyone else stressed over complicated recipes, and somehow yours wins the day. That’s the magic of these little cups.
Why You’ll Love This Recipe
These Easy Candy Corn Layered Jello Cups are proof that you don’t need fancy pastry skills to make something stunning. I’ve tested this recipe about seven times now—yes, I had a few blobby disasters before I figured out the timing—and I can confidently say this version works every single time.
- Quick & Easy: The active prep time is maybe 15 minutes. The rest is just waiting for layers to set. You can binge-watch a show between steps.
- Simple Ingredients: Orange Jell-O, lemon Jell-O, unflavored gelatin, evaporated milk, and sugar. That’s it. No specialty stores required.
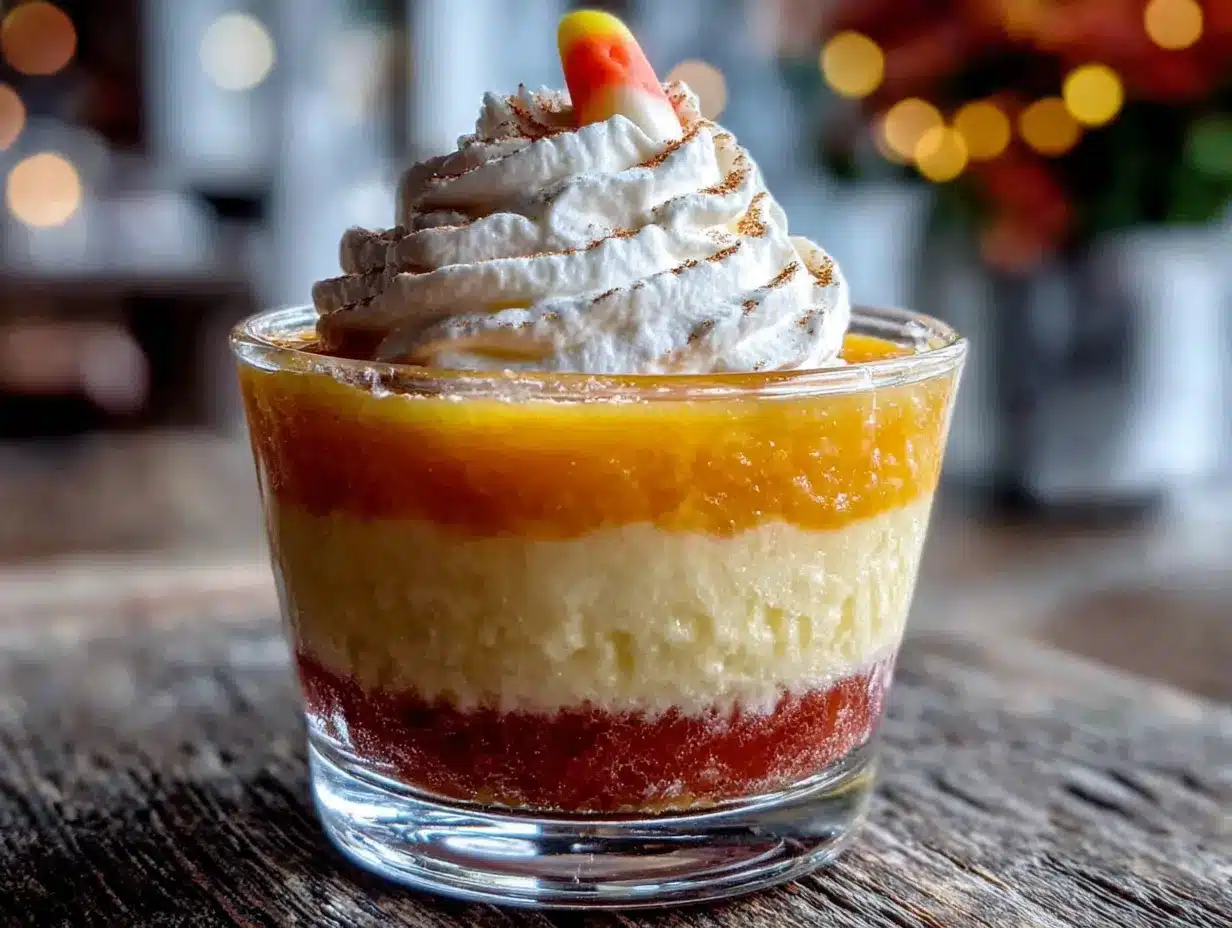
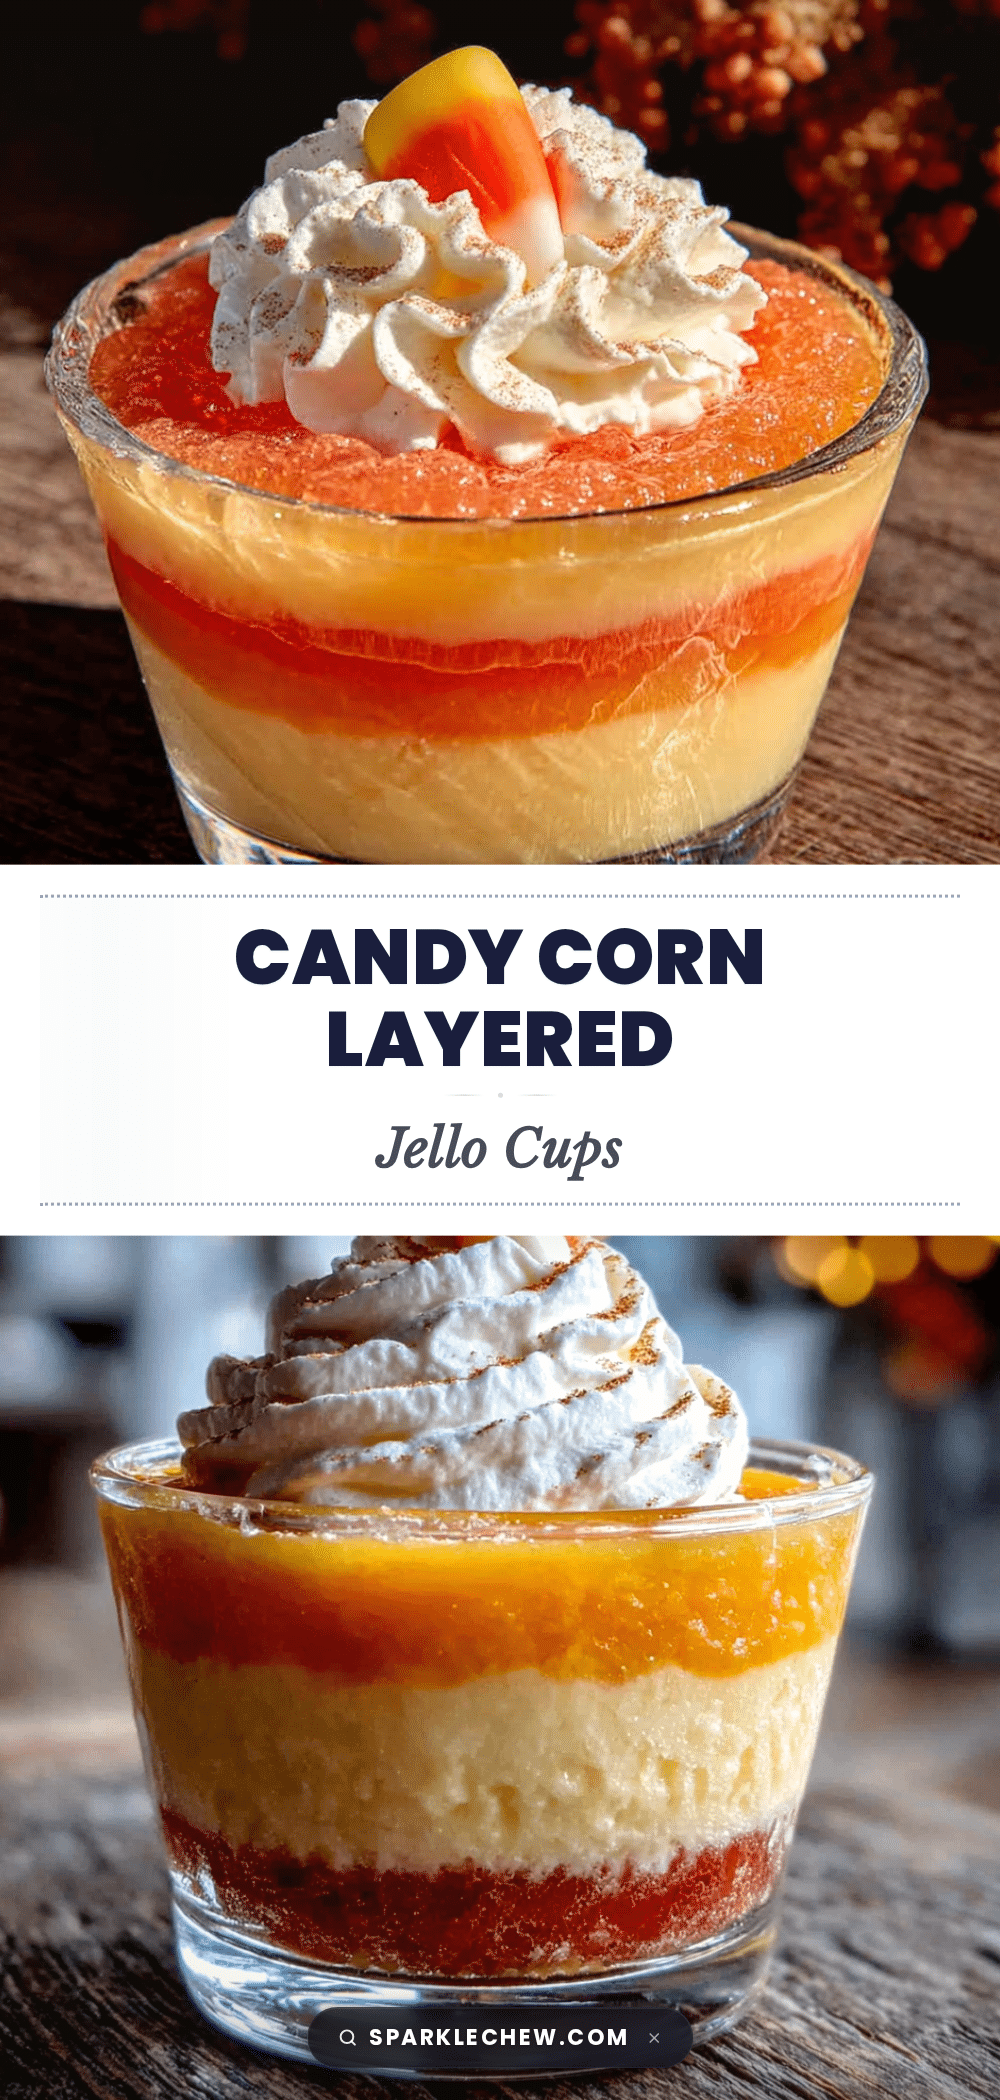
- Perfect for Halloween: These look like tiny edible candy corns in a cup. Kids go crazy for them, and adults get nostalgic.
- Crowd-Pleaser: I’ve brought these to three different parties now, and every single time someone asks for the recipe. They’re gluten-free too, so almost everyone can enjoy them.
- Unbelievably Delicious: The creamy middle layer against the fruity top and bottom is honestly addictive. The texture is silky and firm at the same time—like a Jell-O pudding hybrid.
What makes these different from other layered Jell-O recipes is the technique. Most people try to rush the layers and end up with a muddy mess. I figured out that using a bit of extra unflavored gelatin in the creamy layer gives it structure without making it rubbery. Plus, chilling the cups at an angle for the middle layer creates that signature candy corn wedge shape. It’s a small trick that makes a huge visual difference.
These cups aren’t just cute—they’re the kind of dessert that makes people close their eyes after the first bite. Perfect for Halloween parties without the stress, or for turning a regular Tuesday into something a little more fun.
What Ingredients You Will Need
This recipe uses simple, everyday ingredients to create something that looks deceptively fancy. Most of these are probably already in your pantry—I know they were in mine when I needed them most.
For the Orange Layer (Bottom)
- 1 box (3 oz) orange Jell-O (I prefer Jell-O brand for consistent setting)
- 1 cup boiling water
- 1/2 cup cold water
For the Yellow Layer (Top)
- 1 box (3 oz) lemon Jell-O (or any yellow flavor—pineapple works too)
- 1 cup boiling water
- 1/2 cup cold water
For the Creamy White Layer (Middle)
- 1 packet (0.25 oz) unflavored gelatin (Knox is my go-to)
- 1/4 cup cold water
- 1 can (12 oz) evaporated milk (not sweetened condensed—they’re different!)
- 1/4 cup sugar
- 1 teaspoon vanilla extract
You’ll also need about 8 to 10 small clear plastic cups or glass cups so the layers are visible. I use 5-ounce cups because they’re the perfect single-serving size. If you want to get fancy, you can use small mason jars—they make the layers look even more dramatic.
A quick note on the Jell-O: make sure you’re using the small 3-ounce boxes, not the larger family-size ones. I accidentally grabbed the big box once and ended up with way too much orange gelatin. It wasn’t a disaster, but I had to make extra cups. Also, for the unflavored gelatin, don’t skip it in the creamy layer—that’s what gives it that firm but silky texture that holds up next to the fruity layers.
If you’re dairy-free, you can substitute the evaporated milk with full-fat coconut milk. It changes the flavor slightly but still works beautifully. Just make sure you shake the can well before measuring.
Equipment Needed
You don’t need much for this recipe, which is part of the appeal. Here’s what I use every time:
- Small bowls (one for each Jell-O flavor, plus one for the creamy layer)
- Whisk (a fork works in a pinch, but a whisk dissolves gelatin faster)
- Measuring cups and spoons
- Clear plastic or glass cups (5-ounce size is perfect)
- A tray or baking sheet to hold the cups while they set in the fridge
- A small saucepan (if you’re melting the creamy layer on the stove—though microwave works too)
For the angled middle layer, I prop my cups against the edge of a baking dish or use a muffin tin to hold them at a tilt. Honestly, I’ve used rolled-up dish towels before and it worked fine. You don’t need anything fancy—just a way to keep the cups at a 45-degree angle for about 20 minutes while the creamy layer sets.
If you’re making these often, those clear plastic cups with lids are a game-changer. I found a pack of 50 at the grocery store for like four bucks. They stack nicely in the fridge and make transport super easy.
Preparation Method
Alright, let’s get into the actual making of these things. I’m going to walk you through each step like we’re in the kitchen together. Trust me, the first time I did this, I messed up the timing and ended up with layers that bled into each other. So I’ve learned a few things the hard way.
Step 1: Make the Orange Layer
In a small bowl, empty the orange Jell-O powder. Pour in 1 cup of boiling water and whisk until the powder is completely dissolved—about 2 minutes. Then stir in 1/2 cup of cold water. Pour this mixture evenly into your cups, filling each about one-third full. Place the cups on a tray and refrigerate for at least 1 hour, or until the gelatin is firm to the touch. Don’t rush this. If the orange layer isn’t fully set, the creamy layer will sink into it and you’ll lose that clean line.
Step 2: Make the Creamy White Layer
While the orange layer is setting, make the creamy middle. In a small bowl, sprinkle the unflavored gelatin over 1/4 cup of cold water. Let it sit for about 5 minutes—it’ll look like a weird, spongy mess. That’s normal. In a small saucepan, combine the evaporated milk and sugar over medium heat. Stir until the sugar dissolves and the milk is warm but not boiling—about 3 minutes. Remove from heat and stir in the vanilla extract. Add the bloomed gelatin and whisk until it’s completely dissolved. Let this mixture cool to room temperature—about 15 minutes. If it’s too warm, it will melt your orange layer. I learned this the hard way when my first batch turned into a swirly mess.
Step 3: Add the Creamy Layer at an Angle
Once the orange layer is firm and the creamy mixture is cool, it’s time for the trick. Arrange your cups at a 45-degree angle—I prop them against the edge of a baking dish or use a muffin tin. Gently spoon the creamy mixture into each cup, filling them about halfway up the angled side. You want the creamy layer to cover the orange layer completely but sit at an angle. Refrigerate for about 45 minutes, or until firm. Yes, you need to keep them angled. This is what creates that candy corn wedge shape.
Step 4: Make the Yellow Layer
While the creamy layer sets, prepare the lemon Jell-O the same way: dissolve the powder in 1 cup of boiling water, then stir in 1/2 cup of cold water. Let this cool to room temperature—about 10 minutes. Again, don’t pour hot liquid over the creamy layer. It will melt and create a mess.
Step 5: Add the Yellow Layer
Once the creamy layer is firm, carefully straighten your cups. Gently pour the cooled yellow Jell-O over the creamy layer, filling the cups almost to the top. You want to leave a tiny gap so they don’t spill. Refrigerate for at least 2 hours, or until completely set. Overnight is even better if you have the time.
Step 6: Serve and Enjoy
When you’re ready to serve, you can eat them straight from the cups or run a knife around the edge and pop them out onto a plate. I like serving them in the clear cups because the layers are so pretty to look at. Add a little whipped cream on top if you’re feeling extra festive.
Cooking Tips & Techniques
I’ve made these Easy Candy Corn Layered Jello Cups about a dozen times now, and I’ve definitely had my share of failures. Here’s what I’ve learned so you don’t have to repeat my mistakes.
Patience is everything. I know it’s tempting to rush through the layers, but each one needs to be fully set before you add the next. If you try to speed things up, you’ll end up with layers that bleed together and look more like a muddy rainbow than candy corn. I ruined my first batch because I thought “close enough” was good enough. It wasn’t.
Temperature matters. When you add the creamy layer or the top yellow layer, make sure they’re at room temperature or cooler. Hot liquid will melt the layer underneath and create a cloudy mess. I let my mixtures cool for at least 10-15 minutes before pouring. When in doubt, touch the side of the bowl—if it feels warm, wait longer.
Angle your cups carefully. The candy corn look depends on that angled white layer. I use a muffin tin to hold my cups at a consistent angle. If you don’t have one, a baking dish with a rolled towel works fine. Just make sure all the cups are tilted at the same angle so they look uniform.
Use clear cups. This might seem obvious, but the whole point is showing off those layers. I’ve seen people try this in opaque cups and it just doesn’t have the same effect. Clear plastic cups are cheap and make the presentation pop.
Don’t skip the unflavored gelatin in the creamy layer. The evaporated milk alone won’t set firmly enough to hold its shape against the Jell-O layers. That extra packet of gelatin is what gives the white layer that perfect, sliceable texture.
One more thing—if you’re making these for a party, you can prep them the day before. They actually hold up really well overnight, and the flavors meld together even better. Just keep them covered in the fridge so they don’t pick up any weird smells from your leftovers.
Variations & Adaptations
Once you’ve mastered the basic technique, you can really play around with these. Here are some variations I’ve tried that turned out great.
Different Color Combinations
You’re not stuck with candy corn colors. Try red, white, and blue for the Fourth of July—use strawberry Jell-O, the same creamy layer, and blueberry Jell-O on top. Or go green, white, and red for Christmas. The technique is exactly the same; just swap the Jell-O flavors.
Dairy-Free Version
I mentioned this earlier, but full-fat coconut milk works beautifully in place of evaporated milk. The flavor is slightly different—you’ll get a hint of coconut—but the texture is just as creamy. Just make sure you use the canned coconut milk, not the refrigerated carton kind. The carton version doesn’t have enough fat to set properly.
Sugar-Free Option
If you’re watching your sugar intake, you can use sugar-free Jell-O and swap the sugar in the creamy layer for a sugar substitute like stevia or monk fruit. I’ve tested this with sugar-free Jell-O and it works fine—just follow the same proportions. The texture might be slightly softer, but it still sets.
Adult Version
For an adult party, you can add a splash of vodka or rum to each layer. Just replace some of the cold water with your alcohol of choice. Keep in mind that alcohol can prevent gelatin from setting properly, so don’t go overboard—about 2 tablespoons per layer is plenty.
Mini Cups for Parties
If you’re serving a crowd, use smaller 2-ounce cups instead of the 5-ounce ones. You’ll get more servings and they look adorable. Just reduce the setting time slightly since the layers are thinner.
I personally love the Fourth of July version—it’s become a tradition at our family barbecue. Something about those red, white, and blue layers just screams summer.
Serving & Storage Suggestions
These Easy Candy Corn Layered Jello Cups are best served cold, straight from the fridge. The texture is firmer and the flavors are more pronounced when they’re chilled. I usually pull them out about 5 minutes before serving so they’re not ice-cold, but still nicely cool.
For presentation, I like to arrange them on a tray with some Halloween-themed napkins or a little fake spider web underneath. If you’re feeling extra, add a dollop of whipped cream on top and a sprinkle of orange or yellow sprinkles. Kids absolutely lose their minds over this.
These pair wonderfully with other Halloween treats. I’ve served them alongside spider web cookies and some hot apple cider for a cozy fall gathering. The lightness of the Jell-O cups balances out richer desserts nicely.
Storage: Keep the cups covered in the refrigerator for up to 5 days. I use those clear plastic lids that come with the cups, or I cover the tray tightly with plastic wrap. Don’t leave them out at room temperature for more than 2 hours—gelatin can start to weep and lose its structure.
Freezing: I don’t recommend freezing these. The texture gets weird and watery when thawed. Gelatin doesn’t freeze well, so just stick to refrigeration.
One thing I’ve noticed is that the flavors actually get better after a day or two in the fridge. The layers meld together slightly at the edges, creating this lovely gradient effect. So don’t worry if you make them a day ahead—they’ll still be fantastic.
Nutritional Information & Benefits
Here’s a rough estimate for one serving (one 5-ounce cup):
- Calories: 180
- Fat: 4g
- Carbohydrates: 34g
- Sugar: 30g
- Protein: 5g
These numbers will vary depending on whether you use sugar-free Jell-O or full-fat evaporated milk. The sugar-free version cuts the carbs and sugar roughly in half.
On the health front, gelatin is actually pretty good for you. It’s rich in collagen, which supports joint health, skin elasticity, and gut health. I know it sounds weird, but that wiggly dessert is doing your body some favors. The evaporated milk adds calcium and protein, making these a bit more substantial than regular Jell-O.
These cups are naturally gluten-free, which makes them a safe option for guests with celiac disease or gluten sensitivity. Just double-check your Jell-O boxes—most are gluten-free, but it’s always good to verify.
If you’re watching your sugar intake, the sugar-free version is a great alternative. You still get that fun, layered look and creamy texture without the sugar crash. I’ve made them for my diabetic aunt and she loved them.
From a wellness perspective, I love that these are a lighter dessert option. They’re satisfying without being heavy, which is perfect after a big Halloween meal or party spread.
Conclusion
These Easy Candy Corn Layered Jello Cups are the kind of recipe that makes you look like a kitchen wizard without actually having to work that hard. They’re fun, festive, and surprisingly forgiving once you know a few basic tricks. Whether you’re bringing them to a Halloween party, making them with your kids on a rainy afternoon, or just want something colorful to brighten up your dessert rotation, these little cups deliver every time.
I love how versatile they are—you can change the colors for any holiday, make them dairy-free or sugar-free, or just keep them classic. The first time I made these, I was frantically racing against a party deadline. Now I make them just because they make me smile. There’s something about that perfect little candy corn wedge that feels like a tiny victory.
So go ahead and give them a try. Experiment with the flavors, play with the colors, and don’t stress if your first batch isn’t perfect. Mine wasn’t either. But once you nail that technique, you’ll have a go-to dessert that impresses every single time.
I’d love to hear how yours turn out! Drop a comment below and let me know what color combinations you tried. And if you have any questions, just ask—I’m always happy to help a fellow dessert lover.
Frequently Asked Questions
Can I use homemade gelatin instead of Jell-O?
You can, but it’s trickier. Jell-O has specific proportions of sugar, flavor, and gelatin that make the layers set consistently. If you use homemade gelatin with fruit juice, you’ll need to adjust the unflavored gelatin amount and it might not set as firmly. I’d recommend sticking with Jell-O for the best results.
How long does each layer need to set?
The orange and yellow layers need about 1 hour each in the fridge. The creamy layer needs about 45 minutes. I usually give the final layer at least 2 hours, but overnight is best. Setting times can vary depending on your fridge temperature, so check by gently touching the surface—it should be firm and not sticky.
Can I make these in a large dish instead of individual cups?
Absolutely! You can use a 9×13-inch baking dish or a large glass bowl. Just pour the layers in the same order and let them set. When you’re ready to serve, cut them into squares or scoop them out. The presentation won’t be as dramatic, but the taste is the same.
Why did my layers bleed into each other?
This usually happens when you pour a layer before the one underneath is fully set, or when the liquid you’re pouring is too warm. Make sure each layer is completely firm to the touch before adding the next, and let your mixtures cool to room temperature before pouring. Patience really is the secret here.
Can I use low-fat evaporated milk?
You can, but the texture won’t be as creamy. Low-fat evaporated milk has less fat, which means the creamy layer will be slightly softer and less luxurious. If you’re watching calories, it still works—just expect a slightly different texture. Full-fat is definitely my preference for the best results.
Pin This Recipe!
Perfect Layered Candy Corn Jello Cups
These Easy Candy Corn Layered Jello Cups are proof that you don’t need fancy pastry skills to make something stunning. With simple ingredients and a few tricks, you can create a festive Halloween dessert that looks like you spent hours on it.
- Prep Time: 15 minutes
- Cook Time: 30 minutes
- Total Time: 4 hours 45 minutes
- Yield: 8-10 servings 1x
- Category: Dessert
- Cuisine: American
Ingredients
- 1 box (3 oz) orange Jell-O
- 1 cup boiling water
- 1/2 cup cold water
- 1 box (3 oz) lemon Jell-O
- 1 cup boiling water
- 1/2 cup cold water
- 1 packet (0.25 oz) unflavored gelatin
- 1/4 cup cold water
- 1 can (12 oz) evaporated milk
- 1/4 cup sugar
- 1 teaspoon vanilla extract
Instructions
- In a small bowl, empty the orange Jell-O powder. Pour in 1 cup of boiling water and whisk until the powder is completely dissolved—about 2 minutes. Then stir in 1/2 cup of cold water. Pour this mixture evenly into your cups, filling each about one-third full. Place the cups on a tray and refrigerate for at least 1 hour, or until the gelatin is firm to the touch.
- While the orange layer is setting, make the creamy middle. In a small bowl, sprinkle the unflavored gelatin over 1/4 cup of cold water. Let it sit for about 5 minutes—it’ll look like a weird, spongy mess. That’s normal. In a small saucepan, combine the evaporated milk and sugar over medium heat. Stir until the sugar dissolves and the milk is warm but not boiling—about 3 minutes. Remove from heat and stir in the vanilla extract. Add the bloomed gelatin and whisk until it’s completely dissolved. L…
- Once the orange layer is firm and the creamy mixture is cool, arrange your cups at a 45-degree angle—prop them against the edge of a baking dish or use a muffin tin. Gently spoon the creamy mixture into each cup, filling them about halfway up the angled side. You want the creamy layer to cover the orange layer completely but sit at an angle. Refrigerate for about 45 minutes, or until firm.
- While the creamy layer sets, prepare the lemon Jell-O the same way: dissolve the powder in 1 cup of boiling water, then stir in 1/2 cup of cold water. Let this cool to room temperature—about 10 minutes.
- Once the creamy layer is firm, carefully straighten your cups. Gently pour the cooled yellow Jell-O over the creamy layer, filling the cups almost to the top. You want to leave a tiny gap so they don’t spill. Refrigerate for at least 2 hours, or until completely set. Overnight is even better if you have the time.
- When you’re ready to serve, you can eat them straight from the cups or run a knife around the edge and pop them out onto a plate. I like serving them in the clear cups because the layers are so pretty to look at. Add a little whipped cream on top if you’re feeling extra festive.
Notes
Patience is everything. Each layer needs to be fully set before adding the next. Temperature matters—make sure each layer is at room temperature or cooler before pouring. Angle your cups carefully for the candy corn look. Use clear cups to show off the layers. Don’t skip the unflavored gelatin in the creamy layer. You can prep these the day before for best results.
Nutrition
- Serving Size: 1 cup (5 oz)
- Calories: 180
- Sugar: 30
- Sodium: 150
- Fat: 4
- Saturated Fat: 2
- Carbohydrates: 34
- Protein: 5
Keywords: candy corn, jello cups, Halloween dessert, layered jello, easy dessert, gluten-free dessert


