Love this? Save it for later!
Share the inspiration with your friends
My sister asked why I couldn’t just bake three separate thin layers and stack them instead of trying to swirl everything into one pan. I started to explain why that wouldn’t work — then stopped. Honestly, I had no good reason except that I’d never seen it done that way before. And let’s face it, that’s a terrible reason not to try something.
So we tried it. She stood there with a bowl of vanilla batter, I had the chocolate, and my niece was already elbow-deep in the strawberry. The kitchen looked like a bakery exploded, and somewhere in the middle of it all, I realized I was learning more from them than they were from me. The cake turned out perfect — three distinct layers, each with its own flavor, stacked tall and proud.
That afternoon taught me something about letting go of control in the kitchen. Sometimes the best recipes come from not knowing what you’re doing. This Neapolitan layer cake is proof of that. It’s the kind of cake that makes people stop mid-conversation and just stare at it for a second. And when they take that first bite — well, you know that feeling when something tastes exactly like a memory you didn’t know you had?
Maybe you’ve been there, standing over a cake that feels a little too ambitious, questioning every decision. Trust me, this one is worth it. It’s not as complicated as it looks, and the payoff is ridiculous. Three flavors, one cake, zero regrets.
Why You’ll Love This Recipe
This Neapolitan layer cake isn’t just a pretty face. It’s the kind of dessert that makes you look like a hero without spending all day in the kitchen. Here’s why it works:
- Three Flavors, One Cake: Strawberry, chocolate, and vanilla all in one stunning package. No need to choose a favorite when you can have all three.
- Simple Ingredients: You probably already have most of what you need in your pantry. No weird extracts or hard-to-find specialty items.
- Perfect for Celebrations: Birthdays, anniversaries, or just a Tuesday that needs a little extra joy — this cake delivers every time.
- Crowd-Pleasing Appeal: Kids love the strawberry, adults fight over the chocolate, and everyone agrees on the vanilla. It’s the diplomat of desserts.
- Make-Ahead Friendly: The layers freeze beautifully, so you can prep in advance and assemble when you’re ready.
What sets this recipe apart is the technique. Instead of fighting with complicated swirl patterns or worrying about flavors bleeding into each other, we’re building the cake layer by layer. Each one gets its moment to shine, and together they create something truly special. I’ve tested this method at least six times to make sure it works every single time.
This is the cake that makes people close their eyes after the first bite. It’s comfort food reimagined — familiar flavors arranged in a way that feels fresh and exciting. Perfect for impressing guests without the stress, or turning an ordinary weekend into something memorable.
What Ingredients You Will Need
This recipe uses simple, wholesome ingredients to deliver bold flavor and satisfying texture. Most of these are pantry staples, which makes this cake surprisingly approachable for something that looks so fancy.
For the Vanilla Layer
- 1 ½ cups all-purpose flour (I prefer King Arthur for consistent results)
- 1 cup granulated sugar
- ½ cup unsalted butter, softened (make sure it’s truly room temperature)
- 2 large eggs, room temperature
- ½ cup whole milk (adds richness)
- 1 ½ teaspoons baking powder
- 1 teaspoon vanilla extract (use pure, not imitation)
- ¼ teaspoon salt
For the Chocolate Layer
- 1 ½ cups all-purpose flour
- 1 cup granulated sugar
- ½ cup unsalted butter, softened
- 2 large eggs, room temperature
- ½ cup whole milk
- ⅓ cup unsweetened cocoa powder (I use Ghirardelli for deep flavor)
- 1 ½ teaspoons baking powder
- 1 teaspoon vanilla extract
- ¼ teaspoon salt
For the Strawberry Layer
- 1 ½ cups all-purpose flour
- 1 cup granulated sugar
- ½ cup unsalted butter, softened
- 2 large eggs, room temperature
- ½ cup whole milk
- ⅓ cup freeze-dried strawberry powder (blitz freeze-dried strawberries in a food processor)
- 1 ½ teaspoons baking powder
- 1 teaspoon vanilla extract
- ¼ teaspoon salt
- 2-3 drops pink food coloring (optional, for visual appeal)
For the Vanilla Buttercream Frosting
- 1 ½ cups unsalted butter, softened
- 4 cups powdered sugar
- 2 teaspoons vanilla extract
- 2-3 tablespoons heavy cream
- Pinch of salt
For Decoration
- ½ cup fresh strawberries, sliced
- ¼ cup chocolate shavings
- Sprinkles or edible glitter (optional, for fun)
If you can’t find freeze-dried strawberries, you can substitute with ½ cup strawberry jam reduced on the stove until thick. Just be aware it will change the texture slightly. For a dairy-free version, swap the butter with a high-quality vegan butter and use oat milk instead of whole milk.
Equipment Needed
You don’t need a professional bakery setup for this cake, but having the right tools makes everything smoother. Here’s what you’ll need:
- Three 8-inch round cake pans: The key to even layers. If you only have two, bake the vanilla layer first and wash the pan between uses.
- Electric hand mixer or stand mixer: Creaming butter and sugar by hand is possible but exhausting. Save your arm strength for frosting.
- Parchment paper: Cut circles for the bottom of each pan. This is non-negotiable for clean release.
- Cooling rack: Essential for letting layers cool completely before frosting.
- Offset spatula: Makes frosting so much easier. A butter knife works in a pinch but expect rustic results.
- Food processor: For grinding freeze-dried strawberries into powder. A blender also works.
- Kitchen scale: Optional but helpful for even layers. I weigh my batter to make sure each pan gets the same amount.
- Cake stand or serving plate: For the grand reveal.
I bought my first set of cake pans from a thrift store for five dollars. They were scratched and slightly warped, but they worked perfectly. Don’t let fancy equipment stop you from trying this recipe.
Preparation Method
Take a deep breath. This recipe has multiple steps, but each one is simple on its own. I’ll walk you through it.
Step 1: Prep Your Pans and Oven
Preheat your oven to 350°F (175°C). Grease three 8-inch round cake pans with butter or non-stick spray. Cut parchment paper circles for the bottom of each pan and place them inside. This extra step guarantees your cakes won’t stick. Trust me on this one — I learned the hard way after a whole layer crumbled apart.
Step 2: Make the Vanilla Layer
In a medium bowl, whisk together the flour, baking powder, and salt. In a separate large bowl, beat the softened butter and sugar together until light and fluffy — about 3 minutes with an electric mixer. Add the eggs one at a time, beating well after each addition. Mix in the vanilla extract. Gradually add the dry ingredients to the wet mixture, alternating with the milk. Start and end with the flour mixture. Mix until just combined — overmixing makes the cake tough. Pour the batter into one of the prepared pans and spread it evenly.
Step 3: Make the Chocolate Layer
In the same large bowl (no need to wash it between layers), cream the butter and sugar again. Add the eggs and vanilla. In a separate bowl, whisk together the flour, cocoa powder, baking powder, and salt. Add the dry ingredients to the wet mixture, alternating with the milk. The batter will be darker and slightly thicker than the vanilla. Spread it into the second prepared pan.
Step 4: Make the Strawberry Layer
Repeat the creaming process with the butter and sugar. Add the eggs and vanilla. Whisk together the flour, freeze-dried strawberry powder, baking powder, and salt. Add the dry ingredients to the wet mixture, alternating with the milk. If you’re using food coloring, add it now and mix until the batter is a uniform pink. Pour into the third pan.
Step 5: Bake the Layers
Place all three pans in the oven. Bake for 20-25 minutes, rotating the pans halfway through. The cakes are done when a toothpick inserted in the center comes out clean or with a few moist crumbs. The chocolate layer might look slightly darker — that’s normal. Let the cakes cool in the pans for 10 minutes, then turn them out onto a cooling rack. Remove the parchment paper and let them cool completely. This is critical — warm cake will melt your frosting into a mess.
Step 6: Make the Buttercream
While the cakes cool, beat the softened butter in a large bowl until smooth and creamy. Gradually add the powdered sugar, one cup at a time, beating on low speed. Add the vanilla extract and a pinch of salt. Pour in the heavy cream one tablespoon at a time until the frosting reaches a spreadable consistency. If it’s too thick, add more cream. Too thin, add more powdered sugar. Beat on medium-high for 2 minutes until light and fluffy.
Step 7: Assemble the Cake
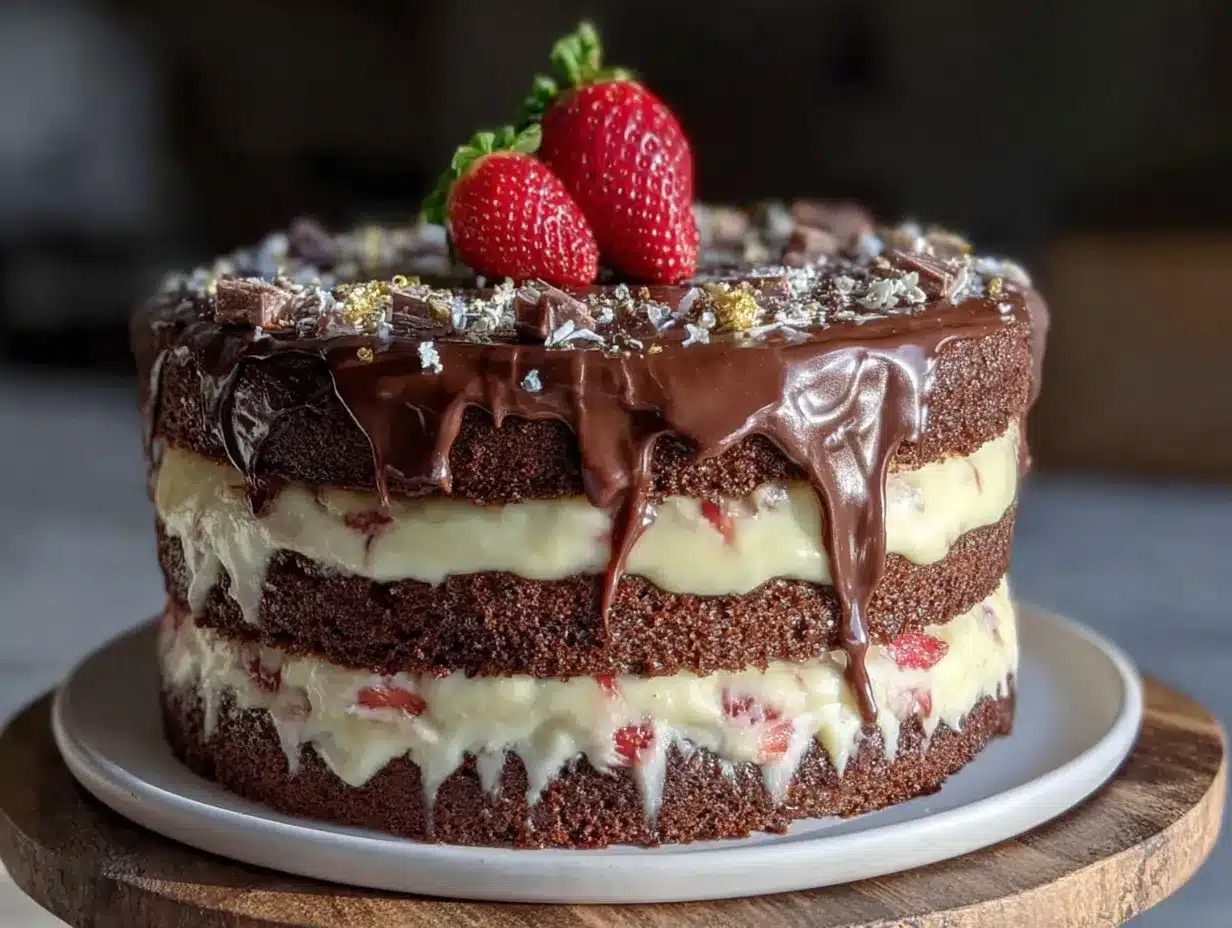
Place the vanilla layer on your cake stand or serving plate. Spread a generous layer of buttercream on top. Place the strawberry layer on top of that, and spread another layer of frosting. Finally, add the chocolate layer. Apply a thin crumb coat — a thin layer of frosting that catches any loose crumbs — and refrigerate for 15 minutes. Then apply the final coat of frosting, smoothing it with your offset spatula.
Step 8: Decorate
Arrange fresh strawberry slices on top of the cake. Sprinkle chocolate shavings around the edges. Add sprinkles or edible glitter if you’re feeling festive. Step back and admire your work.
Cooking Tips & Techniques
I’ve made this cake more times than I care to admit, and I’ve messed it up in almost every way possible. Here’s what I learned:
- Room temperature ingredients matter: Cold butter doesn’t cream properly, and cold eggs can curdle the batter. Take everything out of the fridge an hour before you start.
- Don’t overmix: Once you add the flour, mix just until it disappears. Overmixing develops gluten and makes the cake dense and tough.
- Weigh your batter: If you have a kitchen scale, weigh the batter for each layer to ensure they’re the same thickness. Aim for about 450 grams per pan.
- Cool completely before frosting: I once frosted a slightly warm cake and watched the buttercream slide off like a slow-motion disaster. Wait the full hour.
- Crumb coat is your friend: That thin layer of frosting you apply first catches all the loose crumbs so your final coat stays clean. Don’t skip it.
- Use a serrated knife to level layers: If any of your layers domed in the center, slice off the top to make them flat. This prevents the cake from wobbling.
One time I forgot the baking powder in the chocolate layer. It came out of the oven looking like a sad brown pancake. I crumbled it up and used it as a topping for ice cream. Not my finest moment, but it taught me to double-check my ingredients.
Variations & Adaptations
This Neapolitan layer cake is surprisingly flexible. Here are some ways to make it your own:
- Gluten-Free Version: Substitute the all-purpose flour with a 1:1 gluten-free baking blend. Add an extra tablespoon of milk to compensate for the drier texture.
- Dairy-Free Adaptation: Use vegan butter and oat milk in all three layers. The texture will be slightly denser but still delicious.
- Berry Swap: Replace the freeze-dried strawberries with freeze-dried raspberries or blueberries for a different flavor profile.
- Chocolate Intensification: Add ½ cup of mini chocolate chips to the chocolate layer for extra richness and texture.
- Lemon Vanilla Twist: Add 1 tablespoon of lemon zest to the vanilla layer for a bright, citrusy contrast to the chocolate and strawberry.
- Mini Cake Version: Use 6-inch pans and reduce the baking time by 5 minutes. Perfect for smaller gatherings.
I tried a lavender-infused version once by adding dried lavender buds to the vanilla layer. It was beautiful but tasted like soap. Some experiments don’t work out, and that’s okay.
Serving & Storage Suggestions
This cake tastes best at room temperature, so take it out of the fridge about 30 minutes before serving. The flavors are more pronounced when the buttercream isn’t cold. Slice with a sharp knife dipped in hot water for clean cuts. Wipe the knife between slices for the prettiest presentation.
For beverages, this cake pairs beautifully with a strong cup of coffee, a cold glass of milk, or a dessert wine like Moscato. If you’re feeling extra indulgent, serve it with a scoop of vanilla ice cream on the side.
Storage Instructions: Keep the cake covered in the refrigerator for up to 5 days. The flavors actually meld together and improve after the first day. For longer storage, freeze individual slices wrapped tightly in plastic wrap and then aluminum foil. They’ll keep for up to 3 months. Thaw in the refrigerator overnight before serving.
Reheating Tip: If you prefer your cake slightly warm, microwave individual slices for 10-15 seconds. The frosting will soften and the cake will taste freshly baked.
Nutritional Information & Benefits
Let’s be honest — this is a celebration cake, not a health food. But here’s the breakdown if you’re curious:
| Nutrient | Per Slice (1/12 of cake) |
|---|---|
| Calories | 485 |
| Total Fat | 28g |
| Saturated Fat | 17g |
| Cholesterol | 115mg |
| Sodium | 310mg |
| Total Carbohydrates | 56g |
| Dietary Fiber | 2g |
| Sugars | 38g |
| Protein | 5g |
The strawberries provide a small amount of vitamin C and antioxidants. The cocoa powder contains flavonoids that may support heart health. But honestly, the biggest benefit here is the joy it brings to the table. Sometimes food is about more than nutrition — it’s about connection, celebration, and making memories.
This recipe contains dairy, gluten, and eggs. For allergen-friendly options, check the variations section above.
Conclusion
This Neapolitan layer cake is everything I want in a dessert — beautiful, delicious, and surprisingly doable. It started with a simple question from my sister and turned into one of my most-requested recipes. Every time I make it, someone asks for the recipe. Every single time.
I love that this cake brings people together. Kids get excited about the pink strawberry layer, chocolate lovers go straight for the dark layer, and vanilla purists find their happy place too. It’s a crowd-pleaser in the truest sense. And honestly, it makes me feel like a rock star every time I set it on the table.
I’d love to hear how yours turns out. Did you try a variation? Did someone lick the frosting bowl clean? Share your experience in the comments below — I read every single one. And if you loved this recipe, share it with a friend who needs a little sweetness in their life. Happy baking!
Frequently Asked Questions
Can I use a box cake mix for this Neapolitan layer cake?
Absolutely. Use one box of white cake mix and divide the batter into three bowls. Add cocoa powder to one, strawberry puree to another, and leave the third plain. The texture will be slightly different but the concept works perfectly.
How do I prevent the layers from sliding?
Make sure your buttercream is thick enough to support the weight. If the frosting is too thin, the layers will slip. Also, refrigerate the cake for 15 minutes after applying the crumb coat to set everything in place.
Can I make this cake ahead of time?
Yes! Bake the layers up to two days in advance and wrap them tightly in plastic wrap. Store them at room temperature. Make the frosting the day you plan to assemble. The assembled cake keeps well in the fridge for up to five days.
Why did my strawberry layer turn brown?
Freeze-dried strawberry powder can sometimes oxidize and turn brown during baking. This is normal and doesn’t affect the taste. Adding a drop of pink food coloring helps maintain the vibrant color.
Can I freeze the assembled cake?
Yes, but it’s better to freeze the layers separately. If you freeze the assembled cake, the frosting can pick up odors from the freezer. Wrap it in several layers of plastic wrap and then foil. Thaw in the refrigerator overnight before serving.
Pin This Recipe!
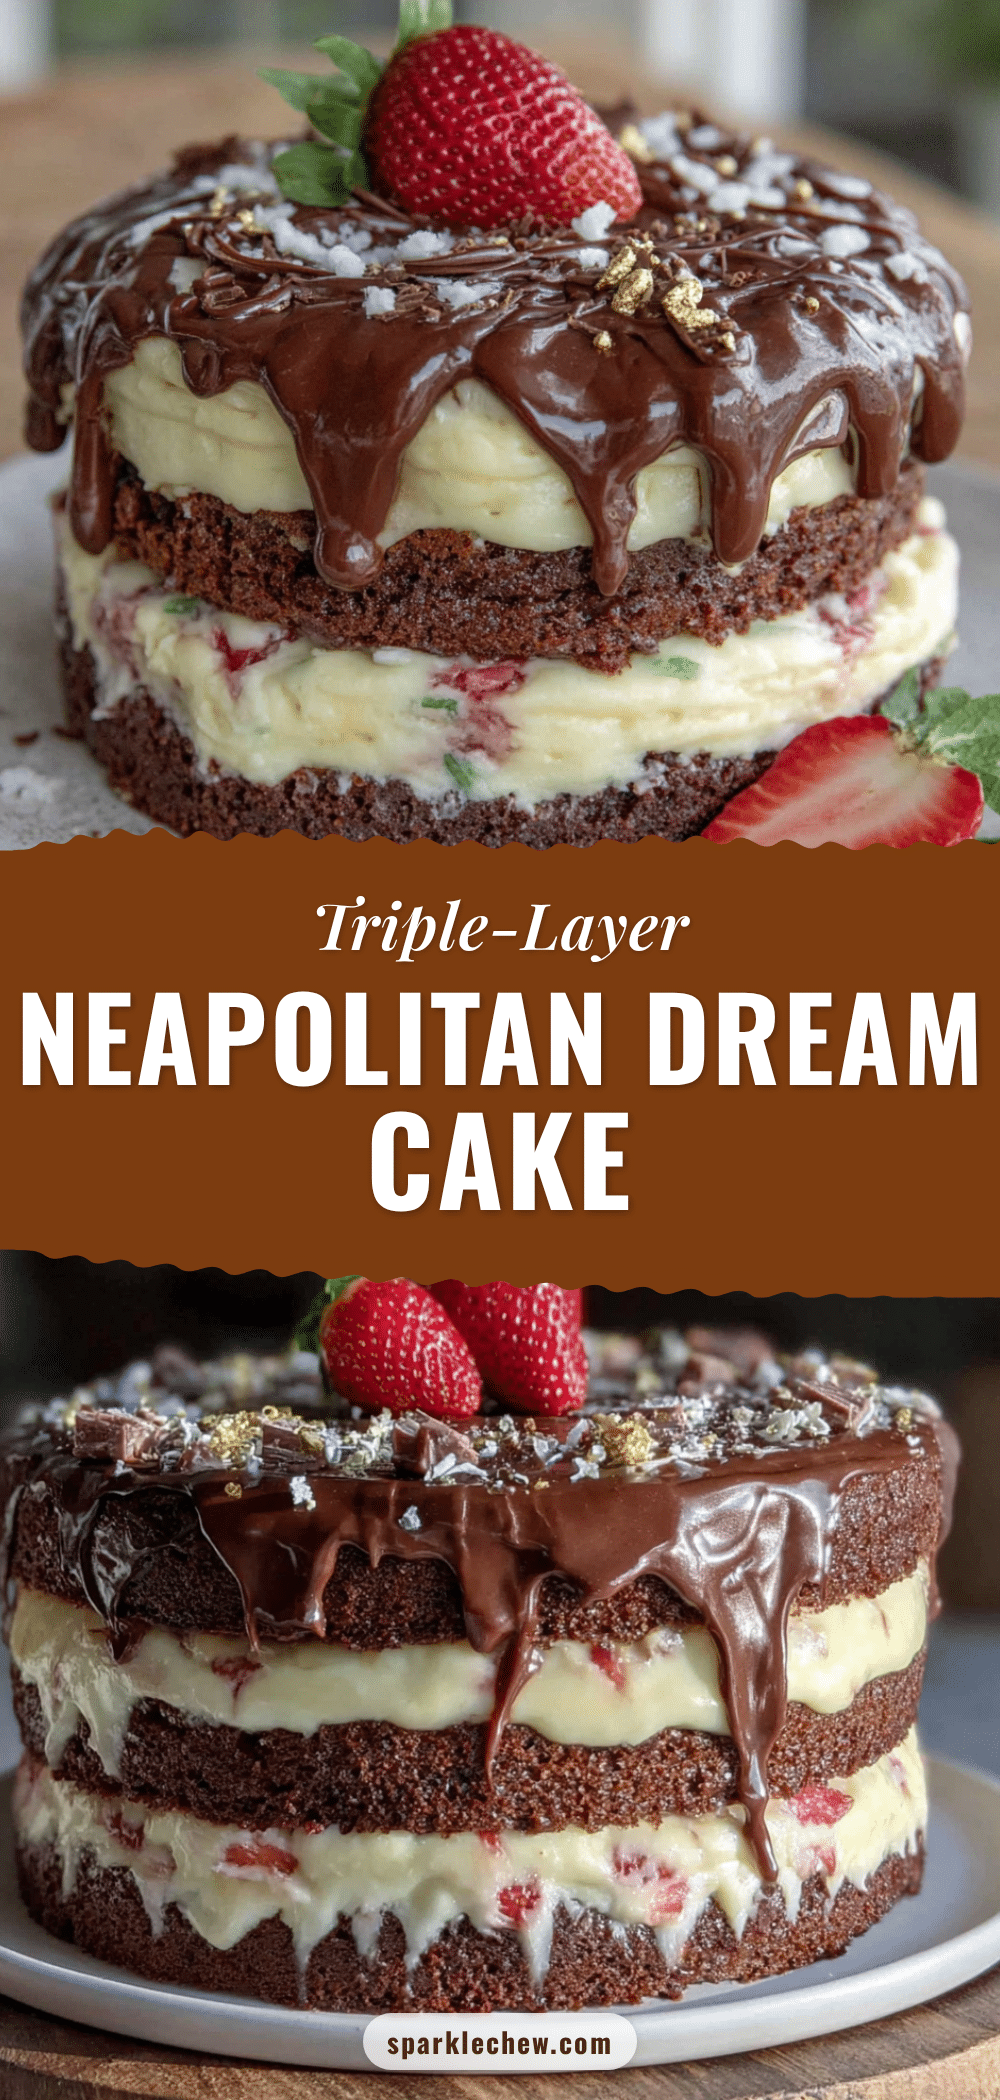
Perfect Neapolitan Layer Cake: Easy 3-Flavor Recipe
A stunning three-layer cake featuring strawberry, chocolate, and vanilla flavors, all in one beautiful dessert. This crowd-pleasing recipe is surprisingly simple to make and perfect for celebrations.
- Prep Time: 30 minutes
- Cook Time: 25 minutes
- Total Time: 1 hour 55 minutes
- Yield: 12 servings
- Category: Dessert
- Cuisine: American
Ingredients
- For the Vanilla Layer: 1 ½ cups all-purpose flour
- For the Vanilla Layer: 1 cup granulated sugar
- For the Vanilla Layer: ½ cup unsalted butter, softened
- For the Vanilla Layer: 2 large eggs, room temperature
- For the Vanilla Layer: ½ cup whole milk
- For the Vanilla Layer: 1 ½ teaspoons baking powder
- For the Vanilla Layer: 1 teaspoon vanilla extract
- For the Vanilla Layer: ¼ teaspoon salt
- For the Chocolate Layer: 1 ½ cups all-purpose flour
- For the Chocolate Layer: 1 cup granulated sugar
- For the Chocolate Layer: ½ cup unsalted butter, softened
- For the Chocolate Layer: 2 large eggs, room temperature
- For the Chocolate Layer: ½ cup whole milk
- For the Chocolate Layer: ⅓ cup unsweetened cocoa powder
- For the Chocolate Layer: 1 ½ teaspoons baking powder
- For the Chocolate Layer: 1 teaspoon vanilla extract
- For the Chocolate Layer: ¼ teaspoon salt
- For the Strawberry Layer: 1 ½ cups all-purpose flour
- For the Strawberry Layer: 1 cup granulated sugar
- For the Strawberry Layer: ½ cup unsalted butter, softened
- For the Strawberry Layer: 2 large eggs, room temperature
- For the Strawberry Layer: ½ cup whole milk
- For the Strawberry Layer: ⅓ cup freeze-dried strawberry powder
- For the Strawberry Layer: 1 ½ teaspoons baking powder
- For the Strawberry Layer: 1 teaspoon vanilla extract
- For the Strawberry Layer: ¼ teaspoon salt
- For the Strawberry Layer: 2-3 drops pink food coloring (optional)
- For the Vanilla Buttercream Frosting: 1 ½ cups unsalted butter, softened
- For the Vanilla Buttercream Frosting: 4 cups powdered sugar
- For the Vanilla Buttercream Frosting: 2 teaspoons vanilla extract
- For the Vanilla Buttercream Frosting: 2-3 tablespoons heavy cream
- For the Vanilla Buttercream Frosting: Pinch of salt
- For Decoration: ½ cup fresh strawberries, sliced
- For Decoration: ¼ cup chocolate shavings
- For Decoration: Sprinkles or edible glitter (optional)
Instructions
- Preheat oven to 350°F (175°C). Grease three 8-inch round cake pans and line bottoms with parchment paper.
- Make the vanilla layer: In a medium bowl, whisk together flour, baking powder, and salt. In a separate large bowl, beat butter and sugar until light and fluffy (about 3 minutes). Add eggs one at a time, beating well after each. Mix in vanilla. Gradually add dry ingredients alternating with milk, starting and ending with flour. Mix until just combined. Pour into one prepared pan.
- Make the chocolate layer: In the same large bowl, cream butter and sugar. Add eggs and vanilla. In a separate bowl, whisk together flour, cocoa powder, baking powder, and salt. Add dry ingredients to wet mixture alternating with milk. Spread into second prepared pan.
- Make the strawberry layer: Cream butter and sugar. Add eggs and vanilla. Whisk together flour, freeze-dried strawberry powder, baking powder, and salt. Add dry ingredients to wet mixture alternating with milk. Add food coloring if using. Pour into third pan.
- Bake all three layers for 20-25 minutes, rotating pans halfway through. Cakes are done when a toothpick inserted in center comes out clean. Cool in pans for 10 minutes, then turn out onto a cooling rack. Remove parchment and cool completely.
- Make the buttercream: Beat softened butter until smooth. Gradually add powdered sugar, one cup at a time, beating on low. Add vanilla and salt. Add heavy cream one tablespoon at a time until spreadable. Beat on medium-high for 2 minutes until fluffy.
- Assemble the cake: Place vanilla layer on serving plate. Spread generous layer of buttercream on top. Add strawberry layer, then more frosting. Top with chocolate layer. Apply thin crumb coat and refrigerate 15 minutes. Apply final coat of frosting.
- Decorate with fresh strawberry slices, chocolate shavings, and optional sprinkles or edible glitter.
Notes
Room temperature ingredients are crucial for proper creaming. Cool layers completely before frosting to prevent melting. A crumb coat helps achieve a clean final finish. For gluten-free, use a 1:1 gluten-free baking blend. For dairy-free, use vegan butter and oat milk.
Nutrition
- Serving Size: 1 slice (1/12 of cak
- Calories: 485
- Sugar: 38
- Sodium: 310
- Fat: 28
- Saturated Fat: 17
- Carbohydrates: 56
- Fiber: 2
- Protein: 5
Keywords: Neapolitan cake, layer cake, strawberry chocolate vanilla, birthday cake, celebration cake, three flavor cake


