Love this? Save it for later!
Share the inspiration with your friends
It was 10:47 PM on a random Wednesday, and I had an overwhelming need for something chocolate, peanut buttery, and completely over-the-top. I’d just gotten the kids to bed, the kitchen was a disaster zone, and honestly, I was running on fumes. I didn’t have the energy for a layered cake with fancy frosting, but I had a box of chocolate cake mix, a jar of peanut butter, and a bag of mini Reese’s cups that were dangerously close to their expiration date. That’s when the idea hit me — what if I combined a poke cake with all the peanut butter cup goodness I was craving?
I mean, let me tell you, I’ve made a lot of desserts in my time. Some were beautiful disasters, and some were so good they became family legends. But this one? This one was born from pure desperation and a pantry that was almost empty. I poured the sweetened condensed milk and peanut butter mixture over the warm cake, watching it seep into every little hole I’d poked. Then came the chocolate pudding, the Cool Whip, and a generous shower of chopped Reese’s cups. I shoved it in the fridge, crossed my fingers, and went to bed.
The next morning, I cut myself a slice before coffee — that’s how confident I was. And honestly? It was the best decision I’d made all week. The cake was ridiculously moist, the peanut butter flavor was perfect, and every bite had little chunks of chocolate and peanut butter candy. It tasted like something you’d pay good money for at a bakery, but it came together in about 20 minutes of actual work. Maybe you’ve been there — you need something incredible, but you’re too tired for a complicated recipe. This cake is for those nights. It’s the dessert that keeps showing up at every potluck and family dinner, and nobody ever guesses how easy it is.
Why You’ll Love This Recipe
This isn’t just another chocolate cake recipe — it’s the one that will ruin you for all others. I’ve tested this cake at least a dozen times, tweaking the ratios and timing until everything was just right. My sister-in-law, who’s a pastry chef, actually asked for the recipe after she tried it at a family barbecue. That’s when I knew I had something special.
- Quick & Easy: You only need about 20 minutes of hands-on time. The oven and the fridge do the rest of the work for you.
- Simple Ingredients: Everything comes from a regular grocery store. No specialty baking sections or online orders needed.
- Perfect for Any Occasion: I’ve brought this to birthday parties, church potlucks, Super Bowl gatherings, and casual weeknight dinners. It fits everywhere.
- Crowd-Pleaser: Kids love the candy topping, adults love the rich peanut butter flavor, and everyone goes back for seconds.
- Unbelievably Delicious: The combination of moist chocolate cake, creamy peanut butter filling, and chocolate pudding creates layers of flavor and texture that feel absolutely indulgent.
What makes this recipe different from all the other poke cakes out there is the technique. Instead of just pouring sweetened condensed milk over the cake, I mix it with creamy peanut butter first. This creates a rich, peanut butter custard that soaks into every bite. Then I add a layer of chocolate pudding for extra moisture, and finally, the Cool Whip and Reese’s cups on top. It’s not just a cake with stuff poked into it — it’s a fully layered dessert experience.
This is the kind of cake that makes you close your eyes after the first bite. It’s comfort food at its finest — rich, nostalgic, and completely satisfying. You can impress a crowd without stressing yourself out, and honestly, that’s the best kind of recipe to have in your back pocket.
What Ingredients You Will Need
This recipe uses simple, everyday ingredients to create something that tastes like it came from a fancy bakery. Most of these items are probably already in your pantry or fridge.
- For the cake:
- 1 box (15.25 oz) chocolate cake mix (I prefer Betty Crocker or Duncan Hines for consistent results)
- Ingredients listed on the back of the box (usually eggs, oil, and water)
- For the peanut butter filling:
- 1 can (14 oz) sweetened condensed milk
- 3/4 cup creamy peanut butter (Jif or Skippy work great — avoid natural peanut butter that separates, as it can make the filling grainy)
- For the pudding layer:
- 1 box (3.9 oz) instant chocolate pudding mix
- 2 cups cold milk (whole milk gives the richest texture, but 2% works fine)
- For the topping:
- 1 tub (8 oz) Cool Whip, thawed (or homemade whipped cream if you’re feeling fancy)
- 1 cup mini Reese’s peanut butter cups, roughly chopped (about 20-25 mini cups)
- 1/4 cup chocolate syrup for drizzling (optional, but highly recommended)
- Extra chopped Reese’s cups for garnish
A few notes on ingredient selection: When I make this cake, I always use the full-fat sweetened condensed milk — the low-fat version just doesn’t have the same richness. For the peanut butter, I’ve found that the shelf-stable commercial brands work best because they have stabilizers that keep the filling smooth. If you use natural peanut butter, the oil can separate and make the filling greasy.
You can also customize this cake based on what you have available. If you don’t have mini Reese’s cups, regular-sized ones work fine — just chop them into smaller pieces. And if you want to go completely over the top, add some chopped peanuts or even a layer of hot fudge sauce between the pudding and the Cool Whip.
Equipment Needed
The beauty of this recipe is that you don’t need any fancy equipment. Here’s what you’ll need:
- 9×13 inch baking pan (metal or glass both work — I prefer glass because I can see how the filling is soaking in)
- Large mixing bowl for the cake batter
- Medium mixing bowl for the pudding
- Small saucepan or microwave-safe bowl for the peanut butter filling
- Whisk or hand mixer
- Wooden spoon or spatula for poking holes
- Measuring cups and spoons
- Sharp knife and cutting board for chopping Reese’s cups
- Rubber spatula for spreading the toppings
If you don’t have a 9×13 pan, you can use two 8-inch square pans — just adjust the baking time slightly. And if you don’t have a hand mixer, a whisk works perfectly fine for the pudding. I’ve made this cake with nothing but a whisk and a wooden spoon, and it turned out great.
One tip I learned the hard way: use a wooden spoon or a chopstick to poke the holes in the cake. A fork makes holes that are too small, and the filling won’t soak in properly. You want holes that are about the width of a pencil.
Preparation Method
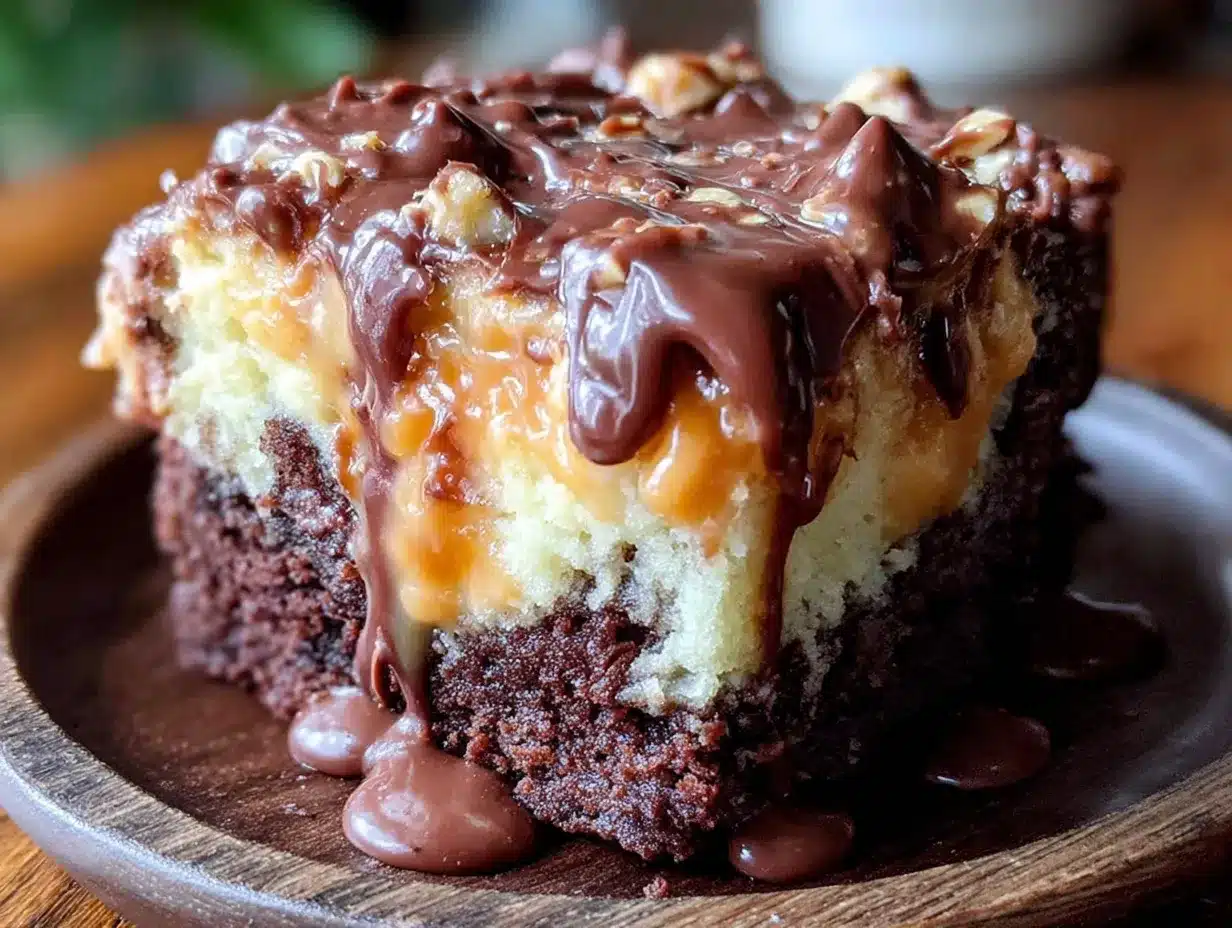
Let me walk you through this step by step. I’ve made this cake so many times that I could do it in my sleep, but I’ll share all the little tricks I’ve picked up along the way.
- Preheat your oven to 350°F (175°C). Grease your 9×13 pan with butter or non-stick spray. I use butter because it adds a little flavor to the edges of the cake.
- Prepare the cake batter according to the box directions. Usually this means mixing the cake mix with eggs, oil, and water. Don’t overmix — just stir until the dry ingredients are moistened. A few lumps are totally fine.
- Pour the batter into the prepared pan and spread it evenly. Bake for 28-32 minutes, or until a toothpick inserted in the center comes out clean. The cake should be golden brown and spring back when you touch it lightly.
- While the cake bakes, make the peanut butter filling. In a small saucepan over low heat, combine the sweetened condensed milk and peanut butter. Stir constantly until the peanut butter is fully melted and the mixture is smooth. This takes about 3-4 minutes. Don’t walk away from it — the milk can scorch easily. If you’re using the microwave, heat in 30-second intervals, stirring between each, until smooth.
- When the cake comes out of the oven, let it cool for 5 minutes. This is important — if the cake is too hot, the filling will just run off the top. If it’s too cool, the cake won’t absorb the filling properly. Five minutes is the sweet spot.
- Using the handle of a wooden spoon, poke holes all over the cake. Space them about an inch apart. Don’t be shy — you want plenty of holes so the filling can get everywhere. Go all the way to the edges and corners of the cake.
- Pour the warm peanut butter filling over the cake, making sure to get it into all the holes. Use a spatula to spread it evenly. You’ll see the filling disappearing into the cake — that’s exactly what you want.
- Let the cake cool completely. This takes about 30-40 minutes. The filling needs to set before you add the pudding layer, or everything will get muddy.
- While the cake cools, make the chocolate pudding. In a medium bowl, whisk the pudding mix with 2 cups of cold milk for about 2 minutes until it thickens. Let it set for 5 minutes in the fridge.
- Spread the pudding evenly over the cooled cake. Use a rubber spatula to get it into an even layer. Don’t worry if it mixes slightly with the peanut butter filling — that’s part of the magic.
- Refrigerate the cake for at least 30 minutes to let the pudding set completely. This is a good time to chop your Reese’s cups.
- Spread the Cool Whip over the pudding layer. Make it as thick or thin as you like. I like a generous layer because it balances the richness of the cake.
- Sprinkle the chopped Reese’s cups over the top. Be generous — this is the best part. Drizzle with chocolate syrup if you’re using it.
- Refrigerate for at least 4 hours, but overnight is best. I know it’s hard to wait, but the cake really needs time to absorb all those flavors. The longer it sits, the better it gets.
One thing I always tell people: don’t skip the overnight refrigeration. The first time I made this cake, I was too impatient and only let it set for 2 hours. It was good, but the next day it was incredible. The cake gets even more moist, the flavors meld together, and the texture becomes perfectly creamy.
Cooking Tips & Techniques
After making this cake more times than I can count, I’ve learned a few things that make a real difference. Let me share the ones that matter most.
Don’t overbake the cake. A slightly underdone cake is actually better for poke cakes because it’s more absorbent. Start checking at 28 minutes and pull it out as soon as a toothpick comes out with just a few moist crumbs attached. An overbaked cake will be dry and won’t soak up the filling as well.
Temperature matters more than you think. The cake needs to be warm when you pour the filling, but not hot. I’ve ruined a batch by pouring the filling on a cake that was too hot — it just ran off the top and pooled in the pan. Letting it cool for exactly 5 minutes is the sweet spot I’ve found through trial and error.
Poke with purpose. I used to poke holes randomly, but now I make a grid pattern with the holes about an inch apart. This ensures every slice gets an even amount of filling. And don’t forget the corners — they need love too.
The filling consistency is everything. When you’re heating the sweetened condensed milk and peanut butter, stir constantly and don’t let it boil. You want it warm enough to be pourable but not so hot that it breaks. If it gets too thick, add a tablespoon of milk to thin it out.
Let the layers set properly. This is the hardest part, I know. But if you rush the process, the layers will blend together and you’ll end up with a mess instead of a beautiful, distinct-layered cake. Give each layer time to set before adding the next one.
I once made this cake for a friend’s birthday and forgot to refrigerate it overnight. I served it after just 2 hours, and while everyone was polite about it, I knew it wasn’t at its best. The next day, I had a slice leftover and it was like a completely different dessert. That’s when I learned the patience lesson.
Variations & Adaptations
One of the best things about this recipe is how easy it is to adapt. Here are some variations I’ve tried and loved.
Peanut Butter Lover’s Version: Add 1/2 cup of creamy peanut butter to the pudding layer. Just whisk it in with the milk before adding the pudding mix. You’ll get peanut butter flavor in every single layer.
Chocolate Overload: Use a dark chocolate cake mix instead of regular chocolate. Add a layer of hot fudge sauce between the pudding and the Cool Whip. Top with chocolate shavings along with the Reese’s cups. This version is dangerously rich.
Gluten-Free Option: Use a gluten-free chocolate cake mix. Everything else in the recipe is naturally gluten-free, so this is an easy swap. I’ve used the King Arthur brand and it worked beautifully.
Healthier-ish Version: Use a sugar-free cake mix, sugar-free pudding, and light Cool Whip. You can also reduce the Reese’s cups by half. It won’t be health food, but it’ll be a little lighter while still satisfying that craving.
Seasonal Twist: For holidays, swap the Reese’s cups for seasonal candies. Use candy cane pieces at Christmas, or chopped peanut butter eggs at Easter. I made a version with crushed butterfingers for Halloween and it was a huge hit.
Cookie Butter Version: Replace the peanut butter with cookie butter (like Biscoff spread). The filling will have a spiced, caramel-like flavor that pairs beautifully with chocolate cake. This is my personal favorite variation.
I once tried making this with crunchy peanut butter because that’s all I had in the pantry. The texture was interesting — not bad, just different. The little peanut pieces added a nice crunch, but I personally prefer the smooth version. If you like texture, give it a try.
Serving & Storage Suggestions
This cake is best served cold, straight from the refrigerator. The chilled layers hold their shape better and the flavors are more pronounced. I like to let it sit out for about 10 minutes before serving to take the chill off slightly — this makes the cake more tender and the topping creamier.
For presentation, I cut the cake into 12-15 squares and arrange them on a platter. A drizzle of chocolate syrup and a few extra chopped Reese’s cups on top make it look bakery-worthy. If I’m feeling extra fancy, I add a dollop of whipped cream and a whole mini Reese’s cup on each slice.
This cake pairs beautifully with a cold glass of milk, a hot cup of coffee, or even a scoop of vanilla ice cream. The ice cream melting into the cake is pure heaven. For a complete dessert spread, serve it alongside fresh strawberries or a fruit salad to balance the richness.
Storage Instructions:
- Refrigerator: Store in an airtight container for up to 5 days. The cake actually improves after the first day as the flavors continue to meld.
- Freezer: This cake freezes beautifully. Wrap individual slices in plastic wrap, then place them in a freezer bag. They’ll keep for up to 3 months. Thaw overnight in the refrigerator before serving.
- Reheating: I don’t recommend reheating this cake — it’s meant to be served cold. But if you want a warm dessert, microwave a slice for 10-15 seconds. The Cool Whip will melt, but the cake and filling will be warm and gooey.
A word of warning: the Reese’s cups on top can get a little soft after a day or two in the fridge. If you’re making this for a special occasion, save some chopped cups and add them just before serving for the best texture.
Nutritional Information & Benefits
Let’s be real — this is an indulgent dessert, not a health food. But knowing what’s in it helps you enjoy it mindfully. Here’s the approximate nutritional breakdown per slice (based on 15 servings):
| Nutrient | Amount Per Serving |
|---|---|
| Calories | 420-480 |
| Total Fat | 22g |
| Saturated Fat | 9g |
| Cholesterol | 35mg |
| Sodium | 480mg |
| Total Carbohydrates | 55g |
| Dietary Fiber | 2g |
| Sugars | 38g |
| Protein | 8g |
On the positive side, peanut butter is a good source of protein and healthy fats. It also contains vitamin E, magnesium, and potassium. The chocolate in the cake and pudding provides antioxidants, particularly flavonoids. And the milk in the pudding adds calcium and vitamin D.
This recipe contains common allergens including wheat, dairy, peanuts, and soy (in the chocolate). If you’re serving this to a crowd, it’s always good to label it clearly. For a nut-free version, you can use SunButter or WowButter instead of peanut butter — just note that the flavor and texture will be different.
I personally believe that desserts like this have a place in a balanced diet. It’s not about eating this every day, but about enjoying something truly special when the occasion calls for it. One slice of this cake with a glass of milk is a perfectly reasonable treat.
Conclusion
This Ultimate Reese’s Peanut Butter Poke Cake is the dessert that keeps on giving. It’s the cake you bring to a potluck and watch disappear in minutes. It’s the cake you make on a Wednesday night when you need something to look forward to. And it’s the cake that makes you look like a baking genius when really, it’s just a few simple ingredients and a little patience.
I love this recipe because it reminds me that you don’t need fancy techniques or expensive ingredients to create something amazing. Sometimes the best recipes come from a late-night craving and a willingness to experiment. This cake is proof that a boxed mix can be transformed into something truly special with just a little creativity.
Now I want to hear from you. Have you tried making this cake? Did you add your own twist? Drop a comment below and let me know how it turned out. And if you loved it as much as I do, share this recipe with a friend who needs a little chocolate and peanut butter in their life. Trust me, they’ll thank you.
Frequently Asked Questions
Can I make this cake ahead of time?
Absolutely! In fact, I recommend it. This cake needs at least 4 hours to set, but overnight is best. You can make it up to 2 days in advance and keep it in the refrigerator. The flavors get better with time.
Can I use homemade whipped cream instead of Cool Whip?
Yes, you can. Whip 1 1/2 cups of heavy cream with 3 tablespoons of powdered sugar until stiff peaks form. Spread it over the pudding layer just like you would with Cool Whip. Just note that homemade whipped cream is less stable and may weep after a day or two.
Why did my filling not soak into the cake?
This usually happens for one of two reasons: either the cake was too cool when you poured the filling, or the holes weren’t big enough. Make sure to poke holes with the handle of a wooden spoon (about 1/4 inch wide) and pour the filling while the cake is still warm — about 5 minutes out of the oven.
Can I use a different cake flavor?
Definitely. Yellow cake, vanilla cake, or even devil’s food cake all work great. If you use a white or yellow cake, the peanut butter filling will stand out more visually. For a real twist, try a strawberry cake mix — the chocolate and peanut butter with strawberry is surprisingly good.
How do I keep the Reese’s cups from sinking into the Cool Whip?
Let the Cool Whip set in the refrigerator for about 30 minutes before adding the chopped Reese’s cups. The topping will be firmer and the candy pieces will stay on top. You can also sprinkle them on right before serving for the best presentation.
Pin This Recipe!
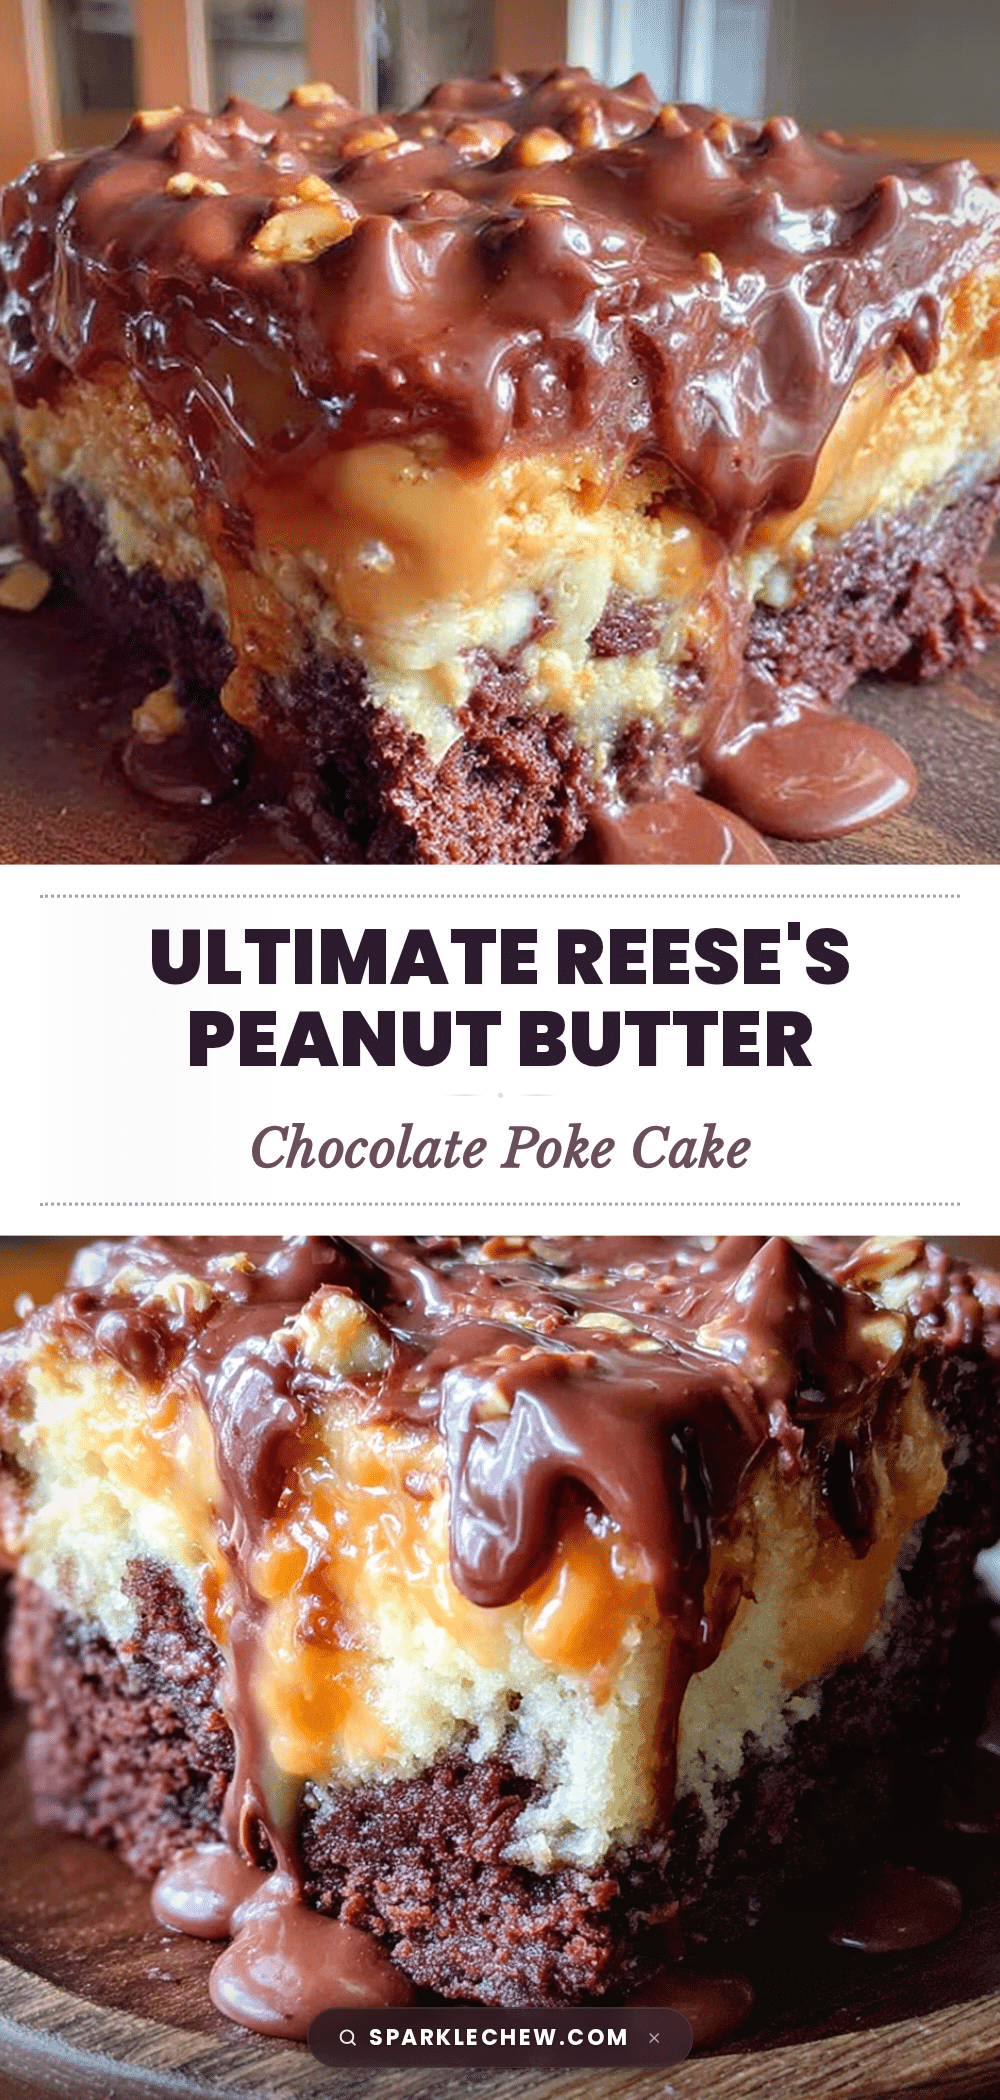
The Best Ultimate Reeses Peanut Butter Poke Cake

This ridiculously moist and decadent poke cake combines chocolate cake, a creamy peanut butter filling, chocolate pudding, and a topping of Cool Whip and chopped Reese’s cups. It’s an easy, no-fuss dessert that tastes like a bakery creation, perfect for potlucks, parties, or a late-night craving.
- Prep Time: 20 minutes
- Cook Time: 30 minutes
- Total Time: 4 hours 50 minutes (includes chilling time; overnight recommended)
- Yield: 12-15 servings 1x
- Category: Dessert
- Cuisine: American
Ingredients
- 1 box (15.25 oz) chocolate cake mix (e.g., Betty Crocker or Duncan Hines)
- Ingredients listed on the back of the box (usually eggs, oil, and water)
- 1 can (14 oz) sweetened condensed milk
- 3/4 cup creamy peanut butter (Jif or Skippy recommended)
- 1 box (3.9 oz) instant chocolate pudding mix
- 2 cups cold milk (whole milk preferred, 2% works)
- 1 tub (8 oz) Cool Whip, thawed
- 1 cup mini Reese’s peanut butter cups, roughly chopped (about 20–25 mini cups)
- 1/4 cup chocolate syrup for drizzling (optional)
- Extra chopped Reese’s cups for garnish
Instructions
- Preheat oven to 350°F (175°C). Grease a 9×13 inch baking pan with butter or non-stick spray.
- Prepare the cake batter according to the box directions. Do not overmix; a few lumps are fine.
- Pour batter into the prepared pan and spread evenly. Bake for 28-32 minutes, or until a toothpick inserted in the center comes out clean.
- While the cake bakes, make the peanut butter filling: In a small saucepan over low heat, combine sweetened condensed milk and peanut butter. Stir constantly until smooth and fully melted (about 3-4 minutes). Alternatively, microwave in 30-second intervals, stirring between each.
- When the cake comes out of the oven, let it cool for exactly 5 minutes.
- Using the handle of a wooden spoon, poke holes all over the cake, spacing them about 1 inch apart. Go all the way to the edges and corners.
- Pour the warm peanut butter filling over the cake, making sure it gets into all the holes. Use a spatula to spread evenly.
- Let the cake cool completely (about 30-40 minutes) so the filling sets.
- While the cake cools, make the chocolate pudding: In a medium bowl, whisk the pudding mix with 2 cups cold milk for about 2 minutes until thickened. Refrigerate for 5 minutes to set.
- Spread the pudding evenly over the cooled cake using a rubber spatula.
- Refrigerate the cake for at least 30 minutes to let the pudding set completely.
- Spread the Cool Whip over the pudding layer.
- Sprinkle the chopped Reese’s cups over the top. Drizzle with chocolate syrup if desired.
- Refrigerate for at least 4 hours, but overnight is best for maximum flavor and texture.
Notes
For best results, refrigerate overnight. The cake improves after the first day as flavors meld. Use full-fat sweetened condensed milk and shelf-stable peanut butter for best texture. Poke holes with a wooden spoon handle (about 1/4 inch wide) for proper absorption. If using natural peanut butter, the filling may become grainy. For a gluten-free version, use a gluten-free chocolate cake mix. Store in an airtight container in the refrigerator for up to 5 days, or freeze individual slices for up to 3 months.
Nutrition
- Serving Size: 1 slice (based on 15
- Calories: 420480
- Sugar: 38
- Sodium: 480
- Fat: 22
- Saturated Fat: 9
- Carbohydrates: 55
- Fiber: 2
- Protein: 8
Keywords: Reese's, peanut butter, poke cake, chocolate cake, easy dessert, potluck, no-bake, Cool Whip, chocolate pudding


